Advertisement
Quick Links
46222.036C.01
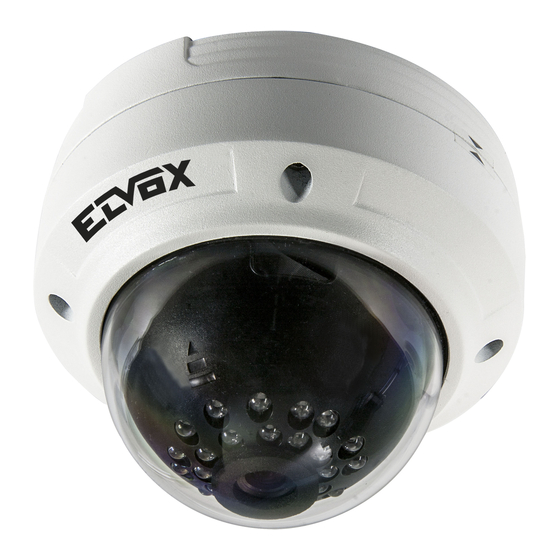
Telecamera mini Dome IR IP 3 Mpx H.265, obiettivo 3,6 mm,
PoE
Avvertenze
- Prima di utilizzare il prodotto si raccomanda vivamente di leggere il manuale e di
conservarlo in un luogo sicuro per consultazione futura.
- Utilizzare l'alimentazione specificata per il collegamento.
- Evitare di azionare il prodotto in modo improprio, sottoporlo a urti o vibrazioni,
forti pressioni che possono danneggiarlo.
- Non utilizzare detergenti corrosivi per pulire il corpo principale della telecamera.
Se necessario, utilizzare un panno morbido e asciutto per pulirla; in caso di spor-
co resistente utilizzare un detergente neutro. È possibile utilizzare detergenti per
mobili di qualità.
- Non puntare la telecamera direttamente verso oggetti estremamente luminosi,
ad esempio il sole, in quanto si potrebbe danneggiare il sensore d'immagine.
- Seguire le istruzioni per installare la telecamera. Non rovesciare la telecamera,
altrimenti riceverà un'immagine rovesciata.
- Non azionarla se temperatura, umidità e alimentazione non corrispondono ai
limiti o valori specificati.
- Tenere lontano da fonti di calore quali radiatori, bocchette dell'aria calda, stufe e simili.
- Il presente documento contiene le istruzioni per l'uso del prodotto. Non è la ga-
ranzia di qualità. Ci riserviamo il diritto di correggere errori di stampa, incon-
gruenze con la versione più recente, aggiornamenti del software e miglioramenti,
interpretazione e modifiche al prodotto. Tali cambiamenti saranno pubblicati nella
versione più recente senza previa notifica.
- Quando il prodotto è in uso, sono applicabili i contenuti di Microsoft, Apple e
Google. Le immagini e le schermate di questo manuale hanno lo scopo di spie-
gare l'utilizzo del prodotto. La proprietà dei marchi commerciali, dei logo e altre
proprietà intellettuali relative a Microsoft, Apple e Google appartengono alle sud-
dette aziende.
Contenuto della confezione
Le illustrazioni sotto riportate hanno solo funzione di riferimento. Far riferimento
all'apparecchiatura in dotazione.
Telecamera
Istruzioni per l'uso
Camera
Quick and start guide
Collegamento
Far riferimento all'apparecchiatura in dotazione. Le immagini seguenti illustrano
l'aspetto e la funzione delle interfacce.
1 Introduzione
Riepilogo
Questa telecamera IP (abbreviato in IP-CAM) è stata progettata per fornire pre-
stazioni elevate nell'uso con soluzioni di TVCC. Adotta chip di elaborazione video
allo stato dell'arte. Utilizza le tecnologie più avanzate, quali la tecnologia di codifica
e decodifica video ed è conforme al protocollo TCP/IP, SoC. ecc. per assicurare
la stabilità e l'affidabilità del sistema. L'unità comprende due parti: il dispositivo
IP-CAM e il software di gestione centrale (abbreviato in CMS). Il CMS consente di
centralizzare tutti i dispositivi via Internet o LAN e creare un impianto di sorveglian-
za affidabile che offre gestione unificata e attivazione in remoto di tutti i dispositivi
in rete. Questo prodotto è ampiamente utilizzato nelle banche, nei sistemi di tele-
comunicazione, siti di fornitura elettrica, enti statali, fabbriche, magazzini, centri
urbani ecc. È inoltre la scelta ideale per aree di sorveglianza a medio e alto rischio.
2 Installazione
I passaggi per installare la telecamera dome sono i seguenti:
Fase 1- Allentare le viti con una brugola e togliere la scatola posteriore come illu-
strato nella figura a sinistra.
Fase 2- Incollare la dima al soffitto. Praticare quattro fori e inserire i tasselli nel
soffitto come indicato sulla dima. Fissare la piastra di base della telecamera al
soffitto con le viti.
Fase 3 - Serrare le viti e installare la scatola posteriore
49401130A0 00 1610
Modello
CD
Drill template
Screws & spiles
Step 1
Step 2
IT
IP IR mini Dome camera, 3 Mpx H.265, 3.6 mm lens, PoE
Cautions
- Before operation, we strongly advise users to read this manual and keep it pro-
perly for using later.
- Please use the specified power supply to connect.
- Avoid from in correct operation, shock vibration, heavy pressing which can cause
damage to product.
- Do not use corrosive detergent to clean main body of the camera. If necessary,
please use soft dry cloth to wipe dirt; for hard contamination, use neutral deter-
gent. Any cleanser for high grade furniture is applicable.
- Avoid aiming the camera directly towards extremely bright objects, such as, sun,
as this may damage the image sensor.
- Please follow the instructions to install the camera. Do not reverse the camera,
or the reversing image will be received.
- Do not operate it incase temperature, humidity and power supply are beyond the
limited stipulations.
- Keep away from heat sources such as radiators, heat registers, stove., etc.
- This is product instructions not quality warranty. We may reserve the rights of
amending the typographical errors, inconsistencies with the latest version, sof-
tware upgrades and product improvements, interpretation and modification. The-
se changes will be published in the latest version without special notification.
- When this product is in use, the relevant contents of Microsoft, Apple and Google
will be involved in. The pictures and screenshots in this manual are only used
to explain the usage of our product. The ownerships of trademarks, logos and
other intellectual properties related to Microsoft, Apple and Google belong to the
above-mentioned companies.
Package content
The pictures below are only for reference. Please make the object as the standard.
Viti
Cacciavite
Screw-driver
Connection
Please take the real object as standard. The below figures will introduce the appe-
arance and function of interfaces.
1 Introduction
Summarization
This IP-camera (short for IP-CAM) is designed for high performance CCTV solu-
tions. It adopts state of the art video processing chips. It utilizes most advanced
technologies, such as video encoding and decoding technology, complies with the
TCP/IP protocol, SoC, etc to ensure this system more stable and reliable. This unit
consists of two parts: the IP-CAM device and central management software (short
for CMS). The CMS centralizes all devices together via internet or LAN and esta-
blishes a sound surveillance system to realize unified management and remote
operation to all devices in one network.
This product is widely used in banks, telecommunication systems, electricity power
departments, law systems, factories, storehouses, uptowns, etc. In addition, it is
also an ideal choice for surveillance sites with middle or high risks.
2 Installation
The installation steps of Dome Camera are as follows:
Step 1- Loosen the screws with a hexagonal screwdriver and take down the back
box as shown in the following left picutre.
Step 2- Paste the plotting sheet on the ceiling. Drill four holes and instert spiles in
the ceiling as per the sheet. Use the screws to fix the bottomboard on the ceiling.
Step 3 - Tighten the screws and install the back box.
Step 3
EN
Cappuccio impermeabile
Water-proof Cap
Viale Vicenza, 14
36063 Marostica VI - Italy
www.vimar.com
Advertisement

Related Manuals for Vimar ELVOX 46222.036C.01


Summary of Contents for Vimar ELVOX 46222.036C.01
- Page 1 Step 3 - Tighten the screws and install the back box. Fase 3 - Serrare le viti e installare la scatola posteriore Step 1 Step 2 Step 3 Viale Vicenza, 14 36063 Marostica VI - Italy www.vimar.com 49401130A0 00 1610...
- Page 2 Giorno/Notte, Day/night Sì/Yes Range di visione notturna/Night vision range 10-20 m Grado IP/IK, Degree IP/IK IP66 / IK10 Altri Alimentazione/Power supply 12 Vdc/PoE Others Ambiente di esercizio/Working environment -20°C ~ 50°C con umidità 10% ~ 90%/-20°C ~ 50°C, 10% ~ 90% humidity Dimensioni/Dimension Φ116 mm×91 mm Viale Vicenza, 14 36063 Marostica VI - Italy www.vimar.com 49401130A0 00 1610...
Need help?
Do you have a question about the ELVOX 46222.036C.01 and is the answer not in the manual?
Questions and answers