Advertisement
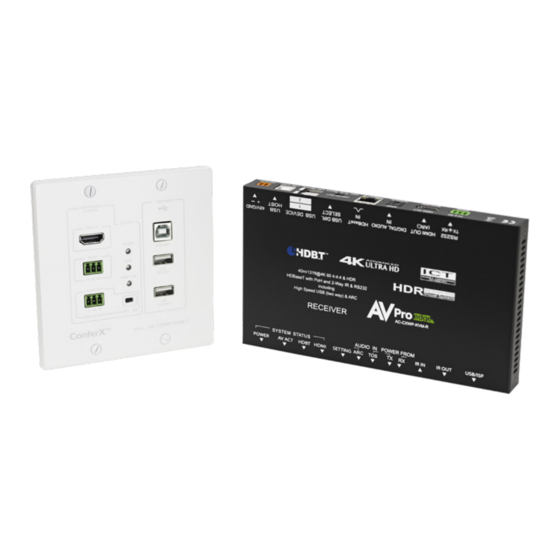
ac-CXWP-KVM-kit
HDMI & Bi-Directional USB Extension Kit
Quick Start Guide
AVPro Edge's ConferX Dual Gang Wall Plate presents a Full 4k60 444 KVM solution
for anything from the home office to the classroom. Fully integrate with today's
interactive displays using bidirectional USB and ARC up to 40 meters over a single
category cable.
This guide will walk you through the following topics:
• Installation
• EDID Management
• Scaling
• Test Pattern Generator
• IR Control Signals
• RS232 Control Signals
• Audio Extraction
• ARC
• USB Extension
• Troubleshooting
installation
1. Install a CAT5e (or better) cable between the display and the source (be sure
to follow local low voltage code. This varies state to state).
2. The Tx has an HDMI input. Connect this to the output of the source with an
18Gbps HDMI cable
3. The Rx has an HDMI output. Connect this to the input of the display with an
18Gbps HDMI cable.
4. Both the Tx and Rx have an RJ45 HDBT connector. Connect each end of the
installed Category cable to these ports.
5. Install the TX Wall Plate into the dual gang box
6. Connect the orange 2 Pin Phoenix power supply to the RX, setting the RX POE
Switch to the "RX" Position
*NOTE - Only use the included power supply
EDID management/Scaling
The EDID Management Pin Wheel allows
you to manage the input device (typically the
display) to request specific video resolutions
and/or audio codecs from a source. EDID Pin
Wheel also allows for downscaling for use with newer sources and legacy displays.
HDB
T technology
with
ase
Advertisement
Table of Contents

Related Manuals for AVPro Edge AC-CXWP-KVM-KIT


Summary of Contents for AVPro Edge AC-CXWP-KVM-KIT
- Page 1 Quick Start Guide AVPro Edge’s ConferX Dual Gang Wall Plate presents a Full 4k60 444 KVM solution for anything from the home office to the classroom. Fully integrate with today’s interactive displays using bidirectional USB and ARC up to 40 meters over a single category cable.
- Page 2 Using a small, flathead screwdriver adjust the EDID Pin Wheel to the desired EDID *”E” Copies EDID from Display and downscales incoming signal to 1080p Test Pattern Generator (Tx only): The Test Pattern Generator can be used for testing and troubleshooting infrastructure, cables, and signal path.
- Page 3 *Must be supported by both devices USB Extension The AC-CXWP-KVM-Kit can extend USB 2.0 bidirectionally up to 40 meters. USB Direction is selected by the “USB DIR. SELECT” switch on the RX. Use the USB Type A ports to extend USB devices to the PC on the opposite USB type B port.
- Page 4 5. Avoid RJ45EZ connectors 6. Check the Category cable length. It may be too long. 7. Remove any excess Category cable and be sure that it is not twisted or damaged. 8. Bypass any patch panels or punch-down blocks 9. If you are powering the Rx with the power supply and the Tx is not getting power, try plugging the power supply into the Tx instead.
Need help?
Do you have a question about the AC-CXWP-KVM-KIT and is the answer not in the manual?
Questions and answers