Table of Contents
Advertisement
Advertisement
Table of Contents

Subscribe to Our Youtube Channel
Related Manuals for La Crosse CA79103/V11


Summary of Contents for La Crosse CA79103/V11
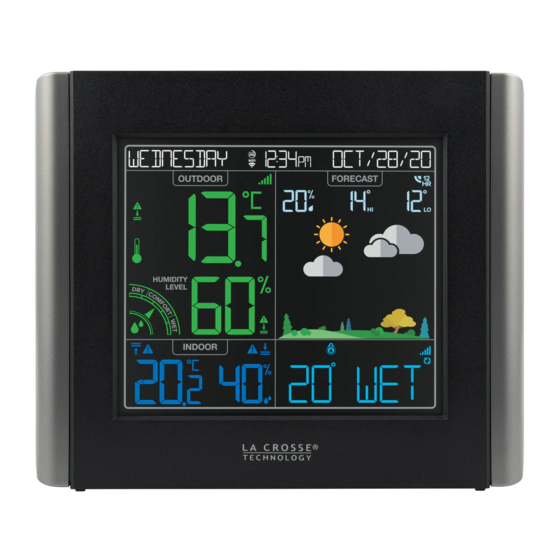
- Page 1 Wi-Fi COLOR FORECAST STATION SET UP GUIDE MODEL NUMBER CA79103/V11...
-
Page 2: Table Of Contents
Table of Contents BASICS LA CROSSE VIEW TEMP. AND HUMIDITY Initial Setup Connecting to the App Viewing Your TH Data 11-12 Station Settings Connecting Your Station History Records Buttons Add Your Sensors to the Outdoor Comfort Meter LCD Display Brightness Temp. -
Page 3: Basics
BASICS Initial Setup Power Up Weather Station Insert the 5V Power Adapter into an outlet, and then plug it into the Power Jack on the back of the station. Next, remove the Insulation Tab from the Station’s Battery Compartment. Thermo-Hygro Sensor Install 2 fresh “AA”... -
Page 4: Connecting To The App
Download the La Crosse View App Visit the App Store or Google Play Store to download the free La Crosse View app onto your mobile device. Launch the App Open the La Crosse View app and follow the on-screen setup instructions. -
Page 5: Connecting Your Station
La Crosse View app. Connecting to Your Wi-Fi Network The La Crosse View app is required to connect your station to the Wi-Fi network. Download and install the app first. The app will provide detailed instructions and inform you what buttons to press while connecting the display to your Wi-Fi network. -
Page 6: Add Your Sensors To The
LA CROSSE VIEW Add Your Sensors to the App Upon getting the station connected to your Wi-Fi network, the next app screen will explain how your connected sensor(s) should be brought in. Within the next 15 minutes, you should receive an Add Device notification in your app. - Page 7 Manually Add Sensor Into the App* Open your La Crosse View app. On the Main Menu, go to ADD/EDIT and select DEVICES. On the Devices page, select the ADD DEVICE or PLUS (+) button. Scan the Barcode on your Breeze Pro Sensor or type in the Device ID manually.
-
Page 8: Station Settings
BASICS Station Settings When the station is first powered on, it will search for the sensors which will connect Use the buttons on the within 10 minutes. top of the station to adjust Note: The Water Leak sensor will show in place the values. -
Page 9: Buttons
BASICS Buttons Back View 1. LIGHT ( 2. TEMPERATURE ( ) 3. EXTRA Press to adjust backlight. Press to view Temperature Press to toggle through extra Hold to enter Auto-Dim and Humidity History. While sensors and pressure. Hold to settings. viewing, hold MINUS button to... -
Page 10: Lcd Display Brightness
BASICS LCD Display Brightness Adjusting the LCD Display Brightness Press the button to adjust the backlight intensity. There are 4 brightness levels, plus an off option. Auto-Dim Settings Program your display to automatically dim during preselected times. Hold the button to enter the Auto-Dim Settings Menu. -
Page 11: Time And Calendar
BASICS Time and Calendar Display 1. DAY OF THE WEEK 2. WI-FI ICON ( 3. AUTO-DIM ICON ( Select from English, Spanish, or Indicates active Wi-Fi Indicates active auto-dim French in the settings menu connection* setting 4. 12/24 HOUR TIME 5. -
Page 12: Viewing Your Th Data
TEMPERATURE & HUMIDITY Viewing Your Temperature and Humidity Data... - Page 13 TEMPERATURE & HUMIDITY Viewing Your Temperature and Humidity Data 1. LOW BATTERY ICON 2. OUTDOOR HIGH 3. OUTDOOR LOW FOR THERMO-HYGRO TEMPERATURE ALERT TEMPERATURE ALERT SENSOR ( ICON ( ) ICON ( ) Appears if a high temperature Appears if a low temperature Indicates thermo-hygro sensor alert is set and active alert is set and active...
-
Page 14: History Records
TEMPERATURE & HUMIDITY Viewing Your Temperature and Humidity Data Viewing Records Press the button to toggle through indoor/ outdoor temperature & humidity history records with time and date stamps. Records Viewing Order Outdoor High Temperature • Outdoor Low Temperature • Outdoor High Humidity Outdoor Low Humidity •... -
Page 15: Temp. & Humidity Alerts
TEMPERATURE & HUMIDITY Temperature and Humidity Alerts Setting Temperature and Humidity Alerts Hold the button for to enter the Alert Settings Menu. Use the buttons adjust alerts settings. Press to confirm your selection. Your programmed alerts are active when the icon(s) appear on the LCD. -
Page 16: Forecast
FORECAST Viewing Your Forecast Data 1. INTERNET ICON ( ) Indicates the station is connected and receiving AccuWeather forecasts* 2. CHANCE OF PRECIPITATION Percent chance of precipitation in the 12 hours* 3. DAILY FORECASTED HIGH TEMPERATURE Forecasted high temperature in the next 12 hours* 4. -
Page 17: Standalone Forecast Icons
FORECAST Viewing Your Forecast Data Forecast Icons When using as a standalone station, the display will use changes in barometric pressure to predict your weather to come in the next 12 hours. This is represented by 6 forecast scenes (sunny, partly Sunny Partly Sunny Clouds... -
Page 18: Daily/Hourly Forecast
FORECAST Viewing Your Forecast Data Daily and Hourly Forecast Buttons When connected to Wi-Fi, use the daily forecast ( ) and hourly forecast ( ) buttons on the top of the station to view future forecast information. Daily Forecast Hourly Forecast •... -
Page 19: App
PRESSURE SENSORS Relative Pressure Spot Water Leak Sensor Your Water Leak Sensor data shares the same display area as the pressure readings. How to View Additional Data in the Extra Sensor Field • Your Relative Pressure reading will come from your station’s internal barometer. •... -
Page 20: Water Leak Sensor
SENSORS Sensor Placement and Mounting Positioning Your Water Leak Sensor • The sensor will work best when simply placed on a floor. It will begin to detect water at 0.787mm (0.031 inches). • If sensor is placed vertically (i.e. hung inside a sump pump) the depth of the water needs to be at least 6.35mm (0.25 inches) high to trigger the sensor. -
Page 21: Adding An Extra Sensor
Whether you choose to connect with the La Crosse View app or not, this station can display data for up to 4 extra sensors. This data will appear in the blue Extra Sensor field and in your La Crosse View app if connected. Adding Sensors to Your Station... -
Page 22: Specifications
APPENDIX Specifications THERMO-HYGRO SENSOR SPECIFICATIONS Wi-Fi NETWORK REQUIREMENTS • Outdoor Temperature Range: -40°C to 60°C • Broadcast Frequency: 2.4GHz (802.11 b/g/n) (-40°F to 140°F) • Network Name/Password: Must Not Exceed • Outdoor Humidity Range: 10 to 99%RH 45 Characters • Transmission Range: 121 Meters (400 feet) open air •... -
Page 23: Warranty
APPENDIX Warranty Care and Maintenance Springfield warrants this instrument to be free from • Do not mix old and new batteries • Do not mix Alkaline, Standard, Lithium or Rechargeable defects in workmanship and material for a period of Batteries one year from date of purchase, and will repair or •... - Page 24 The information it contains is regularly checked and corrections are included in subsequent editions. We disclaim any responsibility for any technical error or printing error, or their consequences. All trademarks and patents are recognized. Designed in La Crosse, Wisconsin • Made in China • Printed in China •...
Need help?
Do you have a question about the CA79103/V11 and is the answer not in the manual?
Questions and answers