Table of Contents
Advertisement
Quick Links
Advertisement
Table of Contents

Related Manuals for SINGULARITY COMPUTERS SPECTRE III


Summary of Contents for SINGULARITY COMPUTERS SPECTRE III
- Page 1 Revision 1.2...
-
Page 2: Table Of Contents
| Spectre 3.0 Assembly Manual Table of Contents Introduction & Features ..........................2 Specifications ..............................4 Included Items ..............................5 Warranty ................................ 6 Table of Fasteners & Panels ........................7 Assembly Manual ............................9 Step 1: Install DRGB 50cm LED Strips......................9 Step 2: Install Power Button. -
Page 3: Introduction & Features
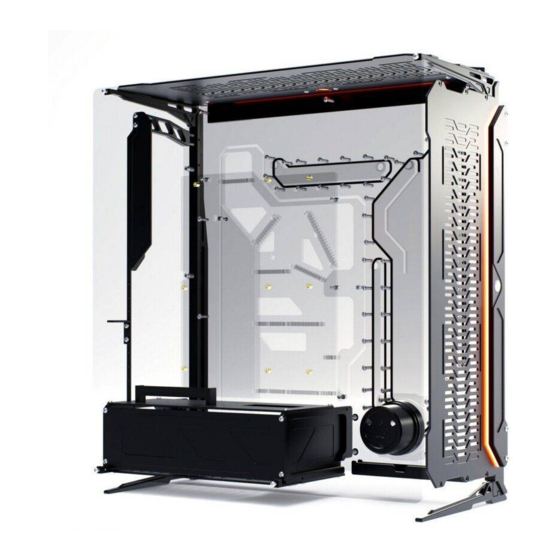
| Spectre 3.0 Assembly Manual Introduction & Features Spectre 3.0 has been completely re-designed from the ground up. The case is larger in all dimensions and has been upgraded to be compatible with XL-ATX with an extra expansion slot for a total of 8. Spectre 3.0 has been designed to fit the RTX 3090 even the Founders Edition with the stock cooler. - Page 4 PSU shroud cannot be used with vertically mounted GPUs. Design & Engineering We are all experienced system builders at Singularity Computers. Our approach to product development begins with a need for our own builds and so the origin is always function. From there we start to build ideas around this function and the aesthetics and everything else follows.
-
Page 5: Specifications
| Spectre 3.0 Assembly Manual Specifications Water-cooling Integration Reservoir, Pump Top, Pump Cover, Fill Port, Drain Port, Part of cooling loop. Ports 6x G1/4” BSPP | 1x Fill Port | 1x Drain Port Pump Compatible with all D5 pumps (Not included) Cable Management Cable Channels with Cable Combs for 4mm Sleeved Cables: 48 total strands: 3x Integration... -
Page 6: Included Items
| Spectre 3.0 Assembly Manual Included Items Items Quantity Spectre 3.0 Case Integrated Components: • Reservoir • Pump Top • Pump Cover • Fill Port • Drain Port • Cable Combs Hex Keys: • M3 • M4 • M6 Cable Comb Sets (2 spare each type) Cable Combs:... -
Page 7: Warranty
That they did not occur after the item was shipped from the Singularity Computers Factory or Retailer. If there are more than 5 marks which are beyond 5mm in length and visible when facing perpendicular to the surface. -
Page 8: Table Of Fasteners & Panels
| Spectre 3.0 Assembly Manual Table of Fasteners & Panels Fasteners Type Quantity Type Quantity M3x6mm Phillips Head M4x35mm M3x6mm M4 Springwasher M3 Nut M6x20mm M4x6mm M6x30mm M4x10mm 6-32 Thumbscrew M4x14mm SO M3x7x6 M4x20mm MB SO M3-M4 x6x6 Panels Name Quantity Strut LED Cover Front... - Page 9 | Spectre 3.0 Assembly Manual Vertical GPU Included list Revision 1.2 Page | 8...
-
Page 10: Assembly Manual
| Spectre 3.0 Assembly Manual Assembly Manual Assembly Note Spectre is build from thick and strong CNC Machined aluminum components with tight tolerances. There is no flex in the metal parts like there is on other cases. Due to this we have had to build tolerances into all the mounting holes on Spectre 3.0. -
Page 11: Step 2: Install Power Button
| Spectre 3.0 Assembly Manual Step 2: Install Power Button. • Front LED Cover • Power Button Pieces Involved Remove the Power Button retention ring and O-ring. Thread the cable through from the front of the Front LED Cover until the Power Button is in position. Install the O-ring onto the Power Button and then tighten the retention ring to hold it in position. -
Page 12: Step 3: Install Led Covers Onto Radiator Panels
| Spectre 3.0 Assembly Manual Step 3: Install LED Covers onto Radiator Panels. • • Radiators Panels – Front & Top Fasteners – 6x M4 x 10mm • LED Covers - Front and Top Pieces Involved • LED Diffusors – Front & Top Attach the Radiator Panels to the LED Covers with the LED Diffusors sandwiched in between. -
Page 13: Step 4: Assemble Legs
| Spectre 3.0 Assembly Manual Step 4: Assemble Legs. • 2x Struts • Fasteners – 4x M4 x 20mm • 2x Feet • Fasteners – 6x M4 x 14mm Pieces Involved • • Fasteners – 6x M4 Spring Washers Top Radiator Panel Supports Attach the Feet to the Struts with 3x M4 x 14mm and 3x M4 Spring Washers per leg. -
Page 14: Step 5: Assemble Psu Shroud
| Spectre 3.0 Assembly Manual Step 5: Assemble PSU Shroud. • • PSU Rear Bracket PSU Bottom Panel • • PSU Front Bracket PSU Shroud Pieces Involved • • PSU Top Panel 2x Side Panel Window Bracket • PSU Side Panel •... -
Page 15: Step 6: Install Legs Onto Distribution Plate
| Spectre 3.0 Assembly Manual Step 6: Install Legs onto Distribution Plate. • • Distribution Plate PSU Shroud Mount Pieces Involved • Legs • Fasteners – 7x M6 x 30mm Lay the legs down so that the main Struts are horizontal with a solid flat surface such as a table, and the Feet and Top Panel Supports are vertical. -
Page 16: Step 7: Install Radiator Panels Onto Legs
| Spectre 3.0 Assembly Manual Step 7: Install Radiator Panels onto Legs. • Spectre 3.0 Case • Fasteners – 10x M4 x 6mm Pieces Involved • Radiator Panels Attach the Front and Top Radiator Panels to the Legs using the M4 x 6mm Fasteners. 6 fasteners are needed for the top panel and 4 are needed for the front panel. -
Page 17: Step 8: Install Psu Shroud, Cable Shroud & Rear Io
| Spectre 3.0 Assembly Manual Step 8: Install PSU Shroud, Cable Shroud & Rear IO. • Spectre 3.0 Case • Fasteners – 4x M6 x 20mm • Radiator Panels • Fasteners – 2x M4 x 14mm • Cable Shroud • Fasteners – 3x M4 x 6mm Pieces Involved •... -
Page 18: Step 9: Install Vertical Gpu Mount
| Spectre 3.0 Assembly Manual Step 9: Install Vertical GPU Mount. • Spectre 3.0 Case • Vertical GPU Spacer • Vertical GPU Bracket & Ribbon • Fasteners – 2x 6-32 x 0.25” Pieces Involved Cable • Vertical GPU Angle • Fasteners – 8x M4 x 10mm Remove the PSU Side Panel to gain access into the PSU Shroud. -
Page 19: Step 10: Install 2 Nd Vertical Gpu Mount
| Spectre 3.0 Assembly Manual Step 10: Install 2 Vertical GPU Mount. (This add-on does not come included with the case). • Spectre 3.0 Case • Fasteners – 2x 6-32 x 0.5” • Vertical GPU Bracket & Ribbon • Fasteners – 2x 6-32 Nuts Cable Pieces Involved •... -
Page 20: Step 11: Install Ssd Tray Into Psu Shroud
| Spectre 3.0 Assembly Manual Step 11: Install SSD Tray into PSU Shroud. • Spectre 3.0 Case • Fasteners – 16x M3 x 6mm • PSU Top Panel • Fasteners – 4x SO M3x7x6 Pieces Involved • SSD Tray • Fasteners – 4x M3 Nuts 4x 2.5"... -
Page 21: Step 12: Install Cable Combs
| Spectre 3.0 Assembly Manual Step 12: Install Cable Combs. • Distribution Plate • Cable Combs Pieces Involved The Spectre 3.0 integrated cable management has three different configurations which is why we have not pre-installed the cable combs. The only variable for the three configurations is how the EPS is routed. - Page 22 | Spectre 3.0 Assembly Manual Configuration 2: EPS from right side of Motherboard. See the diagram below for the installation positions of the cable combs. This configuration uses 4x 20pin Cable Combs. There are also 2x 12pin Cable Combs shown in the diagram below, but they will not be used.
-
Page 23: Step 13: Install D5 Pump (Not Included)
| Spectre 3.0 Assembly Manual Step 13: Install D5 Pump (Not included). • Spectre 3.0 Case • D5 O-Ring Pieces Involved • D5 Pump Cover • D5 Pump (Not Included) It is easier to do this when the Case or Distribution Plate is horizontal because then you can sustain downward pressure on the pump while tightening the pump cover to prevent the O-ring moving out of position. -
Page 24: Step 14: Motherboard Stand Off Installation
| Spectre 3.0 Assembly Manual Step 14: Motherboard Stand Off Installation. • • Fasteners – 9x M3 x 6mm Phillips Head Spectre 3.0 Case Pieces Involved • Fasteners – 9x MB SO M3-M4 x6x6 Install the Motherboard Tray Stand Offs into the holes marked in the diagram below. Use a 5.5mm socket driver. -
Page 25: Step 15: Install Cable Cover
| Spectre 3.0 Assembly Manual Step 15: Install Cable Cover. • Spectre 3.0 Case • Fasteners – 4x M3 x 12mm Pieces Involved • Cable Cover Install one fastener into the top right hole of the Cable Cover and align it with the top right hole on the Distribution Plate. -
Page 26: Step 16: Install Side Panel Window
| Spectre 3.0 Assembly Manual Step 16: Install Side Panel Window. Install the Side Panel Window using 4x M4 x 10mm Fasteners. Place the Side Panel Window in front of the case, pick up one corner and align it with the first hole. Install the fastener but do not fully tighten it. -
Page 27: Step 17: Filling & Draining The Loop
| Spectre 3.0 Assembly Manual Step 17: Filling & Draining The Loop. • Air Pressure Tester • External Power Supply for D5 Pump Recommended • Long Fill Tube Items Filling the Loop: To fill the loop, we strongly recommend a long fill tube. We use a 90-degree fitting with a barb fitting and a 200mm length of soft tube. -
Page 28: Installing Radiators
| Spectre 3.0 Assembly Manual Installing Radiators The radiator panels have sliding adjustment. Use this to position your radiators so that the ports are optimally aligned with the ports on the Distribution Plate. Spectre 3.0 PWM & DRGB Hub The included PWM & DRGB Hub splits 1x PWM to x6 and 1x DRGB to x3. Also included is a PWM and DRGB extension cable.
Need help?
Do you have a question about the SPECTRE III and is the answer not in the manual?
Questions and answers