Table of Contents
Advertisement
Advertisement
Table of Contents
Troubleshooting

Subscribe to Our Youtube Channel
Related Manuals for Olympus OEP-3


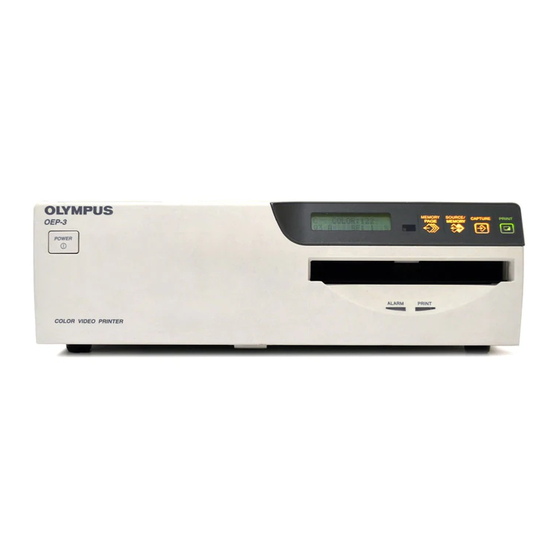
Summary of Contents for Olympus OEP-3
- Page 1 COLOR VIDEO PRINTER OEP-3 SERVICE MANUAL Volume 1 1st Edition...
- Page 2 électrique, d’incendie ou de blessure n’effectuer que les réparations indiquées dans le mode d’emploi à moins d’être qualifié pour en effectuer d’autres. Pour toute réparation faire appel à une personne compétente uniquement. OEP-3 V1 (UC)
- Page 3 Density Adjustment During Thermal Head Replacement ..3-3 3-1-3. Electrical Adjustment (Analog Video Block) ......3-4 3-2. Mechanical Adjustment ................3-8 3-2-1. Mechanical Adjustment Mode ........... 3-8 3-2-2. Entering the Mechanical Adjustment Mode ......3-8 3-2-3. Normal Operation Check and Automatic Adjustment ....3-9 OEP-3 V1 (UC)
- Page 4 Circuit Operation Description of SY-282 and IF-767 Boards ....4-39 4-4-1. Circuit Operation ..............4-39 4-4-2. Communication with Other Boards in Unit ......4-42 4-4-3. VPR (Analog Video Block) Control ........4-43 4-4-4. RS Communication Control ............. 4-45 OEP-3 V1 (UC)
- Page 5 Paper Feed Trouble ..............6-3 6-2-3. Paper Delivery Trouble .............. 6-3 6-2-4. Print Trouble ................6-3 6-2-5. Other Troubles ................6-4 6-3. Cleaning ...................... 6-4 6-3-1. Thermal Head Cleaning ............. 6-4 6-3-2. Paper Feed Roller Cleaning ............6-4 OEP-3 V1 (UC)
- Page 7 Section 1 Reprinted from the Operating Instructions operating instructions OEP-3 OEP-3 V1 (UC)
- Page 8 OEP-3 V1 (UC)
- Page 9 OEP-3 V1 (UC)
- Page 10 OEP-3 V1 (UC)
- Page 11 OEP-3 V1 (UC)
- Page 12 OEP-3 V1 (UC)
- Page 13 OEP-3 V1 (UC)
- Page 14 OEP-3 V1 (UC)
- Page 15 OEP-3 V1 (UC)
- Page 16 1-10 OEP-3 V1 (UC)
- Page 17 1-11 OEP-3 V1 (UC)
- Page 18 1-12 OEP-3 V1 (UC)
- Page 19 1-13 OEP-3 V1 (UC)
- Page 20 1-14 OEP-3 V1 (UC)
- Page 21 1-15 OEP-3 V1 (UC)
- Page 22 1-16 OEP-3 V1 (UC)
- Page 23 1-17 OEP-3 V1 (UC)
- Page 24 1-18 OEP-3 V1 (UC)
- Page 25 1-19 OEP-3 V1 (UC)
- Page 26 1-20 OEP-3 V1 (UC)
- Page 27 1-21 OEP-3 V1 (UC)
- Page 28 1-22 OEP-3 V1 (UC)
- Page 29 1-23 OEP-3 V1 (UC)
- Page 30 1-24 OEP-3 V1 (UC)
- Page 31 1-25 OEP-3 V1 (UC)
- Page 32 1-26 OEP-3 V1 (UC)
- Page 33 1-27 OEP-3 V1 (UC)
- Page 34 1-28 OEP-3 V1 (UC)
- Page 35 1-29 OEP-3 V1 (UC)
- Page 36 1-30 OEP-3 V1 (UC)
- Page 37 1-31 OEP-3 V1 (UC)
- Page 38 1-32 OEP-3 V1 (UC)
- Page 39 1-33 OEP-3 V1 (UC)
- Page 40 1-34 OEP-3 V1 (UC)
- Page 41 1-35 OEP-3 V1 (UC)
- Page 42 1-36 OEP-3 V1 (UC)
- Page 43 1-37 OEP-3 V1 (UC)
- Page 44 1-38 OEP-3 V1 (UC)
- Page 45 1-39 OEP-3 V1 (UC)
- Page 46 1-40 OEP-3 V1 (UC)
- Page 47 1-41 OEP-3 V1 (UC)
- Page 48 1-42 OEP-3 V1 (UC)
- Page 49 1-43 OEP-3 V1 (UC)
- Page 50 1-44 OEP-3 V1 (UC)
- Page 51 1-45 OEP-3 V1 (UC)
- Page 52 1-46 OEP-3 V1 (UC)
- Page 53 1-47 OEP-3 V1 (UC)
- Page 54 1-48 OEP-3 V1 (UC)
- Page 55 1-49 OEP-3 V1 (UC)
- Page 56 1-50 OEP-3 V1 (UC)
- Page 57 1-51 OEP-3 V1 (UC)
- Page 58 1-52 OEP-3 V1 (UC)
- Page 59 1-53 OEP-3 V1 (UC)
- Page 60 1-54 OEP-3 V1 (UC)
- Page 61 1-55 OEP-3 V1 (UC)
- Page 62 1-56 OEP-3 V1 (UC)
- Page 63 1-57 OEP-3 V1 (UC)
- Page 64 1-58 OEP-3 V1 (UC)
- Page 65 1-59 OEP-3 V1 (UC)
- Page 66 1-60 OEP-3 V1 (UC)
- Page 67 1-61 OEP-3 V1 (UC)
- Page 68 1-62 OEP-3 V1 (UC)
- Page 69 1-63 OEP-3 V1 (UC)
- Page 70 1-64 OEP-3 V1 (UC)
- Page 71 1-65 OEP-3 V1 (UC)
- Page 72 1-66 OEP-3 V1 (UC)
- Page 73 1-67 OEP-3 V1 (UC)
- Page 74 1-68 OEP-3 V1 (UC)
- Page 75 1-69 OEP-3 V1 (UC)
- Page 76 1-70 OEP-3 V1 (UC)
- Page 77 1-71 OEP-3 V1 (UC)
- Page 78 1-72 OEP-3 V1 (UC)
- Page 79 1-73 OEP-3 V1 (UC)
-
Page 81: Service Information
SE-548 board SE-546 board SE-547 board SE-553 board SE-554 board SE-552 board SE-542 board SE-540 board SE-551 board SE-550 board For the names and function description of each sensor board, refer to “Section 5 Mechanical Operation Description”. OEP-3 V1 (UC) -
Page 82: Front Panel Assembly
4. Press the PUSH portion of the paper feed tray and take out the tray in the direction indicated by arrow 3. 5. Take out the delivery tray in the direction indicated by arrow 4. EJECT button Cartridge Delivery tray Front door Paper feed tray PUSH portion OEP-3 V1 (UC) -
Page 83: Rear Panel Assembly
(CN104) 5. Install the rear panel assembly in the reverse order of Connector BVTT Connector (CN103) steps 1 to 4. (CN101) frame 5. Install a new VPR-63 board in the reverse order of steps 1 to 4. OEP-3 V1 (UC) - Page 84 BVTP 3x10 BVTT 3x6 Flexible flat cable (24-pin) 7. Install a new IF-764 board in the reverse order of steps 1 to 6. 5. Install a new SY-282 board in the reverse order of steps 1 to 4. OEP-3 V1 (UC)
- Page 85 7. Install a new IF-767 board in the reverse order of steps BVTT 1 to 6. Harness BVTT (for grounding) BVTT 3x6 Mechanical chassis L assembly BVTT 3x6 Coil spring 9. Install new DC fans (1) in the reverse order of steps 1 to 8. OEP-3 V1 (UC)
- Page 86 Connector (CN902) (CN901) PS 3x6 6. Install a new PRT-13 board in the reverse order of PS 3x6 steps 1 to 5. 9. Install a new switching regulator in the reverse order of steps 1 to 8. OEP-3 V1 (UC)
- Page 87 Cartridge board guide Heat sink Hook Hook Connector (CN303) Connector (CN304) Thermal BVTT 3x6 head Head holder Thermal head Flexible flat cables 12. Install a new thermal head in the reverse order of steps 1 to 11. OEP-3 V1 (UC)
- Page 88 Mechanical block (CN203) Connector 6. Install a new SE-539 board in the reverse order of (CN206) steps 1 to 5. BVTT 3x6 BVTT 3x6 7. Install the mechanical block in the reverse order of steps 1 to 6. OEP-3 V1 (UC)
- Page 89 Two solders Mechanical Mechanical block block 10. Install a new tray motor in the reverse order of steps 1 to 9. 10. Install a new ribbon take-up motor in the reverse order of steps 1 to 9. OEP-3 V1 (UC)
- Page 90 4. Remove the coil spring (on the mechanical block side), steps 1 to 8. then remove the four screws (BVTT 3 x 6) and W3. 5. Push down the platen motor bracket assembly, loosen the platen belt 180TN, and remove it. 2-10 OEP-3 V1 (UC)
- Page 91 Harness BVTT solders BVTT SU-52 board BVTT Mechanical chassis R Front door 10. Install a new head motor in the reverse order of steps 1 assembly BVTT 3x6 stopper to 9. Mechanical chassis F assembly 2-11 OEP-3 V1 (UC)
- Page 92 Two solders 18. Install a new paper feed assembly in the reverse order SU-54 board of steps 1 to 17. 9. Install a new paper feed motor in the reverse order of steps 1 to 8. 2-12 OEP-3 V1 (UC)
-
Page 93: Electrical Adjustment
. By decreasing the parameter, the head voltage decreases and the density also decreases. By increasing the parameter, the head voltage increases and the density also increases. This parameter does not directly represent the head applied voltage value. OEP-3 V1 (UC) - Page 94 . This test pattern cannot be output in the state where MULTI PIX is set to “2”. When MULTI PIX is other than “1”, a white frame may be put into the print result of a test pattern. In this case, set MULTI PIX to “1”, then print. OEP-3 V1 (UC)
- Page 95 (3) Press the EXEC key to define the voltage. (4) Press the PRINT key and print test pattern STEP (V). Adjust HEAD V repeatedly until the print result becomes almost the same in density as the reference printed before head replacement. OEP-3 V1 (UC)
- Page 96 “VA ADJUST” mode. In this state, no signal is displayed on the monitor. Press the EXEC key again to cancel the mode. Cautions during adjustment . Before adjustment, return all user adjustment items (including “COLOR ADJUST”) to the center position. . Adjustment is performed in the SOURCE output mode unless otherwise specified. OEP-3 V1 (UC)
- Page 97 Spec. Adjustment 1. VA ADJUST MODE Monitor [SERVICE MENU3] 2. INPUT SELECT: RGB [PICTURE:] 3. AGC: 4. NTSC/PAL: NTSC Adjust so that the red (or yellow, magenta, or white) in the diagonally striped portion is the maximum. OEP-3 V1 (UC)
- Page 98 7. AGC REF adjustment Conditions for adjustment Spec. Adjustment 1. VA ADJUST MODE Monitor [SERVICE MENU3] 2. INPUT SELECT: RGB [SUB-BRIGHT:] 3. AGC: 4. NTSC/PAL: NTSC Adjust so that the white in the diagonally striped portion is the maximum. OEP-3 V1 (UC)
- Page 99 9. H position adjustment Conditions for adjustment Spec. Adjustment 1. INPUT SELECT: VIDEO TP402 (C-5): SWD HD 1RV201 (D-6): H POSI 2. INPUT SIGNAL: COLOR BAR TP410 (A-5): SYNC MONI SWD HD SYNC MONI A = 100 ± 100 nS OEP-3 V1 (UC)
-
Page 100: Mechanical Adjustment
2. The “MECHA_SETUP” menu in the mechanical adjustment mode appears on the screen (or LCD display). [MECHA SETUP menu] [For OK] [For NG] 3. Press the ↑ and ↓ keys, move the cursor to the item to be adjusted or checked, and then press the EXEC key. OEP-3 V1 (UC) - Page 101 . NG: NG command (E3) and NG data (**)(One-byte data is displayed using a hexadecimal code. The hexadecimal code is converted into a binary code, and the bit whose “1” is set indicates the location where NG occurs. Refer to NG_CODE3.) OEP-3 V1 (UC)
- Page 102 (2) Move the cursor to the desired item and press the EXEC key. Display . OK: OK . NG: NG command (E1) and NG data (**)(One-byte data is displayed using a hexadecimal code. The value of the hexadecimal code is an NG item. Refer to NG_CODE1.) 3-10 OEP-3 V1 (UC)
- Page 103 . NG: NG command (E4) and NG data (**)(One-byte data is displayed using a hexadecimal code. The hexadecimal code is converted into a binary code, and the bit whose “1” is set indicates the location where NG occurs. Refer to NG_CODE4.) 3-11 OEP-3 V1 (UC)
- Page 104 EXEC key. When display number is 00: Trouble historical information For 01: RBN_CD sensor For 02: PLT_JAM sensor [Display example of trouble historical information] [Display after trouble historical information is cleared] [Display example of sensor data] 3-12 OEP-3 V1 (UC)
-
Page 105: Upgrading The Firmware
IC6 moves to IC12 and enters the normal operation. If the contents of IC12 are abnormal, IC6 does not move and displays the message below on LCD so as to notify that upgrading is required. If the message below appears on the LCD display, upgrade the firmware first. UPGRADE FIRMWARE REQUEST PRT 3-13 OEP-3 V1 (UC) -
Page 106: Upgrading Method
1. Turn on the power while shorting-circuit connector CN404 (2-pin connector) on the PRT-13 board with tweezers. 2. Message “VERUP REQUEST PRT” appears on the LCD display of a printer. Stop the short-circuit operation and upgrade the firmware again. 3-14 OEP-3 V1 (UC) -
Page 107: Ribbon Tension Adjustment
(on the take-up and supply sides) are increased or decreased and the ribbon tension is adjusted by increasing or decreasing the set parameter. After increasing or decreasing the parameter, be sure to check the printing. 3-15 OEP-3 V1 (UC) -
Page 108: Adjusting The Ribbon Tension
4. Check the printing. Standard of adjustment Creases appear: Decrease the SPLY value and increase the TKUP value. Spots appear: Increase the SPLY value. Color shading occurs: Decrease the TKUP value. Ribbon is caught: Increase the TKUP value. 3-16 OEP-3 V1 (UC) -
Page 109: Circuit Operation Description
The digital signal processing block on the VPR-63 board consists of the following blocks. . CPU block . Memory (DRAM) block . Memory control (ASIC) block . Sampling clock generation block . Color adjustment block . Masking block OEP-3 V1 (UC) -
Page 110: Source Mode
(IC1001) and adjusted in color using a color adjustment circuit (IC701). After that, the image size is adjusted by the blanking produced using a CPU and DRAM control circuit. The resultant signal is converted from digital to analog again as an analog signal and output to the analog signal processing block. OEP-3 V1 (UC) - Page 111 32 bits to 8 bits. After that, the image data is adjusted in color using a color adjustment circuit (IC701), and the image size is adjusted by the blanking produced using a DRAM control circuit. The resultant data is converted from digital to analog and output to the analog signal processing block. OEP-3 V1 (UC)
-
Page 112: Capture Mode
The video signal input from an analog signal processing block is converted from analog to digital as an eight-bit digital signal. The converted video signal is converted from 8 bits to 32 bits and decimated (e.g., 8.16 division) in a DRAM control circuit (CXD9111R: IC1001), and expanded in DRAM. OEP-3 V1 (UC) - Page 113 DRAM into print data and outputs it. After that, the data is color-adjusted, color- rotated, and converted from RGB to YMC. Next, the data is masking-converted using two masking ROMs and output to the PRT-13 board as print data. OEP-3 V1 (UC)
- Page 114 The memory map of CPU is shown below. 00000 Program ROM 20000 C0000 Color adjustment circuit (Monitor) C1000 Color adjustment circuit (Print) C2000 DRAM controller register C3000 FF710 CPU internal SRAM FFF10 FFF1C CPU internal register FFFFF OEP-3 V1 (UC)
- Page 115 Execution of highest-speed image fetch function IRQ4 Command storage and command flag setting Each DMA flag DRAM controller setting VBLANK Color adjustment Write of color adjustment data VBLANK flag VBLANK Caption flag Write of caption data VBLANK Command flag Command execution OEP-3 V1 (UC)
- Page 116 The command communication with the SY board is performed by the bi-directional asynchronous serial communication in which the serial communication port of CPU is used. Asynchronous serial communication . Start bit: . Data bit: . Stop bit: . Parity bit: None . Baud rate: 19200 bps OEP-3 V1 (UC)
- Page 117 To perform the operations described above, each mode is set to the register of a DRAM control circuit. The DRAM control circuit triggers VD and HD signals for operation. Each setting is not restricted by video timing. The setting value is latched using a VD signal and validated after the VD signal. OEP-3 V1 (UC)
- Page 118 (four-dot pixels in one address) in the direction of depth. The conversion of eight bits to 32 bits and vice versa is performed using a DRAM control circuit. 4-10 OEP-3 V1 (UC)
- Page 119 Memory Configuration (Eight-Frame) Memory Configuration (Four-Frame) 4-11 OEP-3 V1 (UC)
- Page 120 VD and HD signals. . Print data output operation Number of output data items Read DRAM address The print data output operation is performed by setting the items above and by triggering from CPU. 4-12 OEP-3 V1 (UC)
- Page 121 The random access operation is performed by setting the items above and by triggering from CPU during V blanking period. . DRAM refresh operation Number of refresh access addresses By setting the item above, the DRAM control circuit automatically performs the DRAM refresh operation. (RAS only refresh) 4-13 OEP-3 V1 (UC)
- Page 122 On the print side, the color rotation and RGB-YMC conversion of print data are also performed as well as color adjustment. The flow of data shown below is obtained according to the print color. The information on the print color is acquired from the PRT-13 board as a COLOR0/1 signal. 4-14 OEP-3 V1 (UC)
- Page 123 This block generates a sampling clock, locks the phase to the “high” level of external and internal sync signals, and distributes the clock to the DRAM control circuit or color adjustment circuit. The clock frequency is 17.897725 MHz for NTSC and 17.734475 MHz for PAL. The operation timing is shown below. 4-15 OEP-3 V1 (UC)
- Page 124 CLP_REF signal that is input to the VREF pin of an A/D converter. In the D/A conversion block, an eight-bit digital RGB signal is converted into an analog video signal using an encoder (BH7243KV IC407) incorporating a three-channel D/A converter. 4-16 OEP-3 V1 (UC)
- Page 125 R115 S101 R101 J101 RL101 J201 FL101 R102 CL101 R_IN FL201 R_OUT CL201 CL102 G_IN G_OUT D115 RD9.1M-T1B D101 B_IN B_OUT RD9.1M-T1B CL202 D102 D116 SYNC_IN SYNC_OUT RD9.1M-T1B RD9.1M-T1B 4-17 OEP-3 V1 (UC)
- Page 126 2SC1623-T1-L5L6 C105 22uF R116 R119 R135 6.3V 2.2k 2.2k C122 CL108 0.001uF C129 R127 2.7k R115 C106 R122 0.1uF 330pF IC102 (2/3) R136 MC74HC4538AFEL CR 10 C124 22uF 6.3V Fig. 1-1 SYNC ON GREEN Discriminator Circuit 4-18 OEP-3 V1 (UC)
- Page 127 007-K4 DEC_C IC201 R212 R201 BA7046F C204 CL201 R202 010-B2 *EXT_CSYNC PHCOMP Q201 SYNCOUT 2SC1623-T1-L5L6 HDOUT HOSC R209 470k R206 C205 VDOUT 100k 0.001uF C203 C202 0.1uF 22uF 6.3V Fig. 1-3 Composite Sync Signal Separation Circuit 4-19 OEP-3 V1 (UC)
- Page 128 3.58 0.1uF 47uF CL202 4.7k C228 DEC_YOUT 0.1uF C258 R226 1M 0.1uF C221 C222 C231 0.001uF 0.001uF 0.001uF VI_RY VO_RY C251 10uF VI_BY VO_BY C247 0.1uF SAND C223 R224 IC202 VCOIN CXL5520M-T4 Fig. 1-4 Decoder Block 4-20 OEP-3 V1 (UC)
- Page 129 The matrix circuit is switched to ON or OFF by IC205 and IC206. R250 IC205 C266 TC7S66F(TE85R) 0.1uF R243 R248 2.2k IC206 TC7S66F(TE85R) R251 R249 C267 4.7k 0.1uF R244 IC204 TC7W00F(TE12R) C265 0.1uF Q206 DTC124EKA-T146 Fig. 1-5 Demodulation Axis Correction Circuit 4-21 OEP-3 V1 (UC)
- Page 130 “offset”, “AGC gain”, and “manual gain”, respectively. Adjustment is performed by I CBUS. (9) EEPROM EEPROM (IC301) is mounted to store the setting and adjustment values of this board. This EEPROM writes or reads data by I CBUS. 4-22 OEP-3 V1 (UC)
- Page 131 YOUT L404 GDA4 GDATA4 AVCC2 GDA3 GDATA3 AGND2 GDA2 GDATA2 BOUT GDA1 GDATA1 GOUT GDA0 GDATA0 ROUT BDA7 BDATA7 BDA6 BDATA6 BDA5 BDATA5 OSDOFF BDA4 BDATA4 OSDSW IC407 BH7243KV BDA7-0 TP403 Fig. 1-7 Video Encoder Circuit 4-23 OEP-3 V1 (UC)
- Page 132 Q408 CL407 C454 DTC124EKA-T146 0.001uF OFLD1 CLOUT C452 47pF OFLD Q412 DTC124EKA-T146 OLALT CT403 C439 R444 20pF 10pF OBF/COLB MODE1 C453 17.7 47pF OBLK MODE2 R445 OSYNC LALTRI CL405 O2FH TEST Fig. 1-8 Sync Generator Block 4-24 OEP-3 V1 (UC)
- Page 133 The memory map of CPU is shown below. 00000 Start ROM 20000 Flash ROM 40000 PQC IC 60000 γ RAM 80000 EX I/O A0000 (PDSP) C0000 Line number correction ROM E0000 Color balance PLD FFF10 External address FFF1C Internal I/O register FFFFF 4-25 OEP-3 V1 (UC)
- Page 134 SE-539 PRT-13 FAN_MOTOR_BLOCK +12V FAN_MTR CN602 CL640 HED_FAN CL641 C633 C632 0.1uF 10uF (2/9) IC601 FAN_MTR CN603 SN74LV541ANSR CN601 CN601 R649 HED_FAN CL644 Q616 2SD999-T1CK R680 +12GND IC_FAN CN606 CL642 HED_FAN CL643 4-26 OEP-3 V1 (UC)
- Page 135 SE-539 PRT-13 RIBBON_SUPPLY_MOTOR_BLOCK +12V R606 C611 C608 100uF 0.1uF IC606 BA6219B +12GND VCC2 VCC1 CN604 OUT1 TP602 TP603 TP604 CL600 CN610 CN601 C601 CL601 0.33uF CL612 CL613 OUT2 CL614 IC11 VREF C612 0.1uF 0.1uF C605 +12GND 4-27 OEP-3 V1 (UC)
-
Page 136: Paper Feed Motor Drive Circuit
TRAY_MOTOR_BLOCK +12V R651 C640 C637 100uF 0.1uF IC607 BA6219B +12GND VCC2 VCC1 CN604 OUT1 TP618 TP620 TP622 CL638 R677 R676 C630 CN610 CN601 CL639 0.33uF CL645 CL646 OUT2 CL647 IC11 VREF C641 C635 0.1uF 0.1uF +12GND 4-28 OEP-3 V1 (UC) - Page 137 R616 0.0022uF PLT_A PLT_A +24GND TP606 TP610 R624 R625 R626 R627 +24GND 4.7k 4.7k IC601 (3/9) 4.7k 4.7k CL616 SN74LV541ANSR IC601 (4/9) CL617 SN74LV541ANSR CL618 TP607 TP611 IC601 (5/9) SN74LV541ANSR CL619 IC601 (6/9) PLT_B PLT_B SN74LV541ANSR 4-29 OEP-3 V1 (UC)
- Page 138 . Paper feed timing sensor . Delivery timing sensor . Paper feed FG sensor . Paper sensor . Tray position sensor Reflective type . Platen chuck sensor . Paper jamming sensor Transmission type . Ribbon code sensor 4-30 OEP-3 V1 (UC)
- Page 139 SE-546 to SE-539 to PRT-13 TP514/PRT-13 board Function: Detects the number of rotations on the supply side of a ribbon. Level: Rectangular wave output SE-546 SE-539 PRT-13 R157 R528 CN102 CN150 CN401 0.01uF 0.01uF RPI-352 (4/7) SN74LV14ANSR RBN_SPLY_FG 4-31 OEP-3 V1 (UC)
- Page 140 SE-547 to SE-539 to PRT-13 TP555, TP556, TP560, and TP561/PRT-13 board Function: Discriminates the thermal head position. Level: Sensor position HED_POS0 HED_POS1 HED_POS3 HED_POS3 (IC9, pin 43) (IC9, pin 42) (IC9, pin 41) (IC9, pin 40) PRINT PFEED HOME CHUCK 4-32 OEP-3 V1 (UC)
- Page 141 Level: Print paper exists at a delivery port. Print paper does not exist at a delivery port. SE-551 SE-539 PRT-13 R516 R167 CN12 CN106 CN150 CN401 PH16 0.01uF GP1S54 0.01uF IC406 (4/9) SN74LV541ANSR EJCT_TMG 4-33 OEP-3 V1 (UC)
- Page 142 Print paper is set, or a paper feed tray is set, but no print paper exists. Print paper does not exist and a paper feed tray is not set. SE-553 SE-539 PRT-13 R525 R159 CN14 CN103 CN150 CN401 0.01uF 0.01uF PH18 GP1S54 IC406 (5/9) SN74LV541ANSR PAPER 4-34 OEP-3 V1 (UC)
- Page 143 Print paper does not exist in the chuck position. Print paper exists in the chuck position. SE-541 SE-539 PRT-13 +12V IC450 (4/4) IC11 UPC324G2-E1 R557 Q450 CN104 CN150 CN401 2SC1523-T1-L5L6 0.01uF 0.01uF GP2S40K R555 13 - C551 IC450 (3/4) 470pF UPC324G2-E1 PLT_CHUCK 4-35 OEP-3 V1 (UC)
-
Page 144: Optional Unit
PRT-13 SE-539 KICK_OUT_MOTOR_BLOCK +12V Q614 R646 C627 C626 2SB962Z-T2P 100uF 0.1uF R647 CN610 CN601 +12GND Q615 CN605 2SC1623-T1-L5L6 CL631 R643 R644 R645 CL632 CL635 R648 R642 4.7k CL633 IC601 (7/9) CL634 SN74LV541ANSR +12GND 4-36 OEP-3 V1 (UC) - Page 145 In this case, the voltage drop due to the common resistance of a harness cannot be ignored and the print density decreases. Therefore, this circuit controls the current-carrying time of a head element and corrects the print density. 4-37 OEP-3 V1 (UC)
- Page 146 PRINT_PULSE_IN signal. The data is also output to the thermal head in synchronization with the fifth PRINT_PULSE_IN signal. Therefore, a PRINT_PULSE_IN signal is more input to PQC IC than the number of actual print lines by four. 4-38 OEP-3 V1 (UC)
-
Page 147: Circuit Operation
IC100. The clock and frequency-divided clock [TP951 SCI-CLK] are sent to a serial communication circuit (IC250). The frequency-divided clock varies depending on the baud rate setting. Baud rate [TP951 SCI-CLK] 1200 19.2 kHz 2400 38.4 kHz 4800 76.8 kHz 9600 153.6 kHz 4-39 OEP-3 V1 (UC) -
Page 148: Non-Volatile Memory
767 board. The two types of remote controls can be connected. A digital-type signal is processed by IC302 and input to CPU (pin 88 of IC100). An analog-type signal is processed by IC300 and input to CPU (pin 84 of IC100). 4-40 OEP-3 V1 (UC) - Page 149 . “CHECK RIBBON 80” is displayed even if an ink ribbon is defective. . “CHECK RIBBON” is displayed when the ribbon that cannot be used in a model is used. . The 12 V system on the SY-282 board is used only in an antenna drive circuit. 4-41 OEP-3 V1 (UC)
- Page 150 Communication data (FMY → SY) FMY_SY_RXD Input Communication enable (SY → FMY) SY_FMY_RTS Output L:active Communication enable (FMY → SY) FMY_SY_CTS Input L:active Communication format System Asynchronous system Data length 8 bits Stop bit Parity None Baud rate 19200 bps 4-42 OEP-3 V1 (UC)
- Page 151 OSD_HD Input Timing pulse (H-SYNC) Sync negative OSD_VD Input Timing pulse (V-SYNC) Sync negative Input signal switching control Purpose Specifies an input signal. INPUT_SEL1 Contents VIDEO/S-VIDEO Remarks: VIDEO and S-VIDEO are switched by I C control. 4-43 OEP-3 V1 (UC)
- Page 152 This signal is used for control of a relay switch on the IF-764 board. Video mode (IF-767 board) Purpose Confirms the video mode set by the user. SW_NTSC_NPAL Contents NTSC Remarks: This mode is connected to the NTSC/PAL set switch on the IF-767 board. 4-44 OEP-3 V1 (UC)
- Page 153 Input Communication format System Asynchronous system Data length 8 bits Stop bit 1 bit Parity None Baud rate 1200/2400/4800/9600 bps (Menu switching) Set the transfer rate to 9600 when upgrading the firmware on the PRT-13 board. 4-45 OEP-3 V1 (UC)
-
Page 155: Mechanical Description
The paper feeder tray is compatible with the UP-5500 series. The paper remove tray is the same as the UP-5500 series. An anti-jamming cover is provided at the bottom of the printer (located under the platen and shown by the broken line). OEP-3 V1 (UC) - Page 156 7 Head cooling fan motor (forward only) . Cools the thermal head during printing and prevents overheating. 8 Printed circuit board cooling fan motor (forward only) . Cools the SE-539 board in synchronization with head fan motor. OEP-3 V1 (UC)
- Page 157 Paper feed FG sensor Transmission x 1 Detects how much paper is fed. Photo-interrupter Tray position sensor Transmission x 2 Detects a tray motor cam position. Photo-interrupter Transmission x 1 Paper sensor Detects paper in the paper feeder tray. Photo-interrupter OEP-3 V1 (UC)
-
Page 158: Description Of Print Operation
Prints cyan. 1 Starts paper removal. Removes paper Home 2 Opens platen chuck. Home 3 Ejects paper to the paper remove unit. Print 4 Places paper on the paper remove tray. Home Home Home End of print operation OEP-3 V1 (UC) -
Page 159: Home Position
. Platen goes back to its home position for positional initialization only when media are mounted. . The printer detects whether both ribbon cartridge and paper are set or not, takes up ribbon slack and transmits with ribbon tele-files. . The printer head is preheated only when media are mounted. OEP-3 V1 (UC) - Page 160 (up to two times). This is not a failure. . The paper feed motor may rotate in reverse direction at the end of paper feeding or printing to return paper to the paper feeder tray. This is not a failure. OEP-3 V1 (UC)
-
Page 161: Print Position
5-2-5. Fast Feed Position When printing of each color is finished, the thermal head is released from the platen to fast feed the ribbon and paper. OEP-3 V1 (UC) - Page 162 Finally, the tray motor cam is rotated in reverse direction to the print position and then in forward direction to the home position. The paper remove arm is activated to drop paper on the paper remove tray. OEP-3 V1 (UC)
- Page 163 If each pulley is damaged, paper is horizontally striped at certain intervals. In such a case, replace the pulley with a new one. Platen motor pulley: 12.6 mm pitch Platen pulley: 33.9 mm pitch Flange B: Always at the same place OEP-3 V1 (UC)
- Page 164 Printed paper is led into the paper feed and remove unit by the paper remove lead roller, and delivered to the paper remove unit by the paper feed roller (rear side) and paper remove roller. 5-10 OEP-3 V1 (UC)
- Page 165 5-5. Direct Chuck Mechanism 5-11 OEP-3 V1 (UC)
- Page 166 Consequently, the spring force incorporated in the chuck base closes the chuck. As mentioned above, the chuck timing cam is rotated at 60 d to reproduce the same state as a 60 d rotation of the platen. 5-12 OEP-3 V1 (UC)
-
Page 167: Section 6 Troubleshooting
3. The print result is abnormal and the monitor display is normal. In this trouble state, a trouble occurs in the print output block. Each block is described below. For more details, refer to the block diagram, schematic diagram, and circuit operation description of each board. OEP-3 V1 (UC) -
Page 168: Input Block
2. Paper delivery trouble such as paper jamming occurring after print 3. Print trouble appearing as the result of print Examples are given for each trouble, and the designation of a place and the way of solving are described. OEP-3 V1 (UC) -
Page 169: Paper Feed Trouble
Loss of synchronism in platen Remedy: Check that the gear and belt between the pulse motor and platen are not out of teeth. The color of a print image is not adjusted. Remedy: Adjust the color using a color balance. OEP-3 V1 (UC) -
Page 170: Other Troubles
. Clean the paper feed roller about once a month as standard. . Replace the cleaning sheet used ten times with a new one as standard. For more details, refer to the Operation Manual of a cleaning kit. OEP-3 V1 (UC) - Page 171 Cannot return tray arm from HOME to LOAD position (when feeding paper). h’2c TRAY_IN_OUT_TIMEOUT Cannot return tray arm from LOAD to PRINT position. h’2d TRAY_HOME_OUT_TIMEOUT Cannot return tray arm from HOME to PRINT position (during initialization). (Continue) OEP-3 V1 (UC)
- Page 172 Dynamic range of PLT_CHUCK sensor is 0.4 V or less because of dust. SE-541 board/PH2 Other possible causes * Motor or sensor unit failure * Sensor has no sensitivity because of a mechanism assembly error. (ii) (ii) OEP-3 V1 (UC)
- Page 173 SE-555 board/THP1 . Connector connection BIT 1 Harness is not inserted into SE-555 board (4.0 V or more). . Defective parts BIT 0 EEPROM ERROR Nothing can be read or written correctly. . Defective parts (iii) (iii) OEP-3 V1 (UC)
- Page 174 SU-54 board/M13 BIT 1 RIBBON_FG_ERROR (Take up) Ribbon take-up FG is not rotating. SE-552 board/PH17 . Connector connection/Defective parts SU-55 board/M4 BIT 0 RIBBON_FG_ERROR (Supply) Ribbon supply FG is not rotating. SE-546 board/PH8 SU-56 board/M5 (iv) (iv) OEP-3 V1 (UC)
- Page 175 SH-63Trd are examples of a passive VOM that is suitable. (See Fig. A) To Exposed Metal Parts on Set 10 k Z 0.015 µ F voltmeter 1.0 k Z (0.5V) Earth Ground Fig A. Using an AC voltmeter to check AC leakage. OEP-3 V1 (UC)
- Page 176 2000. 9 22 OEP-3 (UC) E 9-955-247-11...
Need help?
Do you have a question about the OEP-3 and is the answer not in the manual?
Questions and answers