Table of Contents
Advertisement
Quick Links
Advertisement
Table of Contents

Related Manuals for Endress+Hauser Analytik Jena Biometra TRobot II 96 G


Summary of Contents for Endress+Hauser Analytik Jena Biometra TRobot II 96 G
- Page 1 Operating manual Biometra TRobot II Automated thermal cycler...
- Page 2 Biometra GmbH (Analytik Jena AG) Manufacturer Rudolf-Wissell-Str. 30 37079 Göttingen Germany Phone + 49 551 50 68 6-0 + 49 551 50 68 6-66 Email info@analytik-jena.com Biometra GmbH Service Rudolf-Wissell-Str. 30 37079 Göttingen Germany Phone + 49 551 50 68 6 -10, -12, 14 or -16 + 49 551 50 68 6-66 Email service@analytik-jena.com...
-
Page 3: Table Of Contents
Biometra TRobot II Contents Contents Basic information ....................... 5 Notes on this operating manual ..................5 Intended use ........................6 Safety instructions ...................... 7 General notes ........................7 Safety markings on Biometra TRobot II ................7 Technical condition ......................8 Requirements for the operating personnel .............. - Page 4 Contents Biometra TRobot II Adapting programs of other thermal cyclers ..............28 Recommendations for the use of 384-well sample blocks ..........28 Manually opening and closing the lid ................28 Maintenance and care ....................31 Calibration ........................31 Maintenance and repair ....................31 Cleaning the device ......................
-
Page 5: Basic Information
Biometra TRobot II Basic information Basic information Notes on this operating manual Biometra TRobot II is intended for operation by qualified specialist personnel observing this operating manual and the operating manual for the Biometra TRobot II software. There are three different Biometra TRobot II models available. In the text below these devices are collectively referred to as Biometra TRobot II. -
Page 6: Intended Use
Basic information Biometra TRobot II NOTE Provides information on potential material or environmental damage. Intended use Biometra TRobot II is an automated end-point thermal cycler. Biometra TRobot II was specially developed for integration into automation systems, e.g., in liquid handling sys- tems. -
Page 7: Safety Instructions
Biometra TRobot II Safety instructions Safety instructions General notes For your own safety and to ensure error-free and safe operation of Biometra TRobot II, please read this chapter carefully before commissioning. Besides the safety instructions in this operating manual and the local safety regulations that apply to the operation of the device, the general applicable regulations regarding accident prevention, occupational health and safety, and environmental protection have to be observed and complied with. -
Page 8: Technical Condition
Safety instructions Biometra TRobot II Technical condition Biometra TRobot II has been built and certified according to safety standard EN 61010- 1. Do not modify the device in any way. Any modification made to the device will lead to a loss of warranty and the EN 61010-1 certificate and poses a potential risk. The following has to be observed: ... -
Page 9: Safety Instructions - During Operation
Biometra TRobot II Safety instructions Safety instructions – during operation 2.6.1 Summary of safety instructions Before each commissioning, the operator of Biometra TRobot II must make sure that the condition of the device including the safety equipment is sound. The following has to be observed: ... -
Page 10: Handling Of Samples, Auxiliary And Operating Materials
Safety instructions Biometra TRobot II The electrical components must be checked regularly by a qualified electrician. Any defects, such as loose connections, faulty, or damaged cables, must be repaired with- out delay. Before opening the device it must be switched off at the main power switch and the power plug must be disconnected from the power outlet! ... -
Page 11: Behavior During Emergencies
Biometra TRobot II Safety instructions Behavior during emergencies During hazardous situations, Biometra TRobot II must be switched off immediately by operating the main power switch at the rear left of the controller. Disconnect the power plug from the power supply! Version 04.20... -
Page 12: Function And Setup
Function and setup Biometra TRobot II Function and setup Fields of application Developed in 1983 by Kary Mullis, PCR (polymerase chain reaction) is a common and indispensable technique used in medical and biological research laboratories for a broad variety of applications. Biometra TRobot II is an end-point thermal cycler designed to amplify nucleic acids by repeated heating and cooling cycles using DNA polymerases in a PCR reaction. -
Page 13: Glp Compliance
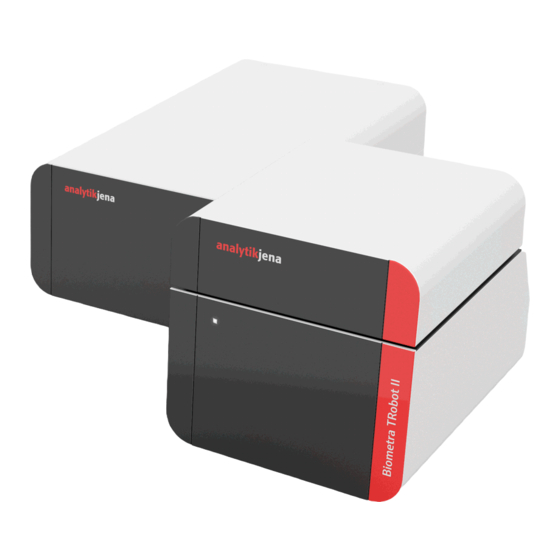
Biometra TRobot II Function and setup Fig. 1 The Biometra TRobot II thermal cycler: Controller and block module The Biometra TRobot II thermal cycler has an automatic restart feature following a power failure. If a power failure occurs during the run, the device will continue the run as soon as power is restored. -
Page 14: Gradient Function With Function For Linear Gradients
Function and setup Biometra TRobot II and avoids the formation of condensed water at the final PCR cooling step. Furthermore all blocks are perfectly sealed to prevent condensed water from penetrating into the Pel- tier elements underneath the sample block and other parts of the electronics. The seal- ing protects the Peltier elements and prolongs the lifetime of the device. -
Page 15: Safety Frame On The Lid
Biometra TRobot II Function and setup tube portion located above the block surface level and it ensures reliable contact be- tween the reaction tubes and the thermoblock by applying constant pressure. The contact pressure can be set individually via software in a range from approx. 4 to 12 kg. -
Page 16: Motorized Plate Lifters
Function and setup Biometra TRobot II 3.4.6 Motorized plate lifters Removing the sample plate from a thermal cycler block without disruption can be a chal- lenge because the sample plate is firmly seated on the sample block and air escapes be- tween the sample block and the plate as a result of the heating and cooling cycles. -
Page 17: Internal Memory
Biometra TRobot II Function and setup half-skirted or non-skirted. Biometra TRobot II can handle all of these types of plates. Since Biometra TRobot II has been designed for automated operation, users will, in the majority of cases, use PCR plates that are particularly suitable for robotic operation. This includes properties such as good plate stability with a firm frame (usually with a skirted edge) so that the plate can be gripped and positioned securely by the robot arm. -
Page 18: Device Installation And Commissioning
Device installation and commissioning Biometra TRobot II Device installation and commissioning Scope of delivery Thermal cycler: Biometra TRobot II setup instructions PCR module + controller (print) Power cable Biometra TRobot II operating manual, Biometra TSuite software operating ... - Page 19 Biometra TRobot II Device installation and commissioning Make sure that the ventilation slots at the sides and the bottom of the device are un- obstructed. Fig. 5 PCR module rear view Fig. 6 Controller rear view Make sure that there are no objects underneath the device (e.g., paper) that may be ...
-
Page 20: Setting The Operating Voltage
Device installation and commissioning Biometra TRobot II Fig. 7 Cables and connectors for connecting the PCR module to the controller. Left: DSub 24W7 signal cable, right: DSub 12 supply cable (cable colors may vary) Connect the controller directly to the computer if you want to use the RS232 connec- tion. -
Page 21: Functional Elements
Biometra TRobot II Functional elements Functional elements Biometra TRobot II PCR module front view Fig. 8 Biometra TRobot II PCR module front view Seal for the block Status LED Heated lid Safety frame Plate lifter Sample block (96-well/silver) LED light signal in the PCR module front The status LED at the front of the PCR module indicates the respective status of the PCR module by its color and luminous rhythm, without the need to look at the software in- terface. -
Page 22: Biometra Trobot Ii Pcr Module Rear View
Functional elements Biometra TRobot II Biometra TRobot II PCR module rear view At the rear of the Biometra TRobot II there are the connectors for the DSub 24W7 signal cable and for the DSub 12 supply cable. Fig. 9 Biometra TRobot II PCR module rear view Signal cable Ventilation slots Supply cable... -
Page 23: Biometra Trobot Ii Controller Rear View
Biometra TRobot II Functional elements Biometra TRobot II Controller rear view Fig. 11 Biometra TRobot II controller rear view Serial RS232 port Ventilation slots Signal cable port Power switch Ethernet port Power supply connection Supply port for PCR module Motorized lid with heating module − adjusting the contact pressure In the motorized lid a heating module is integrated which has a spring-loaded connec- tion to the lid. - Page 24 Functional elements Biometra TRobot II NOTE The strength of the lid contact pressure has been designed for a fully populated block. If only a few samples are to be used in the block, place two additional (empty) tubes of the same height in each of the four corner positions of the block (see Fig.
-
Page 25: Operation Via Software
Biometra TRobot II Operation via software Operation via software The Biometra TRobot II automated thermal cycler can either be integrated into an auto- mation software and operated via it or it can be operated completely independently of an automation system via the Biometra TSuite software included in delivery. Operation via Biometra TSuite software The Biometra TSuite is a Windows PC based application software. -
Page 26: Adapting Programs Of Other Biometra Thermal Cyclers
Adapting programs of other Biometra thermal cyclers Biometra TRobot II Adapting programs of other Biometra thermal cyclers If programs are exchanged between different Biometra thermal cycler models or the sample block is exchanged, programs might need to be adapted prior to the start or dur- ing editing. -
Page 27: Hints And Notes
Biometra TRobot II Hints and notes Hints and notes Forgetting of passwords Passwords can be changed by the system administrator(s) and by users with the "Edit user" right (see the software manual). If the administrator has forgotten his password, use the F function to re- ACTORY SETTINGS set the system. -
Page 28: Mirroring Of Programs On Several Thermal Cyclers
Hints and notes Biometra TRobot II Mirroring of programs on several thermal cyclers Complete thermal cyclers can be mirrored using the backup function. Complete users (via user management) and their programs are copied from one thermal cycler to an- other thermal cycler without having to create each individual user or individual program. The prerequisite is that both cyclers have the same software version (see the software manual). - Page 29 Biometra TRobot II Hints and notes shank length: minimum 140 mm, screwdriver slot width: minimum 6.5 mm, maximum 7.5 mm. The lid opening mechanism can be accessed from behind the removable block module Opening the lid front. To open the lid manually, proceed as follows: 1.
- Page 30 Hints and notes Biometra TRobot II 6. Screw the knurled screw into the base again. ✓ The PCR module is open. The procedure for manually closing the lid is similar to opening the lid. You can use the Closing the lid photos above as reference.
-
Page 31: Maintenance And Care
Biometra TRobot II Maintenance and care Maintenance and care Calibration The Biometra TRobot II thermal cycler is calibrated by the manufacturer before delivery using a measuring system that is traceable to national standards. The Biometra Quality Management System is certified by BSI to BS EN ISO 9001:2015 and the measuring sys- tem is tested and regularly calibrated by an accredited test laboratory in accordance with EN ISO 17025 at prescribed intervals. -
Page 32: Disinfecting The Device
Maintenance and care Biometra TRobot II Only wipe the housing of Biometra TRobot II with a soft clean cloth which may be slightly moistened with a commercial neutral detergent, if necessary. Clean the ventilation slots on the underside and at the rear of the device with a vac- uum cleaner. -
Page 33: Spare Parts
Biometra TRobot II Maintenance and care To update the firmware, please use the USB interface located behind the removable controller front. Spare parts Only use original spare parts. Please contact the Biometra/Analytik Jena service depart- ment or your local distributor. Version 04.20... -
Page 34: Service
Service Biometra TRobot II Service If there are any problems with the device, please contact the service department or your local Analytik Jena dealer. For the address of the Biometra/Analytik Jena service depart- ment, refer to the inside front cover of this operating manual. Please observe the return information (see chapter "Returning a device"... -
Page 35: 10.2 Packaging The Biometra Trobot Ii Thermal Cycler
Biometra TRobot II Service 10.2 Packaging the Biometra TRobot II thermal cycler For dispatch, Biometra uses an extra designed packaging system with inserts of foamed material. NOTE The thermal cycler is only protected from transport damage if the original packaging is used and the packing instructions are followed. -
Page 36: 10.2.2 Packing The Controller
Service Biometra TRobot II Place the two foam inserts onto the device from above. Abb. 15 Packaged PCR module with attached foam inserts Now the box can be sealed. 10.2.2 Packing the controller Place the two foam inserts in the box as shown. Abb. -
Page 37: 10.2.3 Shipping The Pcr Module And The Controller Together
Biometra TRobot II Service 3. Place the two foam mouldings on the device from above. Pull the two device cables upwards through the moulded part recesses. Abb. 18 Controller with attached foam moulded parts Place the cardboard insert on the device and place the two device cables in the cardboard space. -
Page 38: Disposal
Disposal Biometra TRobot II Disposal The operator/user of Biometra TRobot II must properly dispose of the waste materials produced during measurements (sample materials) in accordance with statutory and lo- cal regulations. At the end of its service life, Biometra TRobot II and all its electronic components must be disposed of as electronic waste in accordance with valid regulations. -
Page 39: Specifications
Biometra TRobot II Specifications Specifications Block module Model Biometra TRobot II 96 G Biometra TRobot II 96 SG Biometra TRobot II 384 G Sample block Aluminum, special alloy Silver, gold-plated Aluminum, special alloy Block capacity 96 x 0.2 ml tubes, 96-well 96 x 0.2 ml tubes, 96-well 384-well micro test plate micro test plate or 8-well... - Page 40 Specifications Biometra TRobot II Lid type Motorized lid with heating module, which is connected spring-loaded to the lid Lid temperature 30 °C to 110 °C Contact pressure Constant contact pressure independent of the consumables used, adjustable via soft- ware in a range from 4 kg to 12 kg. Typical default setting: 6 kg to 8 kg Compatible sealing systems Sealing foils, mats and lids...
- Page 41 Biometra TRobot II Specifications Controller technical data and dimensions Power supply 100 V, 115 V or 230 V ±10 %, 50 – 60 Hz Fuse 2x 8AT 250 V (special fuse type required). Please contact the Analytik Jena service de- partment.
-
Page 42: Declaration Of Conformity
Declaration of conformity Biometra TRobot II Declaration of conformity Version 04.20...
Need help?
Do you have a question about the Analytik Jena Biometra TRobot II 96 G and is the answer not in the manual?
Questions and answers