Table of Contents
Advertisement
Quick Links
Advertisement
Table of Contents

Related Manuals for Endress+Hauser Analytik Jena PlasmaQuant PQ 9000


Summary of Contents for Endress+Hauser Analytik Jena PlasmaQuant PQ 9000
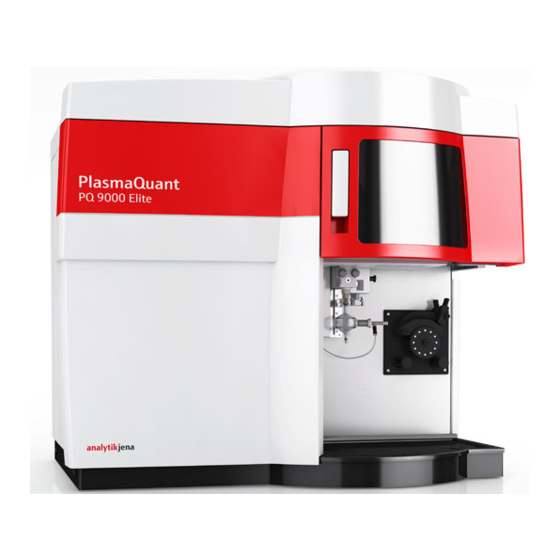
- Page 1 Operating Manual PlasmaQuant PQ 9000 (Elite) High-Resolution Array ICP-OES...
- Page 2 Analytik Jena AG Manufacturer Konrad-Zuse-Str.1 07745 Jena Germany Phone + 49 3641 77 70 + 49 3641 77 9279 Email info@analytik-jena.de Analytik Jena AG Service Konrad-Zuse-Str. 1 07745 Jena Deutschland Phone + 49 3641 77 7407 + 49 3641 77 7449 Email service@analytik-jena.de For safety and proper use follow these instructions.
-
Page 3: Table Of Contents
Contents Contents Basic information ......................7 User manual notes ........................7 Intended use ..........................8 Safety ..........................9 Safety markings on the PlasmaQuant PQ 9000 ..............9 Requirements for the operating personnel ................ 10 Safety instructions, transport and commissioning ............10 Safety instructions - operation .................... - Page 4 Contents 6.2.2 Replacing the torch body ...................... 54 6.2.3 Servicing the one-piece torch ....................57 6.2.4 Cleaning the nebulizer ......................59 6.2.5 Cleaning the sampling compartment and the plasma compartment ......60 6.2.6 Replacing pump tubes ......................60 6.2.7 Changing the plasma compartment windows..............61 6.2.8 Checking the gas system for leaks ..................
- Page 5 Figures and Overviews Figures Figure 1 Sampling compartment and plasma compartment ............17 Figure 2 Concentric nebulizer and spray chamber ................18 Figure 3 Schematic structure of the torch with gas flows ............... 18 Figure 4 Demountable torch ....................... 19 Figure 5 One-piece torch ........................
- Page 6 Figures and Overviews...
-
Page 7: Basic Information
PlasmaQuant PQ 9000 (Elite) Basic information Basic information User manual notes The user manual describes the following models of the PlasmaQuant series: PlasmaQuant PQ 9000 PlasmaQuant PQ 9000 Elite In the text below both devices are collectively called PlasmaQuant PQ 9000. Differences are only stated when appropriate. -
Page 8: Intended Use
Basic information PlasmaQuant PQ 9000 (Elite) Intended use The ICP Emission Spectrometer (ICP-OES) PlasmaQuant PQ 9000 is used in a chemical analysis laboratory for the analysis of liquid - mainly aqueous - samples to determine the concentrations of up to 75 elements up to the trace range. The PlasmaQuant PQ 9000 may only be used for the analyses described in this user manual. -
Page 9: Safety
PlasmaQuant PQ 9000 (Elite) Safety Safety For your own safety and to ensure error-free and safe operation of the PlasmaQuant PQ 9000, please read this chapter carefully before using the appliance. Observe all safety notes listed in this user manual and all messages and notes displayed by the control and analysis program on the monitor. -
Page 10: Requirements For The Operating Personnel
Safety PlasmaQuant PQ 9000 (Elite) Notice symbol Meaning Remark At the power switch: Observe the operating manual Before starting work, read the operating manual. On the side wall at the power inlet: Before opening the device, al- ways disconnect the mains plug Before opening the device cover, switch off the device and disconnect the mains plug from the mains socket. -
Page 11: Safety Instructions - Operation
PlasmaQuant PQ 9000 (Elite) Safety Safety instructions - operation 2.4.1 General safety instructions for operation Observe the following notes: The operator of the PlasmaQuant PQ 9000 must make sure before each commis- sioning that the condition of the device including its safety equipment is sound. This applies in particular after each modification to or extension of the device or its repair. -
Page 12: Hazards Caused By Plasma Operation
Safety PlasmaQuant PQ 9000 (Elite) The PlasmaQuant PQ 9000 and its system components must always be switched off before being connected to the mains. Before opening the device, it must be switched off at the device switch and the mains connector must be disconnected from the mains outlet! Any work on the elec- tronics (behind the device enclosure) may only be carried out by the service engi- neers of Analytik Jena AG and specially authorized technicians. -
Page 13: Safety Instructions Relating To The Formation Of Ozone And Toxic Vapors
PlasmaQuant PQ 9000 (Elite) Safety 2.4.6 Safety instructions relating to the formation of ozone and toxic vapors The interaction between the UV radiation from the torch and the surrounding air results in the formation of a high concentration of toxic gases such as ozone and nitrogen ox- ides. -
Page 14: Safety Instructions Relating To Cleaning And Decontamination Measures
Safety PlasmaQuant PQ 9000 (Elite) Biological samples must be handled according to local guidelines regarding the han- dling of infectious material. When measuring material containing cyanide, you have to make sure that prussic acid cannot be generated in the waste bottle, i.e., the waste solution must not be acidic. -
Page 15: Behavior During Emergencies
PlasmaQuant PQ 9000 (Elite) Safety For cleaning the sampling compartment and transport channels (tube system) of the PlasmaQuant PQ 9000 the operator is responsible for establishing appropriate safety precautions – particularly in terms of contaminated and infectious materials. Before returning the instrument to Analytik Jena AG, clean all parts of the instrument from biologically hazardous, chemical or radioactive contamination. -
Page 16: Function And Setup Of The Plasmaquant Pq 9000
Function and setup of the PlasmaQuant PQ 9000 PlasmaQuant PQ 9000 (Elite) Function and setup of the PlasmaQuant PQ 9000 Physical functional principle of ICP-OES ICP Emission Spectrometry (ICP-OES) makes use of plasma with temperatures of up to 10 000 K. This high temperature is focused on a very small area of approx. 5 cm . -
Page 17: Figure 1 Sampling Compartment And Plasma Compartment
PlasmaQuant PQ 9000 (Elite) Function and setup of the PlasmaQuant PQ 9000 Figure 1 Sampling compartment and plasma compartment The PlasmaQuant PQ 9000 uses a free-running 40 MHz HF generator (High-Frequency HF generator Generator). The HF generator transfers power ranging from 800 to 1700 W into the plasma assisted by the high-performance coil. -
Page 18: Figure 2 Concentric Nebulizer And Spray Chamber
Function and setup of the PlasmaQuant PQ 9000 PlasmaQuant PQ 9000 (Elite) Figure 2 Concentric nebulizer and spray chamber The torch has a three-shell construction and comprises an outer tube, an inner tube and Torch the inner injector tube. The outer tube, in conjunction with the bonnet inserted into the coil, electrically insu- lates the plasma from the induction coil and shields the plasma from the ambient air. -
Page 19: Figure 4 Demountable Torch
PlasmaQuant PQ 9000 (Elite) Function and setup of the PlasmaQuant PQ 9000 The cost of purchasing a one-piece torch is slightly lower. It is cleaned as a whole, mak- ing disassembly and subsequent assembly unnecessary. On the other hand, this torch has to be completely replaced when worn. -
Page 20: Autosampler Aspq 3300
Function and setup of the PlasmaQuant PQ 9000 PlasmaQuant PQ 9000 (Elite) With both models, the monochromator is wavelength-stabilized by the use of an inte- grated neon source. Wavelength reproducibility is achieved by the internal Ne-line cali- bration of the monochromator when approaching a wavelength. A low noise, UV-sensitive semiconductor detector (CCD line detector) is located at the exit slit of the monochromator. - Page 21 PlasmaQuant PQ 9000 (Elite) Function and setup of the PlasmaQuant PQ 9000 waste container during purging. The wash liquid between the measuring breaks or for purging steps within a measuring routine is also taken from the wash cup. A mains connection supplies operating voltage to the ASPQ 3300.
-
Page 22: Installation And Commissioning
Installation and commissioning PlasmaQuant PQ 9000 (Elite) Installation and commissioning CAUTION Prevent any unauthorized interference! The device may only be assembled, installed and repaired by the service engineers from Analytik Jena AG or by technical personnel authorized by Analytik Jena AG. Installation conditions 4.1.1 Environmental conditions... -
Page 23: Gas Supply
PlasmaQuant PQ 9000 (Elite) Installation and commissioning cross-section. The mains connection must be protected on the input (building) side with a 32 A slow-blow fuse and is required to be installed prior to delivery of the Plasma- Quant PQ 9000 near the assembly point. The instrument cable is 3 m long. The CEE sur- face socket (2 pole + E Blue 5UR 3 206-2 220/32) is supplied according to the terms of delivery. -
Page 24: Exhaust Unit
Installation and commissioning PlasmaQuant PQ 9000 (Elite) Oxygen 4.5 or superior 4.1.4 Exhaust unit CAUTION Switch on the exhaust unit during device operation! Switch on the exhaust unit prior to igniting the plasma. Direct the waste air into the at- mosphere and avoid blockages! Correct exhaustion requires the form-locking connection of an extraction hose to the PlasmaQuant PQ 9000 smokestack. -
Page 25: Device Layout And Space Requirements
PlasmaQuant PQ 9000 (Elite) Installation and commissioning NOTICE Danger of corrosion in the cooling water circuit! When selecting the recirculating chiller make sure that no base metals are used in components carrying water. Base metals also increase the conductivity of the cooling water. The system must be filled with cooling water that has been mixed with a cooling water additive to be obtained from Analytik Jena AG. -
Page 26: Figure 7 Dimensions Of The Plasmaquant Pq 9000 - Front View
Installation and commissioning PlasmaQuant PQ 9000 (Elite) Component Width Height Depth Mass [kg] [mm] [mm] [mm] On the workbench PlasmaQuant PQ 9000 Autosampler Waste bottle ∅ 200 mm 400 mm Outside the laboratory / (or next to the workbench) Recirculating chiller Water-air chiller Water-water chiller Figure 7 Dimensions of the PlasmaQuant PQ 9000 - front view... -
Page 27: Supply And Control Connections
PlasmaQuant PQ 9000 (Elite) Installation and commissioning Figure 8 Dimensions of the PlasmaQuant PQ 9000 - top view Supply and control connections The supply lines are connected during the installation of the PlasmaQuant PQ 9000 by service engineers from Analytik Jena AG. The green power switch and the red plasma deactivation switch are located on the left- hand side of the PlasmaQuant PQ 9000. -
Page 28: Figure 9 Overview Of Connections On The Left Side Of The Device
Installation and commissioning PlasmaQuant PQ 9000 (Elite) Figure 9 Overview of connections on the left side of the device Manual plasma deactivation switch Power cable Power switch Fuses 3, 4 Openings for carrying handles Interfaces Connections for gas and water cooling 10 Serial number Water filter... -
Page 29: Figure 10 Interfaces And Fuses
PlasmaQuant PQ 9000 (Elite) Installation and commissioning "USB/B” for PC USB connection "PC" for serial PC connection (optional) “RS 232” (service only) "Autosampler" for serial sampler connec- tion (12 V) "Service" "Chiller remote" for optional control of the recirculating chiller via ICP-OES Fuse S3 25 A Fuse S2 6 A Fuse S1 10 A... -
Page 30: Figure 12 Plug-In Connectors For Gas Connections
Installation and commissioning PlasmaQuant PQ 9000 (Elite) Figure 12 Plug-in connectors for gas connections The tubes for cooling water are also equipped with quick couplings. When connecting the tubes, the connecting pieces on the tubes are pushed into the sockets all the way until they engage with a click. -
Page 31: Connections In The Plasma Compartment, Sampling Compartment And Type Plate
PlasmaQuant PQ 9000 (Elite) Installation and commissioning Connections in the plasma compartment, sampling compartment and type plate Figure 14 Plasma compartment Quartz window for radial observation Type plate Cone for axial observation Photo detector for optical plasma monitoring High voltage (HV) conducting spring Induction coil with bonnet and torch Figure 15 Data on the type plate Manufactuerer's adress... -
Page 32: Installing The Plasmaquant Pq 9000
Installation and commissioning PlasmaQuant PQ 9000 (Elite) Figure 16 Sampling compartment Torch Drip tray Mechanical height adjustment Argon tube connector on the nebulizer Fork clamp Waste tube connector on the spray chamber Sample aspiration tube on the nebulizer Argon tube Peristaltic pump 10 Spray chamber with nebulizer connected Installing the PlasmaQuant PQ 9000... -
Page 33: Installation Of The Torch, Nebulizer With Spray Chamber And Sample Supply
PlasmaQuant PQ 9000 (Elite) Installation and commissioning 4.5.1 Installation of the torch, nebulizer with spray chamber and sample supply CAUTION Risk of glass breakage! Use special glass handling gloves during torch assembly! They will protect your hands against broken glass. 1. - Page 34 Installation and commissioning PlasmaQuant PQ 9000 (Elite) 7. Fit together the spherical joint connection of the torch and the spray chamber and secure the connection with the fork clamp. 8. Push the torch on the adjusting rail upwards until it engages in the height adjustment.
- Page 35 PlasmaQuant PQ 9000 (Elite) Installation and commissioning 14. Connect the sample pump tube to the tube of the autosampler (for automatic operation) or a tube leading di- rectly into the sample (manual operation). 15. At the waste pump tube, connect the waste tube to the waste container. Attention! The waste tube must not dip into the liquid! This prevents waste material from being pumped into the nebulizer system in case of faulty pump tube connection.
-
Page 36: Initial Operation Of The Autosampler Aspq 3300
Installation and commissioning PlasmaQuant PQ 9000 (Elite) 4.5.2 Initial operation of the autosampler ASPQ 3300 Connections at the ASPQ 3300 Figure 17 ASPQ 3300- overview Autosampler arm Wash cup Autosampler head with cannula holder Wash cup pump Cannula 10 Controller for wash cup pump 4, 5 Rack for special samples 11 Mains LED Base plate for racks... -
Page 37: Figure 19 Wash Cup Und Pump At The Aspq 3300
PlasmaQuant PQ 9000 (Elite) Installation and commissioning Figure 19 Wash cup und pump at the ASPQ 3300 1a Inlet connector of the pump tubing Occlusion screw 1b Connection to the wash solution Speed controller 2a Outlet connector to the waste tubing Tube clamping block 2b Connection to the waste container Wash cup... - Page 38 Installation and commissioning PlasmaQuant PQ 9000 (Elite) 2. Install the wash cup. Insert the wash cup into the rear left recess and turn it by 90° in a clockwise direction. 3. Fit the racks for special samples (1) in the base plate and attach the required sample racks (2).
-
Page 39: Installing Additional Accessories
PlasmaQuant PQ 9000 (Elite) Installation and commissioning 8. Guide the sample tube initially in a loop through the eyelet on the cannula holder (1). 9. Thread the tube from the left side through the eyelet (2) at the lower end of the head. 10. - Page 40 Installation and commissioning PlasmaQuant PQ 9000 (Elite) The Isomist is particularly suited for organic analyses. It increases the temperature sta- bility of the samples. It also reduces the amount of solvent vapor generated in the spray chamber by cooling the samples. The spray chamber temperature is controlled using the Isomist software, which is en- closed with the accessory.
-
Page 41: Installing The Argon Humidifier
PlasmaQuant PQ 9000 (Elite) Installation and commissioning Figure 20 Isomist in the sampling compartment Mains cable Nebulizer USB port Isomist Waste hose Carrier gas hose Sample hose on the nebulizer Transfer tube 4.6.2 Installing the argon humidifier The argon humidifier is suitable for the analysis of samples with a high salt content. By humidifying the carrier gas the argon humidifier prevents that salts crystallize inside the nebulizer or injector, blocking it. -
Page 42: Installing The In-Line Filter
Installation and commissioning PlasmaQuant PQ 9000 (Elite) Figure 21 Argon humidifier in the sampling compartment Gas outlet: Argon hose to nebulizer Glass container with membrane coil Gas inlet: Argon hose from ICP-OES Argon hose from device Bypass valve 1. Assemble the argon humidifier as described in the enclosed data sheet. Be careful Installing the argon hu- not to damage the membrane coil. -
Page 43: Figure 22 In-Line Filter In Sampling Compartment
PlasmaQuant PQ 9000 (Elite) Installation and commissioning Figure 22 In-line filter in sampling compartment Sample hose to nebulizer Sample pump hose Filter block with hose connectors 1. Insert the in-line filter into the hose path such that the arrow on the filter block Installing the in-line filter points in the direction of flow (i.e. -
Page 44: Installing The Kit For Internal Standard (Kis)
Installation and commissioning PlasmaQuant PQ 9000 (Elite) 4.6.4 Installing the kit for internal standard (KIS) The KIS is suitable for the analysis of samples in which the matrix has an influence on the measurement. If the standards and samples have a different viscosity, for example, this may influence the measurement result. - Page 45 PlasmaQuant PQ 9000 (Elite) Installation and commissioning HS PQ Pro – for simultaneous determination of Hg/hydrides and classic elements More information on the mercury/hydride systems can be found in the relevant acces- sory manuals.
-
Page 46: Operation
Operation PlasmaQuant PQ 9000 (Elite) Operation Switching on the PlasmaQuant PQ 9000 and igniting the plasma Switch on the PlasmaQuant PQ 9000 as follows: 1. Switch on the PlasmaQuant PQ 9000 at the power switch. 2. Switch on the PC at the power switch and start the operating system. 3. -
Page 47: Switching Off The Plasmaquant Pq 9000
PlasmaQuant PQ 9000 (Elite) Operation 15. If the system has been out of service for a longer period (more than a week) or the spray chamber has been dismantled, the spray chamber and the torch should be purged with carrier gas to evacuate any air from the sample introduction system: —... -
Page 48: Using The Plasma Deactivation Switch In The Event Of Faults
Operation PlasmaQuant PQ 9000 (Elite) 3. Select the F E menu item and end the ASpect PQ program. 4. Confirm the query about switching off the purge gas for the detector with [Y ] if the purge gas should be switched off. If work is only interrupted for a short period (up to 30 min.), do not switch off the purge gas. - Page 49 PlasmaQuant PQ 9000 (Elite) Operation 1. Switch on the PlasmaQuant PQ 9000 and ignite the plasma, as described in the sec- tion "Switching on the PlasmaQuant PQ 9000 and igniting the plasma" p. 46. 2. Select a method. In the toolbar, click on the folder symbol next to the M field and select the ETHOD method in the database window.
-
Page 50: Maintenance And Care
Maintenance and care PlasmaQuant PQ 9000 (Elite) Maintenance and care This chapter contains all the instructions for care and maintenance which users can and must perform themselves. All maintenance work and repairs beyond this scope must only be performed by service engineers from Analytik Jena AG or persons authorized by Analytik Jena AG. -
Page 51: Maintenance Intervals
PlasmaQuant PQ 9000 (Elite) Maintenance and care Maintenance intervals The following maintenance tasks must be performed: Maintenance item Action Reason, frequency Base device Wash solution bottle Check filling level, replenish Daily Waste bottle Check filling level, empty Daily Sampling compartment Remove contamination Daily Check pump tubes for flexibility and... -
Page 52: Base Device Maintenance
Maintenance and care PlasmaQuant PQ 9000 (Elite) Maintenance item Action Reason, frequency Recirculating chiller Coolant tank Check coolant level at the tank level After replacement, otherwise monthly indicator and replenish Replenish on reaching the minimum level Coolant Check coolant conductivity Semi-annually Replace Annually and if conductivity >... - Page 53 PlasmaQuant PQ 9000 (Elite) Maintenance and care 3. Unscrew the torch from the carriage on the rail guide. 4. Pull first the outer and then the inner tube from the holder. Caution! Breakage of glass! The quartz tubes are very fragile and are firmly mounted in the ground glass connector of the holder.
-
Page 54: Replacing The Torch Body
Maintenance and care PlasmaQuant PQ 9000 (Elite) 11. Oil the ground joint of the inner and outer tube with the sup- plied lubricated cloth until the ground joints are transparent. 12. Carefully push the inner tube into the torch body of the holder as far as it will go. - Page 55 PlasmaQuant PQ 9000 (Elite) Maintenance and care 3. Unscrew both connections for the argon supply at the rear of the holder. 4. Pull the torch body from the holder. Remove any shards if necessary. 5. Push the new torch body in the holder. Align the torch body to make sure that the individual bore is visible centered in the front opening of the holder.
- Page 56 Maintenance and care PlasmaQuant PQ 9000 (Elite) 8. Align the top oblique hole for the argon inlet centered with the top O-ring. Caution! — The gas connections are of different lengths and must not be swapped. — Only screw in the gas connections until they are flush with the surface of the mount.
-
Page 57: Servicing The One-Piece Torch
PlasmaQuant PQ 9000 (Elite) Maintenance and care 17. If there is a noticeable resistance against the torch body, unscrew the 8 mm gas connection and Allen screw by approx. 1 mm and continue the steps from item (15). 18. Connect the inner and outer tubes to the torch. See also section "Cleaning the demountable torch" p. 52. 6.2.3 Servicing the one-piece torch CAUTION... - Page 58 Maintenance and care PlasmaQuant PQ 9000 (Elite) 7. Take the quartz bonnet out of the induction coil. 8. Place the glass components for approx. 12 h in aqua regia. 9. Rinse the glass components under deionized water (<1 µS/cm) and dry them with compressed air or argon. 10.
-
Page 59: Cleaning The Nebulizer
PlasmaQuant PQ 9000 (Elite) Maintenance and care 3. Unscrew the clamping ring from the torch holder and remove the retaining ring, 2 O-rings and the spacer ring for the gas line. 4. Check the sealing rings (O-rings) and renew any worn rings. 5. -
Page 60: Cleaning The Sampling Compartment And The Plasma Compartment
Maintenance and care PlasmaQuant PQ 9000 (Elite) Note: Analytik Jena AG offers a special nebulizer cleaning tool optimized for the PFA- nebulizer (HF kit) and the optional parallel path nebulizer. Figure 25 Nebulizer cleaning tool with installed nebulizer Nebulizer 1st red O-ring Nebulizer holder Syringe 1. -
Page 61: Changing The Plasma Compartment Windows
PlasmaQuant PQ 9000 (Elite) Maintenance and care 6.2.7 Changing the plasma compartment windows The windows situated in the plasma compartment in front of the transfer optics must be replaced if their transmission has greatly deteriorated, especially in the UV range. Clean- ing the windows does not usually completely restore UV permeability;... - Page 62 Maintenance and care PlasmaQuant PQ 9000 (Elite) 5. Insert a new or cleaned window into the holder. See the note on the seating of the window below. Attention! Do not touch the end faces of the quartz window with your fingers. Wipe off any fingerprints immediately with ethanol.
-
Page 63: Checking The Gas System For Leaks
PlasmaQuant PQ 9000 (Elite) Maintenance and care Catch the window as it falls out. Also remove the sealing ring from the frame (see Figure above). 6.2.8 Checking the gas system for leaks Check for leak tightness in the scope of the weekly safety check or before placing the PlasmaQuant PQ 9000 into operation if the device has been previously disconnected from the gas supply system. -
Page 64: 6.2.10 Replacing The Air Filter Of The Pq 9000
Maintenance and care PlasmaQuant PQ 9000 (Elite) Fuse number Type Protected electrical circuit 10 A NFC 10x38 gG AC 400 V Spectrometer 6 A NFC 10x38 gG AC 400 V Tubular heating generator 25 A NFC 10x38 gG AC 400 V Power supply unit generator The fuse holders are located on the terminal strip on the left-hand side of the device. -
Page 65: 6.2.12 Replacing The Argon Hose
PlasmaQuant PQ 9000 (Elite) Maintenance and care 1. Switch off the PlasmaQuant PQ 9000 and recirculating chiller from the mains switch (see section "Switching off the Plasma- Quant PQ 9000" p. 47). 2. Put a bucket in place and unscrew the filter cup (2) clockwise from the water filter (1). -
Page 66: Replacing The Pump Tubing Of The Autosampler Pump
Maintenance and care PlasmaQuant PQ 9000 (Elite) 5. Unscrew the banjo bolt at the cannula and the sample tube from the connecting piece. 6. Only use a straight-cut, round and unpinched tube end for the connection when re- placing the sample tube. First push the banjo bolts and then one sealing cone with the conical side onto the tube and the cannula. -
Page 67: Replacing The Fuses
PlasmaQuant PQ 9000 (Elite) Maintenance and care 1a Inlet connector of the pump tubing 1b Connection to the wash solution 2a Outlet connector to the waste tubing 2b Connection to the waste container Pressure bars Occlusion screw Speed controller Tube clamping block Wash cup Pump rotation Figure 29 Autosampler pump... -
Page 68: Maintenance Of The Recirculating Chiller - Changing The Cooling Water
Maintenance and care PlasmaQuant PQ 9000 (Elite) Figure 30 Replacing the fuses of the autosampler Maintenance of the recirculating chiller - Changing the cooling water CAUTION Biocide! Observe the safety data sheet of the biocide used. NOTICE Observe the cooling water preparation! The cooling water additive for recirculating chillers (order no. - Page 69 PlasmaQuant PQ 9000 (Elite) Maintenance and care Switch on the recirculating chiller and observe the level indicator. The level drops when the pump is operating. Continue to slowly fill the tank with the coolant until the level stabilizes slightly be- low the mark.
-
Page 70: Fault Removal
Fault removal PlasmaQuant PQ 9000 (Elite) Fault removal Device faults and error messages in the software NOTICE Please contact the Analytik Jena AG service department in the following cases: The error cannot be rectified with the troubleshooting described above. ... - Page 71 PlasmaQuant PQ 9000 (Elite) Fault removal 3872 CCD cooling is inactive! Cause Remedy A termination occurred during plasma ignition If the plasma is burning, in the S win- PECTROMETER dow, activate the CCD option and then COOLING click on [S 3874 Spectrometer purging is still active! Cause...
- Page 72 Fault removal PlasmaQuant PQ 9000 (Elite) The cooling water flow is too low Determine the cooling water flow, service the coolant The cooling temperature setting at the recircu- Set the recirculating chiller to a cooling tempera- lating chiller is too high ture of 18 °C 4011...
-
Page 73: Equipment Faults And Analytical Problems
PlasmaQuant PQ 9000 (Elite) Fault removal 5204 Status: Plasma error! Cause Remedy Device communication error Restart the device (and PC if relevant) The step motor for grating, prism, shutter is Inform service faulty 5206 Status: One or more safety interlocks are open! Cause Remedy ... - Page 74 Fault removal PlasmaQuant PQ 9000 (Elite) Use an argon humidifier or an in-line filter to prevent further clogging The nebulizer gas is set too low Optimize the carrier gas flow Adjustment on the analyte channel Adjust the x/y offset for the method parameter in the P LASMA DJUST window (see the online help or the ASpect PQ operating in-...
- Page 75 PlasmaQuant PQ 9000 (Elite) Fault removal Check the pump tube for drainage; if necessary, select a larger cross-sec- tion The measured value is too high Cause Remedy Calibration Check the calibration solutions The peak position has slightly shifted or ...
-
Page 76: Transport And Storage
Transport and storage PlasmaQuant PQ 9000 (Elite) Transport and storage Preparing the PlasmaQuant PQ 9000 for transport CAUTION Risk of injury! Screw the transport handles into the device as far as they will go. This is the only way to ensure that you can grip and carry the device safely. -
Page 77: Ambient Conditions For Transport And Storage
PlasmaQuant PQ 9000 (Elite) Transport and storage Ambient conditions for transport and storage NOTICE Risk of damage to the device due to the cooling water freezing! The ambient temperature may fall below freezing when transporting the device. There- fore, make sure the cooling water is completely drained before transport. Observe the safety instructions in the section "Safety instructions, transport and commis- sioning"... -
Page 78: Installing The Recirculating Chiller
Transport and storage PlasmaQuant PQ 9000 (Elite) 8. Install the torch and the sample supply system (see the sections "Installation of the torch, nebulizer with spray chamber and sample supply" p. 33, "Initial operation of the autosampler" p. 36). 9. Install the recirculating chiller (see the section "Installing the recirculating chiller" p. -
Page 79: Disposal
PlasmaQuant PQ 9000 (Elite) Disposal Disposal Liquid waste generated when using ICP-OES typically contain mineral acids, salts, metals and heavy metals. Prior of disposal waste solutions ought to be neutralized, e.g. with diluted sodium hy- droxide solution. Organic solutions must be treated separately. Any waste must be made available for proper disposal in accordance with currently valid rules of law. -
Page 80: Specification
Specification PlasmaQuant PQ 9000 (Elite) Specification 10.1 Technical data 10.1.1 PlasmaQuant PQ 9000 data Optical system Plasma- Monochromator Echelle grating double-monochromator with a focal length of F=400 Quant PQ 9000 Elite mm and variable gap; pre-monochromator with quartz prism, wave- length selection via additional reflected neon radiator Wavelength range 160 –... - Page 81 PlasmaQuant PQ 9000 (Elite) Specification Power supply Supply voltage 230 V ±10% Frequency 50/60 Hz Mains fuse installation in 32 A the building Typical average power con- Base device: 4500 VA sumption Overvoltage category II according to DIN EN 61010-1 Degree of contamination 2 according to DIN EN 61010-1 Protection class...
-
Page 82: 10.1.2 Control Computer Data
Specification PlasmaQuant PQ 9000 (Elite) Storage Temperature: -40°C to +70°C Use desiccant Dimensions and weights Mass 170 kg Dimensions (WxDxH) 987 mm x 853 mm x 937 mm Analytic data Type of sample Liquid Type of nebulizer Concentric nebulizer Spray chamber Cyclone chamber 10.1.2 Control computer data Computer... -
Page 83: 10.1.4 Autosampler Data
PlasmaQuant PQ 9000 (Elite) Specification Water rate 540 l/h* (in the primary water circuit) Noise level Max. 48 dB * at a water outlet temperature of 10 °C on the domestic water side, 18 °C in the cooling water circuit and a pressure differential of Δp = 0,5 bar over the domestic water circuit 10.1.4 Autosampler data Dimensions H x W x D 510 mm x 285 mm x 490 mm... -
Page 84: 10.2 Guidelines And Standards
Specification PlasmaQuant PQ 9000 (Elite) 10.2 Guidelines and standards The PlasmaQuant PQ 9000 belongs to safety class I. Safety class and safety type The housing has safety type IP 20. The PlasmaQuant PQ 9000 conforms to the safety standards Device safety ... -
Page 85: Index
PlasmaQuant PQ 9000 (Elite) Index Index Bonnet 18 Generator 17 Air filter 30 Induction coil 17 Replace 64 Injector 18 Argon humidifier 41 Nebulizer 17 ASpect PQ error message 70 Pump 17 Autosampler Spray chamber 17 Fuse 67 Torch 18 Replace cannula 65 Transfer optics 19 Replace pump hose 66... - Page 86 Index PlasmaQuant PQ 9000 (Elite) Installation site 22 Clean windows 61 Interfaces 29 Connections 31 Internal standard Replace windows 61 Kit 44 Plasma gas 18 Isomist 39 Problems Analytical 73 Protection class 84 Kit for internal standard 44 Protection type 84 Pump 17 Liquid gas systems 13 Pump tube 35...
- Page 87 PlasmaQuant PQ 9000 (Elite) Index Computer 82 Demountable 18 Cooling system 82 One-piece torch 18 Environmental conditions 81 Replacing the torch body 54 Exhaust unit 24 Transfer optics 19 Fuses 81 Type plate 30 Gas supply 81 Optical system PlasmaQuant PQ Use 8 9000 80 User manual conventions 7...
Need help?
Do you have a question about the Analytik Jena PlasmaQuant PQ 9000 and is the answer not in the manual?
Questions and answers