
Related Manuals for Acromag VPX4810


Summary of Contents for Acromag VPX4810
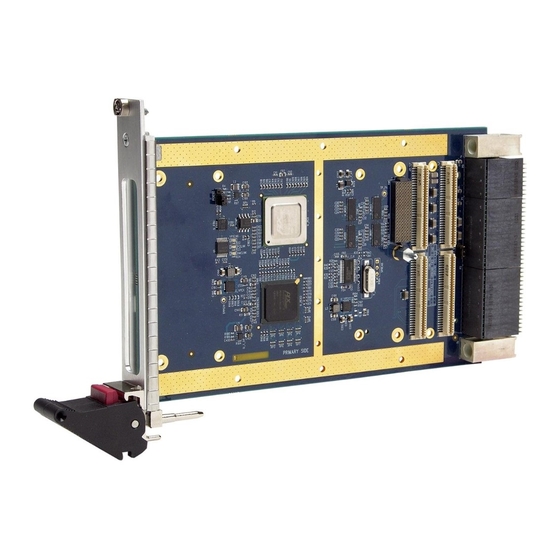
- Page 1 (217) 352-9330 | Click HERE Find the Acromag / Xembedded / Xycom VPX4810CC at our website:...
- Page 2 VPX PCIe PMC/XMC 3U Carrier USER’S MANUAL ACROMAG INCORPORATED 30765 South Wixom Road Wixom, MI 48393-2417 U.S.A. Tel: (248) 624-0310 Fax: (248) 624-9234 Copyright 2017, Acromag, Inc., Printed in the USA. Data and specifications are subject to change without notice. 8500908G...
-
Page 3: Table Of Contents
VPX4810 PCIe PMC/XMC 3U Carrier USER’S MANUAL Table of Contents GENERAL INFORMATION ..................... 3 Key Features ........................3 Software Support......................... 3 References ........................... 4 PREPARATION FOR USE ....................... 5 Unpacking and Inspecting ....................5 Card Cage Considerations ....................5 Backplane ..............................6 Non-Isolation Considerations .................... - Page 4 This is very important where property loss or human life is involved. It is important that you perform satisfactory overall system design and it is agreed between you and Acromag, that this is your responsibility.
-
Page 5: General Information
Front I/O and will only fit in REDI chassis. Key Features • PCIe x4 or x8 lane VITA 46.4 Backplane Compliance: The VPX4810 supports either a 4 or 8 lane PCIe 2.0 connection to the backplane. • Supports either 1 PMC or XMC module – The VPX4810 supports 1 PMC module complaint to PCI 3.0 -- 32 or 64 bits at 33 or 66MHz or PCI-X 1.0b 64 bits at 66MHz, 100MHz, or 133MHz. -
Page 6: References
VPX4810 PCIe PMC/XMC 3U Carrier USER’S MANUAL References The following two whitepapers related to VPX are available for download on Acromag’s website or by contacting your sales representative. Introduction to VPX: VITA 46, 48, and 65. Will Acromag’s VPX4810 work in my system? Acromag, Inc. -
Page 7: Preparation For Use
Each of Acromag’s VPX carriers are in a different pitch as determined by the cooling technique. The VPX4180 is a 1.0” pitch board, the VPX4810CC is 1.0” pitch, and the VPX4810REDI is a 1.00” pitch board. Verify your chassis compliance to accommodate the various board pitches. -
Page 8: Backplane
As such, the field I/O connections are not isolated from the system. Care should be taken in designing installations without isolation to avoid noise pickup and ground loops caused by multiple ground connections. The model VPX4810 carrier field I/O connections are made through the rear via J4 for a single PMC mezzanine I/O module card. -
Page 9: Pmc Connector Pinout
VPX4810 PCIe PMC/XMC 3U Carrier USER’S MANUAL 1-2 (default) USES 3.3V FRU & Temp USES 3.3V_AUX Sensor Voltage 4-5 (default) FRONT PANEL TIED TO GND Orb/Chassis FRONT PANEL ISOLATED Ground 1-2 (default) VREF is 3.3V JTAG REF VREF is 2.5V... - Page 10 VPX4810 PCIe PMC/XMC 3U Carrier USER’S MANUAL Ground V(I/O) AD(15) AD(12) AD(11) AD(09) Ground C/BE(0)* AD(06) AD(05) AD(04) Ground V(I/O) AD(03) AD(02) AD(01) AD(00) Ground REQ64* * Indicates that the signal is active low. Acromag, Inc. Tel: 248-295-0310 - 8 - - 8 - www.acromag.com...
-
Page 11: Pmc Site Connector J2
VPX4810 PCIe PMC/XMC 3U Carrier USER’S MANUAL PMC Site Connector J2 This connector contains PCI bus signals and power for PMC modules. Signal Signal +12V TRST* Ground Ground PCI-RSVD* PCI-RSVD* PCI-RSVD* BUSMODE2* +3.3V RST* BUSMODE3* +3.3V BUSMODE4* PCI-RSVD* Ground AD(30) -
Page 12: Pmc Site Connector J3
VPX4810 PCIe PMC/XMC 3U Carrier USER’S MANUAL PMC Site Connector J3 This connector contains the additional PCI bus signals required for 64-bit transactions. Signal Signal PCI-RSVD Ground Ground C/BE(7)* C/BE(6)* C/BE(5)* C/BE(4)* Ground V(I/O) PAR64 AD(63) AD(62) AD(61) Ground Ground... -
Page 13: Pmc Site Connector J4
VPX4810 PCIe PMC/XMC 3U Carrier USER’S MANUAL PMC Site Connector J4 This connector contains the PMC Rear I/O Signals. These signals are routed to the VPX backplane. Signal Signal Rear Jn4-1/P2-E1 Rear Jn4-2/P2-B1 Rear Jn4-3/P2-D1 Rear Jn4-4/P2-A1 Rear Jn4-5/P2-F2 Rear Jn4-6/P2-C2... -
Page 14: Xmc Connector Pinout
XMC Connector P5 This connector contains eight PCIe lanes as well as all XMC power and control signals. Note that VPRW is 5V on the VPX4810 carrier. The carrier does not support processor XMC modules (PCI enumeration capabilities). PCIeT0p PCIeT0n +3.3V... -
Page 15: Vpx Backplane Connector Pinouts
Note: BOLD ITALIC signals are NOT USED by this carrier board. VPX P1 Connector – PCIe The VPX 3U P1 connector contains the high speed PCIe signals. The VPX4810 is compliant to VITA 46.4 with up to 8 lanes and PCIe. -
Page 16: Vpx P2 Connector -Rear I/O
The VPX P2 connector contains all of the Rear I/O routing from the PMC J4 connector. This connector consists of 16 differential wafers with 7 signals each. This pin out is compliant with VITA 46.9 P2w1-P64s. Note that the backplane connected to the VPX4810 should be VITA 46.9 P2w1-P64s compliant to avoid any possible signal contentions. -
Page 17: Jtag Connector - Jtag Header
VPX4810 PCIe PMC/XMC 3U Carrier USER’S MANUAL JTAG Connector – JTAG Header Pin Number Description JTAG_TDI JTAG_TDO JTAG_TCK JTAG_TMS JTAG_VREF Board Layout Acromag, Inc. Tel: 248-295-0310 - 15 - - 15 - www.acromag.com http://www.acromag.com... - Page 18 PEX8114 PCIX Bridge. The fourth LED (Status X) on the front panel indicates the XMCLNK link status of an XMC module installed on to the VPX4810. Note: The Status C will always blink as “reduced lanes” because of the design. The D status in not available on the VPX4810.
-
Page 19: Installing And Removing Pmc/Xmc Modules
The procedure for installing and XMC/PMC module into the VPX4810 series carrier varies depending on the carrier type. Please note that if you purchase the VPX4810 and one of Acromag’s PMC or XMC modules separately you may require one of the following additional hardware kits to complete mounting. - Page 20 Angle board into position. Press downwards. Step 3: Flip the VPX4810 over and install 4x M2.5 x 5 screws into the locations noted in the picture below. These correspond to the standoffs and the front PMC panel on the attached module.
-
Page 21: Vpx4810Cc Conduction Cooled
Loosen standoff screws. mating connectors. Press downward, turning standoffs (2x) if needed. Note: Consult the factory for any components on a non-Acromag PMC/XMC module that might interfere with the secondary thermal interface areas, before assembly. Acromag, Inc. Tel: 248-295-0310 - 19 - - 19 - www.acromag.com... - Page 22 VPX4810 PCIe PMC/XMC 3U Carrier USER’S MANUAL Step 4: Install the 16x M2 x 6 screws on this side of the board and tighten the 2 standoff screws. Tighten standoff screws Install 16x M2 x 6 screws Step 5: Flip the VPX4810CC over and install 2x M2.5 x 5 screws for the standoffs into the locations noted in the picture below.
-
Page 23: Vpx4810Redi Vita 48
VPX4810 PCIe PMC/XMC 3U Carrier USER’S MANUAL VPX4810REDI VITA 48 Step 1: Take your XMC/PMC module and verify that it has the front panel and standoffs have been removed. The standoffs are pre-installed on the VPX4810REDI. Note that you will need the PMC-KIT-CC to complete mounting. - Page 24 VPX4810 PCIe PMC/XMC 3U Carrier USER’S MANUAL Step 3: Insert the PMC/XMC module and press down firmly. Then install 8x M2.5 x 5 screws and 10x M2.0 x 6 screws as shown in the picture below. Install 10x M2 x 6 screws Install 8x M2.5 x 5 screws...
-
Page 25: Theory Of Operation
Operation of the VPX4810 The VPX4810 bus carrier can be connected as a Double Fat Pipe (PCIe x8) device, but will also link properly to smaller width connections. The PCIe bus is then routed to a switch that then automatically connects via 4 or 8 lanes to the XMC module. -
Page 26: Service And Repair
WARNING: POWER MUST BE TURNED OFF BEFORE REMOVING OR INSERTING BOARDS. Where to Get Help If you continue to have problems, your next step should be to visit the Acromag worldwide web site at http://www.acromag.com. Our web site contains the most up-to-date product and software information. -
Page 27: Specifications
0.50 pounds (0.23 Kg) Model VPX4810REDI 0.95 pounds (0.43 Kg) FRONT PANEL VPX4810-LF front panel is 1.0” based on VITA 48.1. Please contact factory for IEEE 1101.10 1.0” and 0.8” front panel options. POWER REQUIREMENTS 3.3 VDC (5%)* Typical 900 mA Max. -
Page 28: Environmental
VPX4810 PCIe PMC/XMC 3U Carrier USER’S MANUAL ENVIRONMENTAL Operating Temperature/Airflow Requirements Model Op. Temp Airflow Requirements VPX4810 100 LFM 0C to 70C VPX4810CC 200 CFM if not installed in a conduction cooled chassis. -40C to 85C VPX4810REDI N/A. Must be installed in REDI complaint chassis. -
Page 29: Vpx Specifications
VITA 46.4 complaint backing signals either 4x (fat pipe) or 8x (double fat pipe) PCIe. Rear I/O routed per VITA 46.9 P2w1-P64s. Front I/O is only available on the VPX4810 (air cooled) model. Backplane Compatible with the following VITA 65 Profiles:... -
Page 30: Certificate Of Volatility
VPX4810 PCIe PMC/XMC 3U Carrier USER’S MANUAL Certificate of Volatility Certificate of Volatility Acromag Model Manufacturer: VPX4810-L/VPX4810-LF Acromag, Inc. VPX4810-CC-L/VPX4810-CC-LF 30765 Wixom Rd VPX4810-REDI-L/ VPX4810-REDI-LF Wixom, MI 48393 Volatile Memory Does this product contain Volatile memory (i.e. Memory of whose contents are lost when power is removed) ■... -
Page 31: Revision History
Initial Acromag release. 03 JAN 13 Documented the BIOS limitation on the XVPX-6300, when used with the VPX4810. Reference ECN 12L010. 05 APR 13 Page 14 of the manual, first paragraph, is not a completed sentence and needs to be completed for proper customer use.
Need help?
Do you have a question about the VPX4810 and is the answer not in the manual?
Questions and answers