Advertisement
Table of Contents
- 1 Operating Instructions
- 2 Owner's Record
- 3 Specifications
- 4 Power Supply
- 5 Using on AC House Current
- 6 Remote Control
- 7 Tuner Operation
- 8 Programmed Play
- 9 Play Mode
- 10 Tape Operation
- 11 Recording from a CD or the Tuner
- 12 Playing a Tape
- 13 Dubbing a Tape
- 14 Sound Adjustment
- 15 Setting the Sleep Timer
- 16 Microphone Mixing
- Download this manual
See also:
Service Manual
OPERATING INSTRUCTIONS
INSTRUCCIONES DE MANEJO
MODE D'EMPLOI
8B-CTA-903-01
001130ACK-I-FM
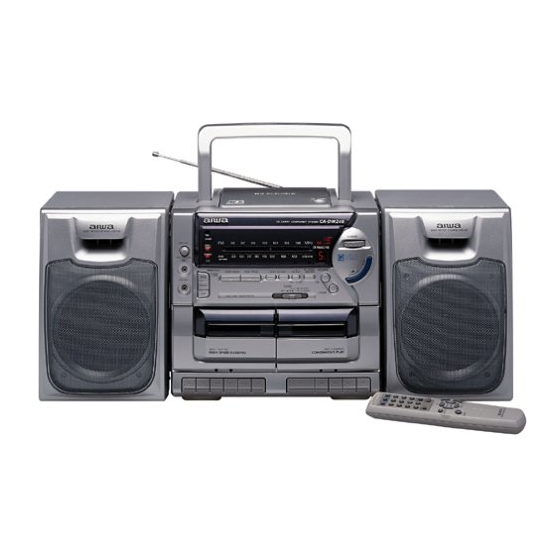
CA-DW248
COMPACT DISC CARRY COMPONENT SYSTEM
SISTEMA DE COMPONENTES DE DISCOS
COMPACTOS PORTATIL
MINICHAINE PORTABLE A LECTEUR DE CD
English : See page 2.
Español : Ver la página 12.
Français : Voir page 22.
U
En
E
F
Advertisement
Table of Contents

Related Manuals for Aiwa CA-DW248


Summary of Contents for Aiwa CA-DW248
-
Page 1: Operating Instructions
OPERATING INSTRUCTIONS INSTRUCCIONES DE MANEJO MODE D’EMPLOI 8B-CTA-903-01 001130ACK-I-FM CA-DW248 COMPACT DISC CARRY COMPONENT SYSTEM SISTEMA DE COMPONENTES DE DISCOS COMPACTOS PORTATIL MINICHAINE PORTABLE A LECTEUR DE CD English : See page 2. Español : Ver la página 12. Français : Voir page 22. -
Page 2: Owner's Record
(you will find it in the battery compartment) in the space provided below. Please refer to them when you contact your AIWA dealer in case of difficulty. Model No. Serial No. -
Page 3: Specifications
a qualified service technician to service or replace the outlet. To avoid defeating the safety feature of the polarized plug, do not force it into a power outlet. 3 AC power cord - When disconnecting the AC power cord, pull it out by the AC power plug. -
Page 4: Power Supply
Power supply OPE / BATT The OPE/BATT indicator lights up while the power is Using on AC house current Connect the AC cord as illustrated below. to the AC inlet of the unit supplied AC cord CAUTION Use only the supplied AC cord. Use with other cords may result in the risk of fire. -
Page 5: Remote Control
Remote control Insert two R6 (size AA) batteries. R6 (AA) When the reach of the remote control signal is less than 5 meters (16 feet), replace the batteries. The remote control may not operate correctly when: - The unit is exposed to intense light, such as direct sunlight - Objects block the remote control signal to the unit To use the buttons on the remote control... -
Page 6: Tuner Operation
REPEAT/ OSC/SLEEP TAPE/ POWER/6STANDBY RADIO TUNER OPERATION Press RADIO. The power is turned on. The RADIO indicator lights up and the volume level is displayed. Select a band (AM or FM STEREO) with BAND. Tune to a station with TUNING. After listening, press TAPE/POWER/6STANDBY to turn the power off. -
Page 7: Programmed Play
STOP/MEMORY PLAY/PAUSE To start play when the power is off, press CD. The power is turned on and play of the loaded disc begins (Direct Play Function). If you load a disc while the CD indicator flashes in step 2, play starts without pressing e. To select a track directly with the remote control, press the numbered buttons 0-9 and +10. -
Page 8: Tape Operation
TAPE/ POWER/ 6STANDBY RADIO TAPE OPERATION • Use Type I (normal) tapes only. • Note that recording is done on only one side of the tape. INSERTING A TAPE Press Z to open the cassette holder and insert a tape with the exposed side down and the side to be played facing out. -
Page 9: Dubbing A Tape
DUBBING A TAPE Press TAPE/POWER/6STANDBY to turn the power off. Insert a tape to be recorded on into deck 1 with the side to be recorded facing out. Insert a tape to be played into deck 2 with the side to be played facing out. Press a then press w on deck 1 to enter recording pause mode. -
Page 10: Sound Adjustment
MIC VOL PHONES r, t GENERAL SOUND ADJUSTMENT Volume or tone adjustment does not affect recording. VOLUME (VOL) Press VOLUME N UP or M DOWN. The volume level is displayed as a number from 0 to 19. “1” in the display indicates the level 1 and “• 1” indicates the level 11. -
Page 11: Microphone Mixing
MICROPHONE MIXING Connect a microphone with a mini plug to the MIC jack and play a source to be mixed. To record the microphone mixing sound, insert a tape in deck 1 and press w. • During dubbing at high speed, the microphone mixing sound is not recorded. - Page 12 NOTE This equipment has been tested and found to comply with the limits for a Class B digital device, pursuant to Part 15 of the FCC Rules. These limits are designed to provide reasonable protection against harmful interference in a residential installation. This equipment generates, uses, and can radiate radio frequency energy and, if not installed and used in accordance with the instructions, may cause harmful...
Need help?
Do you have a question about the CA-DW248 and is the answer not in the manual?
Questions and answers