Table of Contents
Advertisement
Quick Links
Advertisement
Table of Contents

Related Manuals for PICOTE Small Grabber Value


Summary of Contents for PICOTE Small Grabber Value
- Page 1 MINI CLEANER SMALL GRABBER SUPER MIDI MILLER 8/16 | SUPER MIDI MILLER OPERATION & SAFETY MANUAL These instructions are for your personal safety. Always ensure that you have read and understood these instructions before using the machinery. SAVE THESE INSTRUCTIONS FOR FUTURE REFERENCE.
-
Page 2: Table Of Contents
TABLE OF CONTENTS TOPIC PAGE General Safety Information Storage & Disposal General Information & Intended use Operating Instructions Changing The Jaws Maintenance Repairing Damaged Cable (Jaw End) Repairing Damaged Cable (Handle End) Accessories, Spares & Recommended Parts Warranty Policy & Procedure To watch practical demonstration videos, take a course, or to download an electronic copy of these Instructions, please visit www.picoteinstitute.com. -
Page 3: General Safety Information
2. Before each use inspect the Grabber and Jaws carefully for any potential break or damage. Change damaged parts immediately. 3. Only use this tool with the accessories and spare parts offered by the Picote Solutions. Accessories and spare parts should only be used in the manner intended and as described by Picote Solutions. www.picotesolutions.com www.picoteinstitute.com... -
Page 4: Storage & Disposal
The Jaw set, wire and handle can be recycled in metal waste collection points. The plastic outer casing of the shaft can be disposed of as plastic waste. Always follow your local waste handling rules and regulations. Picote Solutions Oy Ltd www.picoteinstitute.com... -
Page 5: General Information & Intended Use
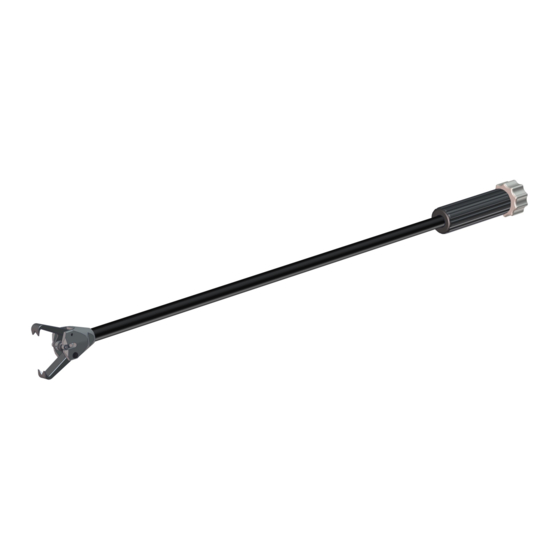
Two packages are available: Extra with 4 Jaws (with both Models 1 & 2) and Value with 2 Jaws (Model 1 only). 2370000020 Small Grabber Value DN50-75 (2-3”) 5m (16ft) Model 1 Jaw Type (Paw) 2370000021 Small Grabber Value DN50-75 (2-3”) 10m (32ft) Model 1 Jaw Type (Paw) 2370000022 Small Grabber Extra DN50-75 (2-3”) 5m (16ft) Model 1 (Paw) and Model 2 (Claw) Jaw types... -
Page 6: Operating Instructions
1. To close the Jaws, rotate the handle clockwise. 2. To open the Jaws, rotate the handle counter clockwise. NOTE! The Small Grabber should only be used in an uncoiled position. Excessive use of force may result in the tool breaking! Picote Solutions Oy Ltd www.picoteinstitute.com... -
Page 7: Changing The Jaws
OPERATING INSTRUCTIONS SAVE ALL WARNINGS AND INSTRUCTIONS FOR FUTURE REFERENCE CHANGING THE JAWS 1. Use a 2.5mm hex key to unscrew both screws at the Jaw 2. Take out the Jaws and re-assemble in reverse order www.picoteinstitute.com Picote Solutions Oy Ltd... -
Page 8: Maintenance
SAVE ALL WARNINGS AND INSTRUCTIONS FOR FUTURE REFERENCE Clean any dirt from the screw handle and lubricate the threads with vaseline after each use. Clean dirt from the Jaw mechanism and lubricate it with oil after each use. Picote Solutions Oy Ltd www.picoteinstitute.com... -
Page 9: Repairing Damaged Cable (Jaw End)
1. Use 2.5mm hex key to unscrew both screws at the Jaw 2. Take out the Jaws 3. Use 2mm and 3mm hex keys to unscrew the set screw to remove the wire holder and spring www.picoteinstitute.com Picote Solutions Oy Ltd... - Page 10 5. Carefully cut the outer casing. Avoid cutting the wire inside. Cut at least 25mm (1”) or until you have no damaged wire left. 7. Pull the wire inside its casing—it should 6. Trim the wire. measure at least the same length as the trimmed outer casing. Picote Solutions Oy Ltd www.picoteinstitute.com...
- Page 11 9. Screw the Jaw Head back on to the outer casing. A vice helps hold it in place. 10. Replace the spring and the wire holder. 11. Put the Jaws back and tighten the Jaw Do not tighten the wire holder yet. screws. www.picoteinstitute.com Picote Solutions Oy Ltd...
- Page 12 REPAIRING DAMAGED CABLE - JAW END SAVE ALL WARNINGS AND INSTRUCTIONS FOR FUTURE REFERENCE 12. Pull the wire to remove any loose wire. Tighten the set screw. 13. Test that the tool works and trim the excess wire. Picote Solutions Oy Ltd www.picoteinstitute.com...
-
Page 13: Repairing Damaged Cable (Handle End)
SAVE ALL WARNINGS AND INSTRUCTIONS FOR FUTURE REFERENCE 1. Use 2.5mm hex key to unscrew both screws at the Jaw end 2. Remove the Jaws 3. Use 1.5mm hex key to unscrew both set screws from the end cap. www.picoteinstitute.com Picote Solutions Oy Ltd... - Page 14 (1”) or until there is no damaged wire left. casing. Approximately 5mm (0.2”) of the inner casing should be showing. 7. Push the wire back in and screw the handle back on to the outer casing. A vice helps hold it in place. Picote Solutions Oy Ltd www.picoteinstitute.com...
- Page 15 SAVE ALL WARNINGS AND INSTRUCTIONS FOR FUTURE REFERENCE 8. Re-assemble the handle in reverse order 9. Put the end cap back but don’t push the wire completely through the end cap to avoid sharp edges! www.picoteinstitute.com Picote Solutions Oy Ltd...
- Page 16 12. Pull the wire to remove any loose wire at the handle end. Tighten the set screw. 13. Test the tool works and trim the excess wire. If there is problem that you cannot resolve with this manual, please consult your Picote Reseller or Picote Solutions.
-
Page 17: Accessories, Spares & Recommended Parts
ACCESSORIES, SPARES & RECOMMENDED PARTS SAVE ALL WARNINGS AND INSTRUCTIONS FOR FUTURE REFERENCE You must use only Picote Solutions accessories and attachments with the Product described in this operations manual. The use of other accessories or attachments could present a risk of injury. -
Page 18: Warranty Policy & Procedure
SAVE ALL WARNINGS AND INSTRUCTIONS FOR FUTURE REFERENCE Limited Warranty: Picote warrants to the original End User that the Product purchased by such End User will operate in accordance with, and substantially conform to their published specifications when shipped or otherwise... - Page 19 Revision number: Rev. 1 Date: JAN. 2021 Author: Ville Hukkanen Please Contact: Accepted: Dawn Greig Your Reseller / Salesperson or Picote www.picotesolutions.com Production & R&D International Offices Technical Support Finland. United Kingdom. USA. support@picotesolutions.com Pienteollisuustie 24 06450 Porvoo, Finland support@picotesolutions.com Claims claims@picotesolutions.com...
Need help?
Do you have a question about the Small Grabber Value and is the answer not in the manual?
Questions and answers