Advertisement
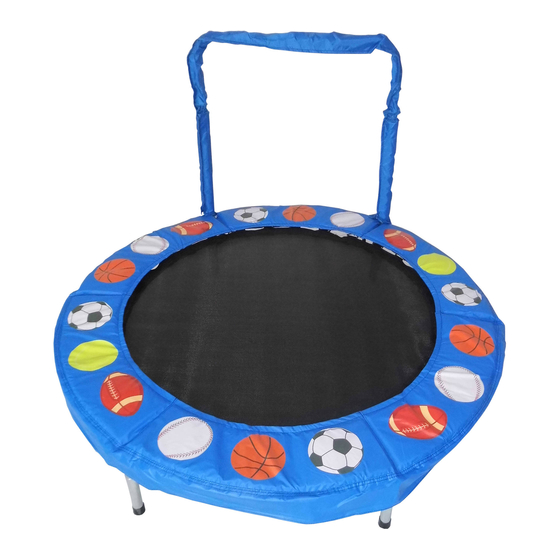
48in Mini Bouncer
Model: JK48CO / JK48CP / JK48SPT / JK48AP / JK48SBC / JK48SPC/
Warning
Read the assembly, installation,
care,maintenance, and use
instructions in this manual prior
to assembling and using this
trampoline/enclosure.Save this
manual for future reference.
Warning
Recommended for use by children between 3~10 years of age.
Maximum weight limit: 100lbs(45kgs). Do not exceed the weight limit recommended
by the manufacturer.
Please read all of the direction prior to assembly. Do not apply excess force during
assembly. Assemble only with adult supervision. Use gloves to protect your hands
from pinch points and sharp points during assembly.
Warning! Not suitable for children under 36 months. Small parts and long cords may
be a choking and strangulation hazard.
JK48BP / JK48FB
USER'S MANUAL . . . . . . . . . . . . 3
Assembly, Installation, Care,
Maintenance, and Use Instructions.
YJ USA Corp.,
3970 Lindbergh Drive
Addison, TX 75001
Customer Hotline: 1-877-927-8777
www.jumpking.com
Advertisement
Table of Contents

Related Manuals for Jumpking JK48CO


Summary of Contents for Jumpking JK48CO
- Page 1 48in Mini Bouncer Model: JK48CO / JK48CP / JK48SPT / JK48AP / JK48SBC / JK48SPC/ JK48BP / JK48FB Warning USER’S MANUAL ... . 3 Read the assembly, installation, care,maintenance, and use...
-
Page 2: Table Of Contents
ORDERING REPLACEMENT PARTS ......9 Model: JK48CO / JK48CP / JK48SPT / JK48AP / JK48SBC / JK48SPC... -
Page 3: Important Precautions
WARNING: This product is intended for use by children between 3-10 years of age. This enclosure is to be used only in connection with this trampoline. Read and follow all warnings and instruction. This product is intended to be assembled by an adult. Maximum weight limited 45kg/100lbs. -
Page 4: Assembly
ASSEMBLY TRAMPOLINE PLACEMENT IMPORTANT ASSEMBLY INFORMATION A Phillips Head screw driver is needed to 1. Place the trampoline on a level surface assemble trampoline. However, a before use. screwdriver is not provided. Assembly requires two persons. Keep 3. Use the trampoline in a well-lit children away from the trampoline until it is fully assembled. - Page 5 3. Lay the Bed (6) on the ground inside of the assembled frame. Make sure that the two warn- V-ring ing decals (not shown) are on top of the Bed. Note: There are V-rings around the edge of the Bed (6) and holes around the top and bottom of the frame.
- Page 6 Frame pad (7) T-connector+welded tube Adjustable handle frame opening 5. Look under the trampoline and locate the pairs of straps attached to the underside of the Frame Pad (7). Note that some pairs of straps are near the frame and other pairs of straps are near the edge of the Bed (6).
- Page 7 Insert the handle (8 / 9) into T-connector +Welded tube. Tighten the self-tapping screw (10). When doing so, please ensure that the arch pole faces inward. The trampoline is now fully assembled. Make sure that all parts are securely attached. Familiarize yourself and all users of the trampoline with the safety precautions,use and instructional materials, and care and maintenance instructions in this...
-
Page 8: Care And Maintenance
CARE AND MAINTENANCE Care - punctures, frays, tears, or holes worn in the bed, frame Do not allow pets or animals on the trampoline pad, foam sleeves. as claws may snag and pull the bed material or - deterioration in the stitching or fabric of the bed, frame damage the frame pad pad. -
Page 9: Exploded Drawing And Part List
EXPLODED DRAWING AND PART LIST Ke y Qty. Description Qty. Description Arch pole Top Tube with T-connector Self-tapping screw Top Tube with T-connector+welded tube Spring Pulling Tool Straight leg User’s Manual Straight leg with welded tube Foam sleeves (had been attached to 3.5”...
Need help?
Do you have a question about the JK48CO and is the answer not in the manual?
Questions and answers