Advertisement
Quick Links
User Guide
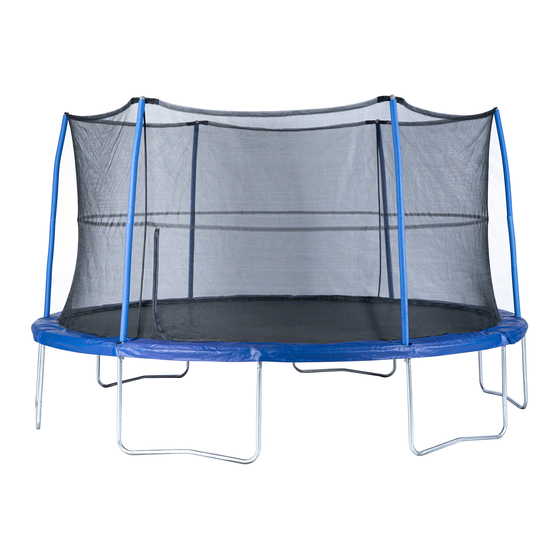
14ft Tr ampoline & Enclosure
Model: JK146PC
The trampoline / enclosure is designed for users weighing 90kg (200lbs) or less.
Got a Problem building your trampoline?
Please contact us at contact@jumpking.com
WARNING: Read these assembly instructions carefully
before attempting to assemble or use this product. Keep
this user guide in a safe place for future reference.
Jumpking
3970 Lindbergh Drive Addison, TX 75001
®
Advertisement

Related Manuals for Jumpking JK146PC


Summary of Contents for Jumpking JK146PC
- Page 1 Model: JK146PC The trampoline / enclosure is designed for users weighing 90kg (200lbs) or less. Got a Problem building your trampoline? Please contact us at contact@jumpking.com WARNING: Read these assembly instructions carefully before attempting to assemble or use this product. Keep this user guide in a safe place for future reference.
- Page 3 14FT / 4.27 M TRAMPOLINE AND ENCLOSURE MODEL: JK146PC If you have questions after reading this manual, please email us at contact@jumpking.com. The trained technicians will provide immediate assistance.
- Page 4 1. Trained Spo er supervision is recommended. 2. Must place the trampoline on lawn, bark wood chip, sand or cushioning materials. 3. Maintain a free space of minimum 2500mm on all sides of the trampoline. This area should not included concrete, bitumen, brick, or other hard surfaces as these can cause serious injuries.
- Page 5 30. Do not use the trampoline while under the influence of alcohol or drugs. 31. For addi onal informa on concerning the trampoline equipment, please email to contact@jumpking.com 32. For informa on concerning skill training, contact a cer fied trampoline instructor.
- Page 6 Maximum User Weight 90kg(200lbs) YJ USA Corp., 3970 Lindbergh Drive Addison, TX 75001 Customer service: contact@jumpking.com Model: JK146PC Avoid bouncing when tired. While keeping the head erect, focus eyes on the trampoline toward the perimeter. JK146PC please email contact@jumpking.com...
- Page 7 Thank you for selecting a Jumpking trampoline / enclosure. “Jumpking” is designed and crafted to provide many years of fun and fitness. This trampoline/enclosure comes equipped with warnings and instructions for the assembly, care, maintenance and use of the trampoline/enclosure. This information must be...
- Page 15 STOP! NOTICE: Determine the final setup location for the trampoline before assembly. Assemble the trampoline in the desired area to prevent unnecessary movement during or after the completed assembly. Moving the trampoline during or after assembly may cause damages to the trampoline frame. If it is necessary to move the trampoline, always do so with 2+ people, keep horizontal, and lift slightly.
-
Page 16: What You Will Need
WHAT YOU WILL NEED Description: Description: Description: Description: Mallet Cross-head screwdriver Safety glasses Gloves PARTS LIST Part Part Part Part Description: Description: Description: Top Tube with Top Tube B Leg extensions Description: T-Connector A Part Number: T-Connector B Part Number: Part Number: L33E508 Part Number:... -
Page 17: Step 1 : Assembling The Frame
STEP 1 : ASSEMBLING THE FRAME... - Page 18 Repeat the last six steps until you have assembled the four sections of the trampolines frame. You have now completed step 1.
- Page 19 STEP 2 : ASSEMBLING THE FRAME This step will require 2 people who must be wearing gloves and protective eyeweare. Connect two of the frame sections together as shown in the diagram. While one person holds the assembled sections upright, the other person can connect a third section onto the end of the assembled sections.
- Page 20 STEP 3 : FITTING THE STITCHED BED WARNING : Wear protective eyewear and gloves during the assembly of the stitched mat. Layout the stitched mat (with the V-Rings) part F inside the frame of the trampoline with the warning labels facing upwards.
- Page 21 Assembly Instructions Yellow stitching Step 4: webbing 1 to 4 Springs Instructions Slot the Closed end of one spring Part G, onto one of the webbings yellow stitched V-Rings as shown. IMPORTANT: Correct Spring direction must be utilized to ensure a secure attachment . Slot the Open end of the spring into corresponding spring slot (location 1) in the top of the frame.
- Page 22 Assembly Instructions Step 6: Step 5: 9 to 12 Springs 5 to 8 Springs Instructions Instructions Step 7: Step 8: 17 to 20 Springs 13 to 16 Springs Instructions Instructions IMPORTANT: It is important to follow the number sequence accordingly to prevent over- stretching the springs.
- Page 23 Assembly Instructions Step 10: Step 9: 25 to 28 Springs 21 to 24 Springs Instructions Instructions Step 11: Step 12: 33 to 36 Springs 29 to 32 Springs Instructions Instructions IMPORTANT: It is important to follow the number sequence accordingly to prevent over- stretching the springs.
- Page 24 Assembly Instructions Step 14: Step 13: 41 to 44 Springs 37 to 40 Springs Instructions Instructions Step 15: Step 16: 49 to 52 Springs 45 to 48 Springs Instructions Instructions IMPORTANT: It is important to follow the number sequence accordingly to prevent over- stretching the springs.
- Page 25 Assembly Instructions Step 18: Step 17: 57 to 60 Springs 53 to 56 Springs Instructions Instructions Step 19: Step 20: 65 to 68 Springs 61 to 64 Springs Instructions Instructions IMPORTANT: It is important to follow the number sequence accordingly to prevent over- stretching the springs.
- Page 26 Assembly Instructions Step 21: 69 to 72 Springs Instructions Attach the remaining springs to the top rail according to the number sequence shown in the above images. IMPORTANT: Follow the number sequence accordingly to prevent the overstretching of springs. The stitched mat is now fitted. NOTICE: The trampoline should not be moved.
- Page 27 STEP 22: FITTING THE FRAME PAD This step will require 2 people. Lay the frame pad - Part I out over the edge of the frame with the ties facing downwards. Align the openings in the frame pad with the T-connector B's on the frame.
- Page 28 STEP 23: FITTING THE ENCLOSURE TUBES Top enclosure tube You will need the following parts to complete step 23: 6 x Top enclosure tubes - Part J Bottom enclosure tube 6 x Bottom enclosure tubes - Part K 6 x Hemisphere caps - Part O Self tapping screw and washer You will also need a cross-head screwdriver (not supplied).
- Page 29 Then place the Hemisphere cap Part O onto the top enclosure pole Part J. Slot the bottom enclosure tube into the tubes in the T-connector B tubes visible through the slots in the frame pad. Assemble the five remaining enclosure tubes using the five self tapping screws and the cross-head screwdriver.
- Page 30 STEP 24 : FITTING THE ENCLOSURE NETTING You will need the following parts to complete step 24: Enclosure 1 x Enclosure netting - Part M netting Lay the enclosure netting out on the trampoline. Find the ROD on top of enclosure netting. Stand on the trampoline and insert one of the exposed sections of the rod into a plastic grip on top of one of the enclosure tubes.
- Page 31 Attach the three other exposed sections of the rods to the other enclosure tubes in the order shown in the diagram. completed this step.
- Page 32 STEP 25 : ATTACHING THE BOT T TOM OF THE NET You will need the following parts to complete step 25: 8 x Cords - Part N. Tie the end of the cord around a V-Ring. Push the end rope through a hole in the bottom of the netting.
- Page 33 USING THE TRAMPOLINE 2.5m Before using your trampoline, check again that 8.2 f t there is enough clearance around it. Maintain a clear space of 2.5 metres (8.2 feet) on all sides of the trampoline. Also check that the area is free from walls, structures, fences, tarmac and other hard surfaces and other play areas.
- Page 34 17 to 32...
-
Page 35: Two+ People
Moving Trampoline TWO+ PEOPLE Notice: The trampoline should not be moved. Unnecessary movement of the trampoline may cause damage to the trampoline frame. If moving is required, use at least 2+ people, keep horizontal, and lift the trampoline slightly from the leg extension.
Need help?
Do you have a question about the JK146PC and is the answer not in the manual?
Questions and answers