
Related Manuals for Seametrics TempHion


Summary of Contents for Seametrics TempHion
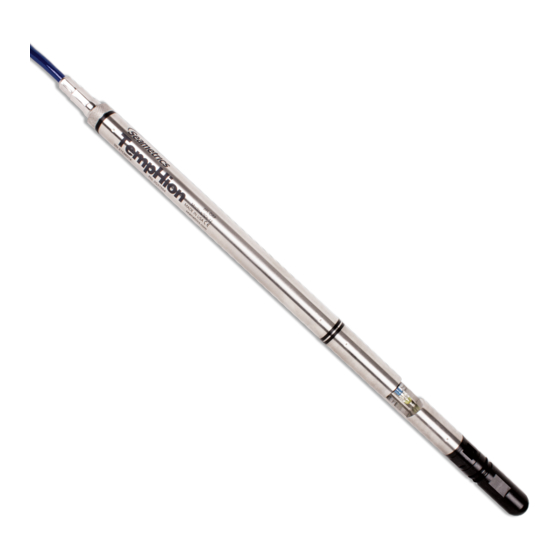
- Page 1 TempHion TempHion pH/ORP (Redox) / ISE Smart Sensor pH/ORP (Redox) / ISE Smart Sensor and Data Logger Instructions and Data Logger Instructions PROUDLY MADE IN THE 9001...
- Page 2 TEMPHION INSTRUCTIONS Seametrics • 253.872.0284 Page 2 seametrics.com...
-
Page 3: Table Of Contents
Problems/Probable Causes/Things to Try ......................Page 26 IF USING ALKALINE BATTERIES — PREVENT BATTERY LEAKAGE! TempHion sensors are typically shipped with lithium batteries. If, however, you are using alkaline batteries, be aware that under some circumstances alkaline batteries can leak, causing damage to the sensor. To prevent leakage, the following is recommended. -
Page 4: General Information
The pH/ORP version measures pH, ORP (Redox), single computer. and temperature. The ISE version measures bromide and While most will use the TempHion with our free, easy-to- temperature. use Aqua4Plus software, it is by no means limited to that The internal processor in the TempHion allows for easy software. -
Page 5: Specifications
700 ft (210 m) / 300 psi, ISE: 230 ft (70 m)/100 psi Environmental IP68, NEMA 6P *Specifications subject to change. Please consult out web site for the most current data (seametrics.com). Modbus is a registered trademark of Schneider Electric. Seametrics • 253.872.0284 Page 5... -
Page 6: Initial Inspection And Handling
TEMPHION INSTRUCTIONS GENERAL INFORMATION Initial Inspection and Handling Upon receipt of your smart sensor, inspect the shipping package for damage. If any damage is apparent, note the signs of damage on the appropriate shipping form. After opening the carton, look for concealed damage, such as a cut cable. -
Page 7: Temphion Reference Electrode
The rest of this manual includes step-by-step instructions TempHion’s superior downhole/high pressure performance. for setting up the TempHion calibrating it, and using it in TempHion uses a long capillary pathway, initially filled the field. When reading and following the instructions in... -
Page 8: Installation
PC and have the sensor connected before opening that can provide 15 mA. Connect to Vaux++ (pin 1 - white) Aqua4Plus 2.0. and Ground (pin 5 - blue) or contact Seametrics for auxiliary power supplies. Connecting the TempHion to a Computer Cabled sensors are terminated with a weather-resistant connector. -
Page 9: Cable Wiring
Installing Aqua4Plus Software If you buy your cabled sensor with a connector installed The TempHion comes with the Aqua4Plus host software (the normal configuration), no further wiring is needed. that is installed on your PC or laptop. Use this software to... -
Page 10: Installing The Sensor
(Note: Some older TempHions may have more channels. If yours has more channels, refer to the documentation that came with the unit or contact Seametrics for more information.) All active channels can be calibrated in the field. -
Page 11: Settings And Calibration
SETTINGS AND CALIBRATION TEMPHION INSTRUCTIONS General Calibration Information IMPORTANT CALIBRATION NOTES! The TempHion must be calibrated before first use and periodically thereafter. It should also be calibrated if moving Data Files • Calibration can only be done when to a different sampling environment where readings will there is no data stored on the sensor. -
Page 12: Ph Calibration
Seametrics recommends a 2 point calibration that brackets the expected pH range of your site. Note: If your TempHion has been stored dry, a 4 hour to overnight soak in pH 4 buffer is needed to recondition the pH bulb. -
Page 13: Redox/Orp Calibration
Use a Redox/ORP meter that is calibrated to your desired Redox/ORP scale to obtain this value. Place both the TempHion and the reference meter into your sample (ideally the waters the TempHion will be installed in). Once readings have stabilized note the value on the reference meter. -
Page 14: Ise-Bromide Calibration
Seametrics recommends using a lab grade 100 mL flask for DI water and pipette for the NaBr solution. Place the TempHion in the standard and use it to stir the solution well. Allow a few minutes for temperature to equalize and readings to stabilize. -
Page 15: Operation
TEMPHION INSTRUCTIONS OPERATION Real-time Data Data Logging Connect to sensor and select the Real-time data tab Select Set Up Logging from the sensor screen. If there are no files currently on the sensor you’ll see the Set Up Logging button active under the Data Files tab as well as in the upper menu. - Page 16 TEMPHION INSTRUCTIONS OPERATION Click to switch between interval and continuous data The 3 previous Logging Schedules that were programmed recording (supported sensors only) Select your continuous to a sensor will be listed under the Select Template drop rate from the drop down box (on the right).
-
Page 17: Program Settings
Retry and Timeout settings to overcome communication issues on very long, or corroded cabling. See Troubleshooting section or contact Seametrics Tech Support for details. To restore factory default settings click Seametrics • 253.872.0284 Page 17 seametrics.com... -
Page 18: Direct Read Modbus/Sdi-12
You must use Aqua4Plus to make baud rate changes. Data Format If needed, set your TempHion to the desired baud rate in The data is returned as 32-bit IEEE floating-point values, user settings. highword first, also referred to as big-endian or float inverse. -
Page 19: Reading Via Sdi-12
TEMPHION INSTRUCTIONS Reading via SDI-12 SDI-12 commands always return values for all four TempHion channels – temperature, pH, ORP, and ISE channels. Most TempHions are configured either as temperature, pH, and ORP or just temperature and Bromide. You will need to disregard the readings for the channel(s) you do not have configured on your unit. - Page 20 DIRECT READ MODBUS & SDI - 12 TEMPHION INSTRUCTIONS Request Measurement with CRC <a>MC! <a>0024<cr><lf> Request all measurements <a>D0! <a>+21.345+7.181+.053+.459 {crc}<cr><lf> Read: temperature, pH (in pH units), (ISE in ppm), ORP (in Eh) <a>MC1! <a>0024<cr><lf> Request all measurements <a>D0! <a>+21.345-134.458+100.48+.84.404 {crc} <cr><lf>...
-
Page 21: Maintenance And Reference
We also recommend replacing the filling solution when Cable doing periodic calibrations. Cable can be damaged by abrasion, sharp objects, twisting, The TempHion is normally shipped with a bottle of crimping, crushing, or pulling. Take care during installation Seametrics Reference Solution. If you will be using a and use to avoid cable damage. -
Page 22: Ph Field Calibration Temperature Chart
MAINTENANCE and REFERENCE and the sensor may read erratically! How to Store and Recondition When storing your TempHion, care must be taken to properly protect the electrodes, including the reference Excess filling solution electrode. After storage, before use, the electrodes may... -
Page 23: Changing Batteries
Battery Type: Two 1.5V AA batteries—Lithium or Alkaline • Never place a tool on the sensor body, it is very (lithium recommended). The TempHion sensors are thin and will deform causing leaks at o-ring seals and potentially crushing the circuit board! shipped from the factory with fresh batteries. - Page 24 TEMPHION INSTRUCTIONS MAINTENANCE and REFERENCE By Hand—cabled version only With Pliers or Vise Grips—good for field use 1. Tightly grasp the top cap in one hand. Cabled Sensor 2. Brace your hand against something such as a 1. Grasp the pliers on the swaged area (do not grab table or the ground.
- Page 25 TEMPHION INSTRUCTIONS MAINTENANCE and REFERENCE Removing the Housing 4. Hold the top cap assembly at 90° to the housing opening as shown. Depress the spring with your 1. With your free hand, grasp the sensor body. Press fingertip and tuck the wiring into the cutaway on down to compress the square ring.
- Page 26 Contacts in connector loose Be sure all wires are securely fastened inside the round connector. USB driver not installed See Connecting the TempHion to a Computer in the Installation section or see the USB/RS485 Adapter Installation application note on our web site.
- Page 27 TEMPHION INSTRUCTIONS WARRANTY/DISCLAIMER LIMITED WARRANTY/DISCLAIMER - Seametrics TempHion SMART SENSOR A. Seller warrants that products manufactured by Seller when properly installed, shall be free from defects in material and workmanship. Seller’s obligation under this warranty shall be limited to replacing or repairing the part or parts or, at Seller’s option, the products which prove defective in material or workmanship within TWO (2) years from the date...
- Page 28 Seametrics • 19026 72nd Avenue South • Kent, Washington 98032 • USA LT-14315r15 20190214 (P) 253.872.0284 • (F) 253.872.0285 • 1.800.975.8153 • seametrics.com 2/14/2019...
Need help?
Do you have a question about the TempHion and is the answer not in the manual?
Questions and answers