Table of Contents

Related Manuals for Seametrics CT2X


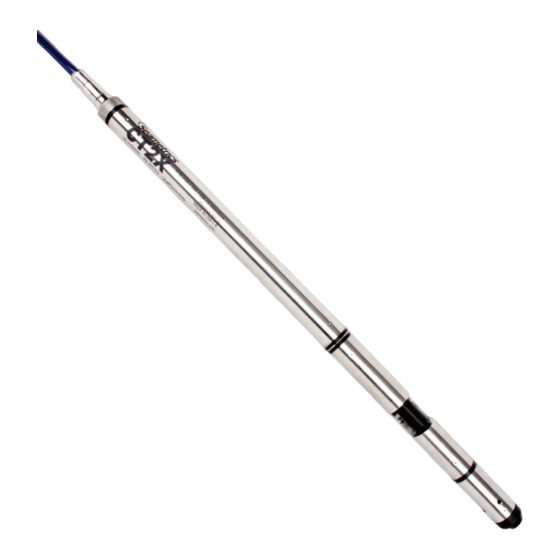
Summary of Contents for Seametrics CT2X
- Page 1 CT2X Conductivity Smart Sensor and Data Logger Instructions For Sales & Service Contact 2650 E. 40th Ave. • Denver, CO 80205 Phone 303-320-4764 • Fax 303-322-7242 1-800-833-7958 PROUDLY MADE IN THE www.geotechenv.com 9001...
- Page 2 CT2X INSTRUCTIONS Seametrics • 253.872.0284 Page 2 seametrics.com...
-
Page 3: Table Of Contents
Problems/Probable Causes/Things to Try ......................Page 29 IF USING ALKALINE BATTERIES — PREVENT BATTERY LEAKAGE! CT2X sensors are typically shipped with lithium batteries. If, however, you are using alkaline batteries, be aware that under some circumstances alkaline batteries can leak, causing damage to the sensor. To prevent leakage, the following is recommended. -
Page 4: General Information
Temperature dissolved solids (TDS). The CT2X is also available with a is measured using a borosilicate glass encapsulated depth/level option giving added functionality in the same thermistor. sensor housing. The CT2X is powered internally with two replaceable AA The CT2X incorporates 4-pole electrode cell measurement batteries. -
Page 5: Specifications
200 msec Max operating pressure 1.1 x full scale Over pressure protection 3x full scale up to 100psi—for > 300psi (650 ft or 200 m), contact Seametrics Burst pressure 550 psi (approx. 2000 ft or 600 m) Environmental IP68, NEMA 6P *Specifications subject to change. -
Page 6: Initial Inspection And Handling
CT2X INSTRUCTIONS GENERAL INFORMATION Initial Inspection and Handling Upon receipt of your smart sensor, inspect the shipping package for damage. If any damage is apparent, note the signs of damage on the appropriate shipping form. After opening the carton, look for concealed damage, such as a cut cable. -
Page 7: Installation
If auxiliary power is desired, you can use a 9–15 VDC supply that can provide 15 mA. Connect to Vaux+(pin 1 - white) and Ground (pin 5 - blue) or contact Seametrics for auxiliary power supplies. Connecting the CT2X to a Computer Cabled sensors are terminated with a weather-resistant connector. -
Page 8: Connecting To Sensors
Simply drag the Address Range slider higher up to increase the maximum Modbus address scanned. If you’ve scanned all the way up through address 255 and still have no connection click Troubleshooting for further troubleshooting or contact Seametrics Tech Support for assistance. Click at any time to refresh sensor information. -
Page 9: Cable Wiring
— with 5-pin connector temperature in a linear fashion. For this situation, the CT2X provides a non-linear mode, which uses a complex formula to calculate and apply temperature compensation to the readings. -
Page 10: Installing The Sensor
The desiccant is a bright blue color when active and dry. See Maintenance section for care and changing of desiccant. 1 If your CT2X has the pressure option, then the maximum installation depth depends on the range of the sensor. -
Page 11: Program Settings
Modbus address 1-10. In certain cases we may need to change the Retry and Timeout settings to overcome communication issues on very long, or corroded cabling. See Troubleshooting section or contact Seametrics Tech Support for details. Under the General Settings tab you can change the default To restore factory default settings click data folder location. -
Page 12: General Calibration Information
µS/cm, mS/cm, psi, feet of water, etc. Conductivity Calibration To perform a Conductivity Calibration first connect to your CT2X and ensure all data has been uploaded and erased from the sensor. The calibration screen will default to the conductivity channel, you may also switch to the Pressure channel if Prepare your calibration standard(s) and place the sensor you need to perform a pressure calibration setup. -
Page 13: Pressure
For linear temperature compensation set the temperature you’d like your conductivity corrected to in the Ref. Temp C box, and the appropriate temperature coefficient you’d like to use in the Temp Coef %/C box. Seametrics defaults the conductivity to a Ref Temp of 25 and 2.1 %/Deg C for the Temp Coef. -
Page 14: Depth To Water
CT2X INSTRUCTIONS SETTINGS AND CALIBRATION Aqua4Plus 2.0 will take 10 readings and display the average. Enter known pressure value in matching units in the Ref. Watch for stability while Aqua4Plus 2.0 is measuring to Point box for second point measurement ensure an accurate calibration. -
Page 15: Groundwater Elevation
CT2X INSTRUCTIONS SETTINGS AND CALIBRATION Groundwater Elevation Removing calibration setup values Position the sensor in its desired location and ensure all To return to factory default simply enter an offset of 0 and data has been uploaded and erased from the sensor before slope of 1 in the Offset and Slope boxes: proceeding with calibration. Once positioned connect to sensor and select the calibration button, followed by selecting the Groundwater Elevation option. -
Page 16: Operation
CT2X INSTRUCTIONS OPERATION Real-time Data Connect to sensor and select the Real-time data tab To save this data to the Reports section click the button located next to the Single button in the Real-Time To start real-time readings click Start, readings default to tab. -
Page 17: Data Logging
CT2X INSTRUCTIONS OPERATION Data Logging Select Set Up Logging from the sensor screen Duration can be set by either number of records If there are no files currently on the sensor you’ll see the Or by setting a duration time Set Up Logging button active under the Data Files tab as well as in the upper menu. Once files have been started/... - Page 18 CT2X INSTRUCTIONS OPERATION To save a logging schedule as a template enter desired You may only have 1 active data file recording on each sensor, however you can store multiple files in memory if settings and click This will add your custom schedule desired. to the Select Template menu.
-
Page 19: Reports
CT2X INSTRUCTIONS OPERATION Reports Data downloaded from your sensor is stored in the Reports Graph saving and export options are available here: section of Aqua4Plus 2.0 for viewing and editing. The files will be saved to default data folder on your PC as well. See Program Settings for default data folder location. -
Page 20: Barometric Compensation
CT2X INSTRUCTIONS OPERATION Barometric Compensation Aqua4Plus 2.0 will perform the barometric compensation For PSIA sensors we’ve built a new barometric compensation and create a new compensated report. Original reports are utility into the Reports section. Click on a report to retained as uploaded. -
Page 21: Direct Read Modbus/Sdi-12
Setting Baud Rate The data is returned as 32-bit IEEE floating-point values, Your CT2X comes configured to communicate at 38,400 highword first, also referred to as big-endian or float baud, with 8 data bits, one stop bit, and no parity. The inverse. -
Page 22: Reading Via Sdi-12
Address Address Request for Returned value(s) values read SDI-12 Commands Sensor Identification <a>I! <a>13 INWUSA CT2X 215ssssssssss<cr><lf> Note: 215 will change to reflect current firmware version. ssssssssss = device serial number Acknowledge Active, Address Query <a>! <a><cr><lf> ?! <a><cr><lf> Change Address <a>A<b>! <b><cr><lf>... - Page 23 DIRECT READ MODBUS & SDI - 12 CT2X INSTRUCTIONS Request Measurement with CRC <a>MC! <a>0024<cr><lf> Request all basic measurements with CRC <a>D0! <a>+22.0512+155.0127+155.2155+12.0512 {crc}<cr><lf> Read: temperature, conductivity (linear), conductivity (nLFn), pressure <a>MC1! <a>0021<cr><lf> Request temperature measurement only <a>D0! <a>+22.0512 {crc} <cr><lf>...
- Page 24 DIRECT READ MODBUS & SDI - 12 CT2X INSTRUCTIONS Concurrent Measurement with CRC <a>CC! <a>0024<cr><lf> Request all basic measurements with CRC <a>D0! <a>+22.0512+155.0127+155.2155+12.0512 {crc}<cr><lf> Read: temperature, conductivity (linear), conductivity (nLFn), pressure <a>CC1! <a>0021<cr><lf> Request temperature measurement only <a>D0! <a>+22.0512 {crc} <cr><lf>...
-
Page 25: Maintenance
The contact areas (pins & sockets) of the connectors will wear out with extensive use. If your application requires repeated connections other types of connectors can be provided. The connectors used by Seametrics are not submersible, but are designed to be splash-resistant. Seametrics • 253.872.0284 Page 25 seametrics.com... -
Page 26: Changing Batteries
— PREVENT BATTERY LEAKAGE! There is a black, compressible square ring near the top of CT2X sensors are typically shipped with the sensor. This ring acts as a spring to lock the cable in. lithium batteries. If, however, you are using... - Page 27 CT2X INSTRUCTIONS MAINTENANCE By Hand—cabled version only With Pliers or Vise Grips—good for field use 1. Tightly grasp the top cap in one hand. Cabled Sensor 2. Brace your hand against something such as a 1. Grasp the pliers on the swaged area (do not grab table or the ground.
- Page 28 CT2X INSTRUCTIONS MAINTENANCE Removing the Housing 4. Hold the top cap assembly at 90° to the housing opening as shown. Depress the spring with your 1. With your free hand, grasp the sensor body. Press fingertip and tuck the wiring into the cutaway on down to compress the square ring. Twist gently.
- Page 29 TROUBLESHOOTING CT2X INSTRUCTIONS Problem Probable Causes Things to try… Software will not Loose cable Make sure all cable connections are secure communicate with sensor Contacts in connector loose Be sure all wires are securely fastened inside the round connector SEE ALSO ERRATIC READINGS BELOW...
- Page 30 TROUBLESHOOTING CT2X INSTRUCTIONS (Continued from previous page) Problem Probable Causes Things to try… Conductivity Poor connection due to moisture between Dry thoroughly. Be sure desiccant is fresh (see readings erratic or contacts in connector Maintenance section). drifting Dirty conductivity element...
- Page 31 CT2X INSTRUCTIONS Seametrics • 253.872.0284 Page 31 seametrics.com...
- Page 32 Similarly, some states do not allow the exclusion or limitation of consequential damages, so the above limitation or exclusion may not apply to you. This limited warranty gives you specific legal rights; however, you may also have other rights which may vary from state to state. Seametrics • 19026 72nd Avenue South • Kent, Washington 98032 • USA LT-14308r19 20190114 (P) 253.872.0284 • (F) 253.872.0285 • 1.800.975.8153 • seametrics.com...
Need help?
Do you have a question about the CT2X and is the answer not in the manual?
Questions and answers