TSC Alpha-30L Series User Manual
Direct thermal bar code printer
Hide thumbs
Also See for Alpha-30L Series:
- User manual (66 pages) ,
- Service manual (40 pages) ,
- Programming manual (434 pages)
Table of Contents
Advertisement
Advertisement
Table of Contents

Related Manuals for TSC Alpha-30L Series


Summary of Contents for TSC Alpha-30L Series
- Page 1 DIRECT THERMAL BAR CODE PRINTER USER’S MANUAL - 0 -...
-
Page 2: Copyright Information
Information in this document is subject to change without notice and does not represent a commitment on the part of TSC Auto ID Technology Co. No part of this manual may be reproduced or transmitted in any form or by any means, for any purpose other than the purchaser’s personal use, without the expressed written... -
Page 3: Table Of Contents
Table of Contents Copyright Information ......................i Agency Compliance and Approvals ..................iv 1. Introduction ........................... 9 1.1 Product Introduction ....................... 9 1.2 Product Features ......................10 1.3 Battery Information ....................... 11 2. Operations Overview ......................12 2.1 Unpacking and Inspection ..................... 12 2.2 Printer Overview ...................... - Page 4 4.6 Advanced ........................48 4.7 File Manager ........................50 4.8 Diagnostic ........................51 5. TSC Console ........................53 5.1 Start the TSC Console ..................... 53 5.2 TPH Care ......................... 54 6. Troubleshooting ......................55 7. Maintenance ........................57 Change History ........................59...
-
Page 5: Agency Compliance And Approvals
Agency Compliance and Approvals Note: There may have certification differences in the series models, please refer to product label for accuracy. EN 55032, Class B EN 55024 EN 55035 EN 62368-1 FCC part 15B, Class B ICES-003, Class B This equipment has been tested and found to comply with the limits for a Class B digital device, pursuant to part 15 of the FCC Rules. - Page 6 2. Follow all warnings and instructions on the product. 3. Disconnect the power plug from the AC outlet before cleaning or if fault happened. Do not use liquid or aerosol cleaners. Using a damp cloth is suitable for cleaning. 4. The mains socket shall be installed near the equipment and easily accessible. 5.
- Page 7 30mW 5470-5725MHz Hereby, TSC Auto ID Technology Co., Ltd. declares that the radio equipment type [Wi-Fi] IEEE 802.11 a/b/g/n is in compliance with Directive 2014/53/EU The full text of the EU declaration of conformity is available at the following internet address: http:// www.tscprinters.com...
- Page 8 This device has also been evaluated and shown compliant with the IC RF Exposure limits under portable exposure conditions. (Antennas are less than 20 cm of a person's body). (For Bluetooth) Canada, avis de l'Industry Canada (IC) Cet appareil numérique de classe B est conforme aux normes canadiennes ICES-003 et RSS-210. Son fonctionnement est soumis aux deux conditions suivantes : (1) cet appareil ne doit pas causer d'interférence et (2) cet appareil doit accepter toute interférence, notamment les interférences qui peuvent affecter son fonctionnement.
- Page 9 - viii -...
-
Page 10: Introduction
This document provides an easy reference for operating the Alpha-30L series. To print label formats, please refer to the instructions provided with your labeling software; if you need to write the custom programs, please refer to the TSPL/TSPL2 programming manual that can be found on TSC website at http://www.tscprinters.com. -
Page 11: Product Features
1.2 Product Features Model Alpha-30L Alpha-40L Item Resolution 203 dpi, 8dots/mm Printing method Direct thermal Max. print speed 5 ips Max. print width 72 mm 104 mm Max. print length 2,794 mm (110”) Enclosure Plastic with rubber over molded Physical dimension (W x H x D) 117 mm x 173 mm x 79 mm 160 mm x 191mm x 79 mm Weight... -
Page 12: Battery Information
Media type Die cut, black mark, receipt, fan-fold, linerless, continuous (outside wound) Media thickness 0.06 ~ 0.16 mm Media width 25.4 ~80 mm with liner 50.8~112mm with liner 12.7 mm (0.5"), standard Media core diameter 19.1 mm (0.75"), with 0.75" ID adaptor ... -
Page 13: Operations Overview
2. Operations Overview 2.1 Unpacking and Inspection This printer has been specially packaged to withstand damage during shipping. Please carefully inspect the packaging and printer upon receiving the bar code printer. Please retain the packaging materials in case you need to reship the printer. Unpacking the printer, the following items are included in the carton. -
Page 14: Printer Overview
2.2 Printer Overview 2.2.1 Front View 1. Media cover 2. Peeler module 3. NFC touch point 4. MicroSD card socket 5. LCD screen 6. Media cover release button 7. Buttons / LED indicators - 13 -... -
Page 15: Interior View
2.2.2 Interior View 1. Power jack 2. Type C interface 3. Peeler sensor 4. Print head 5. Tear bar 6. Media holder 7. Gap/Black mark sensors 8. Platen roller - 14 -... -
Page 16: Rear View
2.2.3 Rear View 1. External label entrance chute 2. Charging position for docking cradle 3. Battery open clasp 4. Li-ion battery 5. Installation location for belt clip - 15 -... -
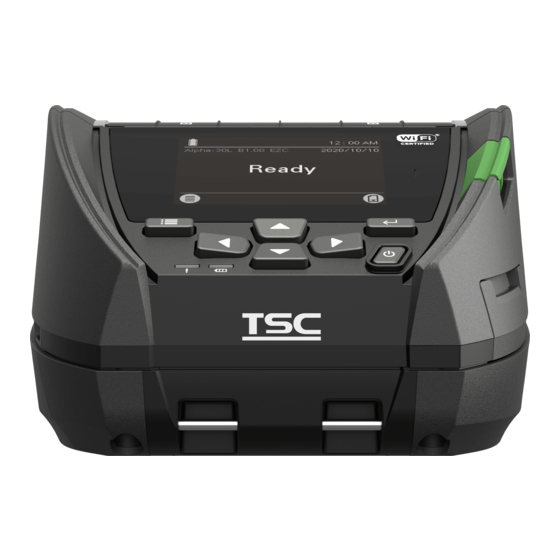
Page 17: Controls And Indicators
2.3 Controls and Indicators Icons Time & Date Model Name & Firmware Version IP Address Status FEED key / Right soft key Menu key / Left soft key Navigational keys Status LED Power key Battery charging LED 2.3.1 Status LED indication LED Color / Status Indication ... -
Page 18: Keys
2.3.3 Keys Keys Function Menu key Enter the LCD menu list. (Ready status) The label on the left footer of the UI will explain the Left soft key function for left soft key. Check the label on the footer of (Menu status) the UI screen. -
Page 19: Setup
3. Setup Alpha-30L and Alpha-40L operate in the same way, this manual uses Alpha-30L as an example. 3.1 Installing the Battery Insert the right side to install the battery at the rear of the printer. Push the left side of the battery. Battery safety warning: DO NOT throw the battery in fire. -
Page 20: Charging The Smart Battery
3.2 Charging the Smart Battery Smart Battery Charging Mode and Operation Instructions In order to battery storage safety and increase battery storage time, the battery will be in shutdown mode for storage and shipping. The smart battery is charged for the first time, it needs to unlock this shutdown mode. ... -
Page 21: Charging The Battery
3.2.1 Charging the Battery 1. Open the interface cover. 2. Plug the power cord to the power jack and plug the power cord into a properly power outlet. 3. When charging, the battery status LED indicator on the printer turns solid amber. After fully charged, the printer LED indicator turns off. -
Page 22: Charging The Battery By 1-Bay/4-Bay Battery Charger (Optional)
3.2.2 Charging the Battery by 1-bay/4-bay Battery Charger (Optional) 1. Plug the power adapter of the charger into a properly grounded outlet and plug the charger connector to a battery charger DC socket. 2. Push the battery down and locked by the latch as shown below. The battery for 3”... -
Page 23: Charging The Battery By 1-Bay Printer Charger (Optional)
3.2.3 Charging the Battery by 1-bay Printer Charger (Optional) 1. Plug the power adapter of the charger into a properly grounded outlet and plug the charger connector to a charger DC socket. 2. Push up the fixing hook with the correct angle and direction along the corresponding printer inch mark. -
Page 24: Charging The Battery By 4-Bay Printer Charger (Optional)
3.2.4 Charging the Battery by 4-bay Printer Charger (Optional) 1. Plug the power adapter of the charger into a properly grounded outlet and plug the charger connector to a charger DC socket. 2. Install the printer onto the charger at the correct angle and direction as shown below. Note: To avoid damage, DO NOT install the printer at the angle shown below. -
Page 25: Loading The Media
3.3 Loading the Media 1. Open the printer media cover by pressing the media cover release button. 2. Pull the media holders apart to fit the label roll width. - 24 -... - Page 26 3. Place the roll between the media holders and close them onto the core. Place the paper, printing side face up, and pull out enough paper over the print head. 4. Press each side of media cover to close the media cover and make sure the media cover closed correctly.
- Page 27 5. Press the Menu key to enter the LCD menu list. Go to [Sensor] [Auto Calibration] to calibrate the media sensor. Note: Please calibrate the gap/black mark sensor when changing media. - 26 -...
-
Page 28: Loading The Media In Peel-Off Mode
3.4 Loading the Media in Peel-off Mode 1. Please refer to section 3.3 to install the media and to calibrate the media sensor before loading media in peel-off mode. 2. Feed the media go through the peeler module. (as figure shown) Note: Making sure the peeler module... - Page 29 3. Pull the media tightly. 4. Press down the peeler module to lock it. - 28 -...
- Page 30 5. Press the Menu key to enter the LCD menu list. Go to [Setting] [Print Mode] to set the print mode to [Peeler Mode]. - 29 -...
-
Page 31: Loading The External Media
3.5 Loading the External Media Flip printer to the back side. Take off the rubber bar. Release the lever. Install the label roll to stuck the media holder The recommended label roll’s inside diameter is 0.5~0.75” inch. - 30 -... - Page 32 Load the paper from the external entrance chute. Pull the label out and make it face toward the print head. Close the lever and make calibration. - 31 -...
-
Page 33: Installing The Belt Clip
3.6 Installing the Belt Clip Lock the belt clip on lower of the printer. Press the hook of belt clip into the bars on the lower printer as pictured. The printer can be hung on the belt. - 32 -... -
Page 34: Installing The Ip54-Rated Environmental Case With Shoulder Strap (Optional)
3.7 Installing the IP54-rated environmental case with shoulder strap (Optional) 1. Zip up the case cover. 2. Place the printer in the case. - 33 -... - Page 35 3. Close the case cover. 4. Zip up the outside cover to check. The outside cover should be opened and fixed while printing. - 34 -...
-
Page 36: Connecting The Printer
3.8 Connecting the Printer The printer must establish communication with a host terminal which sends the data to be printed. There are three ways to connect for Alpha-30L series, * By a cable between the printer and its host terminal... -
Page 37: Wireless Communication With Wi-Fi (Option)
3. Turn on the printer. 4. Start the “TSC Console” by double clicking on the icon. 5. Go to [PrintersAdd Printer] to add this printer on the “TSC Console”. 6. Select this printer and enter the setting page by double clicking on the printer. - Page 38 7. Select the "Wi-Fi" tab to setup the wireless module. For WPA-Personal Select the "Wi-Fi" tab. Fill-in the SSID. Select the Encryption option to WPA-Personal. Fill-in the Key. Select DHCP to "ON". (For "OFF" option, please fill-in the IP Address, Subnet Mask and Gateway) After setting, click the "Set"...
- Page 39 Note: * Before setting, the entered field will be shown in yellow for reminding. * On DHCP, user can change the printer name by another model name in “Printer Name” field. * User also can change the raw port in “Raw Port” field. 8.
-
Page 40: Initialize The Printer Wi-Fi Module (Option)
2. Select the printer in the list then click the “Printer Function” button to enter the setting page. (Refer to ch.3.53 to add the printer for first using TSC Console.) 3. Go to [Functions Wi-Fi Default] to initialize the printer Wi-Fi module settings to factory default. -
Page 41: Lcd Menu Function
4. LCD Menu Function The Alpha-30L/ Alpha-40L series offer the LCD panel to further enhance its capabilities to meet the demands of a wide range of printing solutions. This feature includes LCD control panel, 4 buttons and 2 LED display. Please press the “Menu”... -
Page 42: Main Menu Overview
4.2 Main Menu Overview There are 6 categories for the main menu. You can easy to set the settings of printer without connecting the computer. Please refer to following sections for more details. This “Setting” category can set up the printer settings for TSPL &... - Page 43 Menu Setting Sensor Interface Advanced File Manager Diagnostic Command Auto Bluetooth Language DRAM Print Config. Calibration Manual Printer TSPL ZPL2 Wi-Fi FLASH Dump Mode Calibration Information Threshold Speed Darkness Battery CARD Print Head Detect Maximum Density Print Speed Initialization Display Length Display Direction...
-
Page 44: Setting
4.3 Setting This “Setting” category can set up the printer settings for TSPL & ZPL2. Press right soft key to switch the TSPL & the ZPL2. 4.3.1 TSPL Speed Density Batch Mode Direction Print Mode None Command Set - TSPL Offset Peeler Mode Shift X/Y... -
Page 45: Zpl2
This item is used to set the print mode. There are 3 modes as below, Printer Mode Description Next label top of form is aligned to the print None head burn line location. (Tear Off Mode) Batch Print mode Once image is printed completely, label Mode gap/black mark will be fed to the tear plate Batch Mode... - Page 46 Item Description Default Use this item to setup printing darkness. The available setting is from 0 to Darkness 30, and the step is 1. You may need to adjust your density based on selected media. Use this item to setup print speed. The each increase or decrease is 1 ips. Print Speed 3 ips Available setting is from 1 to 6.
-
Page 47: Sensor
4.4 Sensor This "Sensor" option is used to calibrate the selected media sensor. We recommend calibrate the sensor before printing when changing the media. Black Mark Auto Calibration Continuous Preprint Manual Setup Standard Black Mark Auto Continuous Sensor Threshold Detect Fixed Maximum Length Print Side... -
Page 48: Interface
4.5 Interface This "Interface" option is used to set the printer interface settings. Note: This subsection will only be visible when the option installed. Status DHCP Configure Static IP Wi-Fi SSID Security Interface Password Status Bluetooth Local Name Item Description Default Status This item is used to check the Wi-Fi status... -
Page 49: Advanced
4.6 Advanced This "Advanced" option is used to set the printer language, initialization, battery information, LCD display setting %...etc. Language Printer Information Battery Information Battery Bad Battery Initialization Display Brightness Standby Mode Power Manager Display turns off after Sleep Mode Date Format Advanced Date... - Page 50 This item is used to check print head status and to set the settings for print head care. Item Description This item is used to enable/disable the print head clean warning. If enable this feature, once print head has been reached the setting Warning mileage then the warning icon will be shown on printer UI for...
-
Page 51: File Manager
4.7 File Manager This feature is used to check the printer available memory, show the files list, delete the files or run the files that saved in the printer DRAM/Flash/Card memory. DRAM File Manager FLASH CARD Item Description Use this menu to show, delete and run (.BAS) the files saved in the DRAM printer DRAM memory. -
Page 52: Diagnostic
Self-test printout Model name F/W version Firmware checksum Printer S/N TSC configuration file System date System time Printed mileage (meter) Print head bad dot Print Config. Print speed (inch/sec) - Page 53 Numbers of download files Total & available memory space Print head check pattern Note: Checking dot damage requires the media with max. paper width. Captures the data from the communications port and prints out the data received by printer. In the dump mode, all characters will be printed in 2 columns.
-
Page 54: Tsc Console
Go to [Printers Add Printer] to add the printer onto the “TSC Console”. Select the printer interface to add the printer onto the TSC Console. Select this printer and enter the setting page by double clicking on the printer. -
Page 55: Tph Care
5.2 TPH Care User can use this tab to check the condition of the print head. Users can set the dot failure threshold. The printer will indicate an error when the numbers of failure dot threshold is reached. This option is used to enable (ON)/ disable (OFF) the TPH care function. -
Page 56: Troubleshooting
6. Troubleshooting The following guide lists the most common problems that may be encountered when operating this bar code printer. If the printer still does not function after all suggested solutions have been invoked, please contact the Customer Service Department of your purchased reseller or distributor for assistance. Problem Possible Cause Recovery Procedure... - Page 57 * SD card is damaged. * Use the supported capacity SD card. SD card is unable to use * SD card doesn’t insert correctly. * Insert the SD card again. * Reload the supply. * Clean the print head. * Clean the platen roller. * Media is loaded incorrectly * Adjust the print density and print * Dust or adhesive accumulation on...
-
Page 58: Maintenance
7. Maintenance This session presents the clean tools and methods to maintain your printer. For Cleaning Depending on the media used, the printer may accumulate residues (media dust, adhesives, etc.) as a by- product of normal printing. To maintain the best printing quality, you should remove these residues by cleaning the printer periodically. - Page 59 Cleaning Process Printer Part Method Interval 1. Always turn off the printer before cleaning the printhead. 2. Allow the printhead to cool for a minimum of Clean the print head when Print Head one minute. changing a new label roll. 3.
-
Page 60: Change History
Camille Add Installing the Belt Clip section Add Installing the IP54-rated environmental case with shoulder strap (Optional) section Add TSC Console 2020/11/2 Camille Add Smart Battery Charging Mode and Operation Instructions Add Battery information (ch.1.3) - Page 61 9F., No.95, Minquan Rd., Xindian Dist., No.35, Sec. 2, Ligong 1st Rd., Wujie Township, New Taipei City 23141, Taiwan (R.O.C.) Yilan County 26841, Taiwan (R.O.C.) TEL: +886-2-2218-6789 TEL: +886-3-990-6677 FAX: +886-2-2218-5678 FAX: +886-3-990-5577 Web site: www.tscprinters.com E-mail: apac_sales@tscprinters.com tech_support@tscprinters.com TSC AUTO ID TECHNOLOGY CO., LTD.
Need help?
Do you have a question about the Alpha-30L Series and is the answer not in the manual?
Questions and answers