TSC Alpha-4L User Manual
Hide thumbs
Also See for Alpha-4L:
- User manual (73 pages) ,
- Service manual (40 pages) ,
- Programming manual (434 pages)

Related Manuals for TSC Alpha-4L


Summary of Contents for TSC Alpha-4L
- Page 1 ;’RFTGTT5RT12 Alpha-4L Direct Thermal Moblie Barcode Printers Series Lists: User Manual Alpha-4L...
- Page 2 All other trademarks are the property of their respective owners. Information in this document is subject to change without notice and does not represent a commitment on the part of TSC Auto ID Technology Co. No part of this manual may be reproduced or transmitted in any form or by any means, for any purpose other than the purchaser’s personal use, without the...
-
Page 3: Table Of Contents
Table of Contents 1. Introduction ........................................1 1.1 Product Specification ....................................2 1.2 Printer Optional Featussf .....................................3 1.3 General Specifications ....................................4 1.4 Print Specifications ......................................5 1.5 Media Specifications ....................................6 2. Operation Overview ......................................7 2.1 Unpacking and Inspection ....................................7 2.2 Printer Overview ......................................8 2.2.1 Front View ......................................8 2.2.2 Rear View ......................................9 2.3 Operator Control ...................................... - Page 4 4.3 Install the Belt Strap (Option/ Standard for linerless model) ........................29 5. TSC Console ........................................31 5.1 Start TSC Console ..................................... 31 5.2 Set WiFi and Add to TSC Console Interface .............................. 33 5.3 Initialize the Printer WiFi Setting ................................36 5.4 Setting Post-Print Action .................................... 37 5.5 Printer Function ......................................
- Page 5 6.3 TSPL2 ........................................43 6.4 ZPL2 .......................................... 45 6.5 Sensor ........................................48 6.6 Serial Comm......................................49 6.7 Wireless LAN ......................................50 6.8 Bluetooth ........................................51 6.9 Date Time ........................................52 6.10 Display ........................................53 6.11 File Manager ......................................54 6.12 Diagnostic ........................................
-
Page 6: Introduction
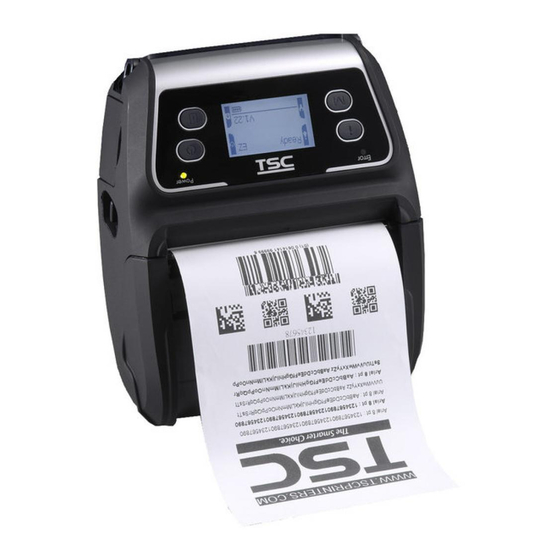
Our Alpha-4L is designed for a rough life, inside the IP54-rated environmental case to resist dust and water and with its rubber over- mold design prepared to take up to a five foot fall and keep printing. These small and light printers can be worn comfortably for a full shift, without interfering with the user’s tasks. -
Page 7: Product Specification
1.1 Product Specification The printer offers the following standard features Product standard feature Direct thermal printing Black mark reflective sensor (center position , black mark in back side) Gap transmissive sensor (Fixed, center of offset 2.75 mm to right from center) Head open sensor Peeler sensor 2 operation buttons (On/off and feed) -
Page 8: Printer Optional Featussf
1.2 Printer Optional Featussf The printer offers the following optional features. Features Description User options Factory options 2” LCD (Liquid crystal display), 128 x 64 pixels resolution ○ w/white LED backlight (with 4 buttons and 2 LEDs) ○ Wi-Fi module ○... -
Page 9: General Specifications
1.3 General Specifications General Specifications Physical dimensions 160 mm (W) x 191.6 mm (H) x 79 mm (D) Mechanism Plastic with rubber over molded Weight 0.945 kg (w/o battery) External power adapter Power Input: AC 100-240V Output: DC 12V 1A Operation: -10 ~ 50˚C (14 ~ 122˚F) Storage: -40 ~ 60 ˚C (-40 ~ 140˚F) Relative humidity: 10 ~ 90% non-condensing... -
Page 10: Print Specifications
1.4 Print Specifications Print Specifications Print head resolution 203 dots/inch (8 dots/mm) (dots per inch/mm) Printing method Direct thermal Dot size 0.125 x 0.125 mm (width x length) (1 mm = 8 dots) Print speed Max. 4 ips (100 mm/sec) (inches per second) 2,3 ips for peeler mode Max. -
Page 11: Media Specifications
1.5 Media Specifications Media Specifications Media roll capacity Max. 2.65” (67.3 mm) OD Media core diameter 12.7 mm ~ 25.4 mm (0.5” ~ 1”) ID core Media type Continuous, die-cut, black mark, External fan-fold, receipt, Linerless label (w/ linerless kit) Media wound type Outside wound Media width... -
Page 12: Operation Overview
2. Operation Overview 2.1 Unpacking and Inspection This printer has been specially packaged to withstand damage during shipping. Please carefully inspect the packaging and printer upon receiving the bar code printer. Please retain the packaging materials in case you need to reship the printer. Unpacking the printer, the following items are included in the carton. -
Page 13: Printer Overview
2.2 Printer Overview 2.2.1 Front View Power on/off button Feed button Printer status LED indicator Battery status LED indicator Media cover release button Peel-off sensor (Without for linerless model) Print head Transmissive sensor – Gap sensor Media holder lock switch Media holder Media cover Reflective sensor –... -
Page 14: Rear View
2.2.2 Rear View Belt chip Battery open clasp Li-ion battery External label entrance chute Hanger for shoulder strap USB interface * MicroSD card socket Power jack... -
Page 15: Operator Control
2.3 Operator Control 2.3.1 Led Indication and Keys Keys Function − Press and hold for 2-3 seconds to turn on the printer − Press and hold for 2-3 seconds to turn off the printer − Ready status: Feed one label −... - Page 16 2.3.2 LED Indication and Keys for LCD (Option) Keys Function − Display the printer information − Button for LCD setting menu − Enter the printer setting menu − Button for LCD setting menu − Press and hold for 2-3 seconds to turn on the printer −...
- Page 17 − Printer power is turned on Green (solid) − Battery is full charged Power Green (blinking) Low battery Amber (solid) Battery is charging Indication Printer has been connected with cable Bluetooth devices have been paired Wi-Fi device has been connected Battery capacity %...
-
Page 18: Power-On Utilities
2.3.2 Power-on Utilities Power-on Utilities provides the basic functions and can be activated by below procedures: Turn off the power > Hold the Feed button ( ) > Open the power > Release the button depending on the the color of the LED. Sequences of the settings standard panel: LED Colors (5 blink) -
Page 19: Setup
3. Setup 3.1 Install the Belt Clip and Battery Insert the belt clip first. Insert the left side to install the battery at the rear of the printer. Push the right side of the battery. Battery safety warning: DO NOT throw the battery in fire. DO NOT short circuit the contacts. -
Page 20: Charge The Battery
3.2 Charge the Battery 3.2.1 Charge the Battery It takes 5 to 6 hours to fully charge the battery before the first time usage. The lifetime of the battery is 300 times for charge/discharge cycles. The battery is installed into the printer. Open the interface cover and plug the power cord to the power jack. - Page 21 Plug the power cord into a properly power outlet. Note: -Please switch OFF printer power prior to plug in the power cord to printer power jack. -When the battery is charging, please do not remove the battery from the printer, otherwise, please re-plug the power cord into a power outlet.
-
Page 22: Loading The Media
3.3 Loading the Media 3.3.1 Loading Media Open the printer media cover by pressing the media cover release button. Pull the media holders apart to fit the label roll width. - Page 23 Place the roll between the media holders and close them onto the core. Place the paper, printing side face up, and pull out enough paper over the print head. Press each side of media cover to close the media cover and make sure the media cover closed correctly.
-
Page 24: Loading Media In Peel-Off Mode
3.3.2 Loading Media in Peel-off Mode Plug the power cord to the power jack on the charger station. Install the battery in the charger station Press each side of media cover to close the media cover and make sure the media cover closed correctly. - Page 25 Feed the liner go through the peeler module. (as figure shown) Pull the liner tightly. Move the peeler module to near the peeler bar by pushing each side of peeler module. (cover the platen roller)
- Page 26 Press down the peeler module to lock it. Loose the peeler module in the reverse procedures:...
-
Page 27: Loading The Fan-Fold/External Media
3.3.3 Loading the Fan-fold/External Media Open the printer media cover by pressing the Push down each side of media media cover release holder lock switch to fix the button. Pull the media media holder.. holders apart to fit the media width. Press each side of media Feed the media through cover to close the media cover... -
Page 28: Loading The Linerless Media (Option)
3.3.4 Loading the Linerless Media (Option) Please refer to subsection 3.3.1 to loading the media roll into the printer. Push down each side of media holder lock switch to fix the media holder for using linerless media. Place the paper, printing side face up, and pull out enough paper over the print head. -
Page 29: Connecting The Printer
3.4 Connecting the Printer The printer must establish communication with a host terminal which sends the data to be printed. There are three ways to connect for Alpha-4L series, By a cable between the printer and its host terminal ... -
Page 30: Wireless Communications With Bluetooth
3.4.2 Wireless Communications with Bluetooth Turn on the printer. Open the Bluetooth device for host terminal to scan for printer’s Bluetooth device. Connect the Bluetooth devices. The Bluetooth LED will turn on blue (the Bluetooth icon will be shown for LCD panel) if devices have been paired. -
Page 31: Accessories
4. Accessories 4.1 Install the IP54-rated Environmental Case with Shoulder Strap (Option) Open the case top cover. Put the printer into the case. Close the case top cover. The outside cover should be opened while printing. -
Page 32: Install The Adapter For 0.75" And 1" Paper Core (Option)
4.2 Install the Adapter for 0.75” and 1” Paper Core (Option) Open the case top cover. Check the parts: Adapter x 2 Screw x 2 Nut x 2 Put the nut on the media holder. - Page 33 Make the arrow direction is as fig. to install the adapter Pull the media holders apart. Push down another side of media holder lock switch to keep the media holder in max width. Tighten the screw on nut for fixing the adapter on media holder.
-
Page 34: Install The Belt Strap (Option/ Standard For Linerless Model)
4.3 Install the Belt Strap (Option/ Standard for linerless model) Tighten 2 screws on the printer. For linerless model For standard model Put the nut on the media holder. Pull up the belt strap to lock it on the screws. - Page 35 Open the belt strap for using.
-
Page 36: Tsc Console
5. TSC Console TSC Console is a management tool combining the Printer Management, Diagnostic Tool, CommTool and Printer Webpage settings, which enables you to adjust printer’s settings/status; change printers’ settings; download graphics, deploy fonts, graphics, label templates or upgrade the firmware to the group of printers, and send additional commands to printers at the same time ※... - Page 37 Select the current interface of the printer. The printer will be added to TSC Console’s interface. Select the printer and set the settings. For more information, please refer to TSC Console User Manual.
-
Page 38: Set Wifi And Add To Tsc Console Interface
5.2 Set WiFi and Add to TSC Console Interface Use USB or COM Port to set up the interface. (refer to chp.5.1) Double click to enter the printer configuration page. Click Get to receive printer’s information. Click Wi-Fi to the wi-fi setting page. - Page 39 For WPA-Personal Fill-in the SSID. Select the Encryption option to WPA-Personal. III. Fill-in the Key. Select DHCP to ON. (For OFF option, please fill-in the IP Address, Subnet Mask and Gateway) After setting, click the Set button. Note: Before setting, the entered field will be shown in yellow for reminding.
- Page 40 After clicking Set button, it'll pop-up the window tip as below shown. Remove the cable between the computer and the printer. Go to main page, click Add Printer to add the printer via Network. Select the printer and enter the setting page by double clicking the printer.
-
Page 41: Initialize The Printer Wifi Setting
5.3 Initialize the Printer WiFi Setting Return to the main page of TSC Console. Click Functions to expand the page. Click Wi-Fi Default to initialize the printer Wi-Fi module setting to factory default setting. -
Page 42: Setting Post-Print Action
When the printer is equipped with other opton kits, ex: cutter, peeler, rewinder, please select the mode after finishing the calibration. Follow below procedure to set the post action for the printing: Refer Chp 5.1 to Connect the printer with TSC Console > Double click the printer >... -
Page 43: Printer Function
5.5 Printer Function Printer Function could be found in Printer Configuration. “Printer Function” will be shown on the left side of the window. Functions Description Calibrate Sensor Detect media types and the size of the label RTC Setup Synchronize printer with Real Time Clock on PC Factory Default Initialize the printer to default settings Reset Printer... -
Page 44: Lcd Menu Function (Option)
6. LCD Menu Function (Option) The Alpha-4L series offer the LCD panel for selection to further enhance its capabilities to meet the demands of a wide range of printing solutions. This option feature includes LCD control panel, 4 buttons and 2 LED display. Please press the “M” button to enter the setting menu. - Page 45 Scroll up Scroll down Return to previous menu Enter to next menu Enter setting mode Exit setting mode Save the selected settings and return to previous menu Select Alter to OFF Alter to ON...
- Page 46 For example: Change the speed setting, please following steps as below: Press “M” button to enter the setting menu. Press button to enter the “Setup” item. button to enter the “Print Setup” item. Select the “TSPL2” item. Enter the “Speed” setting mode. Press At this status, you can scroll up or scroll down to select the value of print speed.
-
Page 47: Main Menu Overview
Print Config. English Initialization Setup ↓ ↓ ↓ Sensor FLASH Dump Mode ↓ ↓ Serial Battery Comm. ↓ ↓ *Wireless Print Head ↓ Bluetooth ↓ Date Time ↓ Display Note: * The Wireless LAN function is optional for Alpha-4L series. -
Page 48: Tspl2
6.3 TSPL2 TSPL2 選項可以設定印表機 TSPL 中的設定值。 Speed Density Direction Print mode Offset Setup TSPL2 Shift X Shift Y Reference X Reference Y Code Page Country... - Page 49 Item Description Default Speed Set the print speed. Density Set the printing darkness. Set the printout direction. Setting Value: 0 and 1. Direction Direction 0: Direction 1: Set the print mode. There are 5 modes in total: None: Next label top of form is aligned to the print head burn line location. (Tear Off Mode) Batch Mode Print mode Batch Mode: Once finishing the printing process, label will be fed to the tear plate location.
-
Page 50: Zpl2
Darkness 6.4 ZPL2 Print Speed Tear Off This “ZPL2” category can set up the printer settings for ZPL2. Print Mode Print Width List Fonts List Images List Formats List Setup ZPL2 Menu Setup Control Prefix Format Prefix Feed Calibration Delimiter Char Length Media Power Up No Motion... - Page 51 Item Description Default Density Set the printing darkness. Available setting range: 0 to 30. Print Speed Set the print speed. 0 dot Tear Off Adjust media stop location. Available setting value range: -120~120 dots. Set the print mode. There are 4 modes: Tear Off: Next label top of form is aligned to the print head heating line Tear Off Print mode...
- Page 52 Set the action of the media when turning on the printer. Feed: Printer will advance one label. No Motion Media Power Up Calibration: Printer will make calibration. Length: Printer determine length and feed label. No Motion: Printer will not move media. Set the action of the media when closing the print head.
-
Page 53: Sensor
6.5 Sensor This option is used to calibrate the selected sensor. We recommend calibrate the sensor before printing when changing the media. Auto Calibration Black Mark Continuous Scan Backing Scan Paper Black Mark Scan Mark Scan Paper Manual Setup Continuous Scan Paper Remove Label Main Menu... -
Page 54: Serial Comm
6.6 Serial Comm. 1200 bps 2400 bps 4800 bps 9600 bps Baud Rate 19200 bps 38400 bps 57600 bps 115200 bps None Main Menu Setup Serial Comm. Parity Even Data Bits Stop Bit(s) Item Description Default Baud Rate Set the RS-232 baud rate. 9600 Parity Set the RS-232 parity. -
Page 55: Wireless Lan
6.7 Wireless LAN Infrastructure Operating Mode Ad-hoc Main Menu Setup Wireless LAN Scan AP DHCP Item Description Default Sset the operating mode of wireless local area networks to connect devices to the networks. Note: Operating Mode Infrastructure Infrastructure mode requires the use of an access point for this communication to take place. -
Page 56: Bluetooth
6.8 Bluetooth Local Name Main Menu Setup Bluetooth PIN Code Item Description Default Local Name Set the local name for Bluetooth. BT-SPP PIN Code Set the local PIN code for Bluetooth. 0000... -
Page 57: Date Time
6.9 Date Time Date Main Menu Setup Date Time Time Item Description Default Date Set the date. (ex: 2013-05-30) Time Set the time. (ex: 19:20:02) -
Page 58: Display
6.10 Display Always On Always Off 5 Seconds 10 Second Contrast 30 Second Main Setup Display Menu Backlight 1 Minute 5 Minutes 10 Minutes 30 Minutes 1 Hour 5 Hours Item Description Default Contrast This item is used to set the contrast for display. Backlight This item is used to set the backlight time for display. -
Page 59: File Manager
6.11 File Manager This feature is used to check the printer available memory and file list. DRAM Saved file list (Available memory) FLASH Saved file list Main Menu File Manager (Available memory) CARD Saved file list (Available memory Item Description DRAM Use this menu to show, delete and run (.BAS) the files saved in the printer DRAM memory. -
Page 60: Diagnostic
6.12 Diagnostic Print Config. Dump Mode Main Menu Diagnostics Battery Print Head Item Description Print current printer configuration to the label. The configuration printout contains print head test pattern, which is useful Print Config. for checking the dot damage on the print head heater. Captures the data from the communications port and prints out the data received by printer. -
Page 61: Language
6.13 Language Main Menu Language English This option is used to setup the language on LCD display. 6.14 Service Main Menu Service Initialization This feature is used to restore printer settings to defaults. Note: When printer initialization is done, please calibrate the gap or black mark sensor before printing. -
Page 62: Troubleshooting
7. TroubleShooting Problem Possible Cause Recovery Procedure * Reinstall the battery. * The battery is not properly installed. * Switch the printer on. Power indicator does not illuminate * Battery out of power. * Charge the battery. * The battery is dead. * Replace a new battery. - Page 63 * Delete unused files in the memory. * The max. numbers of DRAM is 256 files. * The max. user addressable memory space of Can’t downloading the file to memory * The space of memory is full. DRAM is 2048KB. (FLASH / DRAM/CARD) * The max.
-
Page 64: Maintenance
8. Maintenance This session presents the clean tools and methods to maintain the printer. For Cleaning Depending on the media used, the printer may accumulate residues (media dust, adhesives, etc.) as a by-product of normal printing. To maintain the best printing quality, you should remove these residues by cleaning the printer periodically. Regularly clean the print head and supply sensors once change a new media to keep the printer at the optimized performance and extend printer life. - Page 65 Cleaning Tools Cotton swab Lint-free cloth Brush with soft non-metallic bristles Vacuum cleaner 75% Ethanol (for disinfecting) 99% Isopropyl alcohol (for printhead and platen roller cleaning) Genuine printhead cleaning pen Mild detergent (without chlorine) Cleaning Process: Printer Part Method...
-
Page 66: Angency Compliance And Approvals
9. Angency Compliance and Approvals EN 55022/24, IEC 61000-3-3, IEC 61000-3-2 EN 300328, EN 301489 Part 15B/C EN 60950-1 GB 9254 GB 4943.1 GB 17625.1 Wichtige Sicherheits-Hinweise 1. Bitte lesen Sie diese Hinweis sorgfältig durch. 2. Heben Sie diese Anleitung fűr den späteren Gebrauch auf. 3. - Page 67 Battery safety warning: DO NOT throw the battery in fire. DO NOT short circuit the contacts. DO NOT disassemble the battery. DO NOT throw the battery in municipal waste. The symbol of the crossed out wheeled bin indicates that the battery should not be placed in municipal waste. CAUTION Risk of explosion if battery is replaced by an incorrect type.
- Page 68 This device complies with Part 15 of the FCC Rules. Operation is subject to the following two conditions: (1) This device may cause harmful interference, and (2) this device must accept any interference received, including interference that may cause undesired operation.
- Page 69 Radio Frequency (RF) Exposure Information The radiated output power of the Wireless Device is below the Industry Canada (IC) radio frequency exposure limits. The Wireless Device should be used in such a manner such that the potential for human contact during normal operation is minimized. This device has been evaluated for and shown compliant with the IC Specific Absorption Rate (“SAR”) limits when installed in specific host products operated in portable exposure conditions.
- Page 70 ◎ 勿将电池接点短路。 ◎ 不可拆解电池。 ◎ 不乱将电池当成一般废弃物处理。 ◎ 打叉的垃圾桶符号表示电池不应该被放置到一般废弃堆中。 注意: ◎ 更换不正确型号类型的电池, 将产生爆炸危险。 ◎ 请根据使用说明处理用过的电池。 鋰電安全使用指南 注意:電池若未正確更換,可能會爆炸。請用原廠建議之同款或同等級的電池來更換。請依原廠指示處理廢棄電池。...
- Page 71 設備名稱: 可攜式熱感條碼印表機,型號(型式) :主型號:Alpha-4L系列 Equipment Type designation name (Type) 限用物質及其化學符號 Restricted substances and its chemical symbols 六價鉻 多溴聯苯 多溴二苯醚 單元Unit 鉛Lead 汞Mercury 鎘Cadmium Hexavalent Polybrominated Polybrominated (Pb) (Hg) (Cd) chromium biphenyls diphenyl ethers (PBDE) (PBB) ○ ○ ○ ○ ○ ○...
- Page 72 ○ ○ ○ ○ ○ 集成電路-IC ○ ○ ○ ○ ○ ○ 電源供應器 ○ ○ ○ ○ ○ 車用充電器-插頭 ○ ○ ○ ○ ○ 印字頭 ○ ○ ○ ○ ○ 馬達 ○ ○ ○ ○ ○ ○ 液晶顯示器 ○ ○ ○...
-
Page 73: Revise History
10. Revise History Date Content Editor...
Need help?
Do you have a question about the Alpha-4L and is the answer not in the manual?
Questions and answers