Epson TM-m30 Technical Reference Manual
Hide thumbs
Also See for TM-m30:
- User manual (35 pages) ,
- Setup manual (2 pages) ,
- Product information manual (4 pages)
Table of Contents
Advertisement
Quick Links
Technical Reference Guide
Product Overview
Describes features of the product.
Setup
Describes setup and installation of the product and
peripherals.
Advanced Usage
Describes advanced usage methods for the product.
Application Development Information
Describes how to control the printer and necessary
information when you develop applications.
Handling
Describes how to handle the product.
Appendix
Describes general specifications and character code
tables.
M00094210
Rev. K
Advertisement
Table of Contents

Related Manuals for Epson TM-m30


Summary of Contents for Epson TM-m30
- Page 1 Technical Reference Guide Product Overview Describes features of the product. Setup Describes setup and installation of the product and peripherals. Advanced Usage Describes advanced usage methods for the product. Application Development Information Describes how to control the printer and necessary information when you develop applications.
- Page 2 • Neither is any liability assumed for damages resulting from the use of the information contained herein. • Neither Seiko Epson Corporation nor its affiliates shall be liable to the purchaser of this product or third parties for damages, losses, costs, or expenses incurred by the purchaser or third parties as a result of: accident, misuse, or abuse of this product or unauthorized modifications, repairs, or alterations to this product, or (excluding the U.S.) failure to strictly comply with Seiko Epson Corporation’s operating and...
-
Page 3: For Safety
For Safety Key to Symbols The symbols in this manual are identified by their level of importance, as defined below. Read the following carefully before handling the product. You must follow warnings carefully to avoid serious bodily injury. WARNING Provides information that must be observed to prevent damage to the equipment or loss of data. •... -
Page 4: Cautions
- Consult your dealer or an experienced radio/TV technician for help. • Never disassemble or modify this product. • Seiko Epson Corporation shall not be liable for interference to radio/TV resulting from changes or modifications to this product not expressly approved by Seiko Epson Corporation. -
Page 5: About This Manual
About this Manual Aim of the Manual This manual was created to provide information on development, design, and installation of POS systems and development and design of printer applications for developers. Manual Content The manual is made up of the following sections: Chapter 1 Product Overview Chapter 2... -
Page 7: Table Of Contents
Contents ■ For Safety..........................3 Key to Symbols..................................3 Warnings ....................................3 Cautions....................................4 ■ Restriction of Use ........................4 ■ Note about interference ......................4 ■ About this Manual ........................5 Aim of the Manual ................................5 Manual Content .................................. 5 ■ Contents............................7 Product Overview ..................11 ■... - Page 8 Setup....................... 27 ■ Flow of Setup ........................27 ■ Installing the Printer......................28 Changing to the Front Eject Position ........................29 ■ Changing the Paper Width ....................30 ■ Connecting the Optional Wireless LAN Unit ..............32 ■ Connecting the Optional Customer Display ..............32 ■...
- Page 9 ■ Resetting the Interface Settings ..................72 ■ EpsonNet Config (Web Version) ..................73 Information Menu................................73 Configuration Menu................................74 Optional Menu ..................................78 Application Development Information............79 ■ Controlling the Printer ......................79 ePOS-Print XML.................................79 ESC/POS....................................79 ■ Controlling the Cash Drawer....................80 ■ Controlling the Optional External Buzzer ............... 81 ■...
- Page 10 Printing and Cutting Positions..........................105 Electrical Characteristics .............................105 Environmental Conditions ............................106 External Dimensions..............................107 ■ Specifications of Interface and Connector ..............109 USB Interface...................................109 Network Interface................................110 Bluetooth Interface ...............................114 NFC Tag....................................117 ■ Character Code Tables....................... 118 ■ Compatibility with USB Type-A ..................119...
-
Page 11: Product Overview
• Printing triggered by bar code scan by smart device camera. • A utility for iOS/Android (Epson TM Utility for iOS/Android) for making printer settings is provided. • Printing of various types of bar codes, GS1-DataBar, and two-dimensional symbols (PDF417, QR code, MaxiCode, Composite Symbology, Aztec Code, DataMatrix) is supported. -
Page 12: Product Configurations
You can select the printer you want to use by simply placing an NFC device over the NFC tag (mark) on the printer. • There is no data rewriting function. • Use Epson ePOS SDK or ePOS-Print SDK to build this function into your application. -
Page 13: Accessories
Chapter 1 Product Overview Accessories Included • 58-mm width roll paper guides • Roll paper (for operation check) • Power switch cover • AC adapter • AC cable • Basic Manuals • Warranty certificate ∗1 The manual name and formatting differ depending on the model. ∗2 May not be included, depending on the region. -
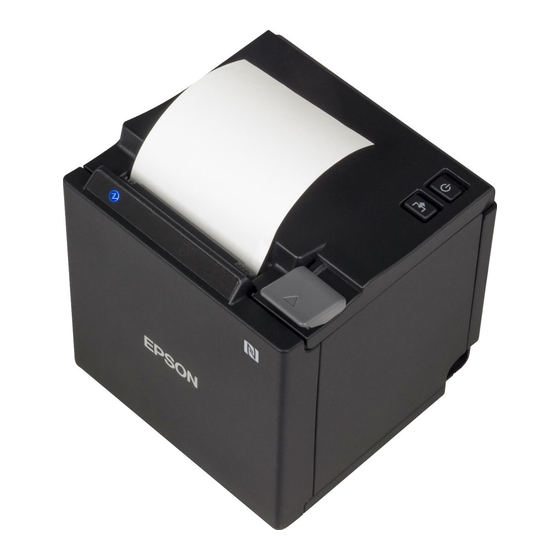
Page 14: Part Names And Functions
Part Names and Functions Roll paper cover Open this cover when loading or replacing roll paper. Panel LED For details on LED, see "Panel LED" on page NFC Tag A mark is printed here to indicate the position of the NFC tag. To establish communication with an NFC device, bring the device close to this mark. -
Page 15: Panel Led
Chapter 1 Product Overview Panel LED Power LED • Lights when the power supply is on. • Off when the power supply is off. • Flashes during the network to start up, when waiting for power off, or updating firmware. Do not turn on by using the power switch while waiting for the power to turn off (when the Power LED is flashing). -
Page 16: Connectors
Connectors All connectors are located on the lower rear of the printer. For Standard, Wi-Fi, and Bluetooth models. USB connector Use only for connecting optional Wireless LAN unit and customer display.* CAUTION: It may be hard to disconnect some types of USB cable. Do not forcibly pull the cable, or the USB connector and USB cable may be damaged. - Page 17 Chapter 1 Product Overview For Onboard USB Powers Tablet model. USB connector for A dedicated connector for charging smart devices and USB devices. charging You can charge whether the printer is on or off as long as the power cable is connected. CAUTION: It may be hard to disconnect some types of USB cable.
-
Page 18: Online And Offline
Online and Offline Online The printer is online and ready for normal printing unless there is a reason to go offline. Offline The printer automatically goes offline under the following conditions: • While the printer power is turning on/off • During the setting and check modes operating (except the hexadecimal dumping mode) •... -
Page 19: Status And Errors
Chapter 1 Product Overview Status and Errors The status of the printer is indicated by lit and flashing LEDs. You cannot print when an error has occurred. You cannot identify the error by the flashing patterns of the LEDs. Develop the application so that users can identify the error description and check the solutions. -
Page 20: Error Status
Error Status There are three possible error types: automatically recoverable errors, recoverable errors, and unrecoverable errors. Automatically Recoverable Errors • Head temperature error Recovery is performed automatically if the head temperature drops. • Cover open error during printing Recovery is performed automatically when the roll paper cover is closed. -
Page 21: Nv Memory (Non-Volatile Memory)
Graphics, such as shop logos to be printed on receipts, can be registered. To register your graphics data, use TM-m30 Utility or ESC/POS commands. You can check registered graphics data using TM-m30 Utility or by printing the data in the NV graphics information print mode. -
Page 22: Maintenance Counter
Maintenance Counter With this function, printer information, such as the number of lines printed, the number of autocuts, and printer operation time after the printer starts working, is automatically stored in printer's memory. You can read the counter information to use it for periodical checks or part replacement. •... -
Page 23: Simple Setup For Wireless Lan
This allows you to easily setup a wireless LAN for the printer by using a printer settings tool (Epson TM Utility, EpsonNet Config, or EpsonNet Config (Web version)) even without a network environment such as access points. -
Page 24: Useful Functions For Smart Devices
See the "Epson ePOS SDK for Android/iOS User's Manual" and the Epson ePOS SDK sample program for more details. The sample program also contains a sample implementation method for reading an NFC tag and capturing a QR code. • You can try a demo of these functions by using Epson TM Utility for iOS/Android. -
Page 25: Printing Using Multiple Interfaces
When not using Bluetooth, set the Bluetooth security level to Middle or High in order to prevent third parties from unauthorized pairing. You can change the security level with Epson TM Utility, TM-m30 Utility, or the Interface Setup mode. You can select the main connection interface and set the time to enable interface switching from the software settings. -
Page 27: Setup
Chapter 2 Setup Setup This chapter describes setup and installation of the product and peripherals. Flow of Setup This chapter consists of the following sections along with the setup flow of the product and peripherals. Installing the Printer (page 28) Changing the Paper Width (page 30) Connecting the Optional Wireless LAN Unit (page 32) Connecting the Optional Customer Display (page 32) -
Page 28: Installing The Printer
Installing the Printer You can install the printer on a flat surface with the paper eject from top or with the paper eject from the front. Place the printer on a flat surface. Top eject position Front eject position • Take measures to prevent the printer from moving due to vibrations when using the cash drawer. •... -
Page 29: Changing To The Front Eject Position
Chapter 2 Setup Changing to the Front Eject Position You can change the eject position by replacing the rear cover and the bottom cover. At the time of purchase, paper is ejected from the top position. When changing to the front eject position, follow the steps below to replace the covers. -
Page 30: Changing The Paper Width
Changing the Paper Width You can change the paper width from 80 to 58 mm by installing the included 58-mm width roll paper guides. Follow the steps below to change the paper width. Turn off the printer when installing the roll paper guides. Open the roll paper cover. - Page 31 Chapter 2 Setup After using the printer for an extended period at 58 mm, do not return to 80 mm. Parts of the print head that do not normally touch the paper may be damaged by the platen roller, and the autocutter may wear out.
-
Page 32: Connecting The Optional Wireless Lan Unit
Connecting the Optional Wireless LAN Unit The optional Wireless LAN cable set (OT-WL02/OT-WL05/OT-WL06) enables you to use the product with a Wi-Fi connection. For more information, refer to Technical Reference Guide of the Wireless LAN cable set. • Be sure to turn off the printer when connecting the Wireless LAN unit. •... -
Page 33: Connecting The Optional External Buzzer
Chapter 2 Setup Connecting the Optional External Buzzer When the optional external buzzer (model: OT-BZ20) is connected to the drawer kick connector of the printer, you can set the printer so that it beeps when you send commands, when an error occurs, when executed autocutting, and when detected paper end. -
Page 34: Connecting The Cash Drawer
Connecting the Cash Drawer • Do not connect both the optional external buzzer and the cash drawer to the printer at the same time by using a branched connector. • When the optional external buzzer is enabled with the memory switch (customized values) (see "Software Settings"... -
Page 35: Connecting The Drawer Kick Cable
Chapter 2 Setup Pin assignments Pin number Signal name Direction Frame GND Drawer kick drive signal 1 Output Drawer kick open/close signal Input +24 V Drawer kick drive signal 2 Output 6 5 4 3 2 1 Signal GND Connecting the drawer kick cable •... -
Page 36: Connecting To The Power Source
Connecting to the Power Source • Be sure to use the specified AC adapter only. • Never insert the AC cable plug into a socket that does not meet the input voltage of the AC adapter. WARNING Doing so may result in damage to the printer. •... - Page 37 Chapter 2 Setup When charging smart devices or USB devices with Onboard USB Powers Tablet model, connect the cable to the USB connector for charging. • Make sure you use the genuine cable for the tablet, smartphone, or USB device you are using.
-
Page 38: Connecting The Printer To The Host Devices
"Network Settings" on page Wireless LAN Interface Using Epson TM Utility, you can easily connect the printer to the network from an iOS or Android devices. We also recommend connecting the SimpleAP from a Windows computer, and setting up the Wireless LAN using the network setup tool (EpsonNet Config or EpsonNet Config (Web version)). - Page 39 Necessary Items Prepare the following items. • Device for setting: iOS or Android device • Utility for setting: Epson TM Utility for iOS/Android Running Epson TM Utility for iOS/Android Run the Epson TM Utility for iOS/Android. Set from “Wi-Fi Setup Wizard” in the menu.
- Page 40 Setting up from a Windows Computer Necessary Items Prepare the following items. • Computer for setting: Windows 10/8/7/Vista Computer equipped with a wireless LAN function • Utility for setting: EpsonNet Config or EpsonNet Config (Web version) Follow the steps below to connect the printer. Turn on the printer.
-
Page 41: Bluetooth Interface
Connector, see the TM Bluetooth Connector User’s Manual. • The device name and passkey are editable with the TM-m30 Utility or Epson TM Utility. • For details about Bluetooth security settings, see "Interface Setup Mode" on page Setting up from a Smart Device Necessary Items Prepare the following items. - Page 42 3. In the Bluetooth Settings dialog box, click the Hardware tab, and then search for the Microsoft Bluetooth Enumerator. If it is not found, the Bluetooth software cannot detect the Epson Bluetooth printer, and you may not be able to connect to the computer.
- Page 43 If the window to enter a passkey appears, enter a passkey and click [OK]. Select the port to be used from the pull-down list, and then click [OK]. Printing method Port name ESDPRTxxx (TM-m30: Queue name) APD print queue UPOS ESDPRTxxx (UPOS for TM-m30) ESC/POS command Displayed virtual COM port (e.g.
- Page 44 The “Connection complete” window appears. Click [Test Buzzer] or [Test Printing] to check operation. Click [Back to Main screen] to return to the main window. ® Click the “x” button of TM Bluetooth Connector to exit. ® • If “Error” is displayed when you click the [Search] on the TM Bluetooth Connector, check whether: * The Bluetooth adapter is installed to the computer.
-
Page 45: Attaching The Power Switch Cover
Chapter 2 Setup Attaching the Power Switch Cover By attaching the power switch cover supplied, you can prevent accidental operations of the power switch. You can press the power switch by inserting a sharp-pointed object in the holes on the power switch cover. If an accident occurs with the power switch cover attached, unplug the power cord immediately. -
Page 47: Advanced Usage
With the memory switches and customized values, which are software settings for this printer, you can set the various functions. For an outline of the functions, see the following section. Use the methods shown in the table below, or ESC/ POS commands for the settings. TM Utility for iOS, TM-m30 Utility Software Item\Method for Android for Windows Setting Mode ✔... -
Page 48: Functions
∗1: Supported by Ver. 3.2.0 or later. ∗2: Enabled only under the following conditions. Epson TM Utility for iOS/Android Ver.3.6.0 or later TM-m30 Utility for Windows Ver.1.20 or later Firmware version 1.13 ESC/POS or later • For information about how to use the software setting mode, see "Software Setting Mode"... - Page 49 Chapter 3 Advanced Usage Release condition of receive buffer BUSY • Releases when the remaining receive buffer capacity becomes 256 bytes (initial setting) • Releases when the remaining receive buffer capacity becomes 138 bytes This function is enabled only when Receive buffer capacity is set to 4KB. Select paper out detector enabled for paper out signal output •...
- Page 50 Print density Selectable from 70 to 130% (5% increment) Initial setting: 100% Depending on the paper type, it is recommended to set the print density as shown in the table below for the best print quality. Original Paper type Density AF50KS-E, KT55FA, KT48FA, P30523, P31523, P35524 100% F5041(55), F5041(48)
- Page 51 • When implementing a backfeed, rubbing smears may occur due to slack in the paper. We recommend using thermal paper with high rub resistance. • You can specify values in 0.5mm steps if you use TM-m30 Utility or TM Utility for iOS/Android. Interface switch waiting time...
- Page 52 Autocutting after closing cover • Cuts (initial setting) • Does not cut Paper reduction Extra upper space reduction • Disabled (initial setting) • Enabled Extra lower space reduction • Disabled (initial setting) • Enabled Line space reduction rate • Not reduced (initial setting) •...
- Page 53 Chapter 3 Advanced Usage Font B auto replacement • Does not replace (initial setting) • Font A • Font C Font C auto replacement • Does not replace (initial setting) • Font A • Font B Multi-tone print density Selectable from 70 to 130% (5% increment) Initial setting: 100% Optional buzzer •...
- Page 54 Buzzer frequency (Pulse 1) • Does not sound • Sounds 1 time (initial setting) Sound pattern (Pulse 2) Selectable from Patterns A to E Initial setting: Pattern B Buzzer frequency (Pulse 2) • Does not sound • Sounds 1 time (initial setting) Communication condition of USB interface Class •...
-
Page 55: Network Settings
As it does not require any settings in advance to allow set up, you can easily perform set up using a computer already connected to the network. Download EpsonNet Config from the Epson website. Method 2: Setup using EpsonNet Config (Web version) This method involves opening the Web application equipped in the printer from a Web browser to perform settings. -
Page 56: Setup Using Epsonnet Config
Setup using EpsonNet Config Execute EpsonNet Config, select the target printer from the displayed device list, then check and change the settings. If the printer is still set to factory defaults, the printer's MAC address is listed up, even if the computer does not have the same network address. -
Page 57: Setup Using Epsonnet Config (Web Version)
Input your user name and password on the authentication window. • The default setting for the password varies depending on the firmware version. Firmware version User name Password Before 1.48A/1.48B ESC/POS "epson" "epson" 1.48A/1.48B ESC/POS or later "epson" Product serial number (10 alphanumeric characters, case sensitive) You can check the firmware version using the self-test ("Self-test Mode"... -
Page 58: Setup Using Arp/Ping Commands
After changing the necessary parameters, click the [Send] button. The changes are sent to the printer. Click the [Reset] button on the Web page displayed after sending. The sent contents are enabled. Depending on the changes, such as the IP address, the connection with the setting computer may be cut and the EpsonNet Config window may not be displayed. -
Page 59: Setting/Check Modes
Chapter 3 Advanced Usage Setting/Check Modes As well as print mode, the following modes are also provided for making various printer settings and checking items. • Self-test mode • NV graphics information print mode • Receipt Enhancement information print mode •... - Page 60 In 1 and 2, the following guidances are printed, the Paper LED flashes, and instructs the user's operations. 1. Continuing self-test guidance 2. Mode selection guidance Mode Selection Modes 0: Exit and Reboot Printer 1: NV Graphics Information 2: Receipt Enhancement Information 3: Customize Value Settings 4: Restore Default Values 5: Interface Setup...
-
Page 61: Self-Test Mode
Chapter 3 Advanced Usage Self-test Mode You can check the following items using the self-test. • Product name • Firmware version • Product serial number • Interface type • Peripheral device information • Resident fonts • Maintenance counter information (head running length, number of times of autocutting) Follow the steps below. -
Page 62: Receipt Enhancement Information Print Mode
After briefly (less than one second) pressing the Feed button once, hold it down for at least one second, to print the NV graphics information. After information printing, the Mode selection guidance is printed again. To finish, turn off the power, or select “Exit and Reboot Printer”. Receipt Enhancement Information Print Mode You can check the following items using the R/E information mode: •... - Page 63 Chapter 3 Advanced Usage • Interface switch waiting time • Main connection interface • Pre-feed before next print For details on the memory switches and customized values, see "Software Settings" on page Follow the steps below. After running a self test, hold down the Feed button for at least one second to enter the Mode selection.
-
Page 64: Restore Default Values Mode
After briefly pressing the Feed button (less than one second) for the number of times shown in the print result, hold down the button for more than one second to select the setting items. The setting selected as the setting item, the current settings and initial settings are printed. Depending on the setting item, you may need to continue selecting the setting item before the settings are printed. -
Page 65: Interface Setup Mode
Chapter 3 Advanced Usage Briefly press the Feed button four times (less than one second), hold it down for at least one second to enter the Restore Default Values. The guidance is printed. Briefly press the Feed button once (less than one second), hold it down for at least one second. - Page 66 • For details on the auto re-connect function, see "Auto Reconnect Feature" on page 114. • You can change the settings with TM-m30 Utility and TM Utility for iOS. Bluetooth Security Settings (Bluetooth model) models, select [Bluetooth Setup], and then select [Security], and you can change the security settings.
-
Page 67: Hexadecimal Dumping Mode
Chapter 3 Advanced Usage Pairing method when the security is set to High (from the host) When the security is set to High and the printer is ready to be paired, perform the following procedure. Search for the printer on the Bluetooth settings screen on the host device. Select the printer you want to pair with. - Page 68 To close hexadecimal dumping mode, turn off the printer after printing is complete, or press the Feed button for three times.
-
Page 69: Printing A Status Sheet
Chapter 3 Advanced Usage Printing a Status Sheet Follow the steps below to check the interface settings. You cannot print after turning on the power while the Power LED is flashing. Using the Status Sheet Button Check that the printer is turned on. Make sure the roll paper cover is closed. - Page 70 Close the roll paper cover. The status sheet is printed. After printing, the printer returns to the standard mode. • After the status sheet is printed, only the print settings of the mainly connected interface are retained. For the mainly connected interface, see "Printing Using Multiple Interfaces"...
- Page 71 : Low Transmission : Unknown Access Point : Unknown Bluetooth Status Signal Level : Unknown : XXXXXXXXXXXX : TM-m30 Ethernet Status MAC Address : XX-XX-XX-XX-XX-XX Physical Layer : Auto-negotiation Link Status : Disconnect Ethernet * * * Wi-Fi & Ethernet Interface * * *...
-
Page 72: Resetting The Interface Settings
Resetting the Interface Settings Follow the steps below to restore the network settings to the factory defaults. You can return the interface settings to their defaults from the Interface Setup mode. See "Interface Setup Mode" on page 65 for details on the Interface Setup mode. Turn off the printer and close the roll paper cover. -
Page 73: Epsonnet Config (Web Version)
EpsonNet Config (Web Version) This section explains items that can be displayed in the Web application EpsonNet Config (Web version) built- into the TM-m30, as well as items that can be set. Information Menu On the Information menu, you can check the following settings. For the details of each protocol or the settings other than the Information menu, check the Configuration menu. -
Page 74: Configuration Menu
Configuration Menu On the Configuration menu, you can check and set the following items. • For the setting method, see "Setup using EpsonNet Config (Web version)" on page • Items that can be set vary depending on the wireless LAN unit being used. Ethernet You can check and set the communication standard. - Page 75 Chapter 3 Advanced Usage Security SSL/TLS You can check and set the SSL/TLS. • Selection of the server certificate type (Selfsigned Certificate / CA signed Certificate1 / CA signed Certificate2 / CA signed Certificate3) • Encryption strength setting (Medium / Low / High) •...
- Page 76 DNS/DDNS This sets the DNS server address (IPv4). • Setting for automatic acquisition of the DNS server address (Disable / Enable) • DNS server address setting This sets the host name and domain name. • Setting for automatic acquisition of the host name and domain name (Disable / Enable) •...
- Page 77 Chapter 3 Advanced Usage Bonjour This sets Bonjour. • Bonjour setting (Disable / Enable) • Name input for when using Bonjour* • Printer name setting for when using Bonjour* • Installation location input * You can use upper and lower case alphabet characters, numerals and hyphens, however, only use upper and lower case alphabet characters for the initial character.
-
Page 78: Optional Menu
You can set the administrator information. You can set up to 255 ASCII characters. • Administrator name setting This is different from the user name used in password authentication. (The user name is fixed to "epson".) • Installation location setting Reset This resets the printer or returns the network settings to default settings. -
Page 79: Application Development Information
• Epson TM/BA Series Thermal Printer Driver ePOS-Print XML ePOS-Print XML is the Epson original control command system for POS printers defined in XML. With ePOS- Print XML commands, you can print in environments where http communication is available and from OS applications. -
Page 80: Controlling The Cash Drawer
Register a cash drawer using the SetupPOS Utility, and control using the OpenDrawer method or the DirectIO function. For details, see the "EPSON OPOS ADK for .NET MANUAL Application Development Guide Cash Drawer (EPSON Standard)" and the "UnifiedPOS Specification". Epson ePOS SDK The output command for the drawer kick pulse and the status transmission command are provided in each SDK library. -
Page 81: Controlling The Optional External Buzzer
(TM Series)". OPOS for .NET Register a POS printer using the SetupPOS Utility and control using the DirectIO function. For details, see the "EPSON OPOS ADK for .NET MANUAL Application Development Guide POSPrinter (TM-m30)". Epson ePOS SDK The command for the buzzer function is provided in each SDK library. For details, see the user's manuals pro- vided with each SDK. -
Page 82: Software
Because controlling POS peripherals with original commands is not required on the application side, efficient system development is possible. EPSON OPOS ADK for .NET The OPOS ADK for .NET is a POS industry standard printer driver compatible with Microsoft POS for .NET. It allows you to develop applications that are compatible with the UPOS (Unified POS) specification. -
Page 83: Drivers
In addition to ordinary Windows printer driver functions, this driver has controls Windows Printer Driver (APD) specific to POS. The Status API (Epson original DLL) that monitors printer status and sends ESC/POS commands is also attached to this driver. EPSON TM Virtual... -
Page 84: Others
TM printers for the first time, or when configuring multiple TM printers at the same time. Monitoring Tool Use to check a list of status for the Epson printers connected to the network. Windows You can also update certificates for multiple printers used for WPA-Enterprise in a batch. -
Page 85: Application Development And Distribution For Ios
Application Development and Distribution for iOS If registering an application that uses in the App Store, Epson must submit an application to Apple in advance. Please apply for each application you want to register in the App Store from the URL below. -
Page 86: Notes On Printing Barcodes And Two-Dimensional Symbols
Notes on Printing Barcodes and Two-dimensional Symbols The user must set the quiet zone, depending on the barcode standards. • When printing PDF417 (two-dimensional symbols), the following are recommended: Module height: 3 to 5 times the module width Vertical size of the symbol: approximately 5 mm {0.20"} or more •... -
Page 87: Handling
Chapter 5 Handling Handling This chapter describes basic handling of the printer. Installing Roll Paper Follow the steps below to install the roll paper. Make sure you use a specified roll paper type. Use the cover open lever to open the roll paper cover. Remove the used roll paper core if any, and insert the roll paper. - Page 88 Load the roll paper in the correct direction. Pull out some paper, and close the roll paper cover. When the printer power is on, the roll paper is automatically cut.
-
Page 89: Removing Jammed Paper
Chapter 5 Handling Removing Jammed Paper Do not touch the thermal head and its surroundings. After printing, the thermal head and its surroundings can be very hot. CAUTION When a paper jam occurs, never pull out the paper forcibly. Follow the steps below if the roll paper is jammed. Turn off the printer Open the roll paper cover. -
Page 90: Roll Paper Cover Does Not Open
Roll Paper Cover does not Open When the roll paper cover does not open using the lever, restart the printer. -
Page 91: Cleaning The Printer
Chapter 5 Handling Cleaning the Printer Cleaning the Printer Case Be sure to turn off the printer, and wipe the dirt off the printer case with a dry cloth or a damp cloth. Be sure to unplug the AC cable while cleaning. Never clean the product with alcohol, benzine, thinner, or other such solvents. -
Page 92: Preparing For Transport
Preparing for Transport Follow the steps below to transport the printer. Turn off the printer. Confirm that the Power LED is off. Disconnect the AC cable from the socket. Remove the roll paper. Pack the printer upright. -
Page 93: Removing/Attaching The Rear And Bottom Covers
Chapter 5 Handling Removing/Attaching the Rear and Bottom Covers Removing the Covers Follow the steps below to remove the covers. For the top eject position Use your finger to remove the rear cover as shown in the illustration. - Page 94 Use your finger to remove the bottom cover as shown in the illustration. For the front eject position Use your finger to remove the rear cover as shown in the illustration.
-
Page 95: Attaching The Covers
Chapter 5 Handling Use your finger to remove the bottom cover as shown in the illustration. Attaching the Covers Follow the steps below to attach the covers. For the top eject position Align the catches and attach the bottom cover to the printer. - Page 96 Hook the catches into the bottom cover and attach the rear cover to the printer. For the front eject position Align the catches and attach the rear cover to the printer.
- Page 97 Chapter 5 Handling Hook the catches into the rear cover and attach the bottom cover to the printer.
-
Page 99: Appendix
Appendix Appendix Product Specifications Printing method Thermal line printing Printing direction Two directional with friction feed Paper feed speed 200 mm/s {7.87"/s} (continuous paper feeding with the Feed button) Cutting method Partial cut (cutting with one point in center left uncut) Interface Standard model Ethernet [10BASE-T/100BASE-TX]... - Page 100 Power Standard model Operating 26.6 W (AC 115 V/60 Hz) consumption Standby 0.44 W (AC 115 V/60 Hz) Wi-Fi model Operating 26.6 W (AC 115 V/60 Hz) Standby 1.67 W (AC 115 V/60 Hz) Bluetooth model Operating 26.6 W (AC 115 V/60 Hz) Standby 0.44 W (AC 115 V/60 Hz) Onboard USB...
-
Page 101: Printing Specifications
Appendix Printing Specifications Paper width 58 mm Paper width 80 mm Printing method Thermal line printing Dot density 203 × 203 dpi Printing width 52.5 mm {2.07"}, 420 dots 72.0 mm {2.83"}, 576 dots Character spacing Font A 0.25 mm {0.0098"} (2 dots) Font B 0.125 mm {0.0049"} (1 dot) Font C... - Page 102 Character structure Font A 12 × 24 (including 2-dot horizontal spacing) Font B 10 × 24 (including 1-dot horizontal spacing) Font C 9 × 17 (including 2-dot horizontal spacing) Special Font A 12 × 24 (including 2-dot horizontal spacing) Special Font B 9 ×...
-
Page 103: Paper Specifications
Appendix Special Font B 46/46/23/23 64/64/32/32 Kanji font A 17/17/8/8 24/24/12/12 Kanji font B 26/26/13/13 36/36/18/18 Paper Specifications Paper width 58 mm Paper width 80 mm Paper types Specified thermal paper Form Roll paper Size Roll paper diameter 83 mm {3.27"} maximum Roll paper core Outside: 18 mm {0.71"} Roll width when taken up... -
Page 104: Printable Area
Printable Area For paper width 80 mm The maximum printable area of paper with a width of 79.5 ± 0.5 mm is 72.0 ± 0.2 mm (576 dots), and the approximate space is 3.75 mm on both sides. 79.5 ± 0.5 mm {3.13 ± 0.02"} 72 ±... -
Page 105: Printing And Cutting Positions
Appendix Printing and Cutting Positions Manualcutter position Approx. 20.0 mm {0.79"} Approx. 9.5 mm {0.37"} Autocutter position Center of the print dotline Paper feed direction • The values above may vary slightly as a result of paper slack or variations in the paper. Take this into account when setting the cutting position of the autocutter. -
Page 106: Environmental Conditions
Acoustic noise (operating) Approximately 55 dB (bystander position) Note: The values above are measured in the Epson evaluation condition. Acoustic noise differs depending on the paper used, printing contents, and the setting values, such as print speed or print density. -
Page 107: External Dimensions
Appendix External Dimensions Top eject position [Unit: mm]... - Page 108 Front eject position [Unit: mm]...
-
Page 109: Specifications Of Interface And Connector
USB vendor-defined class USB printer class Vendor ID 04B8h 04B8h Product ID 0202h 0E20h String Descriptor Manufacturer EPSON EPSON Product TM-m30 TM-m30 Serial number Charac ter string based on the Charac ter string based on the product serial number product serial number... -
Page 110: Network Interface
Network Interface For both Ethernet interface and Wi-Fi interface Support protocols Protocols Usage IP, ARP, ICMP, UDP, TCP Basic communication protocols LP, LPR, TCP Socket Port Printing protocols HTTP/HTTPS Used in ePOS-Print, ePOS-Display, and EpsonNet Config (Web version) SNMP, ENPC Used in setting and monitoring DHCP, APIPA Used in automatic setting for the IP address and so on... - Page 111 1.45A ESC/POS or later, or 1.45B ESC/POS or later You can perform a firmware update by using the TM-m30 Firmware Updater if using a Windows computer, or by using the Epson TM Utility if using a smart device. For details, see "Utilities"...
- Page 112 When using OT-WL05: • IEEE802.11b (2.4 GHz) • IEEE802.11g (2.4 GHz) • IEEE802.11n (2.4 GHz) • IEEE802.11a (5 GHz) • IEEE802.11n (5 GHz) When using OT-WL06 • IEEE802.11b (2.4 GHz) • IEEE802.11g (2.4 GHz) • IEEE802.11n (2.4 GHz) • IEEE802.11a (5 GHz) •...
- Page 113 Appendix Notes on Using the Wi-Fi Model • Keep the printer away from the devices, such as kitchen microwaves, that may cause radio wave interference. • Use channels that are away from the frequency bands that may cause radio wave interference. •...
-
Page 114: Bluetooth Interface
Bluetooth Interface Countries and regions where Bluetooth can be used are limited. Since notes are provided for each country, check the sheet supplied with the product. Specification • 3.0 (EDR supported) • Power Class 2 • Built-in antenna • Pass key setting is possible •... - Page 115 Method 2: After disconnecting from the connected iOS device using applications with the TM Utility or Epson ePOS SDK/ePOS-Print SDK disconnection feature, make settings on the Bluetooth device you want to connect. ∗ In the following situations, even if the feature is enabled, the same operations are performed as when it is disabled.
- Page 116 • When the paper is out Solution Do not send data to the printer if the printer is not ready to print. For developers using the SDK from Epson, see the User's Manual - Chapter 3 Programming Guide - "Printing After Checking the Printer Status".
-
Page 117: Nfc Tag
When using the SDK from Epson, this connection process is not necessary. The iOS application cannot receive the data sent from the printer Situation Although the printer sends data to the iOS device and the data is received by the iOS device, depending on the combination of the iOS version and the iOS device, the iOS application may not be able to receive the data. -
Page 118: Character Code Tables
Character Code Tables Refer to the following URL regarding the character code table. www.epson-biz.com/pos/reference/charcode/... -
Page 119: Compatibility With Usb Type-A
Appendix Compatibility with USB Type-A Devices can be connected to the USB Type-A connector of the TM-m30 in the following ways. TM-m30 Direct connection Secondary connection Wireless LAN unit of OT-WLxx Extension cable of OT-WLxx Barcode scanner DM-D30 (f )
Need help?
Do you have a question about the TM-m30 and is the answer not in the manual?
Questions and answers