
Related Manuals for Varian CP-3800 GC


Summary of Contents for Varian CP-3800 GC
- Page 1 (217) 352-9330 | Click HERE Find the Agilent / Varian Saturn 2000 at our website:...
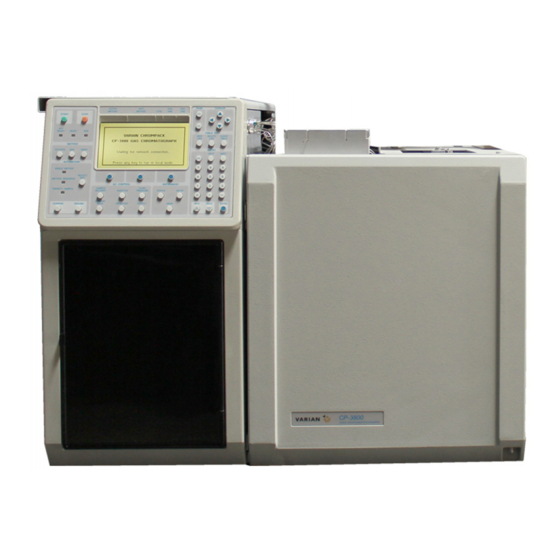
- Page 2 Operator’s Manual 3800 Keyboard and Display Sample Introduction Detectors Communications Local Automation Varian, Inc. 2700 Mitchell Drive Walnut Creek, CA 94598-1675/usa ©Varian, Inc. 2000 - 2004 03-914648-00:Rev. 7 Artisan Technology Group - Quality Instrumentation ... Guaranteed | (888) 88-SOURCE | www.artisantg.com...
- Page 3 Artisan Technology Group - Quality Instrumentation ... Guaranteed | (888) 88-SOURCE | www.artisantg.com...
-
Page 4: Table Of Contents
Manual Pneumatics ....................64 1177 Modes of Operation ................... 65 Testing the 1177 Injector Performance ..............66 The 1079 Universal Capillary Injector ................. 67 CP-3800 GC Operator’s Manual Artisan Technology Group - Quality Instrumentation ... Guaranteed | (888) 88-SOURCE | www.artisantg.com... - Page 5 Features of the 1079 injector ..................68 Automatic Start Switch ....................68 1079 Injector Assembly....................69 1079 Injector Inserts....................70 1079 Modes of Injection ....................71 1079 Flow Diagram .....................73 1079 Pneumatics ......................74 Operation of the 1079 Injector ..................75 Setting 1079 Gas Flow Rates ..................78 EFC Pneumatics ......................78 Gas Saver ..........................81 Manual Pneumatics.....................82...
- Page 6 Figure 16 Structure of Components in the TSD Test Sam*ple ..........119 Figure 17 TSD Exploded View ....................122 Figure 18 TSD Cross-Sectional View..................125 Figure 19 TCD Sensitivity and Amplification ................. 133 CP-3800 GC Operator’s Manual Artisan Technology Group - Quality Instrumentation ... Guaranteed | (888) 88-SOURCE | www.artisantg.com...
- Page 7 Figure 20 Cross-Sectional View of the ECD................. 145 Figure 21 Radioactive Caution Label - Factory Installed ............147 Figure 22 Radioactive Caution Label - User Installed ............147 Figure 23 3800 GC Ethernet Connection ................156 Figure 24 10Base2 Ethernet Components ................157 Figure 25 3800 GC to Star Workstation Connection ............
- Page 8 Table 23 Chromatographic Conditions for Testing the 1061 Injector........101 Table 24 TSD Gases, Pressures, Purity, and Flow Rates ........... 120 Table 25 ECD Gases, Pressures, Purity, and Flow Rates........... 143 CP-3800 GC Operator’s Manual Artisan Technology Group - Quality Instrumentation ... Guaranteed | (888) 88-SOURCE | www.artisantg.com...
- Page 9 03-914648-00:7 Artisan Technology Group - Quality Instrumentation ... Guaranteed | (888) 88-SOURCE | www.artisantg.com...
-
Page 10: 3800 Keyboard And Display
Set (°C): 250 Actual (°C): 250 Split Ratio: Off FRONT 1079, Page 3 of 3 Time Split State Split Ratio Initial 0.75 1.50 CP-3800 GC Operator’s Manual Artisan Technology Group - Quality Instrumentation ... Guaranteed | (888) 88-SOURCE | www.artisantg.com... - Page 11 The top line of each page identifies the method that is currently active, the method that is currently available to edit, whether the GC is under local or remote control (if the 3800 is under remote control then a computer icon appears in the middle of the top line of the display), and finally, the current run time and the end time of the active method.
-
Page 12: The 3800 Keyboard
Contains the START and STOP keys to manually start or stop a Start/Stop run. Not Ready, Ready, and Run lights indicate the GC status. These sections are described in detail in the following paragraphs. CP-3800 GC Operator’s Manual Artisan Technology Group - Quality Instrumentation ... Guaranteed | (888) 88-SOURCE | www.artisantg.com... -
Page 13: Page And Cursor Keys
PAGE and CURSOR Keys PAGE CURSOR The PAGE and CURSOR keys allow you to move around the display and between screens. Pressing the UP arrow key backs up to the previous page; likewise, the DOWN arrow key advances to the next page. If no next or previous page exists, then pressing these keys has no effect. -
Page 14: Entry Keys
If the parameter is changed, pressing ENTER will implement the new value but not advance the cursor. ENTER can then be pressed a second time to advance the cursor. CP-3800 GC Operator’s Manual Artisan Technology Group - Quality Instrumentation ... Guaranteed | (888) 88-SOURCE | www.artisantg.com... -
Page 15: Instrument Keys
INSTRUMENT Keys INSTRUMENT The Instrument keys are typically the first sections of the keyboard that a new user will encounter. SETUP is used to configure the GC STATUS SETUP for its installed options and their locations. STATUS is where you can monitor the current status, such as zone temperatures and detector signals. -
Page 16: Setup Parameters
“front FID”, “middle TSD” and “rear ECD.” The SETUP screen below shows a typical 3800 configuration where four of the available heated zones are configured and two are free. CP-3800 GC Operator’s Manual Artisan Technology Group - Quality Instrumentation ... Guaranteed | (888) 88-SOURCE | www.artisantg.com... - Page 17 ACTIVE EDIT CTRL METHOD METHOD TIME TIME EDIT HEATED ZONES Zone Type Temp Limit Location Coolant Col Oven Col Oven 450 (°C) Col Oven None 1079 450 (°C) Front 1079 450 (°C) Middle None 450 (°C) Rear None 450 (°C) Front None 450 (°C)
- Page 18 The septum purge flow rate is adjustable but is typically set at 3 - 5 mL/min. Save and Exit Save the changed parameters and reinitialize the 3800. CP-3800 GC Operator’s Manual Artisan Technology Group - Quality Instrumentation ... Guaranteed | (888) 88-SOURCE | www.artisantg.com...
- Page 19 Outlet Pressure Atm if the column exit is to atmospheric pressure Vacuum if the column is connected to a vacuum source, e.g., Varian Mass Spectrometer. Pressure Display Units psi, bar, kPa, depending on which pressure units that you want to display.
- Page 20 AutoCalibration. Note that AutoCalibration should be done on a semiannual basis, or whenever an EFC module is changed. Save and Exit Save the changed parameters and reinitialize the 3800. CP-3800 GC Operator’s Manual Artisan Technology Group - Quality Instrumentation ... Guaranteed | (888) 88-SOURCE | www.artisantg.com...
- Page 21 Type 12 Type 12 EFC is a detector EFC module specifically designed for the Thermionic Specific Detector (TSD). It is a flow controlled system with three independent channels, channel 1 for make-up flow, channel 2 for hydrogen flow and channel 3 for air flow. Note that the only parameter that can be changed in the type 12 Setup screen is the choice of make-up gas.
- Page 22 AutoCalibration. Note that AutoCalibration should be done on a semiannual basis, or whenever an EFC module is changed. Save and Exit Save the changed parameters and reinitialize the 3800. CP-3800 GC Operator’s Manual Artisan Technology Group - Quality Instrumentation ... Guaranteed | (888) 88-SOURCE | www.artisantg.com...
- Page 23 Type 14 EFC is a detector EFC module specifically designed for the Type 14 Thermal Conductivity Detector (TCD). It is a flow controlled system with two independent channels, channel 1 for make-up flow and channel 2 for reference flow (or make-up flow if two capillary columns are used with the TCD).
- Page 24 AutoCalibration. Note that AutoCalibration should be done on a semiannual basis, or whenever an EFC module is changed. Save and Exit Save the changed parameters and reinitialize the 3800. CP-3800 GC Operator’s Manual Artisan Technology Group - Quality Instrumentation ... Guaranteed | (888) 88-SOURCE | www.artisantg.com...
- Page 25 Type 16 Type 16 EFC is a detector EFC module specifically designed for the Thermal Conductivity Detector (TCD) when used with Hydrogen gas. It is a flow controlled system with two independent channels, channel 1 for make- up flow and channel 2 for reference flow (or make-up flow if two capillary columns are used with the TCD).
- Page 26 The following example is shown for a 3800 with two capillary columns installed. ACTIVE EDIT CTRL METHOD METHOD TIME TIME EDIT COLUMN PARAMETERS Location Carrier Length Front 30.00 Middle 30.00 Rear 0.00 Save and Exit CP-3800 GC Operator’s Manual Artisan Technology Group - Quality Instrumentation ... Guaranteed | (888) 88-SOURCE | www.artisantg.com...
- Page 27 Sample This section has parameters for an autosampler, if installed, and valving. Delivery Setup In this section you configure which injectors you want the 8400 to injector into. You Autosampler also select the syringe capacity. This section configures the seven external events available on the 3800 that are Valves typically used to control the CP-1177 and 1079 split valve with manual pneumatics (non-EFC) or actuators for sampling or switching valves.
-
Page 28: Instrument Status Key
The column oven temperature appears on all pages. The PAGE UP/DOWN keys can be used to move between the pages CP-3800 GC Operator’s Manual Artisan Technology Group - Quality Instrumentation ... Guaranteed | (888) 88-SOURCE | www.artisantg.com... - Page 29 or the CURSOR UP/DOWN keys can be used to scroll one line at a time. Status parameters appear in the same order as the sample flows through the system, i.e., Injector, Flow / Pressure, Column Oven, Detector, and Output. Local Automation status indicates the current automation status if a series of runs has been started from the local keyboard of the 3800.
-
Page 30: Instrument Menu Key
To disable remote control, move the cursor to the Enable field and toggle to “Prevent” using the INCR or DECR key. CP-3800 GC Operator’s Manual Artisan Technology Group - Quality Instrumentation ... Guaranteed | (888) 88-SOURCE | www.artisantg.com... - Page 31 ACTIVE EDIT CTRL METHOD METHOD TIME TIME Method 1 Method 1 0.00 20.00 REMOTE / LOCAL CONTROL Enable Ethernet Address: XX:XX:XX:XX:XX:XX IP Address: XXX.XXX.XX.XXX Alias: 3800A The Standby Mode allows you to set a standby temperature for the column oven. This standby temperature will be invoked after the timer counts to zero, provided another run is not started before the timer has timed out.
-
Page 32: Method
XX/XX/XX XX.XX Method 3 XX/XX/XX XX.XX Method 7 XX/XX/XX XX.XX Method 4 XX/XX/XX XX.XX Method 8 XX/XX/XX XX.XX Activate Method: Method 1 Activate Now CP-3800 GC Operator’s Manual Artisan Technology Group - Quality Instrumentation ... Guaranteed | (888) 88-SOURCE | www.artisantg.com... - Page 33 EDIT Method The EDIT key allows you to select one of the eight methods to edit. The active method is the default selection to edit, which allows quick access to modifying the active method. The components available to edit are those that have been configured earlier in the Instrument SETUP section.
- Page 34 CTRL METHOD METHOD TIME TIME Method 1 Method 1 0.00 20.00 COPY METHOD Copy From Method 1 Copy To Method 2 COPY NOW CP-3800 GC Operator’s Manual Artisan Technology Group - Quality Instrumentation ... Guaranteed | (888) 88-SOURCE | www.artisantg.com...
- Page 35 Preset to This allows you to set all of the parameters in the selected method back to Defaults default values. ACTIVE EDIT CTRL METHOD METHOD TIME TIME Method 1 Method 1 0.00 20.00 PRESET TO DEFAULTS Method Name Method 1 Preset New Lock/Unlock This allows you to prevent unauthorized changes to a method.
-
Page 36: Gc Control
OUTPUT GC Control screens for each component have the following format: • Status • Name and Location • Method Section • Softkey Commands CP-3800 GC Operator’s Manual Artisan Technology Group - Quality Instrumentation ... Guaranteed | (888) 88-SOURCE | www.artisantg.com... -
Page 37: Sample Delivery Key
Pressing a GC Control key will cause the appropriate screen to be displayed. If more than one component of that type is installed on the GC, e.g., two injectors, you will be asked to choose which one you wish to program or check the status of. - Page 38 2 GSV Fill 3 FSV ON 4 RSV ON 5 None 6 None 7 None VALVE TABLE Time None None None Initial 0.01 0.75 CP-3800 GC Operator’s Manual Artisan Technology Group - Quality Instrumentation ... Guaranteed | (888) 88-SOURCE | www.artisantg.com...
-
Page 39: Injector Key
Below is the complete set of valve names and associated states that are available for programming. Valve Type Abbreviation Default State (-) Energized State (+) Front Split Valve ON (split) OFF (s/less) Middle Split Valve ON (split) OFF (s/less) Rear Split Valve ON (split) OFF (s/less) Gas Sampling Valve... - Page 40 EDIT CTRL METHOD METHOD TIME TIME Method 1 Method 1 0.00 20.00 INJECTOR MENU [1.] Front 1177: [2.] Middle 1079 [3.] Rear 1041 CP-3800 GC Operator’s Manual Artisan Technology Group - Quality Instrumentation ... Guaranteed | (888) 88-SOURCE | www.artisantg.com...
- Page 41 The Injector Component Screen (below) is displayed once you select from the above Injector menu or if only one injector installed. This screen contains the Injector Status information [Setpoint and Actual Temperature, Split State (if EFC equipped)], Injector Component Method instructions, a prompt line, and softkeys.
- Page 42 If the injector is equipped with manual pneumatics, then the injector split state is programmed in the VALVE TABLE of the SAMPLE DELIVERY section. CP-3800 GC Operator’s Manual Artisan Technology Group - Quality Instrumentation ... Guaranteed | (888) 88-SOURCE | www.artisantg.com...
- Page 43 1079 Injector The 1079 has three pages: Page Description Temperature control and programming Oven power and cryogenic parameters (if configured in Setup) Split state programming (if type 1 EFC is installed) If the 1079 has manual pneumatics, then the split valve is programmed in the valve table located in SAMPLE DELIVERY.
- Page 44 Split State is OFF indicating that when the sample is injected all the sample vapor should enter the column. After 0.75 minutes, the split state is switched to ON with a 100:1 split ratio. CP-3800 GC Operator’s Manual Artisan Technology Group - Quality Instrumentation ... Guaranteed | (888) 88-SOURCE | www.artisantg.com...
- Page 45 ACTIVE EDIT CTRL METHOD METHOD TIME TIME Method 1 Method 1 0.00 20.00 Set (°C): 50 Actual (°C): 50 Split Ratio: OFF FRONT 1079, Page 3 of 3. Time Split State Split Ratio Initial 0.75 Default Range Time (min) Initial [0.00 - 999.99] Split State [On/Off]...
-
Page 46: Valve Oven
Select the module that you want to view the status of/or change method parameters. CP-3800 GC Operator’s Manual Artisan Technology Group - Quality Instrumentation ... Guaranteed | (888) 88-SOURCE | www.artisantg.com... - Page 47 Type 1 EFC Type 1 EFC, used with the either the CP-1177 or 1079 injector, allows you to maintain a constant pressure or to build a pressure program to maintain constant column flow while temperature programming the column oven. An example of a Type 1 EFC method is shown below. The status field displays the column head pressure (in the units chosen in Setup), calculated column flow rate, calculated column linear velocity, total flow and split ratio status.
-
Page 48: Gas Saver
EFC module is installed. Failure to AutoCalibrate may cause a mismatch between set and actual flowrates resulting in a Not Ready condition in the CP-3800. CP-3800 GC Operator’s Manual Artisan Technology Group - Quality Instrumentation ... Guaranteed | (888) 88-SOURCE | www.artisantg.com... - Page 49 Type 3 EFC Type 3 EFC, used with the 1041 and 1061 injectors, allows you to set a constant column flow or to program the column flow. An example of a Type 3 EFC method is shown below. The status field displays the column pressure (in the units chosen in Setup), actual flow rate, calculated linear velocity.
- Page 50 Linear Vel. (cm/sec): 125 cm/sec Total Flow (mL/min): 30 REAR EFC Type 4, Page 2 of 2 Time Total Flow (mL/min) Initial 0.00 0.50 CP-3800 GC Operator’s Manual Artisan Technology Group - Quality Instrumentation ... Guaranteed | (888) 88-SOURCE | www.artisantg.com...
-
Page 51: Column Oven Key
The COLUMN OVEN section allows you to establish the column oven COLUMN temperature, build a temperature program, or view the column oven status. OVEN Key The status field for the COLUMN OVEN indicates the programmed set temperature, the actual measured temperature, the set or remaining stabilization time and whether the column oven is turned on or off. -
Page 52: Detector Key
If detector EFC is installed, then page 2 of adjustments allows setting the appropriate flow rates for an FID. CP-3800 GC Operator’s Manual Artisan Technology Group - Quality Instrumentation ... Guaranteed | (888) 88-SOURCE | www.artisantg.com... - Page 53 The screen below indicates the set and actual detector oven temperature FID (Flame and the FID analog signal level. Ionization Detector) The method parameters, default settings, and range are: Default Range Oven Power [On/Off] [50 - 450 °C] Temperature (°C) Electronics [On/Off] Range...
- Page 54 0.00 20.00 Set (°C): 300 Actual (°C): 300 Signal (mV): 5.15 FRONT FID ADJUSTMENTS, Page 1 of 2 Time Constant: Fast Clear AUTOZERO CP-3800 GC Operator’s Manual Artisan Technology Group - Quality Instrumentation ... Guaranteed | (888) 88-SOURCE | www.artisantg.com...
- Page 55 Page two, on GCs purchased with detector EFC parameters, is accessed by pressing the PAGE DOWN key. ACTIVE EDIT CTRL METHOD METHOD TIME TIME Method 1 Method 1 0.00 20.00 Make-up Flow (ml/min): 25 H2 Flow (ml/min): 30 Air Flow (ml/min): 300 FRONT FID ADJUSTMENTS, Page 2 of 2 Make-up Flow (ml/min) Flow (ml/min)
-
Page 56: Output Key
0.00 20.00 Detector: Front: FID Middle: TSD Rear: FID ANALOG OUTPUT PORT A Time Signal Source Attenuation Initial Front Detector 10.00 Middle Detector CP-3800 GC Operator’s Manual Artisan Technology Group - Quality Instrumentation ... Guaranteed | (888) 88-SOURCE | www.artisantg.com... - Page 57 03-914648-00:7 Artisan Technology Group - Quality Instrumentation ... Guaranteed | (888) 88-SOURCE | www.artisantg.com...
-
Page 58: Sample Introduction
Optional actuators are available to automate the function on the sampling valves. In addition to sampling valves, Varian also supplies a large number of switching valve configurations. CP-3800 GC Operator’s Manual... -
Page 59: External Sample Introduction Systems
External Sample Introduction Systems In addition to liquid injectors and sampling valves, several external sampling systems can be used with the 3800. The most common are the 8400/8410, 8200 AutoSamplers, Purge, and Trap System, and the Heated Headspace System. These sampling systems are supplied with individual operator’s manuals. -
Page 60: The Cp-1177 Split/Splitless Capillary Injector
• The CP-1177 uses a unique dual split vent that allows effective sweeping of the entire injector body. CP-3800 GC Operator’s Manual Artisan Technology Group - Quality Instrumentation ... Guaranteed | (888) 88-SOURCE | www.artisantg.com... -
Page 61: Automatic Start Switch
Automatic Start Switch The automatic start switch is a spring loaded actuator that fits over, and is aligned with, the injection port of the CP-1177 injector nut. The GC run is started when the actuator is depressed by the syringe barrel, or manually pressed at the moment of sample injection. -
Page 62: Cp-1177 Injector Inserts
The following are brief descriptions of the various modes of injection. More detailed information on each mode is given later in this section. CP-3800 GC Operator’s Manual Artisan Technology Group - Quality Instrumentation ... Guaranteed | (888) 88-SOURCE | www.artisantg.com... - Page 63 If you are using the CP-8400 AutoSampler use the Standard Split/Splitless mode of injection. If you are using a non- Varian AutoSampler or you are using the User Defined Mode of operation on either the CP-8400 or the 8200 AutoSamplers, if the sample injection time...
-
Page 64: Cp-1177 Flow Diagram
CP-1177 Flow Diagram Refer to Figure 6 for the flow path in the CP-1177 Injector. Figure 2 CP-1177 Injector Flow Path CP-3800 GC Operator’s Manual Artisan Technology Group - Quality Instrumentation ... Guaranteed | (888) 88-SOURCE | www.artisantg.com... -
Page 65: Cp-1177 Pneumatics
CP-1177 Pneumatics CP-1177 Electronic Flow Control The Electronic Flow Control module used on a CP-1177 injector is identified as a type 1 EFC. This EFC type is designed specifically for the CP-1177 and 1079 injectors to support their various modes of operation. In simple terms it duplicates the behavior of the Split/Splitless manual pneumatics system in that there is an inlet mass flow controller supplying carrier gas to the injector and a pressure control valve downstream from the injector which sets the... -
Page 66: Operation Of The Cp-1177 Injector
The following procedure describes the installation (or reinstallation) of a Installation capillary column in a Varian 3800 GC equipped with a CP-1177 injector. Each step of the procedure is described in detail: Refer to Figure 8 when preparing the end of a capillary column for Prepare the installation into the CP-1177 injector. - Page 67 • Tools and Ceramic scoring wafer (01-900158-00) or a scoring tool equipment • Magnifying lens (00-997369-00) needed Follow these steps to prepare the end of the column for insertion into the 1177 Injector. Slide the capillary column nut over the fused silica column end. Install the appropriate ferrule over the column end.
-
Page 68: Table 2 Detector Installation Depths
Note that the TCD refers to the installation distance with a make-up adapter installed. Table 2 Detector Installation Depths Detector Depth (cm) FID/TSD PFPD 10.5 CP-3800 GC Operator’s Manual Artisan Technology Group - Quality Instrumentation ... Guaranteed | (888) 88-SOURCE | www.artisantg.com... -
Page 69: Setting Cp-1177 Gas Flow Rates
Tips for Refer to the table below for instructions to tighten the capillary column nut with a variety of ferrule types. Do not over tighten capillary column nuts - Tightening use a new ferrule if the column does not seal. Over tightening capillary nuts Column can destroy some ferrules, particularly graphite. - Page 70 OFF, or a whole number. Page two allows you to view/edit constant flow mode. The following screen is an example of a type 1 EFC method. CP-3800 GC Operator’s Manual Artisan Technology Group - Quality Instrumentation ... Guaranteed | (888) 88-SOURCE | www.artisantg.com...
- Page 71 The example shown below is a constant pressure method. ACTIVE EDIT CTRL METHOD METHOD TIME TIME Method 1 Method 1 0.00 20.00 Col Press (psi):10.0 Col Flow (mL/min):2.0 Linear Vel(cm/sec):35 Total Flow (mL/min):25 Split Ratio: OFF FRONT EFC, TYPE 1 Page 1 of 2 Step Pressure (psi)
-
Page 72: Gas Saver
Gas Saver flow rate will be started. A message will be logged in the instrument log. The fault is cleared by activating a method. CP-3800 GC Operator’s Manual Artisan Technology Group - Quality Instrumentation ... Guaranteed | (888) 88-SOURCE | www.artisantg.com... -
Page 73: Manual Pneumatics
Press “Save and Edit” softkey to exit setup. Manual Pneumatics • Tools and Bubble or electronic flowmeter, e.g., Varian Intelligent Digital equipment Flowmeter, P/N 01-900115-00 needed Turn the CP-1177 Split Flow Controller (on the GC pneumatics panel) counterclockwise to open the split flow controller. -
Page 74: 1177 Modes Of Operation
In addition the injector pressure or pressure ramp should be set to achieve the desired column flow rate. CP-3800 GC Operator’s Manual Artisan Technology Group - Quality Instrumentation ... Guaranteed | (888) 88-SOURCE | www.artisantg.com... -
Page 75: Testing The 1177 Injector Performance
Capillary Injector. This is best done with a test sample containing an appropriate set of components for the installed detector. The following table lists the series of test samples available for Varian GC. 03-914648-00:7 Artisan Technology Group - Quality Instrumentation ... Guaranteed | (888) 88-SOURCE | www.artisantg.com... -
Page 76: The 1079 Universal Capillary Injector
This is the case whether manual pneumatics or Electronic Flow Control is used. CP-3800 GC Operator’s Manual Artisan Technology Group - Quality Instrumentation ... Guaranteed | (888) 88-SOURCE | www.artisantg.com... -
Page 77: Features Of The 1079 Injector
Features of the 1079 Injector • The 1079 can be operated isothermally or temperature programmed. The temperature range of the injector is from -99 to 450 °C. Sub- ambient temperatures are achieved using cryogenic cooling. • Changing from one injection mode to another typically involves a change of injector insert and a modification to the injector program. -
Page 78: 1079 Injector Assembly
1079 Injector Assembly Figure 5 1079 Injector Assembly Injector Nut Automatic Start Switch Septum purge outlet Pressure sense line Carrier gas inlet Split vent outlet CP-3800 GC Operator’s Manual Artisan Technology Group - Quality Instrumentation ... Guaranteed | (888) 88-SOURCE | www.artisantg.com... -
Page 79: 1079 Injector Inserts
1079 Injector Inserts Note that all 1079 injector inserts are deactivated for maximum inertness. Mode Insert Description Part Number Split Mode Fritted Enhances sample mixing to ensure linear split, 03-926119-46 3.4 mm ID instantaneous sample vaporization. Open Can be packed with quartz wool, glass beads, etc. 03-926119-45 3.4 mm ID Can be used with the full range of capillary columns. -
Page 80: 1079 Modes Of Injection
After the sampling time, the injector is vented to clean any residual sample out of the injector. CP-3800 GC Operator’s Manual Artisan Technology Group - Quality Instrumentation ... Guaranteed | (888) 88-SOURCE | www.artisantg.com... - Page 81 Temperature The splitless temperature ramp mode is preferred for compounds that are altered by higher temperatures (thermolabile). Also, the splitless temperature Ramp ramp mode is used with wide boiling range mixtures (e.g., hydrocarbon Splitless mixtures). Two glass inserts are recommended when operating in the Mode splitless temperature ramp mode: 1) The 2 mm ID glass wool packed insert is used for non-polar compounds at levels >1 ng;...
-
Page 82: 1079 Flow Diagram
1079 Flow Diagram Refer to Figure 6 for the flow path in the 1079 Injector. Figure 6 1079 Injector Flow Path CP-3800 GC Operator’s Manual Artisan Technology Group - Quality Instrumentation ... Guaranteed | (888) 88-SOURCE | www.artisantg.com... -
Page 83: 1079 Pneumatics
1079 Pneumatics 1079 Electronic Flow Control The Electronic Flow Control module used on a 1079 injector is identified as a type 1 EFC. This EFC type is designed specifically for the 1079 injector to support its various modes of operation. In simple terms it duplicates the behavior of the 1079 manual pneumatics system in that there is an inlet mass flow controller supplying carrier gas to the injector and a pressure control valve downstream from the injector which sets the injector pressure. -
Page 84: Operation Of The 1079 Injector
The following procedure describes the installation (or reinstallation) of a Column capillary column in a Varian 3800 GC equipped with a 1079 injector. Each Installation step of the procedure is described in detail:... - Page 85 • Tools and Ceramic scoring wafer (01-900158-00) or a scoring tool equipment • Magnifying lens (00-997369-00) needed Follow these steps to prepare the end of the column for insertion into the 1079 Injector. Slide the capillary column nut over the fused silica column end. Install the appropriate ferrule over the column end.
-
Page 86: Table 7 Detector Installation Depths
Note that the TCD refers to the installation distance with a make-up adapter installed. Table 7 Detector Installation Depths Detector Depth (cm) FID/TSD PFPD 10.5 CP-3800 GC Operator’s Manual Artisan Technology Group - Quality Instrumentation ... Guaranteed | (888) 88-SOURCE | www.artisantg.com... -
Page 87: Setting 1079 Gas Flow Rates
Tips for Refer to the table below for instructions to tighten the capillary column nut with a variety of ferrule types. Do not over tighten capillary column nuts - Tightening use a new ferrule if the column does not seal. Over tightening capillary nuts Column can destroy some ferrules, particularly graphite. - Page 88 Split Ratio: OFF FRONT EFC Type 1 Page 1 of 2 Step Pressure (psi) Rate (psi/min) Hold (min) Total (min) Initial 10.0 2.00 2.00 CP-3800 GC Operator’s Manual Artisan Technology Group - Quality Instrumentation ... Guaranteed | (888) 88-SOURCE | www.artisantg.com...
- Page 89 Constant Type 1 EFC with the CP-1079 will automatically building a pressure program to keep the column flow rate constant Column during temperature programming of the column oven when Flow Constant Flow is selected. Constant Flow is enabled on page 2 of the EFC method section. The same general guidelines should be followed for all injection modes.
-
Page 90: Gas Saver
Gas Saver flow rate will be started. A message will be logged in the instrument log. The fault is cleared by activating a method. CP-3800 GC Operator’s Manual Artisan Technology Group - Quality Instrumentation ... Guaranteed | (888) 88-SOURCE | www.artisantg.com... -
Page 91: Manual Pneumatics
Manual Pneumatics • Tools and Bubble or electronic flowmeter, e.g., Varian Intelligent Digital equipment Flowmeter, 01-900115-00 needed Turn the 1079 Split Flow Controller (on the GC pneumatics panel) counterclockwise to open the split flow controller. Adjust the Back Pressure Regulator (on the GC pneumatics panel) to establish a positive column head pressure (monitored on the pressure gauge). -
Page 92: Table 9 Split Injection Typical Conditions
(typically 0.5 to 1.5 minutes) the split state is turned ON to vent any residual sample or solvent from the injector. CP-3800 GC Operator’s Manual Artisan Technology Group - Quality Instrumentation ... Guaranteed | (888) 88-SOURCE | www.artisantg.com... -
Page 93: Table 10 Isothermal Splitless Injection Method Parameters
The following table describes typical method parameters for an isothermal splitless injection. Table 10 Isothermal Splitless Injection Method Parameters Injector Insert Install the standard 3.4 mm ID splitless insert (P/N 03-926119-45). Column Position 7.5 cm from the bottom of the column nut at the base of the injector. Initial temperature isothermal 250 °C. -
Page 94: Table 11 Temperature Ramped Splitless Injection
The septum support must not be screwed all the way down or the septum will not seal. CP-3800 GC Operator’s Manual Artisan Technology Group - Quality Instrumentation ... Guaranteed | (888) 88-SOURCE | www.artisantg.com... -
Page 95: Table 12 On-Column Injection
The following are typical conditions for carrying out an on-column injection. The injector should be maintained at 10 - 20 °C below the solvent boiling point at injection. In this example the solvent is hexane which has a boiling point of 68 °C. Note: With the high performance insert the taper is towards the bottom of the injector. -
Page 96: Testing The 1079 Injector Performance
Universal Capillary Injector. This is best done with a test sample containing an appropriate set of components for the installed detector. The following table lists the series of test samples available for Varian GC. Table 14 1079 Test Samples Test Sample... -
Page 97: The 1041 On-Column Injector
The 1041 On-Column Injector The 1041 on-column injector is designed for use with 0.53 mm ID capillary columns or 1/8 - 1/4" packed columns. Switching from one mode to another involves changing the injector and detector column mounting hardware. The 1041 is supplied with capillary mounting hardware as standard. -
Page 98: Column Installation
Note: To prevent the column from unwinding, weave both of the column ends through and around the column loop several times. This is particularly useful if your column is not mounted in a cage. CP-3800 GC Operator’s Manual Artisan Technology Group - Quality Instrumentation ... Guaranteed | (888) 88-SOURCE | www.artisantg.com... -
Page 99: Figure 10 Column Ends
Hang the coiled column on the capillary column holder then prepare column end and complete column connections to both the injector and detector fittings, as detailed in the following paragraphs. To ensure a leak-free connection of capillary columns, the ends of the Preparing column must be cut squarely and as smoothly as possible. -
Page 100: Table 15 General Tightening And Retightening For Common Ferrules
Column IMPORTANT ALIGNMENT OF THE CAPILLARY COLUMN: When a 0.53 Connection mm ID capillary column is used in combination with the Varian 1041 injector, to Injector alignment of the column is critical. Use the following steps to precisely align the capillary column. Unless this procedure is followed, the injection syringe may damage the top of the column or peak tailing may result. -
Page 101: Table 16 Carrier Gas Flow Rates For 1041
Manually insert the syringe that will be used with the column into the 1041 injector, checking that the syringe goes into the injector completely with no binding or interference. If interference occurs, repeat the above column insertion procedure until the syringe moves smoothly into the injector. -
Page 102: 1041 Operation
CTRL METHOD METHOD TIME TIME Method 1 Method 1 0.00 20.00 Set(°C): 250, Actual(°C): 250 MIDDLE 1041 1041 Oven Power 1041 Temperature (°C): CP-3800 GC Operator’s Manual Artisan Technology Group - Quality Instrumentation ... Guaranteed | (888) 88-SOURCE | www.artisantg.com... -
Page 103: Testing The 1041 Injector
1041 on column injector. This is best done with a test sample containing an appropriate set of components for the installed detector. The following table lists the series of test samples available for Varian GC detectors. Note: Due to airline regulations, test samples are not shipped outside the USA. -
Page 104: The 1061 Flash Vaporization Injector
1/8″ metal packed columns. Complete instructions are provided in this kit for installing and operating the injector in the packed column mode. CP-3800 GC Operator’s Manual Artisan Technology Group - Quality Instrumentation ... Guaranteed | (888) 88-SOURCE | www.artisantg.com... -
Page 105: Automatic Start Switch
Automatic Start Switch The automatic start switch is a spring loaded actuator that fits over, and is aligned with the injection port of the 1061 universal injector nut. The GC run is started when the actuator is depressed by the syringe barrel, or manually pressed at the moment of sample injection. -
Page 106: Column Installation
Install a capillary injector nut and reversed ferrule on the column. Push the column into the injector until it stops. CP-3800 GC Operator’s Manual Artisan Technology Group - Quality Instrumentation ... Guaranteed | (888) 88-SOURCE | www.artisantg.com... -
Page 107: Figure 12 Column Ends
Continue to hold the column as you tighten the capillary column nut carefully and only enough to obtain a good seal and hold the column firmly in place. Refer to Table 20 for tightening recommendations for common ferrules. Table 19 Detector Installation Depths Detector Depth (cm) FID/TSD... -
Page 108: 1061 Operation
Method status information. The 1061 is an isothermal injector and cannot be temperature programmed. CP-3800 GC Operator’s Manual Artisan Technology Group - Quality Instrumentation ... Guaranteed | (888) 88-SOURCE | www.artisantg.com... - Page 109 ACTIVE EDIT CTRL METHOD METHOD TIME TIME Method 1 Method 1 0.00 20.00 Set(°C): 250, Actual(°C): 250 MIDDLE 1061 1061 Oven Power 1061 Temperature Electronic With EFC installed there is one additional screen to configure accessed by pressing the FLOW/PRESSURE key. Type 3 EFC allows the user to set a Flow Control constant flow or to program the flow.
-
Page 110: Testing The 1061 Injector
The following procedure describes how to test the performance of the 1061 flash vaporization injector. This is best done with a test sample containing an appropriate set of components for the installed detector. The following table lists the series of test samples available for Varian G.C. detectors. Note:... -
Page 111: Valved Systems
Valved Systems The 3800 can be equipped with a variety of valving options, including gas sampling valves, liquid sampling valves and switching valves. There are numerous locations for valves on the 3800, some of which are unheated and others that are heated. All valves can be automated regardless of location. The following are the typical locations for valves on the 3800: •... - Page 112 Total Flow (mL/min): 30 FRONT EFC TYPE 4, Page 1 of 2 Step Pressure (psi) Rate (psi/min) Hold (min) Total(min) Initial 2.00 2.00 5.00 17.00 CP-3800 GC Operator’s Manual Artisan Technology Group - Quality Instrumentation ... Guaranteed | (888) 88-SOURCE | www.artisantg.com...
- Page 113 ACTIVE EDIT CTRL METHOD METHOD TIME TIME Method 1 Method 1 0.00 20.00 Col Press (psi): Column Flow (mL/min): 15 Linear Velocity (cm/sec): Total Flow (mL/min): 30 FRONT EFC TYPE 4, Page 2 of 2 Time (min) Total Flow (mL/min) Initial 0.01 1.50...
-
Page 114: Detectors
3800 keyboard, the gas flows are set and controlled either from the 3800 keyboard (if detector EFC is installed) or at the pneumatics panel. CP-3800 GC Operator’s Manual Artisan Technology Group - Quality Instrumentation ... Guaranteed | (888) 88-SOURCE | www.artisantg.com... -
Page 115: Initial Set-Up
Initial Set-Up To set up the FID, proceed as follows. Note that when the 3800 is first powered up all heated zones with the exception of the column oven are powered off, and all detector electronics are turned off. Connect the air, hydrogen, and carrier gas lines to the appropriate bulkhead fittings on the GC. -
Page 116: Operation
Page two establishes time programs to either change the range, or Autozero the detector at specific times. CP-3800 GC Operator’s Manual Artisan Technology Group - Quality Instrumentation ... Guaranteed | (888) 88-SOURCE | www.artisantg.com... - Page 117 The third and fourth pages, located by pressing the adjustments softkey, include detector-specific parameters not routinely adjusted. For the FID, these pages allow you to select between a fast or slow detector time constant (page 1) and to set detector gas flows if EFC is installed (page 2). The normal setting for the time constant is fast.
-
Page 118: Installation/Disassembly
FID and the detector oven. Figure 13 is an exploded view of the FID. Refer to these figures as you disassemble the detector. CP-3800 GC Operator’s Manual Artisan Technology Group - Quality Instrumentation ... Guaranteed | (888) 88-SOURCE | www.artisantg.com... -
Page 119: Figure 13 Fid Exploded View
Signal Cable Signal Probe Ignitor Cable Ignitor Probe Collector Ceramic Insulator FID Tower Flame Tip Aluminum Crunch Washer Detector Base Column Ferrule Column Nut Figure 13 FID Exploded View Disassemble To disassemble the FID, proceed as follows: the FID Set the FID to 50 °C and wait for it to cool before disassembly. Turn the detector electronics and detector oven OFF in the active method. - Page 120 32 x 2-3/4-inch tower mounting screws. Alternately tighten these screws a ½-turn as the tower tightens into place. Handle the ceramic insulator and probes with tweezers to avoid CAUTION contamination. CP-3800 GC Operator’s Manual Artisan Technology Group - Quality Instrumentation ... Guaranteed | (888) 88-SOURCE | www.artisantg.com...
-
Page 121: Figure 14 Orientation Of Ignitor Probe Elements In Fid Tower
Carefully insert the ignitor probe into the lower arm of the detector tower. Align the probe key with the tower arm slot. Check the orientation of the ignitor elements by looking down through the top of the detector tower. The spring clip should slip around the flame tip and make good contact (see Figure 14). -
Page 122: Figure 15 Fid Cross-Sectional View
Make sure that all cables are out of the way before you insert the board. Reconnect the cables to the detector. Check that the connectors mate. CP-3800 GC Operator’s Manual Artisan Technology Group - Quality Instrumentation ... Guaranteed | (888) 88-SOURCE | www.artisantg.com... -
Page 123: Thermionic Specific Detector
Condition the TSD bead. The following bead conditioning and optimization procedures assume use of a short, non-polar column such as the Varian test column, 03-912300-30 (packed) or 03-912805-99 (capillary). If you use a different type of column, you should adjust conditions accordingly. - Page 124 Allow the tower to reach temperature, and allow the bead to thermally equilibrate for at least 15 minutes prior to turning on the bead power supply by turning Electronics ON. CP-3800 GC Operator’s Manual Artisan Technology Group - Quality Instrumentation ... Guaranteed | (888) 88-SOURCE | www.artisantg.com...
- Page 125 Page forward to page 2 and turn the initial Autozero OFF. Set the bead current to 2.400 A. Turn on the power to the bead by setting Electronics to ON. Allow the bead to condition for at least 15 minutes. Increase the bead current in steps of 0.100 Ampere, waiting at least 15 minutes for the bead to equilibrate between increases.
- Page 126 MIDDLE TSD ADJUSTMENTS, Page 1 of 2 Time Constant: Fast Clear AUTOZERO The Clear Autozero softkey removes the Autozero offset so that you can observe the detector background signal. CP-3800 GC Operator’s Manual Artisan Technology Group - Quality Instrumentation ... Guaranteed | (888) 88-SOURCE | www.artisantg.com...
- Page 127 Using the Therefore, optimum operating conditions for a given TSD cannot be Varian Test specified exactly; the user should determine optimum operating conditions Sample for the application and TSD bead.
-
Page 128: Figure 16 Structure Of Components In The Tsd Test Sam*Ple
CP-3800 GC Operator’s Manual Artisan Technology Group - Quality Instrumentation ... Guaranteed | (888) 88-SOURCE | www.artisantg.com... -
Page 129: Table 24 Tsd Gases, Pressures, Purity, And Flow Rates
Solvent When the TSD is used for trace level analysis, only solvents free of nitrogen, phosphorus, sulfur, or halogenated compounds should be used. Considerations Depending on the volatility of the impurity in a solvent, it can produce excessive solvent tailing or extraneous chromatographic peaks. Chlorinated Chlorinated solvents can be used with the TSD. -
Page 130: Tsd Assembly
Disassembly/re-assembly instructions are detailed below for both the TSD and the detector oven. The TSD is mounted on the ion detector base in the detector oven. Disassembly CP-3800 GC Operator’s Manual Artisan Technology Group - Quality Instrumentation ... Guaranteed | (888) 88-SOURCE | www.artisantg.com... -
Page 131: Figure 17 Tsd Exploded View
Figure 17 is an exploded view of the TSD. GC covers should be removed. Signal Cable Signal Probe Bead Supply Cable Bead Probe Ceramic Bead Collector Ceramic Insulators TSD Tower Flame Tip Aluminum Crunch Washer Detector Base Column Ferrule Column Nut Figure 17 TSD Exploded View 03-914648-00:7 Artisan Technology Group - Quality Instrumentation ... - Page 132 The Vespel ferrule supplied with the GC has a maximum temperature limit of 350°C. If it is ever necessary to operate the detector above 350 °C, replace the Vespel ferrule with a graphite ferrule. CP-3800 GC Operator’s Manual Artisan Technology Group - Quality Instrumentation ... Guaranteed | (888) 88-SOURCE | www.artisantg.com...
- Page 133 Install a new aluminum seal washer onto the shoulder of the detector base. Note: For a reliable tower seal, use a new aluminum washer each time the detector is installed. Measuring the nominal 4.0 mL/min H flow for the TSD may be simplified at this time by attaching a tube to the flame tip, and then connecting the tube to a flowmeter.
-
Page 134: Figure 18 Tsd Cross-Sectional View
To remove the TSD PC Board, proceed as follows: Removal/ Installation Turn the GC power OFF when CAUTION removing or installing PC Boards CP-3800 GC Operator’s Manual Artisan Technology Group - Quality Instrumentation ... Guaranteed | (888) 88-SOURCE | www.artisantg.com... -
Page 135: Thermal Conductivity Detector
Turn the GC power OFF. Disconnect the signal and ignitor cables from detector. Remove the left side panel from the GC by removing the 8 -32 screws. Remove the 8 -32 screw securing the TSD electrometer board in the detector bay. Slide the PC board straight out of the guide slots in the cabinet. - Page 136 (Note that if the TCD signal is sufficiently large CP-3800 GC Operator’s Manual Artisan Technology Group - Quality Instrumentation ... Guaranteed | (888) 88-SOURCE | www.artisantg.com...
- Page 137 the output may go to zero and become unresponsive. If this occurs, adjust your injection site and conditions to avoid over range conditions.) To adjust for this increase in resistance, set the Filament Temperature Limit to 490 °C, even for filament temperature setpoints below 390 °C. The TCD filament is automatically protected in the GC.
-
Page 138: Operation
TCD. However, you can configure the GC with the analytical column connected to the left side of the TCD, simply reverse the TCD polarity. CP-3800 GC Operator’s Manual Artisan Technology Group - Quality Instrumentation ... Guaranteed | (888) 88-SOURCE | www.artisantg.com... - Page 139 Note: If you plan to operate the TCD after the carrier gas has been turned off for an extended period of time, turn on the carrier gas for five minutes before turning on the filament current to purge air from the system. This prevents oxidation of the TCD filaments.
- Page 140 Filament Current (mA): 220 Balance (%): -42 MIDDLE TCD, Page 2 of 2. Time Range Autozero Polarity Initial Positive 5.00 Positive 6.50 Positive AUTOZERO ADJUSTMENTS CP-3800 GC Operator’s Manual Artisan Technology Group - Quality Instrumentation ... Guaranteed | (888) 88-SOURCE | www.artisantg.com...
- Page 141 300 mA and a range of 0.5 mV. At the lower current, the detector noise is lower, the stability is higher, and the filament lifetime is extended. Thus, Varian recommends that, whenever possible, you operate the TCD at the lowest practical filament current.
-
Page 142: Figure 19 Tcd Sensitivity And Amplification
390 °C and 490 °C, set the Filament Temperature Limit to 490 °C. See Figure 19 for an example of the performance of the TCD at a high current. CP-3800 GC Operator’s Manual Artisan Technology Group - Quality Instrumentation ... Guaranteed | (888) 88-SOURCE | www.artisantg.com... - Page 143 Calculate To calculate the sensitivity of the TCD, proceed as follows: Detector Sensitivity EXAMPLE 1: Known Sample Weight S = PF Where: S = Sensitivity in mV x mL/mg P = Integrated peak area in mV x min W = Weight of sample in carrier gas in mg = Carrier gas flow in mL/min corrected to detector temp )(1-P Where:...
-
Page 144: Adjust Tcd Carrier Gas Flow Rates
Tightly cap gas filters when not used. Prolonged exposure of the contents of the filter to room air degrades the performance of the filters. CP-3800 GC Operator’s Manual Artisan Technology Group - Quality Instrumentation ... Guaranteed | (888) 88-SOURCE | www.artisantg.com... - Page 145 Remove/ To remove the TCD PC Board from the GC, proceed as follows: Install the TCD PC Board Turn OFF the power to the GC when CAUTION removing or installing PC Boards. Turn the GC power OFF. Disconnect the TCD power/signal cable from the TCD PC Board. Remove the left side panel from the GC by removing the 8 -32 screws.
-
Page 146: Electron Capture Detector
Method if Detector EFC is installed. An ECD equipped with a captive detector cell is included in the ECD Kit. Varian is authorized to distribute this kit to General Licensees, as defined in the Radiation Safety Manual. Due to the NRC regulations on the testing, packaging, and labeling of radioactive materials, additional or replacement ECD detector cells are available only as kits. - Page 147 ACTIVE EDIT CTRL METHOD METHOD TIME TIME Method 1 Method 1 0.00 20.00 Set (°C): 300 Actual (°C): 300 Signal (mV): 2.15 FRONT ECD, Page 1 of 2 ECD Oven Power: Temperature (°C): Electronics: Range: AUTOZERO ADJUSTMENTS The AUTOZERO softkey applies an immediate zeroing of the detector signal. Page 2 allows time programming events such as range and Autozero.
- Page 148 Potential operation, therefore you may need to repeat this adjustment procedure daily until the contact potential stabilizes. CP-3800 GC Operator’s Manual Artisan Technology Group - Quality Instrumentation ... Guaranteed | (888) 88-SOURCE | www.artisantg.com...
- Page 149 Install a conditioned column and establish carrier gas and makeup flow. If the column is not well conditioned, remove the column from the detector inlet and cap off the inlet to the ECD. Condition the column as recommended by the supplier, then reconnect the column to the detector. NEVER operate the ECD cell at high temperature without a source of inert gas, either carrier gas from the column or makeup gas.
- Page 150 Place septa in a clean glass beaker or dish and bake the septa in the GC oven at 150 °C for 30 minutes. Complete the septa conditioning phase Conditioning before you place the septa in the injector. CP-3800 GC Operator’s Manual Artisan Technology Group - Quality Instrumentation ... Guaranteed | (888) 88-SOURCE | www.artisantg.com...
- Page 151 Column Oven In selecting ECD oven temperatures, consider the following: and Detector • Oven The maximum permissible operating temperature of the radioactive foil is Temperature 400 °C. This foil temperature cannot be reached, even when the Selection detector oven temperature is set to 450 °C. Do not add additional insulation material around the detector tower.
-
Page 152: Ecd Pneumatics
99.999% 30 (packed column) ≤5 (capillary columns) , He, or Ar/CH (90:10) Detector Make-Up (capillary): 80 psig 99.999% 20 to 30 or Ar/CH CP-3800 GC Operator’s Manual Artisan Technology Group - Quality Instrumentation ... Guaranteed | (888) 88-SOURCE | www.artisantg.com... -
Page 153: Installation/Disassembly
Installation/Disassembly If you need to remove the detector components to inspect, clean, or replace parts, or to install another detector, refer to the following disassembly/re- assembly instructions for the ECD and the ionization oven. In the ECD Kit (P/N 02-001972-00) the detector cell, WARNING: which contains the radioactive ionization source, is RADIATION SOURCE... -
Page 154: Figure 20 Cross-Sectional View Of The Ecd
Note: Poor metal-to-metal contact between the tower contact area and the detector oven can produce a temperature gradient. Remove the insulated detector cap. CP-3800 GC Operator’s Manual Artisan Technology Group - Quality Instrumentation ... Guaranteed | (888) 88-SOURCE | www.artisantg.com... - Page 155 Return the installation tool to the ECD case. You will use this tool each time you remove the ECD. Retain the ECD case should you need to store the ECD or to return the detector to Varian. See the Radiation Safety Manual. 03-914648-00:7...
-
Page 156: Figure 21 Radioactive Caution Label - Factory Installed
03-913999-00. For repair and disposal, return device regulations of the US NRC or State with which NRC has to Varian Analytical Instruments, 2700 Mitchell Drive, an agreement for the exercise of regulatory authority. Walnut Creek, CA 94598-1675, Attention: Radiation This device is distributed under License Laboratory, Phone (925) 939-2400. -
Page 157: Pulsed Flame Photometric Detector
Pulsed Flame Photometric Detector The PFPD is supplied with a separate manual, P/N 03-914649-00. All 3800 GCs equipped with a PFPD will be supplied with this manual which containscomplete setup and operating information for the PFPD. 03-914648-00:7 Artisan Technology Group - Quality Instrumentation ... Guaranteed | (888) 88-SOURCE | www.artisantg.com... -
Page 158: Test Chromatograms
Test Chromatograms The following figures show typical chromatograms of the Varian test mixes for the CP-3800 detectors. FID Test Mix Column: Non-polar, e.g., 1µ film thickness, 15m x 0.25 mm, CP-Sil 5 CB Carrier: Nitrogen, 5 mL/minute Injection: 1079, 200 °C, 1 µL splitless Temperature Program: 80 °, hold 1 minute, 20°/minute to 200°, hold 1 minute... - Page 159 TSD Test Mix Column: Non-polar, e.g., 1µ film thickness, 15m x 0.25 mm, CP-Sil 5 CB Carrier: Nitrogen, 5 mL/minute Injection: 1079, 200 °C, 1 µL splitless Temperature Program: 80°, hold 1 minute, 20°/minute to 200°, hold 1 minute Detector: 300 °C, Range 12 03-914648-00:7 Artisan Technology Group - Quality Instrumentation ...
- Page 160 Temperature Program: 80°, hold 1 minute, 20°/minute to 200°, hold 1 minute Detector: 220 °C, Range 0.05, Filament Temperature 270° ± 20°, Filament current 200 ±10 mA CP-3800 GC Operator’s Manual Artisan Technology Group - Quality Instrumentation ... Guaranteed | (888) 88-SOURCE | www.artisantg.com...
- Page 161 ECD Test Mix Column: Non-polar, e.g., 1µ film thickness, 15m x 0.25 mm, CP-Sil 5 CB Carrier: Nitrogen, 5 mL/minute Injection: 1079, 200 °C, 1 µL splitless Temperature Program: 80°, hold 1 minute, 20°/minute to 200°, hold 1 minute Detector: 300 °C, Range 1, Capillary current setting 03-914648-00:7 Artisan Technology Group - Quality Instrumentation ...
- Page 162 Detector: 300 °C, Range 10, Air1 17 mL/min., Hydrogen 14 mL/min., Air2 10 mL/min. Gate Delay 4 msec., Gate Width 10 msec, Trigger level 200 mV CP-3800 GC Operator’s Manual Artisan Technology Group - Quality Instrumentation ... Guaranteed | (888) 88-SOURCE | www.artisantg.com...
- Page 163 PFPD S Mode Column: Non-polar, e.g., 1µ film thickness, 15m x 0.25 mm, CP-Sil 5 CB Carrier: Nitrogen, 2 mL/minute Injection: 1079, 220 °C, 1 µL splitless of a 1:30 dilution of FPD test mix in iso-octane Tempe ature Program: 80°, hold 1 minute, 20°/minute to 200°, hold 1 minute Detector: 300 °C, Range 10, Air1 17 mL/min., Hydrogen 14 mL/min., Air2 10 mL/min.
-
Page 164: Communications
Tee. Otherwise, another cable can be connected to the BNC Tee to attach to another GC. CP-3800 GC Operator’s Manual Artisan Technology Group - Quality Instrumentation ... Guaranteed | (888) 88-SOURCE | www.artisantg.com... -
Page 165: Figure 23 3800 Gc Ethernet Connection
Ethernet Connection Figure 23 3800 GC Ethernet Connection The following is the start-up sequence for a 3800 that has the Communications board installed: 1. If there is no Communications Board installed, the GC will boot up normally into local control mode. 2. -
Page 166: Figure 24 10Base2 Ethernet Components
Ethernet Cable Comm. Board Star WS Ethernet Comm. Board Star Workstation Computer 3800 GC Keyboard Figure 25 3800 GC to Star Workstation Connection CP-3800 GC Operator’s Manual Artisan Technology Group - Quality Instrumentation ... Guaranteed | (888) 88-SOURCE | www.artisantg.com... -
Page 167: Figure 26 Acceptable And Unacceptable Disconnection Examples
Connecting Additional 3800 GCs or Star Chromatography Workstation Computers can easily be added to a 10Base2 Ethernet segment. The rules to follow are: Additional 3800 GCs and Star WS 1. Whenever any portion of the cable that is connected between the two BNC terminators is to be disconnected, all devices on that Ethernet Computers segment must be turned off or disconnected from the Ethernet segment. -
Page 168: Figure 27 Complex 3800 Gc To Star Workstation Connections
3800 GC Ethernet Cable Comm. Board Comm. Board Star Workstation Computer 3800 GC Keyboard Figure 27 Complex 3800 GC to Star Workstation Connections CP-3800 GC Operator’s Manual Artisan Technology Group - Quality Instrumentation ... Guaranteed | (888) 88-SOURCE | www.artisantg.com... -
Page 169: Analog Communications
Notice how the Ethernet cables (shown by the heavy black line) along with the BNC Tees provide a single unbroken path from one BNC terminator to the other. More detailed information on setting up Star Workstation communications is provided in the Star 3800 GC Control Software Installation and Operation manual. - Page 170 Two channel cable for Varian ADC Board: 03-925672-01. This cable is equipped with two 9 pin D-shell connectors for the ADC Board. The Varian ADC Board can collect a maximum of two channels of analog data. Analog Output Port A is connected to the Varian ADC Board Channel A.
- Page 171 • Two channel cable for 4400 Integrator: 03-925303-01. This cable is equipped with a status connector (ready in/start out) and spade lug terminations for two analog channels. The 4400 Integrator can collect a maximum of two channels of analog data. Analog Output Port A is connected to the 4400 Integrator Channel A.
-
Page 172: Local Automation
One type refers to automation using a device that can be controlled from the 3800 through a communications interface called a Sample Introduction Device. This type of automation is known as addressable automation. The most common example of addressable automation is control of the Varian 8400 GC AutoSampler. 3800 Local Automation... -
Page 173: Non-Addressable Automation
The second type of automation control simply involves running a series or sequence of methods without control of an addressable device such as an AutoSampler. This is referred to as non-addressable automation. An example of non-addressable automation would be to run a series of analyses where sampling is accomplished using a gas sampling valve controlled from one of the 3800 valve drivers. -
Page 174: Automation Control
If you are running local automation and later want to add Star Workstation communication you must select the Manual Injection mode and enabling remote control found by pressing the Instrument Menu key and selecting enable. CP-3800 GC Operator’s Manual Artisan Technology Group - Quality Instrumentation ... Guaranteed | (888) 88-SOURCE | www.artisantg.com... -
Page 175: Automation Methods
ACTIVE EDIT CTRL METHOD METHOD TIME TIME Method 1 Method 1 0.00 20.00 AUTOMATION MODE SELECT Automation Mode: Manual Injection Note: Selecting Single Method or Method Sequence Automation will disable remote control. The automation mode is selected using the increment or decrement key on the 3800 keyboard. -
Page 176: Single Method, Non-Addressable Automation
New Line key on the 3800 keyboard. Page 2 of the Method Sequence allows repetition of the sequence up to 999 times. CP-3800 GC Operator’s Manual Artisan Technology Group - Quality Instrumentation ... Guaranteed | (888) 88-SOURCE | www.artisantg.com... - Page 177 Method Sequence automation, page 1 of 2 ACTIVE EDIT CTRL METHOD METHOD TIME TIME Method 1 Method 1 0.00 20.00 METHOD SEQUENCE AUTOMATION, Page 1 of 2 Method Injections Method 1 Method 2 Injections refers to the number of times the method specified in that line of the table should be run.
-
Page 178: Single Method, Addressable Automation
Prep-Ahead count down timer if you wish to have the next sample ready to inject exactly when the GC becomes ready after the current run ends. CP-3800 GC Operator’s Manual Artisan Technology Group - Quality Instrumentation ... Guaranteed | (888) 88-SOURCE | www.artisantg.com... -
Page 179: Method Sequence, Addressable Automation
To start a Single Method Automation, press the Select / Edit key in the Automation section of the 3800 keyboard, then select Single Method as the automation choice. Press the 3800 Start key to start automation. Note that if the method specified in Single Method Automation is different from the currently active 3800 method, the method specified in automation will be activated upon pressing the Start key. -
Page 180: 8400 Autosampler Control
The viscous sampling mode is used for samples with a higher viscosity than water. • User defined mode allows the user to specify additional injection parameters. CP-3800 GC Operator’s Manual Artisan Technology Group - Quality Instrumentation ... Guaranteed | (888) 88-SOURCE | www.artisantg.com... -
Page 181: Automation Status
Automation Status The 3800 has a status screen which is dedicated to automation status. This screen is accessed by pressing the status key on the 3800 keyboard and using the Page Down key to access Local Automation Status. The information displayed on the screen varies depending on whether addressable or non-addressable automation is active. -
Page 182: Non-Addressable Automation Status Screen
(page 2 of the Method Sequence method). Note that table line number and sequence number are blank if Single Method automation is active. CP-3800 GC Operator’s Manual Artisan Technology Group - Quality Instrumentation ... Guaranteed | (888) 88-SOURCE | www.artisantg.com...
Need help?
Do you have a question about the CP-3800 GC and is the answer not in the manual?
Questions and answers