
Related Manuals for Almost Heaven Saunas TIMBERLINE


Summary of Contents for Almost Heaven Saunas TIMBERLINE
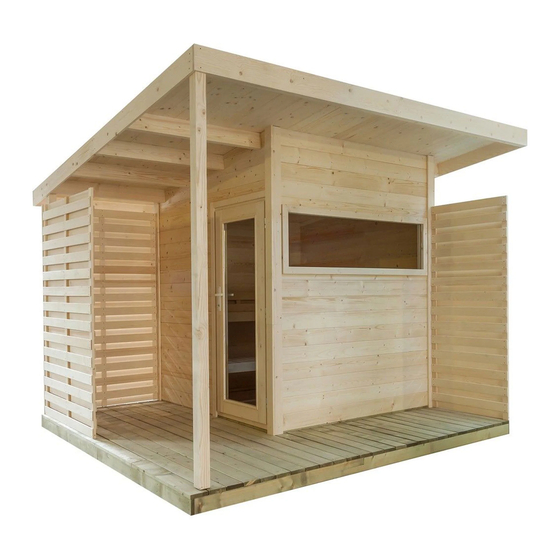
- Page 1 Outdoor Sauna TIMBERLINE 344 x 313 x 271 cm ASSEMBLING INSTRUCTIONS English Version 06/20...
-
Page 2: Table Of Contents
Table of Contents 1. Preparing for installation 1.1. Important notes 1.3. Foundation 1.4. Anchoring the sauna 1.2. Maintenance and cleaning 1.5. Tools required 1.6. Parts list 2. Floor plan / Foundation 2.1. Floor plan left 2.2. Floor plan right 3. View / Dimensions 3.1. -
Page 3: Preparing For Installation
Assemble instructions p. 3/33 1. Preparing for installation Read these assembly instructions carefully and keep them in a safe place, so that you can look up product information at any time. These assembly instructions can also be found on our website: www.almostheaven.com 1.1. Important notes ● Inquire with your local building authority (municipal office, municipal authority) regarding the construction guidelines and load standards. ● A solid concrete foundation is important for the durability and safety of the out- door sauna. For you, we recommend the foundation to be done by an expert. ● You need an assistant for the installation. ●... -
Page 4: Foundation
Assemble instructions p. 4/33 1.2. Maintenance and cleaning ● The sauna should be cleaned with a damp cloth. Only use warm water – no cleaning products. ● We recommend heating the cabin once a month if the sauna is not used for a long time. You are likely to find pitch pockets in some of the wood pieces. The leaking pitch can be removed with a rag soaked in acetone. If only droplets of pitch occur, allow these to harden and then carefully scrape them off with a knife. 1.3. Foundation You can support your sauna with a full concrete slab of 3-4” in thickness (recomended) or obtain treated 4*4 timbers to support the saune kit. In either case, be sure the surface is level prior to installation of the sauna kit. -
Page 5: Tools Required
Assemble instructions p. 5/33 1.5. Tools required ● Hammer with a wooden head or a mallet ● Cordless screwdriver with bits for cross-head screws and Torx ● Tape measure ● Drill bits with a diameter of 3 mm, 10 mm, 20 - 30 mm ● Level ● Utility knife ● Ladder ● Hand saw ● Approximately 4 tubes of construction adhesive This symbol indicates tips and useful information Pre-drill Cut to real measurement with backsaw Check the right angle: 80 cm Handle glass with care: Special care must be taken with the edges of... -
Page 6: Parts List
Assemble instructions p. 6/33 1.6. Parts list Name Dimensions No. of items Base frame Bottom timber (impregnated) 1910x146x40 Bottom timber (impregnated) 1990x146x40 W1: Side wall with door 14 Timber 1085x146x40 Timber crossing the door 1910x146x40 Timber upper triangle 1910x397x40 W2: Rear wall 14 Timber 1990x146x40 Timber (cutout air supply) 1990x146x40... - Page 7 Assemble instructions p. 7/33 Name Name Name Dimensions Dimensions Dimensions No. of No. of No. of items items items Window Window glass 1741x496x16 Window frame 1805x560x16 Corner covers Corner covers 1000x80x20 Corner covers 1630x80x20 Corner covers 82° 1630x80x20 Corner covers 1360x80x20 Corner covers 82° 1360x80x20 Roof inside Roof panel 1890x955x55 Roof panel...
- Page 8 Assemble instructions p. 8/33 Name Dimensions No. of items Interior Bench support slats 495x88x28 Bench support slats 900x88x28 Bench 1900x500x88 Backrest 1900x220x48 Heater safety guard 1000x88x28 Heater safety guard 490x70x28 Heater safety guard 675x70x28 Heater safety guard 575x70x28 Terrace Base frame 1210x95x40 Base frame 2000x95x40 Base frame 1375x95x40 16 Floor boards 825x120x25 Floor boards...
-
Page 9: Floor Plan / Foundation
Assemble instructions p. 9/33 2. Floor plan / Foundation 2.1. Floor plan left 3210 2030 1910 Your sauna can be assembled with a „left“ or „right“ floor-plan as shown. The instructions are given with a „left“ floor-plan, so be sure to invert accordingly if you asseble in the „right“ configuration. -
Page 10: Floor Plan Right
Assemble instructions p. 10/33 2.2. Floor plan right 3210 2030 1910... -
Page 11: View / Dimensions
Assemble instructions p. 11/33 3. View / Dimensions 3.1. View left 3130 3.2. View right 3130... -
Page 12: Assembling The Cabin
Assemble instructions p. 12/33 4. Assembling the cabin ATTENTION! Note the floor plan on page 10 or 11 and the illustrations from page 15 onwards. 4.1. Mounting the base frame Lay the base frame on to the foundation as shown in the floor plan and in the foundation displays (see page 10, 11 and 12). Glue the floor frames together at the corners and screw the parts using 5 x 90 mm screws. 4.2. Mounting the cabin walls Start with the assembly of the log planks on the back wall. Proceed row-wise. As done in case of base frame, screw the corners. Hammer the dowel nails into the drilled holes in every row. If you are not assembling in a high-wind area it is not necessary to use the metal dowels. Check the right angle before screwing the wall elements together. Ob- serve the tip on page 4. Note the position of the ventilation slides in the 2nd and 14th row. -
Page 13: Assembling The Benches And Backrest
Assemble instructions p. 13/33 4.7. Assembling the benches and backrest 4.8. Assembling the bench rail/ heater guard Place the rafters into the recesses according the diagram shown and note the distance of the overhang. Screw the rafters to the logs. Screw the tongue and groove roof boards to the rafters. Next install the 40x40 pieces to the underside of the roof boards, noting the angle place on the edge of the 40x40 board. Next install the facia pieces to the 40x40 boards around the perimeter of the roof. Install the shingles of your choice (not included) on the top of the sauna roof. 4.9. Assembling the outer roof Note the distance of the overhang screw the tongue and groove roof boards to the rafters. - Page 14 Pictures p. 14/33 4.1. Optional Metal dowels...
- Page 15 Pictures p. 15/33 4.2. 5 x 90...
- Page 16 Pictures p. 16/33 5 x 90...
- Page 17 Pictures p. 17/33 4.3. 3,2 x 40...
- Page 18 Pictures p. 18/33 4.4. 3,2 x 40 3,2 x 40 3,5 x 50...
- Page 19 Pictures p. 19/33 4.5. 4 x 60 3,5 x 50 3,5 x 50...
- Page 20 Pictures p. 20/33 4.6. 4 x 70...
- Page 21 Pictures p. 21/33 4.7. 5 x 60 5 x 60 3,5 x 50...
- Page 22 Pictures p. 22/33 4.8. 3,5 x 50 4 x 60 4 x 60 3,5 x 50 3,5 x 50 4 x 60...
- Page 23 Pictures p. 23/33 4.9. 6 x 120 6 x 150 3,5 x 50...
- Page 24 Pictures p. 24/33 1740 1740 1475 1965 1475 1965 1740 1740...
- Page 25 Pictures p. 25/33 3,5 x 50 1965x130x40...
- Page 26 Pictures p. 26/33 1965x130x40 1607x150x20...
- Page 27 Pictures p. 27/33 4.10. 5 x 80 4 x 60 3,5 x 50...
- Page 28 Pictures p. 28/33 3,5 x 50...
- Page 29 Pictures p. 29/33 4.11. 3,5 x 50 3,5 x 50...
- Page 30 Pictures p. 30/33 4.12. 4 Pcs. 4 x 70 3,5 x 50 3,5 x 50 3,5 x 50...
- Page 31 Pictures p. 31/33 4 Pcs. 4 x 70 3,5 x 50 3,5 x 50 3,5 x 50 4 x 70...
- Page 32 Pictures p. 32/33 3,5 x 50 4 x 70...
- Page 33 Almost Heaven Saunas, LLC, 25 West 8th Street, Holland, MI 49423 Office 888.355.3050 | sales@almostheaven.com | www.almostheaven.com...
Need help?
Do you have a question about the TIMBERLINE and is the answer not in the manual?
Questions and answers