
Subscribe to Our Youtube Channel
Related Manuals for Almost Heaven Saunas Worthington Sauna


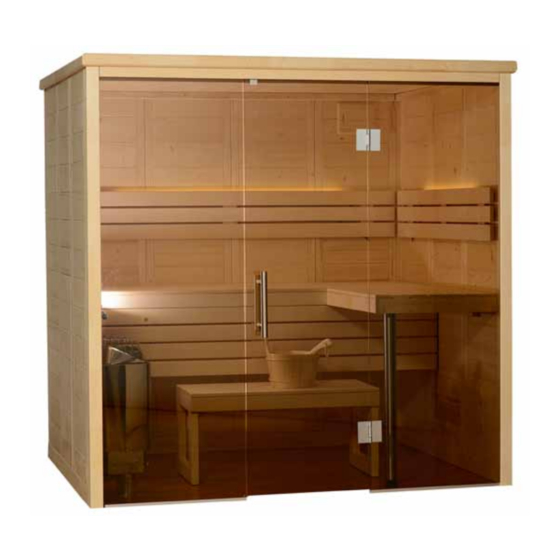
Summary of Contents for Almost Heaven Saunas Worthington Sauna
- Page 1 Almost Heaven Saunas ® T H E A U T H E N T I C S A U N A E X P E R I E N C E Worthington Sauna Installation & Owner’s Manual...
-
Page 2: Electrical Requirements
If you choose to invert the assembly then be sure to do all assembly opposite of the directions shown. Almost Heaven Saunas ® T H E A U T H E N T I C S A U N A E X P E R I E N C E... - Page 3 STEP 1 - Locate the (3) bottom rails and position as shown. Overlap the corner joints and be sure the rails are square to each other. Drill a 1/8” pilot hole in the corner joints and secure rails to each other using a single 5x70 screw in each of 3 corners.
- Page 4 STEP 4 - Verify that the element wall sections are square to the rails, perpendicular to each other, and that the flat top of the wall elements and corner posts align. Using a cordless drill with the appropriately sized bit (included) use 6x20 screws and secure the 90°...
- Page 5 STEP 7 - Continue the addition of wall elements by adding (3) of the wood wall element sections along the back rail. The wall sections will not screw together, but be sure they are level at the top and firm to each other by tapping in place with a rubber mallet.
- Page 6 STEP 10 - Add two more wood wall element sections along the left wall. The wall sections will not screw together, but be sure they are level at the top and firm to each other by tapping in place with a rubber mallet.
- Page 7 STEP 13 - You will now install the roof support rails. Location (3) roof support rails and cut to length. The left and right rails should butt up to the front corner posts and the rear wall. NOTE: BE SURE THERE ARE NO GAPS BETWEEN THE WOOD WALL ELEMENTS BEFORE TAKING YOUR MEASUREMENTS.
- Page 8 STEP 16 - Locate the glass wall header and position over the glass window sections. Lower the header over the glass so that the glass will fit into the grooves at the base of the header. Line up the pins of the header to the holes in the corner posts and gently tap into place with a rubber mallet.
- Page 9 STEP 19 - You will now install the bench supports. Find the long bench support and cut to length so that it will go as far as the left and right walls. On the rear wall and from the floor measure 33”...
- Page 10 STEP 22 - Attached the metal post support bracket to the bottom of the upper side bench using screws included in hardware packet. Slip the metal support post over the bracket and secure in place with the hex screw located in the support bracket. STEP 23 - Place the upper side bench on the side bench support rail and line up to the upper rear bench.
- Page 11 STEP 25 - You will now install the lower bench back support. From the front of the two UPPER bench supports that you just installed, measure 1-1/2” back and make a mark. Then, install the two lower backrest supports (one on the left and right side of the sauna) to the sidewall element sections using 5x70 screws.
- Page 12 STEP 28 - Assemble the lower bench by attaching the right and left framed leg supports to the bench and screwing into place with 4x60 screws. Be sure the two holes in the uprights are to the rear of the bench and the plastic floor protectors are down.
- Page 13 STEP 31 - Locate the exterior roof trim pieces. These will attach to the exterior top perimeter of the sauna. The pieces create an “L” around the top edge and will be screwed to the roof sections from the top using 3.5x40 screws. NOTE: The trim pieces are not pre-cut and must be cut to size using a hand saw.
- Page 14 STEP 34 - On the header above the door, peel back some of the sealing strip and find the pre-drilled hole for the magnet. Find the magnet in the hardware kit and squeeze it into the hole using pliers. The magnet is adjustable and can be loosened or tightened as needed.
-
Page 15: Operation
Dress only after you have cooled down completely. NOTE: Whatever your sauna regimen, it is important that you keep yourself hydrated by drinking plenty of water! Almost Heaven Saunas ®...
Need help?
Do you have a question about the Worthington Sauna and is the answer not in the manual?
Questions and answers