Advertisement
Plastic wall anchors x 4
M3x6 screw x 1
10 Pin cable x 1
C317X x 1
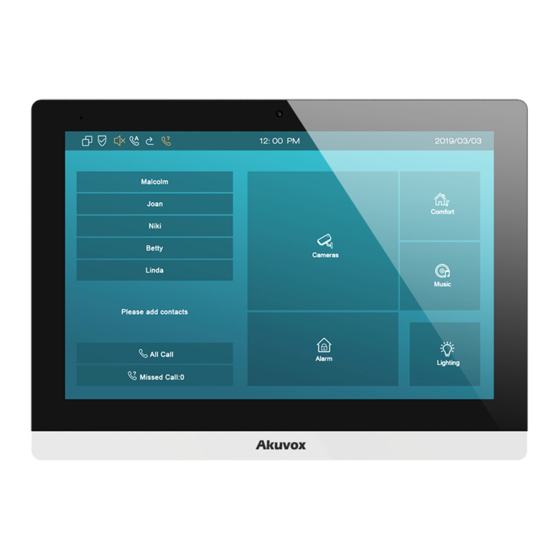
Product Overview
MIC
Touch Screen
Loudspeaker
Camera (Optional)
Front Panel
Rear Panel
ST4x20 screw x 4
M3x10.5 screw x 1
11 Pin cable x 1
Right Side
11 Pin Terminals
10 Pin Terminals
Network Interface(POE)
RJ45 Interface
Loudspeaker
C317X
M4x30 screw x 4
Allen Wrench x 1
Wall bracket x 1
Micro SD slot
Advertisement
Table of Contents

Related Manuals for Akuvox C317A


Summary of Contents for Akuvox C317A
- Page 1 C317X Plastic wall anchors x 4 ST4x20 screw x 4 M4x30 screw x 4 M3x6 screw x 1 M3x10.5 screw x 1 Allen Wrench x 1 10 Pin cable x 1 11 Pin cable x 1 Wall bracket x 1 C317X x 1 Product Overview Camera (Optional)
- Page 2 Step 1: Wall Bracket Installation Without embedded box in the wall Align the square holes of According to the position the wall bracket with the of the cable in the wall, holes previously dug, dig out a square and then mark the four hole(height*width*depth fixing holes of the wall =66*50*50 mm) that can...
- Page 3 C317X Step 2: Device Mounting Connect the cables to device. Push down to fix the device securely. Use the Allen wrench to tighten the device with one M3x10.5 screw. Configuration 1.Access basic information: After setting up network and power, enter More -> System Info to check Account, Network,Version status.
- Page 4 C317X Device Wiring AKUVOX (XIAMEN) NETWORKS CO., LTD. ADD: 10/F, NO.56 GUANRI ROAD, SOFTWARE PARK II, XIAMEN 361009, CHINA www.akuvox.com...
Need help?
Do you have a question about the C317A and is the answer not in the manual?
Questions and answers