Table of Contents
Advertisement
Advertisement
Table of Contents

Related Manuals for Sandstrom SF-DABA18


Summary of Contents for Sandstrom SF-DABA18
- Page 1 Portable Bluetooth® DAB Radio Instruction Manual SF-DABA18 / SF-DABG18...
-
Page 3: Table Of Contents
Contents Safety Warnings ....................5 Unpacking ....................... 8 Product Overview ................... 9 Front View ........................... 9 Rear View ...........................10 Top View ..........................11 Connections ....................12 Using the AUX Connection ..................12 Using Earphones ......................12 Power Source ....................14 Mains Power ........................14 Battery Power ........................15 Battery Life (Approx. - Page 4 Activate/Deactivate the Alarm Function ...............23 DAB Operation ....................24 Auto Scan ..........................24 Manual Tune ........................25 Presetting Stations ......................25 Recalling a Preset Station ....................26 DAB Display Modes .......................26 FM Operation ....................28 Selecting FM Mode ......................28 Searching for a Station Automatically ..............28 Searching for a Station Manually ................28 Scan Setting ........................28 Audio Setting ........................29...
-
Page 5: Safety Warnings
Safety Warnings • Read all the instructions carefully Place the unit well away from before using the unit and keep heat sources such as radiators or them for future reference. gas/electric fires. • Retain the manual. If you pass the •... - Page 6 Safety Interference • Always disconnect the unit • Do not place the unit on or near from the mains supply before appliances which may cause connecting/ disconnecting other electromagnetic interference. If devices or moving the unit. you do, it may adversely affect the operating performance of the •...
- Page 7 the presence of important operating Disposal of a battery and maintenance (servicing) into fire or a hot oven, or instructions in the manual mechanically crushing or accompanying the unit. cutting of a battery, that can result in an explosion; Service Leaving a battery in an •...
-
Page 8: Unpacking
Thank you for purchasing your new product. We recommend that you spend some time reading this instruction manual in order that you fully understand all the operational features it offers. You will also find some hints and tips to help you resolve any issues. -
Page 9: Product Overview
Product Overview Front View Speakers Adjustable Handle Display... -
Page 10: Rear View
Rear View AUX IN RESET Battery Compartment DAB / FM Aerial 1A Socket AUX IN Socket Earphones Socket RESET Button... -
Page 11: Top View
Top View STANDBY/MUTE Button • Press to switch between On and Standby mode. • In On mode, press and hold to mute/resume playback. ALARM Button Press to enter Alarm 1/2 Setup menu. MODE Button Press to switch between FM, DAB, Auxiliary Input and Bluetooth mode. - Page 12 INFO/MENU Button • Press repeatedly to show the information. • Press and hold to enter the menu page. Button • Press to skip backwards to the beginning of the track or to the previous track in Bluetooth mode. • Press to skip forwards to the next track in Bluetooth mode. •...
-
Page 13: Connections
Connections Using the AUX Connection Use a 3.5 mm to 3.5 mm stereo audio cable (included) to connect a mobile device to the main unit’s AUX IN socket. AUX IN RESET Using Earphones Turn down the volume before connecting the earphones (not included). Slowly raise the volume with the earphones on until you reach your desired volume. -
Page 14: Power Source
Power Source Your unit can be mains powered or battery powered. We recommend for prolonged use to use the mains power. Mains Power Connecting the unit to any other power source may damage the unit. Unwind the mains adapter cable to its full length. Connect the end of the cable to the DC IN Socket at the rear of the unit and then connect the mains adapter to the mains socket. -
Page 15: Battery Power
Battery Power Insert 4 x 1.5V AA battery (not included) into the battery compartment located at the rear of the unit. AUX IN RESET Battery Life (Approx. Hours) Battery Type Alkaline (Size AA) Using your radio at high volume will reduce your battery life. Knowing when to Replace the Batteries When the batteries become weak, the sound becomes weak and distorted. - Page 16 Handling the Batteries • Improper or incorrect use of batteries may cause corrosion or battery leakage, which could cause personal injury or damage to property. • Install the batteries correctly by following the polarity (+ and –) indications in the battery compartment. •...
-
Page 17: General Operation
General Operation Powering ON/OFF After connecting the mains adapter to the unit and the mains socket, the unit will enter Standby mode. Press the STANDBY/MUTE button to switch on the unit. • Press the STANDBY/MUTE button again to switch the unit back to •... -
Page 18: Automatically Setting The Clock
Automatically Setting the Clock The clock will be updated automatically if you can receive DAB/FM signal in your location. In order to synchronise to the current local time, you must leave it on the DAB/FM station for a period of time. It may take about 1-2 minutes to receive the time signal. -
Page 19: Equaliser
Equaliser Your radio has preset equaliser setting. This feature enables you to set a sound equalization profile. The equalization setting will change the tone of the sound from your radio. 1. In ON mode, press and hold the INFO/MENU button, and then turn the –VOLUME+/SELECT/SNOOZE dial or press the button to select <System>. -
Page 20: Backlight
Backlight You can set the brightness for the power on screens and the Standby screen. 1. In ON mode, press and hold the INFO/MENU button, and then turn the –VOLUME+/SELECT/SNOOZE dial or press the button to select <System>. Press the –VOLUME+/SELECT/SNOOZE dial to confirm. 2. -
Page 21: Factory Reset
Factory Reset If you want to delete all your stations and settings, you can return your radio back to the default setting by running a Factory Reset. 1. Press the –VOLUME+/SELECT/SNOOZE dial or press the button to select <System>. Press the –VOLUME+/SELECT/SNOOZE dial to confirm. -
Page 22: Alarm
Alarm Ensure the time and date is set before you can activate the alarm function. Setting the Alarm Your radio has two alarms (Alarm 1 and Alarm 2). This is handy so you can set one alarm for workdays and one for weekends. You set both alarms in the same way. -
Page 23: Activate/Deactivate The Alarm Function
3. After the setup is done, will show on the display. 4. To temporarily switch off alarm, press the –VOLUME+/SELECT/ SNOOZE dial to activate Snooze function when alarm sounds. Press the –VOLUME+/SELECT/SNOOZE dial repeatedly to set snooze period time of 5, 10, 15 or 30 minutes in turn. The set snooze time will show on the display and unit will go to standby. -
Page 24: Dab Operation
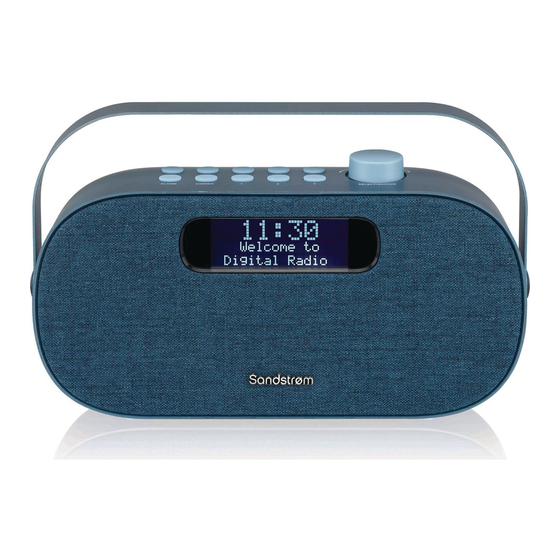
DAB Operation If the unit is connected to the mains power for the first time, the unit will show “Welcome to Digital Radio“ and then “00:00”. Press STANDBY/MUTE button to switch on the unit and perform auto scan. During the scan the display will show “Scanning…”... -
Page 25: Manual Tune
Manual Tune This function is for advanced users only. Stations are selected from the station list. Manual scan enables you to tune to each multiplex channel, check if a multiplex is present and measure the signal strength. 1. In ON mode, press and hold the INFO/MENU button, and then turn the –VOLUME+/SELECT/SNOOZE dial or press the button to select <Manual tune>. -
Page 26: Recalling A Preset Station
Recalling a Preset Station Preset station 1-3 Press the Preset 1, 2 or 3 button Preset station 1-10 1. Press and hold the INFO/MENU button, and then turn the –VOLUME+/ SELECT/SNOOZE dial or press the button to select <Preset>. Press the –VOLUME+/SELECT/SNOOZE dial to confirm. 2. - Page 27 Channel Number/Frequency Signal Strength The Channel number/frequency of the present station will be displayed. Error in signal A number showing the error Programme Type rate. If the number is 0, it means the signal received is error free and the signal strength is strong. If the error rate is high, it is recommended to reorient the Ensemble Name...
-
Page 28: Fm Operation
FM Operation Selecting FM Mode The unit will automatically select a FM radio station with a good signal. 1. Press MODE button repeatedly to select FM mode. 2. For initial use, it will start at the beginning of the FM frequency range (87.50 MHz). -
Page 29: Audio Setting
Audio Setting If you find that the station you are listening is not clear, you can select to listen to it in MONO this can often clear up some of the static. 1. In ON mode, press and hold the INFO/MENU button, and then turn the –VOLUME+/SELECT/SNOOZE dial or press the button to select <Audio setting>. -
Page 30: Recalling A Preset Station
Recalling a Preset Station Preset station 1-3 Press the Preset 1, 2 or 3 button Preset station 1-10 1. Press and hold the INFO/MENU button, and then turn the –VOLUME+/ SELECT/SNOOZE dial or press the button to select <Preset>. Press the –VOLUME+/SELECT/SNOOZE dial to confirm. 2. - Page 31 Time Radio Text This shows the current time provided automatically by the broadcaster. Date Programme Type This shows the current date provided automatically by the broadcaster. Frequency Audio Type Power Source Time Date...
-
Page 32: Bluetooth® Operation
Bluetooth® device. The system has entered paring mode. 2. Activate your Bluetooth® device and select the search mode. 3. “SF-DABA18/SF-DABG18” will appear on your Bluetooth® device. 4. Select “SF-DABA18/SF-DABG18” and enter “0000” for the password if necessary. To pause/resume playback, press the –VOLUME+/SELECT/SNOOZE •... -
Page 33: Aux Operation
AUX Operation There are AUX IN socket located at the rear of the unit. Analogue audio sound signals from other sources can be connected to the unit through these sockets. 1. Connect to another audio device using the AUX IN socket via a RCA stereo audio cable (not included). - Page 34 The unit will try to re-tune or perform a scan. Bluetooth® I cannot find • Ensure the Bluetooth® function is “SF-DABA18/ activated on your Bluetooth® device. SF-DABG18” on my Bluetooth® device If any functional abnormality is encountered, unplug the unit...
-
Page 35: Specifications
Specifications Model SF-DABA18 / SF-DABG18 Batteries 1.5V × 4, AA size Output Power 3W rms × 2 (Mains Powered), up to 2.5W rms × 2 (Battery mode) Radio Frequency FM: 87.5 - 108 MHz range DAB: 174.928 - 239.2 MHz Bluetooth version V4.2... - Page 36 Visit Partmaster.co.uk today for the easiest way to buy electrical spares and accessories. With over 1 million spares and accessories available we can deliver direct to your door the very next day. Visit www.partmaster.co.uk or call 0344 800 3456 (UK customers only) Calls charged at National Rate.
Need help?
Do you have a question about the SF-DABA18 and is the answer not in the manual?
Questions and answers
How to save a station to a preset
To save a station to a preset on the Sandstrom SF-DABA18:
, then press the dial to confirm., then press the dial to confirm.
For Preset Stations 1–3:
1. Tune to the station you want to save.
2. Press and hold one of the Preset buttons (1, 2, or 3) for about 2 seconds.
3. “Preset # stored” will appear on the display.
For Preset Stations 1–10:
1. Tune to the station you want to save.
2. Press and hold the INFO/MENU button.
3. Turn the –VOLUME+/SELECT/SNOOZE dial or press the button to select
4. Select
5. Choose a preset number from 1 to 10, then press the dial to confirm.
This answer is automatically generated