Table of Contents
Advertisement
Advertisement
Table of Contents

Related Manuals for Sandstrom SFPDAB17


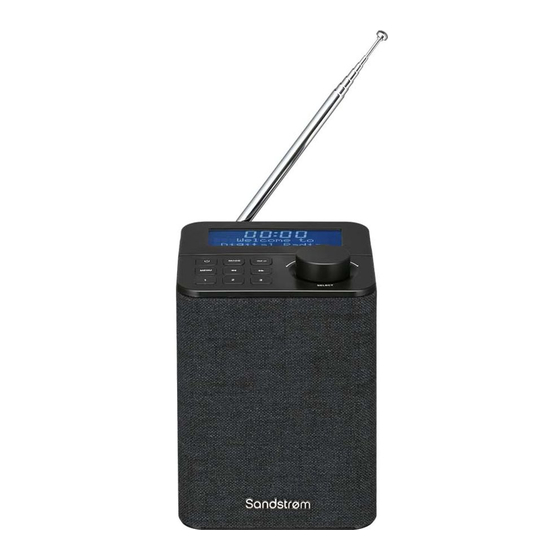
Summary of Contents for Sandstrom SFPDAB17
-
Page 1: Instruction Manual
Instruction Manual Portable DAB Radio SFPDAB17... -
Page 3: Table Of Contents
Contents Safety Warnings ....................5 Unpacking ....................... 8 Product Overview ................... 9 Front View ........................... 9 Rear View ..........................9 Top View ..........................10 Connections ....................11 Using the AUX Connection ..................11 Using Earphones ......................12 Connecting to the Mains Supply ................13 General Operation .................. - Page 4 FM Operation ....................24 Selecting FM Mode ......................24 Searching for a Station Automatically ..............24 Searching for a Station Manually ................24 Scan Setting ........................25 Audio Setting ........................25 Presetting Stations ......................26 Recalling a Preset Station ....................26 AUX Operation ....................27 Maintenance ....................28 Cleaning the Unit ......................28 Hints and Tips....................
-
Page 5: Safety Warnings
Safety Warnings Temperature • Read all the instructions carefully before using the unit and keep • Avoid extreme degrees of them for future reference. temperature, either hot or cold. • Retain the manual. If you pass the Place the unit well away from unit onto a third party make sure heat sources such as radiators or to include this manual. - Page 6 Safety CAUTION • Always disconnect the unit RISK OF ELECTRIC SHOCK DO NOT OPEN from the mains supply before The lightning flash with connecting/ disconnecting other arrowhead symbol, within an devices or moving the unit. equilateral triangle, is • Unplug the unit from the mains intended to alert the user to socket before a lightning storm.
- Page 7 • Unplug the charger from the • Do not attempt to open the electrical plug and the product product or replace the battery. when not in use. It is built-in and not changeable. Use of other batteries may • Do not leave a fully charged present a risk of fire or explosion battery connected to a charger, and the warranty will be...
-
Page 8: Unpacking
Thank you for purchasing your new product. We recommend that you spend some time reading this instruction manual in order that you fully understand all the operational features it offers. You will also find some hints and tips to help you resolve any issues. -
Page 9: Product Overview
Product Overview Front View Speaker Rear View 2 3 4 5 Aerial AUX IN Socket 1A Socket Earphones Socket Connect the mains cable to the RESET Button mains socket. -
Page 10: Top View
Top View Display • Press to tune FM station. • Press to select DAB station. INFO Button • Press and hold to search for a • Press to check the information. radio station going forwards/ MODE Button backwards through accessible Press to switch between DAB, radio frequencies in FM mode. -
Page 11: Connections
Connections Using the AUX Connection Use a 3.5 mm to 3.5 mm stereo audio cable (included) to connect a mobile device to the main unit’s AUX IN socket. Mobile device 3.5 mm to 3.5 mm stereo audio cables (included) -
Page 12: Using Earphones
Using Earphones Turn down the volume before connecting the earphones. Slowly raise the volume with the earphones on until you reach your desired volume. When earphones are connected, the speakers automatically mute. Long-term exposure to loud music may cause hearing damage. It is best to avoid extreme volume when using earphones, especially for extended periods. -
Page 13: Connecting To The Mains Supply
Connecting to the Mains Supply • This unit is designed to operate with an AC power supply or with the built-in battery. To the mains socket • Connecting the unit to any other power source may cause damage to the unit. Unwind the mains cable to its full length. -
Page 14: General Operation
General Operation Switching ON/OFF While using battery power: • Press and hold button to switch the unit on. • Press and hold button again to switch the unit off. While using mains power: • Press and hold button to switch the unit on. button again to switch the unit in Standby mode. -
Page 15: System Settings
System Settings Sleep You can set a sleep timer so if you are listening to your radio and fall asleep, it will automatically switch off at the preset time. The sleep timer can be activated for up to a maximum of 90 minutes. 1. -
Page 16: Backlight
Set Time/Date Here you can manually set the time and date. Auto update Choose how you want the time to be automatically updated. Update from Any / Update from DAB / Update from FM / No update Set 12/24 hour Set 24 hour or Set 12 hour. -
Page 17: Language
Language This feature enables you to change menu language. 1. In ON mode, press MENU button, and then turn the +/–VOLUME/ SELECT dial or press button to select System. Press the +/– VOLUME/SELECT dial to confirm. 2. Turn the +/–VOLUME/SELECT dial or press button to select Language. -
Page 18: Dab Operation
DAB Operation When you turn on the radio it will automatically search and store all the available stations. You may conduct an additional full scan to ensure all stations are picked up and stored. It is also recommended every few months to run a new scan to pick up any new DAB/DAB+ that may have begun broadcasting after your radio scanned last time. -
Page 19: Auto Scan
Auto Scan The auto scan will search for all DAB Band III channels. After the scan has finished, the first alphanumerically found station will be automatically selected. 1. In ON mode, press MENU button, and then turn the +/–VOLUME/ SELECT dial or press button to select Full scan. -
Page 20: Drc
You can set the DRC (Dynamic Range Compression) to High, Low or Off. This will reduce the volume of loud sounds and increase the volume of quiet sounds. 1. In ON mode, press MENU button, and then turn the +/–VOLUME/ SELECT dial or press button to select DRC. -
Page 21: Recalling A Preset Station
Recalling a Preset Station Presets 1-3 To recall preset stations that are stored in positions 1-3, just press the Preset 1, 2 or 3 button. Presets 1-10 1. In ON mode, press MENU button, and then turn the +/–VOLUME/ SELECT dial or press button to select Preset. -
Page 22: Dab Display Modes
DAB Display Modes Every time you press the INFO/MENU button, the display will cycle through the following display modes. DLS (Dynamic Label Segment) Dynamic label segment is a scrolling message that the broadcaster may include with their transmissions. The message usually includes information, such as programme details etc. - Page 23 Bitrate The display will show the digital audio bit rate being received. Clock The broadcaster (Radio station) provides clock information automatically. If the information is not available, the display will show the incorrect time. Date The broadcaster (Radio station) provides date information automatically.
-
Page 24: Fm Operation
FM Operation Selecting FM Mode The unit will automatically select a FM radio station with a good signal. 1. Press MODE button repeatedly to select FM mode. 2. For initial use, it will start at the beginning of the FM frequency range (87.50 MHz). -
Page 25: Scan Setting
Scan Setting In the Scan Settings menu you can choose if you want your radio to tune to All stations or Strong stations only, and it will try to tune to all stations, however some may be very weak. 1. In ON mode, press MENU button, and then turn the +/–VOLUME/ SELECT dial or press button to select Scan setting. -
Page 26: Presetting Stations
Presetting Stations You can store up to 10 of your favourite FM stations to the memory. This will enable you to access your favourite stations quickly and easily. Presets 1-3 To store a preset, you must first be listening to the station that you would like to save. -
Page 27: Aux Operation
AUX Operation There are AUX IN socket located at the rear of the unit. Analogue audio sound signals from other sources can be connected to the unit through these sockets. 1. Connect to another audio device using the AUX IN socket via a RCA stereo audio cable (not included). -
Page 28: Maintenance
Maintenance Cleaning the Unit Ensure the unit is fully unplugged from the mains socket before cleaning. • To clean the unit, wipe the case with a slightly moist, lint-free cloth. • Do not use any cleaning fluids containing alcohol, ammonia or abrasives. - Page 29 Problem Solution Radio Desired station not • Weak signal. Use the Manual Tune found function. No coverage in your • Adjust the position of the aerial. area or poor reception The display is blank • This may occur if the broadcaster changes the label of a service or removes a label while tuned.
-
Page 30: Specifications
Specifications Model SFPDAB17 Power Consumption 3 W x 1 rms, 3.5 ohm Power Standby < 1 W Frequency response 100 Hz-10 KHz (-10dB) < 10% >65 dB(A) Radio Frequency range FM: 87.5 MHz~108 MHz DAB: 174.928 MHz~239.200 MHz Battery Lithium battery 2200 mAh, 3.7 V... - Page 32 For advice on where to purchase accessories, please contact the store where you purchased your equipment. All trademarks are the property of their respective owners and all rights are acknowledged. DSG Retail Ltd. (co. no. 504877) 1 Portal Way, London, W3 6RS, UK IB-SFPDAB17-170303V1...
Need help?
Do you have a question about the SFPDAB17 and is the answer not in the manual?
Questions and answers