Table of Contents
Troubleshooting

Related Manuals for Johnson Controls York YHAU-CGN-CXR Series


Summary of Contents for Johnson Controls York YHAU-CGN-CXR Series
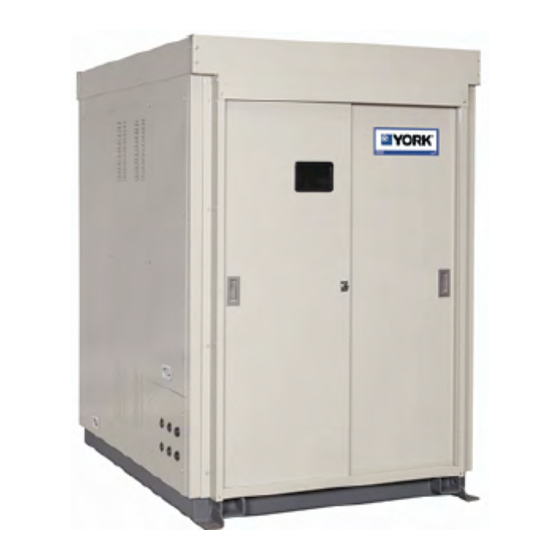
- Page 1 Model YHAU-CGN/H-CXR(M)Double Effect Direct Fired Small Absorption Chiller-Heater 30 ton to 300 ton, 105 kW to 1055 kW Installation, Commissioning, Operation, and Form: 155.42-ICOM2.EN.UL (320) Maintenance New Release Issue Date: 2020-03-12...
-
Page 3: Table Of Contents
Contents General safety guidelines......................5 C o n t e n t s Safety symbols............................. 5 Changeability of this document......................6 Associated literature........................... 6 Nomenclature............................7 General chiller-heater information and safety................8 Introduction............................8 About this manual..........................8 Warranty............................... 9 Quality assurance.......................... - Page 4 Inspection window..........................21 Installation guidelines........................21 Hoisting the machine........................23 Moving the machine on rollers......................23 Storage method of the chiller-heater..................... 26 Structural support and installation....................26 Indoor and outdoor installation...................... 26 Electrical.............................. 27 Precautions for use........................... 27 Leak testing............................28 Electrical shock cautions........................
- Page 5 Interlocking procedure........................87 Operation............................ 103 YHAU-CGN/H-CXR(M) control center.................... 103 Common items..........................103 Change numeric values........................105 Main screen............................106 Operating status..........................106 Control parameter........................... 128 Valve operation..........................129 Date and time..........................130 Operation switch..........................131 Select language..........................131 Weishaupt burner operation LCD....................132 Single loop controller........................
- Page 6 Decrystallization method........................ 153 Decrystallization..........................154 Precautions for decrystallization....................155 Maintenance items.......................... 155 Lifespan for various parts......................158 Water quality control........................159 Chemical water treatment......................159 Replacement of water........................160 Treatment for long stoppage of the absorption chiller-heater..........160 Chemical treatment......................... 160 Flow speed in tubes........................
-
Page 7: General Safety Guidelines
General safety guidelines Important Read before proceeding. This equipment is a relatively complicated apparatus. During rigging, installation, operation, maintenance, or service, individuals may be exposed to certain components or conditions including, but not limited to: heavy objects, refrigerants, materials under pressure, rotating components, and both high and low voltage. -
Page 8: Changeability Of This Document
All wiring must be in accordance with Johnson Controls’ published specifications and must be performed only by a qualified electrician. Johnson Controls will NOT be responsible for damage/problems resulting from improper connections to the controls or application of improper control signals. -
Page 9: Nomenclature
Nomenclature Model YHAU-CGN/H-CXR(M)Double Effect Direct Fired Small Absorption Chiller-Heater... -
Page 10: General Chiller-Heater Information And Safety
Maintenance. About this manual This manual and any other document supplied with the unit are the property of Johnson Controls which reserves all rights. This manual may not be reproduced, in whole or in part, without prior written authorization from an authorized Johnson Controls representative. -
Page 11: Warranty
All wiring must be in accordance with Johnson Controls’ published specifications and must be performed only by a qualified electrician. Johnson Controls will NOT be responsible for damage/problems resulting from improper connections to the controls or application of improper control signals. -
Page 12: Emergency Shutdown
The unit must be grounded. No installation or maintenance work should be attempted on the electrical equipment without first switching the power off, then isolating and locking-off the power supply. Servicing and maintenance on live equipment must not be attempted. No attempt should be made to gain access to the control panel or electrical enclosures during normal operation of the unit. -
Page 13: Safety Labels
Safety labels For safe operation, read the instructions first. WARNING: This machine may start automatically without prior warning. WARNING: Hot surface. WARNING: Safety relief valve may discharge gas or liquid without prior warning. WARNING: Risk of electric shock. General attention symbol. WARNING: On isolating the supply it may take up to 300 seconds for the capacitor voltage to fall below 50 volts. - Page 14 CAUTION: Risk of getting hand caught in machinery. CAUTION: Protect ears. Model YHAU-CGN/H-CXR(M)Double Effect Direct Fired Small Absorption Chiller-Heater...
-
Page 15: Product Description
Product description The principle of refrigeration is the exchange of heat. In absorption liquid chilling, there are four basic heat exchange surfaces: the evaporator, the absorber, the generator, and the condenser. See Figure 2. Like any refrigeration system, absorption chilling uses evaporation and condensation to remove heat. - Page 16 Figure 2: YHAU-CGN-CXR components Model YHAU-CGN/H-CXR(M)Double Effect Direct Fired Small Absorption Chiller-Heater...
-
Page 17: How It Works (Direct Fired Units)
How it works (direct fired units) The double effect (direct fired) absorption chiller-heater uses water as the refrigerant and lithium bromide (LiBr) as the absorbent. It is the strong affinity that these two substances have for one another that makes the chiller-heater cycle work. The vapor pressure of the lithium bromide solution is lower than the vapor pressure of the refrigerant. -
Page 18: Absorber
Absorber Concentrated LiBr solution enters the absorber section of the chiller-heater and is sprayed over the absorber tube bundle. Because the vapor pressure of the concentrated solution is very low, the refrigerant (water) vapor from the evaporator flows into the absorber and is absorbed into the LiBr solution. -
Page 19: Parallel Flow
Figure 5: Plate type heat exchanger The relatively high temperature solution streams from the two generators are used to preheat the weak solution stream leaving the absorber. Parallel flow The unique parallel flow divides the solution between the low temperature generator and the high temperature generator sections into two parallel, balanced paths. -
Page 20: Crystallization
Figure 6: Condenser This completes the cooling cycle. Crystallization All absorption chiller-heaters that use LiBr and water as the solution/refrigerant pair are subject to crystallization. This is due to the fact that some areas of the unit operate with solution liquid concentration levels that are solely possible at higher than the normal ambient temperature surrounding the unit. -
Page 21: Why Does Crystallization Occur
Why does crystallization occur? The most common reason for crystallization is due to power failures. If a chiller-heater is running at full load and power is interrupted for a sufficient length of time, the concentrated solution in the high side of the unit (condenser/generator section) eventually cools down. As no dilution cycle was performed, the solution concentration in some areas of the unit can still be relatively high. -
Page 22: Handling, Storage, Installation, And Reassembly
Handling, storage, installation, and reassembly Figure 7: Warning DANGER Rigging and lifting must be done by a professional rigger in accordance with a written rigging and lifting plan. The most appropriate rigging and lifting method depends on job specific factors, such as the rigging equipment available and site needs. -
Page 23: Inspection
Inspection The unit must be inspected by a Johnson Controls Service representative before customer use. All damage or possible damage must be reported to the transportation company. For further details, see Commissioning. Note: The chiller charges the solution and refrigerant water before delivery, and also charges to 4 psig (0.3 BarG), to pressurize the unit. - Page 24 Check the machine compound gauge daily to verify that there is no decline in vacuum and record the vacuum value (0 mmHg to 40 mmHg [-0.1 MPa to -0.095 MPa]). If the vacuum is below the low limit, contact your nearest authorized Johnson Controls Service Center immediately.
-
Page 25: Hoisting The Machine
CAUTION Ensure that foreign matter does not enter the drain valve and air vent valve in the water chamber casing. Keep these valves fully open while the machine is in storage. Hoisting the machine When hoisting the machine, attach a shackle to each of the four eye plates and lift the machine. Ensure that the angle formed by the wire is within 60 degrees, as shown in Figure 8. - Page 26 When a skid base is used to move the machine on rollers, secure the skid base and place the machine legs evenly on the skid base before moving the machine on rollers. Figure 9: Moving the machine on rollers If using a tir-roller to move the machine, fit the tir-roller set to each of the four holes shown in Figure 10.
- Page 27 Figure 11: Jack-up procedure Operate the front and rear jacks alternately. Do not jack up the machine more than about 20 mm at a time. Each time the machine is jacked up, adhere it with a suitable crosstie. Use the jack-up support on the main shell of the body as shown in Figure 12. If you are using a high temperature generator, use a secondary jack-up support.
-
Page 28: Storage Method Of The Chiller-Heater
Nitrogen gas pressurization inside the absorption chiller-heater is required when the storage period exceeds 6 months. Contact your local Johnson Controls Service Center for more details. DANGER The chiller-heater is not explosion proof. Highly flammable items, gas, or liquids should not be handled or stored near the chiller-heater. -
Page 29: Electrical
Do not place anything heavy on the machine or its control panel; it can fall and injure a worker. Do not climb up the unit without safety harnessing. Contact your local Johnson Controls service office for inspection and maintenance of the unit. Improper inspection and maintenance can cause a machine problem, and can also injure workers. -
Page 30: Leak Testing
Only use the fuel specified on the unit name plate. Inspect the exhaust duct periodically to check for gas leaks. If black and white smoke is produced, stop the machine and contact your local Johnson Controls Service Office for assistance. -
Page 31: Vibration And Isolation Details
Do not block the outer cover suction port or exhaust port. This can cause oxygen starvation. Vibration and isolation details Before installing the unit, fit rubber vibration isolators to the unit base as shown in Figure 13. Use liners to adjust the levelness of the unit. For unit dimensions, see Table 4 and Table 5. Note: Place the unit and frame on flat ground. -
Page 32: Rupture Disk And Relief Piping
Figure 14: YHAU-CGN-CXR nozzle locations Item Description Chilled/hot water outlet Chilled/hot water inlet Cooling water outlet Cooling water inlet Rupture disk and relief piping Note: The ANSI/ASHRAE 15-2001 safety standard code was recently revised to include absorption chiller relief devices. Please read and follow these instructions closely to ensure the chiller installation is compliant to the revised code. -
Page 33: Rupture Disk Discharge Piping Material
CAUTION Liquid coming out of the rupture disk could be in excess of 200°F (93.3°C) The metallic disk is mounted at the factory between two special flanges. The flanges have a knife- edge that perforates a special flange on the disk to create an airtight seal. Note: Do not loosen the bolts around the flange or remove the disk from the holder. -
Page 34: Rupture Disk Discharge Piping Sizing
Rupture disk discharge piping sizing The sizing of the rupture disk discharge piping must not be less than the rupture disk diameter. Where two or more relief devices are connected to a common line or header, the effect of back- pressure that is developed when more than one relief device operates, must be considered. - Page 35 Figure 17: Location of rupture disks Figure 18: Fuel gas piping system The oil return pipe should be connected to the vapor phase part above the service tank, and no shut off valve should be located on this oil return line. In addition, to prevent aeration into the oil supply (delivery) pipe, the oil return pipe should be set apart from the delivery line and a baffle plate should be installed on the return pipe.
- Page 36 The scope of supply of delivery is inside the parameters of the unit shown in Scope of delivery. Installation and piping are outside the scope of supply and should be supplied and prepared by the contractor or customer. See Figure 19 to plan the fuel supply piping from oil storage tank to chiller- heater.
-
Page 37: Flue Equipment Procedure
Flue equipment procedure Select a flue material having sufficient corrosion resistance. Provide the flue with heat insulation to prevent burns and ambient temperature rises. Design a flue that makes the static pressure 0 Pa to -49 Pa at the high-temperature generator connection to the flue. - Page 38 Figure 20: Exhaust gas flue diagram Note: 1. The smokestacks box (option) and the flue and instruments after the points of connection with the flue are outside the scope of delivery. 2. Insulate the flue on the basis of 663°F to protect from possible burning. 3.
-
Page 39: Hot Insulation/Cold Insulation Common Procedure
Hot insulation/cold insulation common procedure The materials and their thickness for hot insulation/cold insulation are shown in Table 1. 1. Use a bonding agent, iron wire, iron band, or other suggested bonding agents, to fix the hot insulation/cold insulation materials. Never rivet them. Do not use welding pins. 2. - Page 40 Figure 21: Interior of control panel (in.) Model YHAU-CGN/H-CXR(M)Double Effect Direct Fired Small Absorption Chiller-Heater...
- Page 41 Figure 22: Exterior of control panel (in.) Model YHAU-CGN/H-CXR(M)Double Effect Direct Fired Small Absorption Chiller-Heater...
-
Page 42: Technical Data
0.3 psig to 4.3 psig (2 kPag to 30 kPag) The numbers shown in Table 3 are the allowable ranges for each parameter. Not all combinations are possible. Check with your Johnson Controls Service Center to see if your temperature differential is possible. - Page 43 Table 7: Physical data (without the auxiliary heat exchanger) Exhaust Outline dimension ft (mm) Holding volume ft gas volume Tube extracting YHAU-CGN /H (m Cooling space ft (mm) Length Width Height Chilled/hot water H) approx. water 536°F (280°C) 30 CXR 11653.8 (330) 7.2 (2200) 4.3 (1320)
- Page 44 Figure 23: Split outline diagram Table 11: Electrical data - CGN Solution Vacuum Main breaker Refrigerant pump circulation pump pump (option) Power source YHAU-CGN Rated (V-pH-Hz) Frame current FLA (A) FLA (A) FLA (A) size (A) AC208V-3pH-60Hz 0.75 30CXR AC460V-3pH-60Hz 1.05 0.75 AC208V-3pH-60Hz 0.75...
- Page 45 Table 12: Electrical data - CGN Burner fan (115 Power source YHAU-CGN V single phase) Total capacity (kVA) Total consumption (kW) SCCR kA (V-pH-Hz) AC208V-3pH-60Hz 0.11 30CXR AC460V-3pH-60Hz 0.11 AC208V-3pH-60Hz 0.11 40CXR AC460V-3pH-60Hz 0.11 AC208V-3pH-60Hz 0.23 50CXR AC460V-3pH-60Hz 0.23 AC208V-3pH-60Hz 0.23 60CXR AC460V-3pH-60Hz...
- Page 46 Figure 24: Power wiring Power supply three-phase, 208/460V, 60 Hz Switch box Solution circulation pump Refrigerant pump LD29650a Model YHAU-CGN/H-CXR(M)Double Effect Direct Fired Small Absorption Chiller-Heater...
- Page 47 Figure 24: Power wiring Switch box Vacuum pump (option) LD29650b Model YHAU-CGN/H-CXR(M)Double Effect Direct Fired Small Absorption Chiller-Heater...
- Page 48 Figure 25: Power supply wiring 115 VAC power supply 115 VAC power supply Noise filter for WS burner fan WS burner controller control circuit LD29703a Model YHAU-CGN/H-CXR(M)Double Effect Direct Fired Small Absorption Chiller-Heater...
- Page 49 Figure 25: Power supply wiring 24 VDC power supply 24 VDC power supply 24 VDC power supply 24 VDC power supply for PLC and HMI control relay on delay relay CN3 for PLC, CN1 for HMI LD29703b Model YHAU-CGN/H-CXR(M)Double Effect Direct Fired Small Absorption Chiller-Heater...
- Page 50 Figure 26: PLC I/O input wiring LD29704a Model YHAU-CGN/H-CXR(M)Double Effect Direct Fired Small Absorption Chiller-Heater...
- Page 51 Figure 26: PLC I/O input wiring LD29704b Model YHAU-CGN/H-CXR(M)Double Effect Direct Fired Small Absorption Chiller-Heater...
- Page 52 Figure 27: PLC I/O input wiring LD29705a Model YHAU-CGN/H-CXR(M)Double Effect Direct Fired Small Absorption Chiller-Heater...
- Page 53 Figure 27: PLC I/O input wiring Solution electrode LD29705b Model YHAU-CGN/H-CXR(M)Double Effect Direct Fired Small Absorption Chiller-Heater...
- Page 54 Figure 28: PLC relay output wiring Relay output LD29706a Model YHAU-CGN/H-CXR(M)Double Effect Direct Fired Small Absorption Chiller-Heater...
- Page 55 Figure 28: PLC relay output wiring Standard 7 LD29706b Model YHAU-CGN/H-CXR(M)Double Effect Direct Fired Small Absorption Chiller-Heater...
- Page 56 Figure 29: PLC relay output wiring LD29707a Model YHAU-CGN/H-CXR(M)Double Effect Direct Fired Small Absorption Chiller-Heater...
- Page 57 Figure 29: PLC relay output wiring Standard 5 LD29707b Model YHAU-CGN/H-CXR(M)Double Effect Direct Fired Small Absorption Chiller-Heater...
- Page 58 Figure 30: PLC analog input wiring LD29708a Model YHAU-CGN/H-CXR(M)Double Effect Direct Fired Small Absorption Chiller-Heater...
- Page 59 Figure 30: PLC analog input wiring LD29708b Model YHAU-CGN/H-CXR(M)Double Effect Direct Fired Small Absorption Chiller-Heater...
- Page 60 Figure 31: PLC analog input wiring LD29709a Model YHAU-CGN/H-CXR(M)Double Effect Direct Fired Small Absorption Chiller-Heater...
- Page 61 Figure 31: PLC analog input wiring LD29709b Model YHAU-CGN/H-CXR(M)Double Effect Direct Fired Small Absorption Chiller-Heater...
- Page 62 Figure 32: PLC analog output wiring LD29710 Model YHAU-CGN/H-CXR(M)Double Effect Direct Fired Small Absorption Chiller-Heater...
- Page 63 Model YHAU-CGN/H-CXR(M)Double Effect Direct Fired Small Absorption Chiller-Heater...
- Page 64 Figure 33: PLC relay input wiring Absorber High temperature Hot water Cooling water Chilled water float switch generator pressure flow switch (option) flow switch (option) flow switch 33SL and exhaust gas 69WC3 69WC2 69WC1 temperature switch 63SH1, 26EG LD29711a Model YHAU-CGN/H-CXR(M)Double Effect Direct Fired Small Absorption Chiller-Heater...
- Page 65 Figure 34: Weishaupt burner control wiring WS burner control wiring WS burner WS burner WS burner WS burner start/stop modulating control alarm combustion LD29711b Model YHAU-CGN/H-CXR(M)Double Effect Direct Fired Small Absorption Chiller-Heater...
- Page 66 Figure 35: External heat exchanger for direct fired chiller (option 1) LD29712a Model YHAU-CGN/H-CXR(M)Double Effect Direct Fired Small Absorption Chiller-Heater...
- Page 67 Figure 35: External heat exchanger for direct fired chiller (option 1) Option 1: External heat exchanger for direct fired chiller LD29712b Model YHAU-CGN/H-CXR(M)Double Effect Direct Fired Small Absorption Chiller-Heater...
- Page 68 Figure 36: Freeze protection for low ambient temperature (option 5) 115 VAC power supply heating cable LD29713a Model YHAU-CGN/H-CXR(M)Double Effect Direct Fired Small Absorption Chiller-Heater...
- Page 69 Figure 36: Freeze protection for low ambient temperature (option 5) Option 5 Option 5: Freeze protection for low ambient temperature LD29713b Model YHAU-CGN/H-CXR(M)Double Effect Direct Fired Small Absorption Chiller-Heater...
- Page 70 Figure 37: Residential hot water (option 7) Residential hot water outlet temperature LD29715a Model YHAU-CGN/H-CXR(M)Double Effect Direct Fired Small Absorption Chiller-Heater...
- Page 71 Figure 37: Residential hot water (option 7) Option 7: Residential hot water Please set PLC SW1 and SW2 as shown 115 VAC power supply control valve LD29715b Model YHAU-CGN/H-CXR(M)Double Effect Direct Fired Small Absorption Chiller-Heater...
- Page 72 Figure 38: Display connection details Model YHAU-CGN/H-CXR(M)Double Effect Direct Fired Small Absorption Chiller-Heater...
- Page 73 Figure 38: Display connection details Model YHAU-CGN/H-CXR(M)Double Effect Direct Fired Small Absorption Chiller-Heater...
- Page 74 Figure 39: External connection terminal details Ancillay equipment board Absorption chiller control panel (out of scope of supply) (scope of supply) Power supply 3-phase, 3-wire (see the specification sheet for voltage and frequency) Z3 terminal block Remote start/stop Standard (potential-free level signal) Chilled water pump interlock Cooling water pump interlock Combustion monitoring interlock...
- Page 75 Figure 40: External connection terminal details (2) Ancillary equipment board Absorption chiller control panel (out of scope of supply) (scope of supply) Z3 terminal block Remote start (potential-free pulse signal) Option Remote stop (potential-free pulse signal) Starting panel for residential hot water pump (out of scope of supply) Z5 terminal block Residential hot water pump...
- Page 76 Table 15: Contact specifications Contact specification Max. start and stop voltage: AC250 V/DC30 Max start and stop current: 2 A/1 point Digital signal (resistance load) Absorption chiller-heater control panel Max start and stop voltage: AC250 V/DC30 -> External input terminal V (resistance load) Permit resistance load: 500 Ω...
- Page 77 Figure 42: Signal terminal transition wiring Note: 1. Every unit must be correctly grounded. 2. Connect a following interlock if necessary. 3. (The * tells you to make sure to connect.) a. Operating interlock - *Chilled/hot water operation interlock, - Air handling unit interlock - Gas duct damper full open interlock b.
-
Page 78: Upper Communication Specification
f. Emergency failure interlock - Gas leak detector 4. As for terminal base position and contact specification, see Figure 39. 5. Use a shield wire that has a maximum of extension 650 ft (200 m) and is more than 0.0027 in. (1.75 mm 6. - Page 79 Scope of delivery Johnson Controls scope of delivery for the upper communication system covers the control panels for the upper communication function. The customer is responsible to deliver all other related equipment: concentrator (HUB), installation, wiring, communication program for the central monitoring unit, and other applicable communication cables.
- Page 80 Communication data Table 19: Read command Item Display Unit Address Content 44.6 °F Set Point (Chilled/Hot water 00001 0050~1000 unit, 1 unit=0.1°F (0.1°C) outlet temp.) °C 41.0 °F Automatic stop temp. at cooling 00003 0040~1000 unit, 1 unit=0.1°F (0.1°C) mode (thermo-off temp) °C Temp.
- Page 81 Table 20: Write command Item Address Content Chiller-heater operation 02001 ON at CHILLER-HEATER OPERATION, PULSE SIGNAL signal 2 Chiller-heater stop signal 02002 ON at CHILLER-HEATER STOP, PULSE SIGNAL 3 Set point 00203 0050~1000 unit, 1 unit=0.1°C User-created The diagrams and tables that follow detail some of the work that must be performed by the customer to ensure that the communication systems work correctly.
- Page 82 Table 22: Cable diagram (RS-422/RS485) Pin connection RS-422/RS-485 Pin no. Signal name Direction Meaning Input Receive data A (+) Input Receive data B (-) Output Send data A (+) Output Data terminal ready A (+) Signal ground Input Send possible B (-) Output Send data B (-) Input...
- Page 83 Figure 46: Two-wire N:1 connection with user-created cable Four-wire type cable diagrams The following are sample cable diagrams for four-wire type connections. They use a GP4000 series (COM2). Figure 47: Four-wire 1:1 connection with user-created cable Model YHAU-CGN/H-CXR(M)Double Effect Direct Fired Small Absorption Chiller-Heater...
- Page 84 Figure 48: Four-wire N:1 connection with user-created cable The following table contains information regarding the communication specifications needed for the Modbus RTU. See Communication specification for information about the read command or Table 20 about the write command. Table 23: Communication specifications Communication protocol Modbus/RTU RS422/RS485 data length: 8 Bit Stop Bit: 1 Bit Parity: EVEN...
-
Page 85: Sound Data
Sound data Noise emission information: The direct fired chiller-heater running with the burner can produce an A-weighted emission sound pressure level in excess of 80 dB(A). Normally the A-weighted sound power level is less than 100 dB(A). Hearing protection must be worn at all times when operating the chiller-heater. -
Page 86: Commissioning
Commissioning General guidelines for use Before operation Note: The unit does not have the vacuum pump. Use the service vacuum pump to purge the vacuum initially. Charge the solution and the refrigerant water if the solution and refrigerant water is in the barrels during the delivery. -
Page 87: Precautions For The Use Of Water
The steps and procedures must be performed by a YORK/ Johnson Controls Service person before customer use. All items on the checklist must be completed before charging and initial operation. Failure to do this can result in machine malfunction, damage, and/or injury. -
Page 88: Liquid Level Gauges
Liquid level gauges Liquid level gauges are used to check the conditions of the chiller-heater components. Table 26: Liquid level gauges (sight glass) Liquid level gauge name Symbol Function Refrigerant overflow monitoring G101 Checks refrigerant overflow level level gauge Refrigerant tank level gauge G102 Checks lower limit of refrigerant tank level Absorber level gauge... -
Page 89: Stop The Chiller-Heater
Stop the chiller-heater Press the STOP button on the main screen of the control panel. To stop the chiller-heater from a remote location, enter the remote stop signal. When the chiller-heater stops, the following occurs: • The capacity control valves close. •... - Page 90 Figure 50: Cooling and heating start diagram Note: 1. Do not start the cooling water pump and cooling tower fan during the heating model. 2. If the unit runs the heating model with the auxiliary heat exchanger, the process is not active in the red frame.
- Page 91 Figure 51: Direct fire sequential operation flowchart Note: 1. Implement sequential operation of the chilled/hot water pump and the cooling water pump from the chiller-heater. 2. If there is one air conditioner only, secure interlock for the air conditioner operation (indicated by broken lines in the previous diagram). 3.
- Page 92 Note: 1. Verify that the air conditioner has stopped after the chiller-heater dilution operation is completed. Otherwise, the chiller-heater can become damaged due to freezing of the chilled water and/or crystallization of the solution. 2. If the unit runs the heating model with the auxiliary heat exchanger, the process is not active in the red frame.
- Page 93 YHAU-CGN/H-CXR(M) Small Direct Fired Absorption Chiller-Heater Checklist Chiller-heater start up and commissioning checklist Customer: Address: Phone: JCI tel no.: Job name: Location: Customer order no.: JCI order no.: JCI contract no.: Unit model no.: Unit serial no.: The work (as checked below) is in process and will be completed by: YYYY Form Number: 155.42-CL2.UL (317)
- Page 94 Pre-start up A. General 1. All major components, boxes, and crates have been received and accounted for by a YORK/Johnson Controls Service representative. 2. Any damage, or signs of possible damage, have been documented to the transportation company. 3. Unit is installed in an area protected from weather and maintained at a temperature above freezing.
- Page 95 a. Chilled or hot water inlet line b. Cooling water inlet line c. Residential hot water line 5. Air piping work is complete, leak tested, and flushed for the following lines: a. Chilled or hot water b. Cooling water c. Fuel gas d.
- Page 96 D. Electrical 1. The main and control power supply is available, and voltage is set within acceptable range. 2. The insulation resistance of each motor and MCB secondary side is within acceptable range. 3. All wiring is complete from the main power supply to the power panel, but is not cut to final length or connected to the panel.
- Page 97 H. Fuel gas line check 1. Gas type and calorific value of fuel gas corresponds to specification. 2. Gas supply pressure is within acceptable range. 3. Gas shut-off valves for the main burner perform within acceptable range. 4. Close the measuring port valves for gas line. 5.
- Page 98 18. Confirm that the consumption of fuel gas at high combustion is within the acceptable range. 19. Verify that the concentration of Carbon Monoxide (CO) and Oxygen (O ) is within the acceptable range when the exhaust gas is at high combustion. 20.
- Page 99 Start up A. Operation Check 1. Press the Control Valve Mode Auto button. 2. Check that the capacity control valve works automatically according to the chilled water outlet temperature. 3. Press the STOP button on the Control Panel. 4. Check that the dilution process completes. 5.
- Page 100 E. Operation Instruction Review the operation and maintenance instructions with the customer. a. Customer names: Customer signature: Title: Form completed by: Month Year Table 1: Small direct fired absorption chiller-heater commissioning data sheet (1/3) User: Model: Contract: User's tag ID code: Insulation Resistance Electric Power Supply Standard: 5 MΩ...
- Page 101 Notes: YHAU-CGN/H-CXR(M) Small Direct Fired Absorption Chiller-Heater Checklist Model YHAU-CGN/H-CXR(M)Double Effect Direct Fired Small Absorption Chiller-Heater...
- Page 102 Table 2: Small direct fired absorption chiller-heater commissioning data sheet (2/3) Combustion data Measured by Specification Standard Middle High Output Value Control panel Fuel Damper Damper pointer Position Air Damper Damper pointer Position Fuel Primary Pressure gauge Pressure (P1) Fuel Secondary Pressure gauge Pressure (P2) Fuel Consumption...
- Page 103 Table 3: Small direct fired absorption chiller-heater commissioning data sheet (3/3) User: Model: Contract: User's tag ID code: Running Data Date: Measured by Specification Standard Output valve Control panel Exhaust gas °F Control panel ≤ 482°F Fuel temperature Fuel Flow meter consumption Inlet °F...
- Page 104 (B) - (P) x { (T) - previous(T) } (C) = (T) - previous(T) © 2020 Johnson Controls. All rights reserved. All specifications and other information shown were current as of document revision and are subject to change without notice. www.johnsoncontrols.com...
-
Page 105: Operation
Operation YHAU-CGN/H-CXR(M) control center The YHAU-CGN/H-CXR(M) control center, furnished as standard on each chiller-heater, allows for efficiency, monitoring, data recording, chiller-heater protection, and operating ease. The control center is factory-mounted, wired, and tested. It used as a control system for lithium bromide absorption chiller-heaters. - Page 106 When you press the OPER. button while the chiller-heater is stopped, or STOP while the chiller- heater is operating, a confirmation message appears. Press YES or NO depending on whether you want to continue or cancel your selection. Model YHAU-CGN/H-CXR(M)Double Effect Direct Fired Small Absorption Chiller-Heater...
-
Page 107: Change Numeric Values
• Screen Name Buttons:Each screen includes buttons for changing screens. The button that is lit indicates what screen you are on. These are located along the bottom of the screen. Change numeric values Many numeric values, such as the set point and the ranges on the trend screen, can be changed. To change the values, complete the following steps: 1. -
Page 108: Main Screen
Main screen Figure 53: Main screen The main screen displays the equipment status (chiller-heater start or stop, operating, pumps ON or OFF, purge pump ON or OFF, and chilled or hot, and cooling water pumps ON or OFF). Also, the operating status of the various modes of chiller-heater operation. Operating status On the upper left of the screen below the LOCAL and REMOTE buttons is a list of options. - Page 109 • Dilution: The light is lit during the dilution operation after the chiller-heater stops. It turns off when the dilution operation is complete. Set Point: The set point of chilled/hot water leaving temperature is shown on the left of the screen. The system illustration lights (lines fill in) when the system is operating.
- Page 110 Data screen Figure 54: Data screen The data screen displays values showing temperatures, operating hours, operating frequency, data trends and a history of failures, alarms, and time based temperature trends. In the measured value section of the data screen the following display: Chilled/Hot Water Inlet Temp.: Temperature of the chilled/hot water measured as it enters the evaporator Chilled/Hot Water Outlet Temp.: Temperature of the chilled/hot water measured as it leaves the...
- Page 111 RHW Out Temp: Temperature of the residential hot water as it leaves the residential heat exchanger (optional) The Operation Hours section shows the following: • Operation: How long the chiller-heater has been running. • Cooling: How long the chiller-heater has been running in cooling mode •...
- Page 112 When maintenance is overdue, the maintenance alarm is activated with the warning “Solution analysis should be done.” When the warning appears, contact your local Johnson Controls Service Center. The control panel parts replacement section of the screen shows the maintenance interval and current operation hours from when the last control panel maintenance was performed.
- Page 113 Solution pump overhaul/refrigerant pump overhaul screen Figure 56: Solution pump overhaul/refrigerant pump overhaul screen The solution pump overhaul section of the screen and the refrigerant pump overhaul section of the screen both indicate the maintenance interval and the current operation hours from when the last maintenance was performed.
- Page 114 When the required maintenance interval has passed, the maintenance alarm is activated with the warning “Burner parts should be replaced.” When the warning appears, contact your local Johnson Controls service center.
- Page 115 Trend screen Figure 58: Trend screen To view the trend screen, press the Trend button above the history menu section on the data screen. This screen graphically illustrates the trend of the temperature and the pressure for the following: • Chilled/Hot Water Inlet: Temperature of the chilled/hot water measured as it enters the evaporator •...
- Page 116 Use the numeric keypad to make the changes. For more information on the procedure, see Change numeric values. To move to another screen, press the any of the available buttons along the bottom of the screen. Hourly operation history screen Figure 59: Hourly operation history To view the hourly operation history screen, press the Hourly Operation button in the history menu screen section of the data screen.
- Page 117 The heading of the screen includes the X time ago and the measured date and time. Buttons are available to select measurements for up to 12 times ago, to cover the 12 hour period. Operation: Operation status of the chiller-heater Operation Method: Selected operation method (local or remote) Solution Pump: Operation status of the solution pump Refrigerant Pump: Operation status of the refrigerant pump...
- Page 118 Minutely operation history screen Figure 60: Minutely operation history To view the minutely operation history screen, press the Minutely Operation button in the history menu section of the data screen. The minutely operation history screen shows operational information for the last 12 minutes and contains the following fields of information: Operation: Operation status of the chiller-heater Operation Method: Selected operation method...
- Page 119 The Cooling Water section displays the following: Inlet Temperature: Temperature of the cooling water measured as it enters the absorber Outlet Temp.: Temperature of the cooling water measured as it leaves the condenser Refrigerant Temp.: Temperature of the refrigerant in the evaporator Absorber Temp.: Temperature of the diluted solution in the absorber Exhaust G Temp.: Temperature of the exhaust gas measured as it leaves the high temperature generator...
- Page 120 Failure history screen Figure 61: Failure history screen You move to the failure history screen after you press the Failure History button in the history menu screen section. The failure history screen shows failure information for the last failure and up to six previous failures.
- Page 121 Outlet Temp.: Temperature of the chilled/hot water measured as it leaves the evaporator The Cooling Water section displays the following: Inlet Temperature: Temperature of the cooling water measured as it enters the absorber Outlet Temp.: Temperature of the cooling water measured as it leaves the condenser Refrigerant Temp.: Temperature of the refrigerant in the evaporator Absorber Temp.: Temperature of the diluted solution in the absorber Exhaust G Temp.: Temperature of the exhaust gas measured as it leaves the high temperature...
- Page 122 Alarm history screen Figure 62: Alarm history screen View the alarm history screen after you press the Alarm button in the history menu section of the screen. The alarm history screen shows alarm information for the last alarm and up to six previous alarms. The alarm section contains the following fields of information: Alarm Name: Name or type of alarm Measured Date and Time: Date and time of the alarm...
- Page 123 Outlet Temp.: Temperature of the chilled/hot water measured as it leaves the evaporator The Cooling Water section displays the following: Inlet Temperature: Temperature of the cooling water measured as it enters the absorber Outlet Temp.: Temperature of the cooling water measured as it leaves the condenser Refrigerant Temp.: Temperature of the refrigerant in the evaporator Absorber Temp.: Temperature of the diluted solution in the absorber Exhaust G Temp.: Temperature of the exhaust gas measured as it leaves the high temperature...
- Page 124 Failure and alarm screen Figure 63: Failure and alarm screen This screen displays failure indications (time-outs, operation interlock, overcooled refrigerant, over and under temperatures, and problems with the unit’s pumps) and system alarms. The failure light in the upper right corner is red. The alarm light is orange. Failure When a failure occurs, an alarm sounds (buzzer).
- Page 125 Press the CLOSE button to return to the failure and alarm screen. After fixing the problem, press the FAILURE RESET button to reset the lighted failure button. If you press the FAILURE RESET button before fixing the problem, the lighted failure button stays lighted, and the buzzer sounds again.
- Page 126 Table 27: Failure list Operation at Failure name Cause Counter measures failure occurrence • Check the chilled/hot water pump. • Check the chilled/hot water Chilled/hot water pump operation line. interlock and/or the chilled/hot • Check the chilled/hot water Chilled/Hot Water Time water suspension relay was not flow.
- Page 127 Constantly Monitoring Constant monitoring interlock was • If any of the components Interlock not established. are not working, contact your local Johnson Controls Service Center. Stop after dilution • Check equipment connected as combustion Combustion monitoring interlock monitoring interlock...
- Page 128 Table 27: Failure list Operation at Failure name Cause Counter measures failure occurrence HG solution temperature increased • Check the cooling water HG High Temperature line. abnormally HG High Pressure HG pressure increased abnormally • Check the cooling water flow rate. •...
- Page 129 Table 28: Alarm list Alarm name Cause of alarm and condition to reset Counter measures Purge frequency within a set time exceeded its defined value, • Purge manually (according Abnormal Purge to instructions in therefore chiller-heater is suspected of poor air-tightness. Frequency Maintenance).
-
Page 130: Control Parameter
Setting screen Figure 64: Setting screen This screen displays control parameters (setting method and each setting parameter), operation switch (forced dilution, refrigerant pump, purge mode, and manual purge, and other applicable gauges and pumps), and date and time parameters. Press the SETTING button to access this screen. Control parameter The control parameter section of the SETTING screen is used to enter parameters for the cooling and heating operation, such as target temperature, automatic stop temperature, and differential to... -
Page 131: Valve Operation
If a failure occurs, you automatically see the failure and alarm screen. For detailed information on how to change an entry in one of these fields, see Change numeric values. Valve operation Note: The valve operation buttons can be found in the Maintenance interface on the touch screen. -
Page 132: Date And Time
Note: The valve position setting can be changed when the control valve mode manual button is pushed only. Valve Position Setting: Shows the capacity control valve position setting, expressed as a percentage. In case of the link-less burner, this valve position is for the fuel damper motor. The air damper position is calculated based on the fuel and air position table. -
Page 133: Operation Switch
The date and time can also be updated if you press the Date and Time button on the setting screen. The procedure is the same. Operation switch In this screen section, choices can be made about the mode of operation for the various devices. Use the buttons to make your choice. -
Page 134: Weishaupt Burner Operation Lcd
Weishaupt burner operation LCD Figure 65: Weishaupt burner operation LCD Note: For detailed information of the Weishaupt burner, check the burner manual. Single loop controller Note: This is optional for the simultaneous use of hot water. The YHAU-CGN/H-CXR(M) can have the additional control of hot water or the optional simultaneous operation. - Page 135 The following are included on the controller: Upper Display: Shows the process variable (PV) mode or alternates between the display and set values for each item. If an alarm is triggered, the display changes. It alternates between an alarm code and the normal information. Lower Display: Shows the set point or measured variable or current transformer (SP/MV/CT) value.
- Page 136 Run mode When the control command that comes from the control panel is ON, the controller is in RUN mode. That means the controller is ready to use. Figure 67: Run mode The multi-status display functions as a simple bar graph when the unit is in RUN mode. The graph tells you what the control output of the unit is from 0% to 100%.
- Page 137 Figure 68: Ready mode Alarm mode When the controller receives an alarm signal, the upper display flashes slowly. The information in the display alternates between the normal information and the alarm code. In addition, the multi-status display lights ripple through the left and right lights. See an example of what the single loop controller in alarm mode might look like in Figure 69.
- Page 138 Alarm codes The following table contains the alarm codes for the controller, the name of the failure that triggered the alarm, the cause of the alarm, and the action needed to correct the problem. The codes are the same for both mechanisms covered in this document. Table 29: Alarm codes Alarm code Failure name...
- Page 139 Figure 70: Hot water control valve Auto/manual mode (RHW only) The ability to choose between automatic and manual mode is available when the controller is being used to manage the residential hot water control valve. It is not available for any other mechanism. To access manual mode, press the Display button.
- Page 140 Changeover to cooling mode 1. Press and hold the Operation Mode Cooling button on the setting screen for 15 seconds. See Figure 72. 2. Press the Cool or Heat Simultaneous OFF button on the setting screen. See Figure 72. 3. Set each cooling or heating changeover valve to cooling mode. See Table 30. 4.
- Page 141 6. Close all of the manual valves in the purge line (VC and V15). 7. Press the purge mode Auto button on the setting screen. Use simultaneous residential hot water supply mode (option) In this mode, residential hot water is supplied through the auxiliary heat exchanger (option) while chilled water or hot water is supplied through the evaporator.
- Page 142 6. Open the refrigerant manual blow valve. For the location of the refrigerant manual blow valve (VB), see Figure 75. The refrigerant in the evaporator is diverted into the absorber. 7. Observe the liquid level at the lower part of the evaporator through the level gauge (G102). 8.
- Page 143 Figure 72: Changeover valve locations for standard unit Table 30: Changeover valve operation Valve operation/location Refrigerant Operation mode Refrigerant vapor from Purge valves Cooling water valve E->A (VB) LG -> E (VA) Cooling Close Close Open: VC and V15 Inlet/outlet open Inlet: Closed Heating Open...
- Page 144 Figure 73: Changeover valve locations for high temperature hot water design Model YHAU-CGN/H-CXR(M)Double Effect Direct Fired Small Absorption Chiller-Heater...
- Page 145 Figure 74: Changeover valve locations for simultaneous operation Table 31: Changeover valve operation/location for unit with auxiliary heat exchanger Valve operation/location Operation mode HG -> LG HG sol HG sol E -> A (VB) Purging valve CW valve CH valve HW valve ref (VA) supply (V3) return (V2)
-
Page 146: Maintenance
If not, it can cause electric shock and burn. CAUTION Contact your local Johnson Controls Service Office for inspection and maintenance of the unit. Improper inspection and maintenance can cause a machine malfunction and injury. -
Page 147: Solenoid Valves
Solenoid valves The absorption chiller-heater is equipped with the following solenoid valves. Table 32: Solenoid valves Solenoid valve name Symbol Function Purge solenoid valve (1) Close vacuum pump piping Purge solenoid valve (2) Solenoid valve of water ejector Close the water pipe Air purge valves and drain valves The chiller-heater is equipped with air purge valves and drain valves for chilled/hot water and cooling water. -
Page 148: Purge Procedure
4. Use the procedure shown in Purge procedure, to purge air from the low pressure side (absorber). Note: Remember: Only deionized water can be used as the refrigerant in the chiller-heater Purge procedure Air must be purged from the chiller-heater to maintain its performance and prevent deterioration of its internal parts. -
Page 149: Manual Method To Purge Non-Condensable Gas Directly From Absorber
Figure 75: Location of manual valve in purging system YHAU-CGN/H(30~100)CXR Manual method to purge non-condensable gas directly from absorber When the chiller-heater operates at a lower capacity than usual for a long period of time or when it restarts after a power failure, the absorber can contain non-condensable gases. If the machine starts under these conditions, its performance and efficiency go down. -
Page 150: Manual Method To Purge Non-Condensable Gas From The Purge Tank
5. Close the absorber purging valve. 6. Press the purge pump Mg-SW OFF button. Stop the service vacuum pump. 7. Remove the purge hose from the absorber purging valve and disconnect the wires of the vacuum pump from the control panel. Note: When connecting and disconnecting the wires of the vacuum pump, close the MCCB to power off the unit. - Page 151 4. When the purge tank pressure increases to 60.9 mmHg (8 kPa.a), the water ejector purging operation starts. The water line solenoid valve (SV3) opens firstly. After 10 seconds, the purge line solenoid valve (SV1 and SV2) open. The non-condensable gas is purged out. 5.
- Page 152 Figure 76: Cycle flow diagram (heating) Model YHAU-CGN/H-CXR(M)Double Effect Direct Fired Small Absorption Chiller-Heater...
- Page 153 Figure 77: Cycle flow diagram for high temperature hot water design (heating) Model YHAU-CGN/H-CXR(M)Double Effect Direct Fired Small Absorption Chiller-Heater...
-
Page 154: Refrigerant Refining Method
Figure 78: Cycle flow diagram for simultaneous operation (cooling and heating) Refrigerant refining method Note: Only deionized water may be used as the refrigerant in the chiller-heater. With an increase in the operation time of the chiller-heater, some of the solution can mix in with the refrigerant. -
Page 155: Manual Refrigerant Blow Down And Diluting Method
As it becomes more difficult to melt the crystals as time passes, perform the following operation immediately when crystallization is detected. If the crystals cannot be melted by the following procedure, notify your local Johnson Controls Service Center immediately. -
Page 156: Decrystallization
• The following button is lit and the solution pump trips: - Sol. Circu P. Abnormal • The solution level can be seen through the level gauges on the high temperature generator. • The liquid level in the absorber is low and the solution level can be seen through the generator level gauges (G104) white. -
Page 157: Precautions For Decrystallization
Maintenance items Maintenance and inspection items along with standard inspection periods are shown in the next table. For details, contact your local Johnson Controls Service Center. Inspection frequency can be adjusted according to the actual operating conditions. Table 33: Maintenance and inspection... - Page 158 Table 33: Maintenance and inspection Task Contents Frequency Scope Measure the insulation resistance of the main circuit and motors (solution pump, refrigerant Measurement of pump) mainly to check for lowering of insulation. insulation resistance of When measuring the insulation resistance, electric devices disconnect the wires of the temperature controller and other relevant controllers that can cause...
- Page 159 Collect the combustion data. Check the data collected during the commissioning. Note: *If water quality analysis indicates necessity. Note: C = Customer, S = Johnson Controls Service Refrigerant pump manual stop The refrigerant pump can be stopped manually for maintenance purposes. It can be stopped even while the chiller-heater operates.
-
Page 160: Lifespan For Various Parts
Note: After maintenance of the refrigerant pump is complete, reset it to auto. Continued operation in stop state can cause damage to, and failure of, the chiller-heater. Lifespan for various parts The replacement periods for some parts are shown below. The time periods shown in the following table are for reference only. -
Page 161: Water Quality Control
Table 34: Lifespan of common parts Description Applicable models or sections Lifespan of common parts Bearing For Refrigerant Pump Every 20,000 hrs Refrigerant Pump Every 60,000 hrs Rupture disk 30000 Water Line Solenoid Valve AB41 Every 30,000 hrs Refrigerant Blow Solenoid Valve AB41 Float Valve For HG float box Float Valve... -
Page 162: Replacement Of Water
Replacement of water Because the cooling water system can be polluted by various factors, it must be cleaned and the water it in must be replaced periodically. Generally, if the water is not treated at all by the cooling tower, the interval to replace the cooling water is: •... - Page 163 Table 35: Tendency of generation of scales and corrosion by quality of cooling water General tendency Quality of cooling water Scale and its color Corrosion and its color Hard scales are generated Dark brown ~ Pale Water of low PH number Bad corrosion of iron and copper.
- Page 164 Table 36: Chilled/hot and cooling water quality control (maximum concentrations) Cooling water system Chilled/hot water system Tendency Non- circulating Circulating type water (1) (6) Element Circulating Replenish Replenish Scale Circulating water Passing water water (77°F Corrosion water water forming (25°C) or lower) pH (77°F 6.5~8.2 6.0~8.0...
-
Page 165: Storage Method Of The Chiller-Heater
Nitrogen gas pressurization inside the absorption chiller-heater is required when the storage period exceeds 6 months. Contact your local Johnson Controls Service Center for more details. DANGER The chiller-heater is not explosion proof. Highly flammable items, gas, or liquids should not be handled or stored near the chiller-heater. - Page 166 If it is likely that the temperature can drop below that, provide a heater for the machine. If a heater is not possible, contact your local Johnson Controls service center for further information. For details on the wet storage method, see Wet storage method.
-
Page 167: Precautions Against External Damage
If it is not possible to protect the machine, fill the interior with N to minimize the amount of air leakage. For details, contact your local Johnson Controls service center. Table 37: Wet storage method Storage period... - Page 168 • Lining pipe is not used for the cooling water piping system. If you use the lining pipe, use a heat - resistant lining pipe. CAUTION To avoid risk of corrosion, do NOT leave any poor quality cooling water in the absorber and condenser tubes.
- Page 169 6. Fill the absorber and condenser with clean water. 7. Keep this condition during heating operation period. Dry storage Dry storage involves draining the water from the tubes. It is most often used when the unit is installed in an outdoor location. The condition around the chiller-heater is as follows: •...
- Page 170 5. Drain all of the cooling water from the absorber and the condenser. 6. Dry inside of each water chamber and heat transfer tube well. 7. Keep this condition during heating operation period. Model YHAU-CGN/H-CXR(M)Double Effect Direct Fired Small Absorption Chiller-Heater...
- Page 171 Figure 82: Duhring diagram/PTX chart (°F) Model YHAU-CGN/H-CXR(M)Double Effect Direct Fired Small Absorption Chiller-Heater...
- Page 172 Figure 83: Duhring diagram/PTX chart (°C) Model YHAU-CGN/H-CXR(M)Double Effect Direct Fired Small Absorption Chiller-Heater...
- Page 173 Figure 84: Specific gravity - concentration (°F) Model YHAU-CGN/H-CXR(M)Double Effect Direct Fired Small Absorption Chiller-Heater...
- Page 174 Figure 85: Specific gravity - concentration (°C) Model YHAU-CGN/H-CXR(M)Double Effect Direct Fired Small Absorption Chiller-Heater...
-
Page 175: Troubleshooting
Use the following procedures listed to fix the problem. If the cause is not clear, using the countermeasure cannot repair the problem, or if the chiller- heater seems to have a serious problem, contact your local Johnson Controls Service Center immediately. - Page 176 Use the instructions shown in Maintenance. Heat exchange tube is dirty (chilled/hot water, cooling water). Solution is crystallized. Contact your local Johnson Controls Service Office. Corrosion inhibitor is worn. Air leaks in absorption chiller- heater. Table 40: Refrigerant overcooling relay...
- Page 177 Table 44: Abnormal control sensor Item Cause Countermeasure contact failure tighten terminal in control panel sensor abnormal or disconnected contact your local johnson controls service office. inductive noise Table 45: CPU abnormal Item Cause Countermeasure control board malfunction contact your local johnson controls service office.
- Page 178 Cause Countermeasure Pressure transfer pipe of water suspension switch is clogged. Contact your local Johnson Controls Service Office. Water suspension switch is broken. If the chiller-heater has a pump problem, it does not perform the diluting operation but stops immediately. If left as it is, the solution in it can be crystallized in 4-5 hours. To prevent this, contact your local Johnson Controls Service Office immediately.
-
Page 179: Troubleshooting Performance Issues
If the performance is insufficient while the capacity control valve is fully opened or if the capacity control valve does not fully open while the load is sufficient, check numbers 1-6 in the following table in order. If the cause is found in numbers above 6, contact your local Johnson Controls Service Center immediately. - Page 180 Table 50: Insufficient vacuum levels Item Cause Countermeasure Contact your local Johnson Controls Service Water ejector trouble. Office. Check the water pressure or open the water Water pressure is not enough or the water valve do not open.
- Page 181 Figure 86: Troubleshooting sequence flow chart Model YHAU-CGN/H-CXR(M)Double Effect Direct Fired Small Absorption Chiller-Heater...
-
Page 182: Actions To Take Against Power Failure
Actions to take against power failure If the main power fails, take the following actions. Note: If the unit runs heating with the auxiliary heat exchanger, do not do the following action against the power failure. Figure 87: Actions to take against power failure Model YHAU-CGN/H-CXR(M)Double Effect Direct Fired Small Absorption Chiller-Heater... -
Page 183: Decommissioning, Dismantling, And Disposal
Decommissioning, dismantling, and disposal Unless otherwise indicated, the following operations can be performed by any correctly trained maintenance technician. 1. Isolate all sources of electrical supply to the unit, including any control system supplies switched by the unit. Make sure that all points of isolation are secured in the off position. 2. - Page 184 © 2020 Johnson Controls. 5000 Renaissance Drive, New Freedom, York, PA 17349, USA. Subject to change without notice. All rights reserved.
Need help?
Do you have a question about the York YHAU-CGN-CXR Series and is the answer not in the manual?
Questions and answers