3Com CoreBuilder 2500 Getting Started Manual
3com corebuilder 2500: quick start
Hide thumbs
Also See for CoreBuilder 2500:
- User manual (244 pages) ,
- Software installation and release notes (64 pages)
Table of Contents
Advertisement
Quick Links
Download this manual
See also:
User Manual
Advertisement
Table of Contents

Related Manuals for 3Com CoreBuilder 2500


Summary of Contents for 3Com CoreBuilder 2500
-
Page 1: Getting Started Guide
CoreBuilder Getting Started Guide ® http://www.3com.com/ Part No. 801-00376-000 Published June 1997 Revision 02 2500 ™... -
Page 2: Revision
3Com Corporation © Copyright 3Com Corporation, 1997. All rights reserved. No part of this documentation may be reproduced in any form or by any means or used to make any derivative work (such as translation, transformation, or adaptation) without permission from 3Com Corporation. - Page 3 NS/G/12345/J/100003 for indirect connection to the public telecommunication network. Trademarks 3Com registered trademarks are registered in the United States and may or may not be registered in other countries. 3Com, the 3Com logo, LANplex, LinkBuilder, NETBuilder, SuperStack, and Transcend are registered trademarks of 3Com Corporation. CoreBuilder is a trademark and 3ComFacts is a service mark of 3Com Corporation.
-
Page 5: Table Of Contents
Documentation Comments YSTEM AND ETUP VERVIEW About CoreBuilder Switching Hubs The CoreBuilder 2500 System Solution Features of the CoreBuilder 2500 System System Overview — Front Panel System Overview — Back Panel Modules CoreBuilder Roadmap of Setup Tasks NSTALLING THE YSTEM... - Page 6 4-17 100BASE-FX Configuration Cabling the 100BASE-FX Module FDDI Modules 4-18 FDDI Configurations 4-19 CoreBuilder 2500 System Connection to an FDDI Dual Ring 4-19 Configuring a DAS for Dual Homing Using an Optical Bypass Switch with the CoreBuilder 2500 System 4-21...
- Page 7 Using Unkeyed Single Mode Cables ODES ECHNICAL UPPORT Online Technical Services World Wide Web Site 3Com Bulletin Board Service Access by Analog Modem Access by Digital Modem 3ComFacts Automated Fax Service 3ComForum on CompuServe Online Service Support from Your Network Supplier...
-
Page 9: About This Guide
When you are ready to configure your CoreBuilder switching hub, refer to the CoreBuilder 2500 Administration Console User Guide. If the information in the Installation and Release Notes shipped with your CoreBuilder system differs from the information in this guide, follow the Release Notes. -
Page 10: Conventions
BOUT UIDE Conventions Table 1 Table 2 list conventions that are used throughout this guide. Table 1 Notice Icons Icon Notice Type Alerts you to... Information Important features or instructions. Note Caution Risk of personal safety, system damage, or loss of data Warning Risk of severe personal injury Table 2 Text Conventions... -
Page 11: Corebuilder 2500 Documentation
Paper documents are shipped with your system. Additional documents are included on the 3Com DocsOnCD compact disc. To order a paper copy of a document you see on the compact disc, or to order additional compact discs, call your sales representative. -
Page 12: Documents On Cd-Rom
In addition to the paper documents shipped with your product, use the compact disc that comes with your system to view these books: CoreBuilder 2500 Administration Console User Guide Information about using the Administration Console to configure and manage your CoreBuilder system. -
Page 13: Ystem And Setup Overview
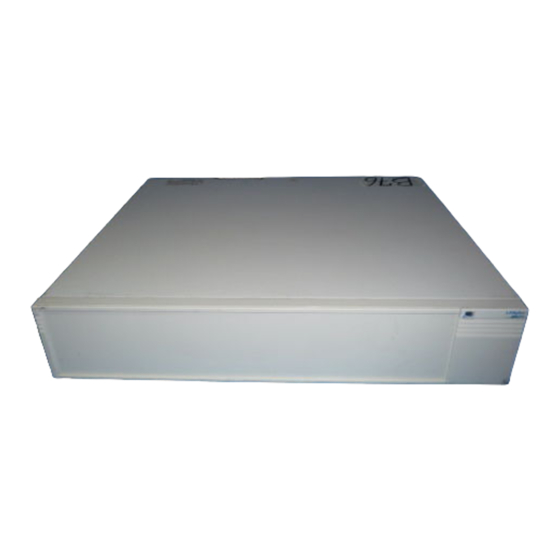
By increasing Ethernet performance through segmentation at the departmental, floor, or building level, the CoreBuilder 2500 system can help you take full advantage of client/server computing. This powerful switch uses 3Com’s new custom ASIC technology, which brings high performance and reliability to your network. -
Page 14: Features Of The Corebuilder 2500 System
FDDI, and Fast Ethernet switching, Ethernet-to-FDDI transparent bridging, VLAN, ATM, and intranetwork routing in a single system. These concepts are described in detail in the CoreBuilder 2500 Operation Guide and the CoreBuilder 2500 Extended Switching User Guide. By choosing the... -
Page 15: System Overview - Front Panel
130-watt power supply. System Processor (Internal) The system processor provides local and remote management and control of the system. Administration Console software resides on the processor. System Overview — Front Panel ™ 2500 systems contain one 130-watt CoreBuilder 2500... -
Page 16: System Overview - Back Panel
Active Error Board Error Fast Ethernet Module The CoreBuilder 2500 system supports up to 2 Fast Ethernet (100 Mbps) ports. Fast Ethernet modules are installed in slot 1 or 2 and are available with either fiber or copper connectors. ATM Module (not shown) The CoreBuilder 2500 system supports one OC-3 155 Mbps interface into a high-speed slot. -
Page 17: Modules
Modules Each CoreBuilder 2500 system can accommodate up to two Ethernet modules in slots 3 and 4, and up to two high-speed modules (FDDI, Fast Ethernet, or ATM) in slots 1 and 2 for a maximum of two high-speed ports and sixteen Ethernet ports. -
Page 18: Corebuilder Roadmap Of Setup Tasks
1: S HAPTER YSTEM AND ETUP CoreBuilder Roadmap of Setup Tasks Administration and Operation See the Administration Console User and Operation Guides Troubleshooting See Getting Started Chapter 7 Configuring See Getting Started Chapter 6 Powering Up See Getting Started Chapter 5 VERVIEW ERROR PCMCIA... -
Page 19: Installing The System
NSTALLING THE This chapter describes how to install your ™ CoreBuilder 2500 system on a table top, in a free-standing stack, or in a distribution rack. To install the CoreBuilder system on a table top or in a free-standing stack, read these instructions: “Before You Begin”... -
Page 20: Installing The Corebuilder System On A Table Top Or In A Free-Standing Stack
2: I HAPTER NSTALLING THE YSTEM Installing the CoreBuilder System on a Table Top or in a Free-Standing Stack To install the CoreBuilder system on a table top or in a free-standing stack, follow the instructions: Turn the system on its side. Remove the protective covering from the rubber feet to expose the adhesive surface. - Page 21 Figure 2-2 Universal Mounting Hole Pattern Determine which holes to use to mount your system. One CoreBuilder 2500 system is designed to mount in any 2U space of the rack (that is, the space occupied by 2 instances of the universal mounting hole pattern).
-
Page 22: Mounting The Corebuilder System Into A Distribution Rack
2: I HAPTER NSTALLING THE YSTEM Hole 1 Placement of CoreBuilder ™ 2500 system (2U) Hole 6 Figure 2-3 Placement of the CoreBuilder a Distribution Rack Be sure that you select holes that are parallel to each other on the mounting rails. If the rack does not have threaded holes, insert the “G”... - Page 23 Tighten the mounting screws. The system is now installed in the distribution rack. Figure 2-5 shows two CoreBuilder 2500 systems installed in a distribution rack. You are now ready to install the Ethernet, Fast Ethernet, FDDI, or ATM modules into the system.
- Page 24 2: I HAPTER NSTALLING THE YSTEM...
-
Page 25: Installing Modules
This installation procedure takes only a few minutes to complete. A small flat-blade screwdriver may be required for module installation. CAUTION: When handling modules, 3Com recommends that you always use a wrist strap connected to a proper ground. This helps prevent the module from being damaged by ESD. - Page 26 3: I HAPTER NSTALLING ODULES Slots 1 and 2 are for FDDI, Fast Ethernet, or ATM modules. Slots 3 and 4 are for Ethernet modules. Slots do not have to be used consecutively. Loosen the two captive screws on the faceplate covering the selected slot.
-
Page 27: Cabling
PC with terminal emulation to the system’s terminal serial port. Ethernet Modules Your Ethernet segments connect to 3Com’s CoreBuilder 2500 system through Ethernet modules, which have various media interface options. Depending on your system configuration, your system may support up to 16 Ethernet ports. -
Page 28: 10Base-T (Rj-21) Module
4: C HAPTER ABLING 10BASE-T (RJ-21) Module This section contains information on common 10BASE-T (RJ-21) configurations, how to cable the 10BASE-T (RJ-21) media option, and how to connect the modules to the network using harmonica panels and punch-down blocks. Follow these guidelines when cabling 10BASE-T: Use only copper, unshielded twisted-pair (UTP) wire. - Page 29 Error Active Error Active Error Active Board Error Repeater 10BASE-2 cable Transceiver Server AUI cable ® NETBuilder II router Figure 4-1 Sample Ethernet Configuration Using the 10BASE-T (RJ-21) Module Error Active Error Active Error Active Error Active Error Active Port Status 50-pin Telco cable Harmonica panel UTP links...
-
Page 30: Cabling The 10Base-T (Rj-21) Module
24 RJ-45 connections for various network devices. Figure 4-3 shows the RJ-45 connections on the front of the harmonica panel. Figure 4-4 of the panel, including the connections for the 50-pin connectors. Harmonica panels are available from 3Com. 10BASE-T (RJ-21) module shows the back... -
Page 31: Connecting 10Base-T (Rj-21) To A Punch-Down Block
Connecting 10BASE-T (RJ-21) to a Punch-down Block You can use two types of punch-down blocks to connect modules with RJ-21 connectors to the network. 3Com recommends Type 110 the type commonly used for data connections, and Type 66 (Figure 4-6), typically used for voice connections. -
Page 32: 10Base-T (Rj-45) Module
4: C HAPTER ABLING 10BASE-T (RJ-45) Module This section contains information on common 10BASE-T (RJ-45) configurations and how to cable the 10BASE-T (RJ-45) media option. Follow these guidelines when cabling 10BASE-T: Use only copper, unshielded twisted-pair (UTP) wire. Do not use flat, multiconductor cable (for example, silver satin), which is often identified by solid colors such as red, green, yellow, or black. -
Page 33: Cabling The 10Base-T (Rj-45) Module
Cabling the 10BASE-T (RJ-45) Module The 10BASE-T (RJ-45) module contains eight 10BASE-T ports using RJ-45 connectors. The ports are implemented as MDI-X (media dependent interface crossover) connections, meaning that a workstation can be directly connected to the port with a straight-through cable. To cable the 10BASE-T (RJ-45) module: Plug the male RJ-45 connector on the 10BASE-T cable into the selected port on the module until it... -
Page 34: 10Base-5 (Aui) Module
4: C HAPTER ABLING 10BASE-5 (AUI) Module This section contains information on common 10BASE-5 (AUI) configurations and how to cable the 10BASE-5 (AUI) media option. 10BASE-5 (AUI) Configuration A sample 10BASE-5 (AUI) configuration is illustrated Figure 4-9. Your configuration may have different quantities or types of devices than pictured in this example. -
Page 35: Cabling The 10Base-5 (Aui) Module
Cabling the 10BASE-5 (AUI) Module The 10BASE-5 (AUI) module contains four 10BASE-5 ports that use four female 15-pin, D subminiature, Attachment Unit Interface (AUI) connectors. The AUI is a DTE interface that must be attached to a transceiver through a standard AUI cable. This configuration allows a standard 10BASE-5 segment to be attached to one of the Ethernet ports of the module. -
Page 36: 10Base-Fl Module
4-10 4: C HAPTER ABLING 10BASE-FL Module This section contains information on common 10BASE-FL configurations and how to cable the 10BASE-FL media option. 10BASE-FL Configuration A sample 10BASE-FL configuration is illustrated in Figure 4-11. Your configuration may have a different number and different types of devices than pictured in this example. -
Page 37: Cabling The 10Base-Fl Module
Cabling the 10BASE-FL Module The 10BASE-FL module contains eight 10BASE-FL ports that use ST connectors to provide Ethernet connections over fiber. To each port, you can attach an Ethernet/IEEE 802.3 segment that is up to 2Km long. As a result, Ethernet segments dispersed throughout a building or campus can be centrally connected to one CoreBuilder system. -
Page 38: 10Base-2 (Bnc) Module
4-12 4: C HAPTER ABLING To cable the 10BASE-FL module: Remove the protective plastic covers from the module’s fiber optic ports and from the ends of the connectors on each fiber strand. Locate the fiber attached to the receiver of the remote 10BASE-FL transceiver/system and connect it to the selected transmitter port on the module. -
Page 39: Cabling The 10Base-2 (Bnc) Module
Each segment on the module is internally terminated. When you connect a 10BASE-2 (BNC) module to your network, the CoreBuilder 2500 system must be an end connection. Ensure that the opposite end of the 10BASE-2 segment is also terminated. -
Page 40: Unterminated 10Base-2 (Bnc)
Because using a T connector with a terminating plug may interfere with adjacent ports, 3Com recommends that you terminate ports with the ITT Pomona Y connector, Model 4896, with a terminating plug on the end, or the ITT Pomona Feed-Thru Terminator, Model 4119-50. - Page 41 CMCIA Inserted Port Status Active Error Port Status Active Error Y connector terminating plug 10BASE-2 network segment Figure 4-15 Terminating BNC Ports with a Y Connector PCMCIA Port Status Unterminated 10BASE-2 (BNC) module Figure 4-16 Terminating BNC Ports with a Feed-thru Ethernet Modules Inserted Active...
-
Page 42: Fast Ethernet Modules
4: C HAPTER ABLING Fast Ethernet Modules Your Fast Ethernet segments connect to 3Com’s CoreBuilder 2500 system through Fast Ethernet modules, which come with a copper or fiber connector. This section describes the Fast Ethernet modules, configurations possible for each module,... -
Page 43: 100Base-Fx Module
To cable the 100BASE-TX module: Plug the male RJ-45 connector on the 100BASE-T cable into the port on the Fast Ethernet module until it clicks into place. Attach the other end of the cable to the network device you wish to connect. Figure 4-18 shows the cabling of the 100BASE-TX module with 100BASE-T cabling. -
Page 44: Fddi Modules
Error Board Error Your FDDI segments connect to 3Com’s CoreBuilder 2500 through FDDI modules, which are available in various media options. This section describes sample FDDI configurations as well as how to cable the following FDDI DAS (Dual Attachment Station) modules to the network:... -
Page 45: Fddi Configurations
A and B ports on the FDDI module. FDDI DAS modules, excluding concentrators, may be attached to the dual ring, as shown. Each CoreBuilder 2500 system shown has a second FDDI module installed to enable additional FDDI connections to servers and other CoreBuilder systems. -
Page 46: Configuring A Das For Dual Homing
4-20 4: C HAPTER ABLING FDDI module FDDI module (Slot 2) (Slot 1) CoreBuilder ™ 2500 FDDI dual ring CoreBuilder 2500 Duplex CoreBuilder fiber 2500 cable CoreBuilder 2500 (DAS) Router Figure 4-20 Connecting CoreBuilder Ring (Logical Diagram) CoreBuilder 6000 SAS server SAS server (FDDI link) DAS server... -
Page 47: Using An Optical Bypass Switch With The Corebuilder 2500 System
2500 receptacles Figure 4-22 Optical Bypass Switch Configuration The optional optical bypass switch, available from 3Com, provides A and B MIC connectors and a power connector. FDDI Modules shows an optical bypass switch Optical bypass switch... -
Page 48: Cabling The Fddi Das Mic Module
4-22 4: C HAPTER ABLING Cabling the FDDI DAS MIC Module The FDDI DAS MIC module contains two media interface connector ports, A and B. The FDDI DAS MIC module also comes with an optical bypass switch power connector. See the section the Optical Bypass Switch”... -
Page 49: Cabling The Fddi Das Tp Module
Cabling the FDDI DAS TP Module The FDDI DAS TP module contains two RJ-45 ports, A and B. To cable the FDDI DAS TP module: Remove the plastic protectors from the transceiver connectors on the module by squeezing the spring clips together and sliding the protector out. -
Page 50: Atm Module
4-24 4: C HAPTER ABLING ATM Module With 3Com’s CoreBuilder 2500 system, you can connect to important network resources over an ATM segment by installing an ATM module. ATM Configuration A sample ATM configuration is illustrated in Figure 4-25. Your configuration may have different quantities and types of devices than pictured in this example. -
Page 51: Cabling The Atm Module
Cabling the ATM Module The ATM module offers a single OC-3 interface, providing a 155 Mbps connection over multimode fiber. To cable the ATM Module: Plug the male SC connectors on the multimode fiber cable into the port on the ATM module until they click into place. -
Page 52: Cabling The Optical Bypass Switch
4: C HAPTER ABLING Cabling the Optical Bypass Switch You can install an optical bypass switch between the CoreBuilder 2500 and the FDDI cable connecting to the network. Refer to Figure 4-27 following the directions below. Power down your CoreBuilder system. -
Page 53: Cabling The System Processor Serial Ports
Cabling the System Processor Serial Ports The system processor serial ports provide the following connectivity options: One serial (RS-232C) modem port for an external modem connection One serial (RS-232C) terminal port for a terminal connection Pinouts for the serial ports are shown in Table 4-4. -
Page 54: Serial Port Pin Assignments
4-28 4: C HAPTER ABLING Serial Port Pin Assignments The following tables show the pin assignments for the two serial ports. See Table 4-3 port and Table 4-4 for the terminal port pin assignments. Table 4-3 Modem Port Pin Assignments Pin No. -
Page 55: System Power Up
YSTEM This chapter contains: Instructions for powering up the CoreBuilder system A description of power-up diagnostics A list of items to check after system power up If you have any problems powering up your CoreBuilder system, see Chapter 7: Troubleshooting System. -
Page 56: Power-Up Diagnostics
5: S HAPTER YSTEM OWER Power-up Diagnostics The CoreBuilder system automatically runs diagnostic software at power up. This software verifies that every component in the system is operating correctly. If any component fails during power-up diagnostics, the system either fails to power up or it keeps faulty modules offline. -
Page 57: System Processor Leds
System Processor LEDs Power Green System powered on ™ CoreBuilder 2500 Power Power supply out of specification Note: Lights only in systems with redundant power supplies Fan has slowed or shut down Note: Lights only in systems with Blinking green System operating Green System running... -
Page 58: System Checks
5: S HAPTER YSTEM OWER System Checks After the system has successfully completed the power-up diagnostics, check the items in to verify that the system is operating correctly. If you discover any abnormal conditions, see Troubleshooting the System. Table 5-3 System Power-up Checklist Check Why? Power-up error... -
Page 59: Quick Setup For Management Access
You can access the Administration Console using the serial ports or IP. For more information, see the CoreBuilder 2500 Administration Console User Guide. For more complete network management, use an external SNMP-based application such as Transcend Enterprise Manager or other network management applications. -
Page 60: Terminal Port
6: Q HAPTER UICK ETUP FOR Terminal Port Direct access through the terminal port allows you to remain on the system during system boots. A Macintosh or PC attachment can use any terminal emulation program for connecting to the terminal serial port. -
Page 61: Setting The Terminal Port Baud Rate
Menu options: ----------------------------------------------- system - Administer system-level functions ethernet - Administer Ethernet ports fddi - Administer FDDI resources - Administer ATM bridge - Administer bridging - Administer IP snmp - Administer SNMP analyzer - Administer Roving Analysis script - Run a script of console commands logout - Logout of the Administration Console Type ? for help. -
Page 62: Modem Setup
6: Q HAPTER UICK ETUP FOR Modem Setup You can set up your system for modem access through an external modem attached to the system processor’s modem port. To do this, you must first set the baud rate of the modem port (if necessary), and then attach and configure your external modem. -
Page 63: Ip Interface Configuration
Each IP address bit corresponding to a 0 is in the host part of the IP address. Advertisement address The CoreBuilder 2500 system uses this IP address to advertise packets to other stations on the same subnet. In particular, this address is used for sending RIP updates. - Page 64 6: Q HAPTER UICK ETUP FOR ANAGEMENT To set the interface parameters: From the top level of the Administration Console at prompt, enter: Select a menu option ip interface define Enter the IP address of the interface. Enter the subnet mask of the subnet to which the interface is to be assigned.
-
Page 65: Troubleshooting The System
fiber optic ports and connectors If you experience system problems that are not addressed in this chapter, contact 3Com Technical Support or your service representative. Before you call, gather the following information and have it available:... - Page 66 5 Restart the system by toggling the power switch OFF (O) and then ON ( I ). 6 If the system still does not operate, contact 3Com Technical Support or your service representative. “Checking Fuses” on page 7-5) and replace any...
- Page 67 Technical Support or your service representative. 1 If you have added a new module, remove it. 2 If you have just updated software, reload the old version of software. 3 Call 3Com Technical Support or your service representative for hardware and software compatibility information.
- Page 68 Cable to the port is faulty When the problem is corrected, the Active LED (port status) lights green. 4 Contact 3Com Technical Support or your service representative if the port status Error LED remains yellow. “Cleaning Connectors” on page 7-7 for...
-
Page 69: Related Maintenance Procedures
Related Maintenance Procedures During system troubleshooting, you might have to perform the minor maintenance procedures described in this section. For other assistance, contact 3Com Technical Support as discussed in Appendix E: Technical Support. Checking the CoreBuilder System Fuses If your CoreBuilder system does not power up, check the fuses. -
Page 70: Installing A New Fuse
7: T HAPTER ROUBLESHOOTING THE Release one of the fuse cartridges by gently pushing on the cartridge in the direction of the arrow until the fuse cartridge is released. Remove the fuse cartridge from the fuseholder. See Figure 7-2. Pull the fuse out of the cartridge and inspect the wire. -
Page 71: Cleaning Dirty Fiber Optic Ports And Connectors
Cleaning Dirty Fiber Optic Ports and Connectors Fiber optic transceivers are sensitive optical devices that you must handle carefully. If dirt collects on the fiber optic lens, you might notice that the LED for an FDDI port either does not light or lights yellow. -
Page 72: System
7: T HAPTER ROUBLESHOOTING THE YSTEM... -
Page 73: Ystem Specifications
YSTEM Physical Dimensions 3.0 inches (H) x 19.0 inches (W) x 14.0 inches (D) [7.6 cm (H) x 48.3 cm (W) x 35.4 cm (D)] Weight (fully loaded): 20 lb (9.0 kg) Environmental Requirements Operating temperature 32˚ to 104˚ F (0˚ to 40˚ C) Operating humidity 10% to 90% relative humidity, noncondensing Storage temperature... - Page 74 A: S PPENDIX YSTEM PECIFICATIONS (continued) Standards Supported SNMP SNMP protocol (RFC 1157) MIB-II (RFC 1213) FDDI SMT 7.3 MIB (RFC 1512) Ethernet MIB (RFC 1398) Bridge MIB (RFC 1493) CoreBuilder CoreBuilder based on SMT 7.3 FDDI ANSI X3T9.5 FDDI, including revision 7.3 SMT Software Installation FTP (RFC 959) ™...
-
Page 75: Odule And System
ODULE AND This appendix contains the pin assignments for the CoreBuilder ™ 2500 modules, serial port connectors, and the optical bypass switch. Ethernet Module Pin Assignments Figure B-1 shows the pin assignments for the 10BASE-FL Ethernet module. pin assignments for the 10BASE-5 (AUI) module. Table B-2 Table B-3 show the pin assignments... - Page 76 B: M PPENDIX ODULE AND YSTEM Table B-2 10BASE-T (RJ-21) Pin Assignments Pin/Port Color Code Signal blue_white Receive – orange_white Transmit – green_white Receive – brown_white Transmit – gray_white Receive – blue_red Transmit – orange_red Receive – green_red Transmit – brown_red Receive –...
-
Page 77: Optical Bypass Connector Pin Assignments
Table B-3 10BASE-T (RJ-45) Pin Assignments Pin No. Signal Description TX + Transmit + TX – Transmit – RX + Receive + Not Used Not Used RX – Receive – Not used Not used Optical Bypass Connector Pin Assignments Table B-4 provides the pin assignments for the optical bypass switch connector on the FDDI DAS MIC module. - Page 78 B: M PPENDIX ODULE AND YSTEM INOUTS...
-
Page 79: Site Equirements And
Wiring Closet Recommendations ™ 2500 systems. The cabling system plan used at your facility probably covers most wiring closet concerns. 3Com also recommends that you check these items: “Building AFETY ODES Verify that your wiring closet meets all requirements mentioned in your facility cabling plan. -
Page 80: Distribution Rack Requirements
AFETY ODES Distribution Rack Requirements If you plan to mount your CoreBuilder 2500 systems in a distribution rack, your rack should meet the basic mechanical and space requirements described in this section. Protective Grounding for the Rack... -
Page 81: Mechanical Requirements For The Rack
Racks, Panels, and Associated Equipment. In countries other than the United States, use IEC Standard 297: Dimensions of Panels and Racks. In addition, 3Com recommends that your distribution rack meet these requirements: Use an open style, 19-inch rack. The rack styles shown in Figure C-2 facilitate easy maintenance and provide excellent ventilation. -
Page 82: Building And Electrical Codes
C: S PPENDIX EQUIREMENTS AND Use a rack that supports approximately 600 lb (272 kg). Use a rack that has adequate electrical grounding, for instance, with a distribution rack grounding kit. Verify that the floor under the rack is level within inch (5 millimeters). -
Page 83: Electrical Codes
Electrical Codes Authorities on electrical codes: National Electrical Code (NEC) Classification (USA only) — a recognized authority on safe electrical wiring. Federal, state, and local governments use NEC standards to establish their own laws, ordinances, and codes on wiring specifications. The NEC classification is published by: National Fire Protection Association (NFPA) 1 Batterymarch Park... - Page 84 C: S PPENDIX EQUIREMENTS AND AFETY ODES...
-
Page 85: Fddi Standards
Single Mode Fiber (SMF-PMD), which is defined in ANSI standard X.3-184-198x For the CoreBuilder ™ 2500 system, 3Com supports multimode fiber (MMF-PMD) 62.5/125 mm and Category one (1) single mode fiber (SMF-PMD). When deciding whether to use multimode or single mode fiber, determine the maximum interstation... -
Page 86: Comparing Fiber To Specifications
Compare the specifications of the fiber you are using to those in the following tables. If the fiber does not meet the specifications, use a different fiber or contact 3Com’s Technical Support. The fiber you use must meet the specifications listed Table D-1, which describes 62.5/125 cable,... -
Page 87: Calculating Insertion Losses For Unlike Fibers
Core (mm) Cladding (mm) If you are using fiber with a diameter of 50 mm and have 3Com equipment at both ends of the link, substitute 8 dB for the maximum attenuation in Table D-1. If 3Com equipment is only at one end, substitute 6 dB for the maximum attenuation value. -
Page 88: Example
D: FDDI S PPENDIX TANDARDS Table D-4 Typical Losses for Connectors, Cables, and Splices* Type of Insertion Loss MIC connector .6 dB ST connector .6 dB (ceramic) ST connector 1.0 dB (plastic) ST connector .7 dB (stainless steel) 62.5/125 cable 1.0 to 3.0 dB maximum per km, depending on cable quality (nominal 2.0 dB) -
Page 89: Example
The modal bandwidth specified in Table D-1 page D-2 is 500 MHz • km, which allows the cable plant to support end-to-end bandwidth of 250 MHz at the maximum 2 km distance. As a check, use the following formula to verify that the bandwidth of your fiber is within an acceptable range: n MHz •... -
Page 90: Comparing Fiber To Specifications
Category 2. These categories refer to the optical power that must be launched into the fiber by the transmitter or detected by the receiver. 3Com supports only Category 1 single mode fiber. The specifications for the standard single mode fiber... -
Page 91: Verifying Maximum Attenuation For Mixed Fibers
Verifying Maximum Attenuation for Mixed Fibers If you mix Category 1 and Category 2 receivers and transmitters, use Table D-7 to verify the maximum attenuation for each possible combination. Table D-7 Acceptable Cable Plants for Combinations of Category 1 and Category 2 Output Input Minimum... - Page 92 Figure D-3 Single Mode Connector Housing Before completing the next step, check to see whether the transceiver is keyed. If you have received a special unkeyed transceiver from 3Com, go to step 3. Remove the A, B, or M key from the keyed transceiver.
-
Page 93: Echnical Upport
NetAge Magazine, technical documentation, and more. 3ComBBS contains patches, software, and drivers for all 3Com products, as well as technical articles. This service is available through analog modem or digital modem (ISDN) 24 hours a day, 7 days a week. - Page 94 3ComFacts Automated Fax Service 3Com Corporation’s interactive fax service, 3ComFacts, provides data sheets, technical articles, diagrams, and troubleshooting instructions on 3Com products 24 hours a day, 7 days a week. Call 3ComFacts using your Touch-Tone telephone using one of these international access numbers:...
-
Page 95: 3Comforum On Compuserve Online Service
Details about recent configuration changes, if applicable If you are unable to contact your network supplier, see the following section on how to contact 3Com. Support from Your Network Supplier Support from 3Com If you are unable to receive support from your network supplier, technical support contracts are available from 3Com. -
Page 96: Returning Products For Repair
44 161 873 7717 (Manchester) 44 162 889 7000 (Marlow) Returning Products for Repair Before you send a product directly to 3Com for repair, you must first obtain a Return Materials Authorization (RMA) number. Products sent to 3Com without RMA numbers will be returned to the sender unopened, at the sender’s expense. -
Page 97: Ambient Air Temperature
LOSSARY A port Each DAS contains two ports, one designated A and one designated B. Port A is intended to be connected to the primary ring on the incoming fiber and the secondary ring on the outgoing fiber. A properly formed trunk ring is composed of a set of stations with the A port of one station connected to the B port of the neighboring station. - Page 98 An example would be a device that connects an Ethernet network to an FDDI network. This bridge would allow the two networks to communicate. The CoreBuilder 2500 system can operate as a translation/transparent 802.1d bridge. bus topology An architecture distinguished by having all of its nodes connected to a single cable.
- Page 99 Dual Attachment Station. A station directly attached to FDDI’s dual token rings. A DAS has four fiber attachments, one receive and one transmit fiber for each ring. Rather than an individual user workstation, a DAS is most likely to be the device controlling LAN operation, such as an FDDI concentrator, bridge, router, server, minicomputer, or mainframe.
- Page 100 LOSSARY FDDI standard A standard written by the X3T9.5 Committee of the American National Standards Institute (ANSI), that addressed the need for greater speed and reliability than what was available in other standard LAN technologies at the time. It is a major factor contributing to the expected acceptance and widespread use of optical fiber as a LAN transmission medium.
-
Page 101: Local Management
Management of a station by using software running on the station. The CoreBuilder Administration Console provides a means to locally manage the CoreBuilder 2500 system. M port Master port. Each PHY/PMD pair, designated as a port, belongs to one of four types: A, B, M, or S. - Page 102 A central wiring connection device typically located in the wiring center of a voice or data network. 3Com recommends Type 110 or Type 66 punch-down blocks. remote management Usually refers to the management of workstations at distant locations linked to the main LAN by a network modem.
- Page 103 RS-232 serial port The ports on the system processor accepting a terminal or modem connector. They change the parallel arrangement of data within computers to the serial (one after the other) form used on data transmissions links. This port can be used for dedicated local management access, as well as for remote access.
-
Page 104: Twisted Pair
LOSSARY transceiver See MAU. twisted pair Two insulated wires wrapped around each other for protection against interference. Each wire is insulated, and the pair is usually covered by an overall casing. This type of wiring is generally used for connecting 10BASE-T, 100BASE-T and CDDI systems. - Page 105 4-4 connecting to a punch-down block 4-5 sample configuration 4-2 10BASE-T (RJ-45) cabling guidelines 4-7 sample configuration 4-6 3Com Bulletin Board Service (3ComBBS) E-1 3Com sales offices E-3 3Com URL E-1 3ComFacts E-2 3ComForum E-3 A port in FDDI configurations 4-19 to 4-21...
- Page 106 NDEX configurations 10BASE-2 (BNC) 4-12 10BASE-5 (AUI) 4-8 10BASE-FL 4-10 10BASE-T (RJ-21) 4-2 10BASE-T (RJ-45) 4-6 ATM 4-24 dual homing 4-20 dual ring 4-19 Ethernet 4-2 to 4-13 Fast Ethernet 4-16 FDDI 4-19 to 4-21 optical bypass switch 4-21 conventions in text defined 2 cooling the system C-2 DAS 4-19 to 4-21...
- Page 107 CoreBuilder system management access 6-1 to 6-6 overview 1-1 table top installation 2-2 LEDs abnormal activity 7-1 error indications, system processor 7-3 modules 5-2 status 5-3 local management 6-1 M port in FDDI configurations 4-19 to 4-21 management access ports on the System Processor 4-27 management, CoreBuilder IP 6-1...
- Page 108 LEDs 5-3 overview 1-3 ports for management access 4-27 power-up LED activity 5-2 serial ports 1-4, 4-27 technical support 3Com URL E-1 bulletin board service E-1 fax service E-2 network suppliers E-3 product repair E-4 using CompuServe E-3 Temp LED 5-3...
- Page 109 If a product does not operate as warranted above during the applicable warranty period, 3Com shall, at its option and expense, repair the defective product or part, deliver to Customer an equivalent product or part to replace the defective item, or refund to Customer the purchase price paid for the defective product.
- Page 110 This warranty gives you specific legal rights which may vary depending on local law. OVERNING This Limited Warranty shall be governed by the laws of the state of California. 3Com Corporation, 5400 Bayfront Plaza, Santa Clara, CA 95052-8145 (408) 764-5000...
Need help?
Do you have a question about the CoreBuilder 2500 and is the answer not in the manual?
Questions and answers