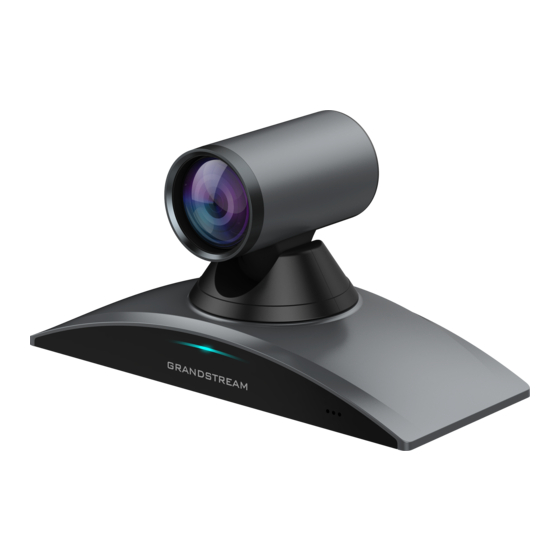
Grandstream Networks GVC3220 User Manual
Ultra hd multimedia conferencing system
Hide thumbs
Also See for GVC3220:
- Administration manual (73 pages) ,
- Quick installation manual (30 pages)

Related Manuals for Grandstream Networks GVC3220


Summary of Contents for Grandstream Networks GVC3220
- Page 1 Grandstream Networks, Inc. GVC3220 Ultra HD Multimedia Conferencing System User Guide...
- Page 2 Grandstream Networks, Inc. is not permitted. The latest electronic version of this guide is available for download here: http://www.grandstream.com/support Grandstream is a registered trademark and Grandstream logo is trademark of Grandstream Networks, Inc. in the United States, Europe, and other countries. CAUTION Changes or modifications to this product not expressly approved by Grandstream, or operation of this product in any way other than as detailed by this guide, could void your manufacturer warranty.
- Page 3 GNU GPL INFORMATION GVC3220 firmware contains third-party software licensed under the GNU General Public License (GPL). Grandstream uses software under the specific terms of the GPL. Please see the GNU General Public License (GPL) for the exact terms and conditions of the license.
- Page 4 WLAN 5470-5725 MHz < 20 dBm; The simplified EU declaration of conformity referred to in Article 10(9) shall be provided as follows: Hereby, [Grandstream Networks, Inc.] declares that the radio equipment type [GVC3220] is in compliance with Directive 2014/53/EU. The full text of the EU declaration of conformity is available at the following internet address: www.grandstream.com...
-
Page 5: Table Of Contents
PRODUCT OVERVIEW ....................18 INSTALLING GVC3220 ....................21 Equipment Package Content ....................... 21 Connecting GVC3220 .......................... 21 Connecting GMD1208 to GVC3220 ....................24 GETTING TO KNOW GVC3220 ................... 26 Remote Control ............................ 26 Remote Control Keys and Touchpad ....................26 Capturing Screenshot Using the Remote Control ................ - Page 6 External USB Device ........................... 55 Using USB Mouse/Keyboard ......................55 Storage Device ..........................55 Microphone and Speaker ........................56 MAKING PHONE CALLS ..................... 58 Account ..............................58 Dial Screen ............................58 P a g e GVC3220 User Guide Version 1.0.0.28...
- Page 7 Open DTMF ..........................77 PIN Code ............................78 FECC - Camera Control in Conference ..................78 End Conference ..........................79 Power Off During a Conference Call .................... 80 View Conference Details ......................82 P a g e GVC3220 User Guide Version 1.0.0.28...
- Page 8 Backup Data ..........................117 Restore Backup Data........................118 Diagnosis ............................119 Browser .............................. 120 State Detection ..........................121 Uninstall Application ........................... 124 GS MARKET ....................... 125 Update Apps ............................126 IPVIDEOTALK ......................127 P a g e GVC3220 User Guide Version 1.0.0.28...
- Page 9 Manually Start IPVideoTalk Tip........................ 133 Conference Control ..........................134 IPVideoTalk Meeting Operations ....................134 Start Cloud Recording ........................135 GVC3220 WEB UI FEATURES ..................137 Accessing GVC3220 Web GUI ......................137 Saving Changes ..........................138 Definitions ............................138 Toolbar ................................139 Call Page............................
- Page 10 Table 8: GVC3220 802.1x Mode Parameters ..................... 49 Table 9: GVC3220 Camera Parameters ..................... 53 Table 10: GVC3220 Call Screen Bottom Menu Icons ................. 69 Table 11: GVC3220 Conference Member Status Descriptions ..............71 Table 12: GVC3220 Add Conference Parameters ..................84 Table 13: GVC3220 Feature Code for SIP Account ..................
- Page 11 Figure 29: Wi-Fi Display - Open ........................43 Figure 30: Basic Settings - Bluetooth......................44 Figure 31: Bluetooth Settings ........................44 Figure 32: GVC3220 Bluetooth – Open Discovery ..................45 Figure 33: Connecting a Bluetooth Headset ....................47 Figure 34: LLDP/VLAN Settings ......................... 47 Figure 35: Network Advanced Settings .......................
- Page 12 Figure 78: Status - Remote control ......................89 Figure 79: Remote Control Settings ......................89 Figure 80: GVC3220 Remote Control Application on Android Device ............90 Figure 81: Send the GVC Remote apk using Bluetooth ................91 Figure 82: QR Code for Remote Control App ..................... 91 Figure 83: BlueJeans/Zoom Call Screen ....................
- Page 13 Figure 128: File Manager - Backups ......................117 Figure 129: New Backup ........................... 117 Figure 130: GVC3220 Automatic Backup Screen ..................118 Figure 131: GVC3220 Restore Backup Data Screen ................118 Figure 132: Applications - Diagnosis......................119 Figure 133: GVC3220 Diagnosis Screen ....................119 Figure 134: Applications - Chrome ......................
- Page 14 Figure 168: GVC3220 Web UI - Camera Control ..................143 Figure 169: Factory Reset via LCD ......................144 Figure 170: GVC3220 Web UI - Factory Reset ..................145 Figure 171: GVC3220 Web UI - Factory Reset Confirmation ..............145 P a g e GVC3220 User Guide...
-
Page 15: Document Purpose
DOCUMENT PURPOSE This User Guide describes the basic concept and tasks necessary to use and configure your GVC3220. This document covers the topics of device installation, making basic conference calls and using basic call features. To learn the advanced features and configurations, please visit http://www.grandstream.com/support... -
Page 16: Change Log
CHANGE LOG This section documents significant changes from previous versions of GVC3220 user manuals. Only major new features or major document updates are listed here. Minor updates for corrections or editing are not documented here. Firmware Version 1.0.0.28 • This is the initial version. -
Page 17: Welcome
The GVC3220 eliminates the traditional barriers to video conferencing and sets a new bar for business- class video conferencing solutions by offering industry-leading flexibility, interoperability, system compatibility, application richness and ease of use. -
Page 18: Product Overview
PRODUCT OVERVIEW Table 1: GVC3220 Technical Specifications Specification Description SIP RFC3261, H.323,BFCP, TIP, RTP/RTCP, HTTP/HTTPS, ARP, ICMP, DNS (A Protocols/ record, SRV, NAPTR), DHCP, PPPoE, SSH, TFTP, NTP, STUN, SIMPLE,LLDP- Standards MED, LDAP, TR-069, 802.1x, TLS, SRTP, TCP/IP/UDP, IPv6, OpenVPN®... - Page 19 Input: 100~240Vac 50~60Hz Energy Efficiency Output: 48V/1.35A(64.8W) GVC3220 video conference system, GMD1208 wireless microphone, remote control, Package Content 4 AAA batteries, universal power supply, network cable(2 meters), HDMI cables(1x 5 meters, 2x 1.5 meters), lens cleaning cloth, bracket, quick installation guide Operation: 0°C to 40°C...
- Page 20 Warranty If GVC3220 is purchased from a reseller, please contact the company where the device is purchased for replacement, repair, or refund. If the device is purchased directly from Grandstream, please contact Grandstream Support for an RMA (Return Materials Authorization) number before the product is returned.
-
Page 21: Installing Gvc3220
INSTALLING GVC3220 Equipment Package Content GVC3220 package contains the following items: Table 2: GVC3220 Package List 1x GVC3220 video conference system, 1x Universal Power Supply: Power cord 1x GMD1208 wireless microphone, Power adapter 1x Remote Control, Screws and bolts: 4x AAA batteries,... -
Page 22: Figure 2: Gvc3220 Back Panel
Figure 2: GVC3220 Back Panel Please connect GVC3220 according to the following procedures: Connect the LAN port of the GVC3220 to the RJ-45 socket of a hub/switch or a router (LAN side of the router) using the Ethernet cable. Connect the HDMI [1] port of the GVC3220 to the HDMI port of the main display device (e.g., TV) using the HDMI cable. -
Page 23: Table 3: Gvc3220 Back Panel
Factory Restore for more than 10 seconds to restore to factory settings. ----------------------------------------------------------------------------------------------------------------------------- --------------- Note: For detailed instructions about installing GVC3220 on wall mount and etc., please refer to the GVC3220 Quick Installation Guide on www.grandstream.com. ----------------------------------------------------------------------------------------------------------------------------- --------------- P a g e GVC3220 User Guide Version 1.0.0.28... -
Page 24: Connecting Gmd1208 To Gvc3220
A sample of GVC3220 back panel connection is shown below: Figure 3: GVC3220 Back Panel Connection Diagram Connecting GMD1208 to GVC3220 1. Switch to Settings ➔ Basic ➔ Wireless Microphone page on GVC3220 local GUI Figure 4: Wireless Microphone Disconnected P a g e GVC3220 User Guide Version 1.0.0.28... -
Page 25: Figure 5: Wireless Microphone - Instructions
2. Users can press the YELLOW shortcut button to show detailed pairing instructions. Below is the instructions screen: Figure 5: Wireless Microphone - Instructions 3. Follow the instructions. By bringing the GMD1208 close to the speaker of GVC3220 (within 10cm), they will finish pairing and connect automatically. Figure 6: Wireless Microphone Connecting... -
Page 26: Getting To Know Gvc3220
Call interface. For example, typing 5 (JKL), 6 (MNO), 4 (GHI), 6 (MNO) can look for John if it exists in GVC3220 contacts list. Camera Switch to PTZ control mode during a call or in idle status. - Page 27 HDMI output 1 as projection when GVC3220 is in standby mode. ● Access the dial screen by default when GVC3220 is in idle mode. ● Enter phone number and press the key to dial out.
- Page 28 Slide on the trackpad to move the mouse cursor. ● Press the trackpad to confirm operations. Trackpad ● Using two fingers to press on the trackpad and slide up/down for page up/down. P a g e GVC3220 User Guide Version 1.0.0.28...
-
Page 29: Capturing Screenshot Using The Remote Control
After powering up GVC3220, pressing "OK" key on the remote control, it will initiate connection and the remote control can be used right away. If the remote control fails to pair and connect to GVC3220, please follow the steps below to troubleshoot: •... -
Page 30: Using The Led Indicator
Using the LED Indicator GVC3220 LED indicator can be used to notify the users with current status of the device. Please refer to the status description below. Table 5: GVC3220 LED Indicator Status Descriptions... -
Page 31: Table 6: Gvc3220 Status Icons Descriptions
For some notifications such as Schedule, Voice Mail…, the users can use the GVC remote control trackpad to select it. It will navigate the users to the corresponding app. The following table lists the main status icons used on GVC3220. Table 6: GVC3220 Status Icons Descriptions... -
Page 32: Using The Onscreen Keyboard
Wi-Fi-Display is opened Using the Onscreen Keyboard English Keyboard This is the default keyboard on GVC3220. The English keyboard supports multiple languages input methods. See figure below: Figure 9: Soft Keyboard - English Input Method Notes: Tap on to switch Caps Lock:... -
Page 33: Home Screen
Note: If there is no activity on main screen, the icons will be hidden, and the video local loopback is displayed. Press OK button on the GVC3220 remote control to bring up the icons to display again. Figure 11: GVC3220 Home Screen GVC3220 Menu Every menu opens a list of options. - Page 34 BroadSoft Contacts Interface Network Camera […] System Remote Control System Network Basic Status Advanced Accounts Account codec Network Advanced Settings Presets Maintenance Upgrade Parameters Security Screenshots Web Access Factory Reset Voicemail P a g e GVC3220 User Guide Version 1.0.0.28...
-
Page 35: Screen Lock
Figure 12: Screen Lock Password 3. Reboot, enter sleep mode or power off the GVC3220. 4. When the GVC3220 boots up again, a screen lock code will be required. The user can unlock the screen by entering the code using the GVC remote control. -
Page 36: Hdmi Settings
HDMI Screen percent: The user can configure screen percent from 0% to 100%. This adjusts the image size displayed on the monitor. Use this option when output device (for example, LCD monitor or TV) is unable to display the GVC3220 screen completely. •... -
Page 37: Storage
Font Size Select the font size from smallest to largest for the site name to display. The default value is Medium. Bold Configure whether the site name is displayed in bold. The default setting is "Disabled". Storage Figure 16: System Storage • Display GVC3220 Internal storage details. P a g e GVC3220 User Guide Version 1.0.0.28... -
Page 38: App & Application Account
Figure 18: Add Google Account ----------------------------------------------------------------------------------------------- --------------------------------------------- Note: The GVC3220 administrators have access to multiple advanced options through LCD Menu Settings. The “Network” section is dedicated for Ethernet/Wi-Fi connection parameters. The “Basic” section allows Language, Date/Time, Audio/Video, Power and Wireless Managers configurations. The “Status”... -
Page 39: Connecting To Network And Devices
If the user would like to use Ethernet connection for network access, please plug the Ethernet cable into the LAN port on the back of GVC3220. Ethernet connection is turned on as DHCP by default on both IPv4 and IPv6 protocols. To configure Ethernet settings on GVC3220, go to LCD menu ➔ Settings ➔ Network ➔... -
Page 40: Figure 20: Ipv4 Settings - Dhcp
Tap on "Address Type" to select DHCP, Static IP or PPPoE as the address type. ➢ For DHCP, save the setting and GVC3220 should be able to get IP address from the DHCP server in the network. Figure 20: IPv4 Settings - DHCP ➢... -
Page 41: Using Ipv6
2. Go to LCD menu ➔ Settings ➔ Network ➔ Ethernet ➔ IPv6 Settings. 3. Tap “Address Type” to select DHCP or Static IP as the address type. ➢ For DHCP, save the setting and GVC3220 should be able to get IP address from the DHCP server in the network. -
Page 42: Wi-Fi
WI-FI Wi-Fi is supported and built-in on GVC3220 only. On the LCD display, go to Settings ➔ Network ➔ Wi- Fi to turn on and configure Wi-Fi. Figure 25: Network Settings Turning Wi-Fi On/Off Once Wi-Fi is turned on, GVC3220 will automatically start the scanning within the range. A list of Wi-Fi networks will be displayed as scanning result. -
Page 43: Wi-Fi Display
Wi-Fi Display Wi-Fi Display feature is used for screen stream mirroring of other devices in the GVC3220 via Wi-Fi. Please refer to the following steps to display your device’s screen on the GVC3220 screen: 1. First, turn on Wi-Fi. -
Page 44: Bluetooth
5. Select the GVC3220. The screen mirroring will start immediately Bluetooth On GVC3220, Bluetooth is enabled by default. Users could connect Bluetooth by remote control, send or receive files to cellphone, or use Bluetooth speaker and etc. on GVC3220. Figure 30: Basic Settings - Bluetooth... -
Page 45: Using Bluetooth Remote Control
3. Select and click "Search for devices". 4. On the remote control, you would like to pair with GVC3220, press "OK" and digit 5 keys at the same time for about 5 seconds. 5. The pairing and connection process will be initiated and finished in a few seconds. Please do not press any keys on the remote control or switch screens during this process to avoid connection failure. - Page 46 2. Reboot GVC3220. Make sure there is no USB mouse connected to GVC3220. Also, make sure no other remote control is paired to the GVC3220. 3. After GVC3220 boots up, on remote control B, press OK + 5 keys at the same time for about 5 seconds to trigger pairing process on remote control B.
-
Page 47: Using Bluetooth Headset
Using Bluetooth Headset Once the Bluetooth headset is connected with GVC3220, it will automatically use Bluetooth headset for calls. Figure 33: Connecting a Bluetooth Headset LLDP and VLAN Settings Access GVC3220 home screen, go to Settings ➔ Advanced ➔ Network Advanced Settings ➔... -
Page 48: 802.1X Mode
Press to Save configuration • Press to Cancel configuration Table 7: GVC3220 LLDP Configuration Parameters L L DP LLDP Enable or disable LLDP. The default setting is “Open”. Layer 3 QoS for This field defines the layer 3 QoS parameter for SIP packets. It is the value used for IP Precedence, Diff-Serv or MPLS. -
Page 49: Table 8: Gvc3220 802.1X Mode Parameters
Figure 36: 802.1X - EAP-MD5 Figure 37: 802.1X - EAP-TLS Figure 38: 802.1X - EAP-PEAP Table 8: GVC3220 802.1x Mode Parameters Parameters Descriptions Allows the user to enable/disable 802.1x and configure 802.1x mode. The default 802.1x Mode setting is disabled. -
Page 50: Proxy
If your network requires going through a proxy, you can configure the proxy server, port, and bypass options under Settings ➔ Advanced ➔ Network Advanced Settings ➔ Proxy. Figure 39: Proxy Figure 40: Proxy Settings P a g e GVC3220 User Guide Version 1.0.0.28... -
Page 51: Camera
• Select on home screen to access Applications, then click on App. GVC3220 camera screen has the following options: • Press recording button on the remote control to start or stop local recording. • Press the red shortcut button on the remote control to edit preset. -
Page 52: Preset
Select the preset window and press the blue shortcut key on the remote control to access the editing screen. Adjust camera position and zoom in/zoom out using the remote control. On GVC3220 remote control, press "OK" key to save the preset, or press Back key to cancel. Note: Press to Delete Preset •... -
Page 53: Camera Parameters Configurations
Figure 43: GVC3220 Camera Parameters Setting Screen Table 9: GVC3220 Camera Parameters Parameters Descriptions GVC3220 has 4 built-in modes as well as "Manual" for customization. When set to "Manual", press "OK" key to access each setting to configure sharpness, contrast, saturation, and brightness. •... - Page 54 Focus • System default position: The GVC3220 will boot up at default camera position. • Position when power off: The GVC3220 will return to the last position before power off. Initial Position • Custom: The GVC3220 will boot up at a custom position. When chosen, users will be redirected to Preset settings page to set a custom preset.
-
Page 55: Peripheral
GVC3220 USB interface could be connected with a USB mouse, a USB keyboard, or a USB storage device. Using USB Mouse/Keyboard When a USB mouse is plugged into GVC3220, users could see the cursor on the screen, move the cursor to perform operations. When a USB keyboard is plugged into GVC3220, users could use GVC3220 remote control to navigate to an input interface and click on the keys on the keyboard to check if it is installed successfully. -
Page 56: Microphone And Speaker
GVC3220 package for better compatibility. For more information, please refer to the [Connecting GMD1208 to GVC3220] section in this documents. If the external speaker supports Bluetooth, users could also pair and connect the speaker to the GVC3220 via Bluetooth. This will provide better mobility and make cabling easier when deploying the GVC3220 conference system in your conference room. -
Page 57: Figure 46: Audio Priority
When there are multiple audio devices connected to the GVC3220, the users could configure the audio device priority from LCD Menu ➔ Settings ➔ Audio ➔ Audio Priority. Users could go to GVC3220’s Menu ➔ Settings ➔ Basic ➔ Audio to check the current Audio •... -
Page 58: Making Phone Calls
Enter digits in the dial-up box. If the digits or the letters for the digit match contacts and call history in GVC3220, a dropdown list of numbers will be displayed. For example, entering 5 (JKL), 6 (MNO), 4 (GHI) and 6 (MNO) will display “5646” or “john” if contact "john" exists. The matching characters will be highlighted in red. -
Page 59: Figure 48: Gvc3220 Call Screen
----------------------------------------------------------------------------------------------------------------------------- --------------- Note: 1. By default, GVC3220 allows users to press # key as SEND key. This behavior can be disabled via option "Use # as Dial Key" in web GUI ➔ Account ➔ SIP/Bluejeans/Zoom ➔ Call Settings 2. When entering initials or full spellings of a name that exists in the contact, this contact will show up in the dropdown list. -
Page 60: Redial
Direct IP Call Direct IP Call allows GVC3220 and another VoIP device to talk to each other in an ad-hoc fashion without a SIP proxy. Direct IP calls can be made if: •... -
Page 61: Paging/Intercom
To make a direct IP call, please follow the steps below: Access the dial screen on GVC3220 LCD. Press the RED shortcut key on the remote control to bring up call mode setting screen, set the mode to "SIP". Input the target IP address. For example, if the target IP address is 192.168.124.123 and the port is... -
Page 62: Answering A Call
When the device is in idle and there is an incoming video call made by SIP or IPVideoTalk account, the device will show the call screen as below: Figure 49: GVC3220 Single Incoming Call Screen • or “Pick up” button on the remote control. or select to reject the call. -
Page 63: Call Hold
Figure 50: GVC3220 New Incoming Call Screen Users could select to answer with audio only. ----------------------------------------------------------------------------------------------------------------------------- --------------- Note: By default, answering a call during an active call will automatically add this party into the conference. ----------------------------------------------------------------------------------------------------------------------------- --------------- Call Hold During an active call, press HOLD button to put the call on hold. -
Page 64: Mute Local Audio
Figure 51: Hold screen • The GVC3220 displays the ongoing conversation time on the bottom right of the screen • On the LCD display, click on to resume the call. Users can also click on or press on the remote control if they wish to end the call. -
Page 65: Call Recording
Figure 52: Mute screen Call Recording During an active call, users could record the video to the external SD card plugged into GVC3220. Once recorded, users can view the recorded video in Recorder application, and download the video from web UI ➔... -
Page 66: Dnd (Do Not Disturb)
DND. • When GVC3220 is in an active call, users could turn on/off DND in call screen. This will not affect the current call, and it will take effect starting from the next incoming call. -
Page 67: Call Forward
Call Forward Call forward (Unconditional/No Answer/Busy/Time Based) can be set up from web GUI. Log in GVC3220 web GUI and go to Account ➔ SIP ➔ Call settings. For details, please refer to "GVC3220 Administration Guide". Conference Device Layout 1080P video conferences GVC3220 supports up to 5-way . -
Page 68: Answering An Incoming Call In Conference
You can specify how your GVC3220 handles incoming calls. Depending on your configuration, your GVC3220 answers a call automatically or prompts you to answer a call manually: Log in GVC3220 web GUI and go to Account ➔ SIP/H323 ➔ Call settings and set "Auto-answer" •... -
Page 69: Table 10: Gvc3220 Call Screen Bottom Menu Icons
The user can choose to adjust “Local Layout” in order to choose a layout for its Layout own GVC3220, or to adjust “Cloud Layout” to choose a layout that will be shown for all the participants of the conference (this feature needs to be supported on the server side). - Page 70 Camera Open Camera Control Enable/Disable GVC3220 audio stream. Enable/Disable GVC3220 video stream. Control video and audio for the host (Me) or other conference members (Participants). It includes the following options: - The selected party will not be heard by other parties.
-
Page 71: Invite Members To Conference
Click to put hand down End conference and go back to home screen. • If the remote party is also a GVC3220, you can press the camera key on the remote control to control PTZ device for the remote party. -
Page 72: Conference Control
• When GVC3220 is on conference screen, press on the remote control to access the call screen. Then, enter the number to dial out. Once the member answers the call, it will be connected into the conference automatically. •... -
Page 73: Pause Conference
Figure 57: Conference Control Operations Note: Users could press the shortcut keys on GVC3220 remote control on conference control screen to mute all, block all or suspend videos. Pause Conference The video will be stopped if the conference is paused. You will not see the video view of the members and the other members will not see your video either. -
Page 74: Figure 58: Layout Customization
Figure 58: Layout customization • Local Layout: Users can choose the local layout that will be shown only on the GVC3220 where the local layout was adjusted, and not for all the participants. The available local layouts are: Average, PIP (Picture in picture) and Full screen display. -
Page 75: Presentation Sharing
GVC3220 supports dual stream video, with the presentation sharing function, you can connect HDMI input devices such as a computer, or a DVD player to GVC3220, and share the HDMI input sources with remote parties while they can still view the local video. -
Page 76: Participants List
During IPVideoTalk meeting, click on “Conf control” and GVC3220 will show all participants in the current IPVideoTalk meeting, including all participants with all types of clients. -
Page 77: Call Details
Open DTMF Users can dial DTMF during a conference. then 1. On GVC3220 remote control, press the red shortcut key, or click on Menu button select on the conference screen to bring up the DTMF input screen. Figure 64: Conference - Dial DTMF 2. -
Page 78: Pin Code
Figure 65: Enter PIN Code to Lock Conference 3. Now the conference call is locked. If someone wants to join the conference call by calling this GVC3220, the same PIN code will be required to be entered before the call goes through. -
Page 79: End Conference
4. Use UP/DOWN/OK navigation keys on the GVC3220 remote control to select the remote party, e.g., GVC-LAB in the above figure. This will bring up camera control interface. 5. On the GVC3220 remote control, press the navigation keys and zoom in/zoom out buttons on trackpad to adjust remote camera. -
Page 80: Power Off During A Conference Call
GVC3220 immediately. Figure 68: Power Off Choose “Power off” to end the conference call and power off the GVC3220 immediately or choose “Power off when idle” to shut down the device when the conference call is ended. -
Page 81: Figure 70: Gvc3220 Schedule Screen
Follow one of the ways below to access schedule conference screen: • On the home screen, click on “Schedule” button. Figure 70: GVC3220 Schedule Screen • Users will see the scheduled conferences (after the current time) in the schedule screen. Select one conference entry to view details. -
Page 82: View Conference Details
View Conference Details Users could view scheduled conference details after the current time. Select one conference and press "OK" key on GVC3220 remote control to view conference details. • If the Conference was already established: Schedule status is “Over”, the user can then choose to “Delete”... -
Page 83: Add Scheduled Conference
Add Scheduled Conference Follow the steps below to add a scheduled conference: On the home screen, select to access schedule screen. On GVC3220 remote control, press the shortcut key to create a new conference. P a g e GVC3220 User Guide... -
Page 84: Table 12: Gvc3220 Add Conference Parameters
It is used to configure how long the conference is supposed to last. Duration It is used to select a camera preset when the scheduled conference starts, the GVC3220’s camera will be automatically placed to the preset position. Click on Preset Conference preset and select “Custom” to be redirected to preset setting interface to configure and set a preset. -
Page 85: Edit Scheduled Conference
Access conference schedule screen and select the conference entry users would like to edit. Select the conference and press OK from the GVC3220 remote control to access edit screen. Press the yellow shortcut key on the remote control to save changes and go back to schedule screen. -
Page 86: Figure 76: Settings - Voicemail
Follow the steps below to access voicemail: Access the dial screen and input voicemail access number. Press on GVC3220 remote control or click on button on the call screen to dial into the voicemail box. Follow the Interactive Voice Response (IVR) for the message retrieval process. -
Page 87: Call Features
Call Features The GVC3220 support traditional and advanced telephony features including caller ID, caller ID with caller Name, call waiting, call forward and etc. for the SIP account. Before using the following feature code, please make sure "Enable Call Features" option is set to "Yes" under web GUI ➔ Account ➔ SIP ➔ Call Settings. - Page 88 Dial *92 followed by the number to forward the call. The default timeout before the call is forwarded is 20 seconds. Cancel Call Forward No Answer. To cancel Call, Forward No Answer: • Dial *93. P a g e GVC3220 User Guide Version 1.0.0.28...
- Page 89 P a g e GVC3220 User Guide Version 1.0.0.28...
-
Page 90: Additional Functions
Bluetooth protocol. Follow the steps below to install the remote control application: Please go to GVC3220 LCD menu ➔ Settings ➔ Status ➔ Remote control to send GVC Remote apk to Bluetooth device or scan the QR code. -
Page 91: Figure 80: Gvc3220 Remote Control Application On Android Device
Once GVC Remote app is installed on your Android device, open it and access settings screen. Select the GVC3220 device that users would like to connect to. Each discovered GVC3220 could be distinguished by the last 6 digits of its MAC address. -
Page 92: Figure 81: Send The Gvc Remote Apk Using Bluetooth
User can also use QR code to acquire the “GVC Remote” App: Figure 82: QR Code for Remote Control App For more information about how to use GVC remote apk on your Android device, please refer to the GVC3220 remote control client quick start guide below: http://www.grandstream.com/sites/default/files/Resources/GVC3220_Remote_Control_Client_Quick_Star t_Guide.pdf... -
Page 93: Bluejeans/Zoom
• Click on for to switch between call modes (video or audio) For more information about how to use BlueJeans on GVC3220, please refer to the link below: http://www.grandstream.com/sites/default/files/Resources/GVC3220_BlueJeans_application_note.pdf P a g e GVC3220 User Guide Version 1.0.0.28... -
Page 94: Applications
GVC3220 Contacts app helps users to easily store and manage phone numbers and contacts information. Users can add contacts on GVC3220 or import contacts from external devices as well as download from a server. On GVC3220 home screen, click on “Contacts”. -
Page 95: Figure 86: Gvc3220 Contacts Screen
Figure 86: GVC3220 Contacts Screen • Local Contacts: It is used to display all contacts. • Local Groups: It is used to view groups. Select one group to view group details. Figure 87: Contacts - Local Groups • Enterprise Contacts: It is used to view IPVideoTalk contacts... -
Page 96: Add Contact/Group
• Operations Search: Users could input keyword to search in the dialog. GVC3220 will display contacts automatically which is related to the search keyword. Fuzzy search and precise search are both supported. Call :Select the contact, and press on GVC3220 remote control or click on the screen button to dial the contact users would like to call. -
Page 97: Figure 89: Gvc3220 Add New Contact Screen
Press the blue shortcut key on GVC3220 remote control to access New Contact screen. Figure 89: GVC3220 Add New Contact Screen Enter the contact information. Note: This screen allows assigning the Contact to a Local Group Press the red shortcut key to add more fields. -
Page 98: Ldap Contacts
Press the blue shortcut key on GVC3220 remote control to save the operations. LDAP contacts LDAP contacts application can be accessed in GVC3220 display device LCD➔ Applications ➔ LDAP Contacts. It helps users to access and manage the contacts at ease. -
Page 99: Figure 94: Ldap Contacts - Batch Add
• Press for Batch Add, the below screen will show up: Figure 94: LDAP contacts - Batch Add • Press for LDAP parameters: Figure 95: LDAP contacts - Settings P a g e GVC3220 User Guide Version 1.0.0.28... -
Page 100: Ldap Settings
LDAP Settings Before starting using LDAP on GVC3220, the users must configure the LDAP settings first. Press shortcut key on the GVC3220 remote control to access LDAP settings, or the users can configure it under GVC3220 Web UI ➔ Contacts ➔ LDAP page. - Page 101 It is used to set if allow the phone system to do LDAP number Call searching for incoming calls. The default setting is "No". Here is an example configuration on GVC3220 LDAP settings in web UI. The LDAP server is the built-in LDAP server in Grandstream UCM6xxx: P a g e GVC3220 User Guide Version 1.0.0.28...
-
Page 102: Call History
Call History provides users access to phone's recent call records. Users can view all records, or select different categories for incoming calls, outgoing calls, missed call and conference. To access Call History, 1. go to Home screen➔ Applications ➔ Call History P a g e GVC3220 User Guide Version 1.0.0.28... -
Page 103: Figure 97: Gvc3220 Call History Screen
2. Click on a record in the call history and press to dial out this number directly. Press "OK" key on GVC3220 remote control to view call details for this number. Figure 98: GVC3220 Call History Details 3. Users can choose to “Batch remove” history logs, show the log “Details” or “Reschedule” the... -
Page 104: Add Contact From Call History
Figure 99: GVC3220 Add Contact Screen Select existing contact or press the blue shortcut key on GVC3220 remote control to access edit screen. Fill in contact information and press the yellow shortcut key on the remote control to save the contact. -
Page 105: Browse Files
Browse Files Insert USB/SD storage device into USB port on GVC3220. It will take a few seconds for GVC3220 to prepare the connection. The USB storage icon will show up on the status bar. Go to Home screen ➔ Applications ➔ File Manager. -
Page 106: File Operations
File Operations 1. Go to Home screen ➔ Applications ➔ File Manager. 2. Open the target folder and select the file. 3. Possible File operations are available on the bottom panel P a g e GVC3220 User Guide Version 1.0.0.28... -
Page 107: Figure 103: File Operations Panel
“Back” to bring the previous screen Click to send the file via Bluetooth or other 3 party applications such as MS Teams: Figure 104: File Manager - Share File Click to “Rename” the file: P a g e GVC3220 User Guide Version 1.0.0.28... -
Page 108: Figure 105: File Manager - Rename File
Figure 107: File Manager - Search Click to create a new folder: A popup will appear to name the new folder Figure 108: File Manager - New Folder P a g e GVC3220 User Guide Version 1.0.0.28... -
Page 109: Figure 109: File Manager - Sort
A popup will appear to allow choosing the Sort option Figure 109: File Manager - Sort Click to change the display mode between icon or list. Figure 110: File Manager - List/Icon View P a g e GVC3220 User Guide Version 1.0.0.28... -
Page 110: Recording
Recording The GVC3220 Transcribe Manage Application is used for the storage of call recording files for both video and audio conferencing. Users can play, export, lock/unlock, send, rename, or delete these recordings and etc. Figure 111: Applications - Transcribe Manage... -
Page 111: Setup Wizard
Setup Wizard GVC3220 offers a Setup Wizard tool to guide users into configuring their units step by step, the setup wizard appears automatically at factory reset, or it can be accessed anytime from LCD menu ➔ Applications ➔ Setup Wizard. -
Page 112: Figure 115: Setup Wizard - Wi-Fi
Users can connect to the GVC default Wi-Fi: This allows to access the Web GUI Note: The GVC3220 provides QR Code with the URL to access the Web GUI Figure 115: Setup Wizard – Wi-Fi Users can click to access remote control configuration 1. -
Page 113: Figure 117: Setup Wizard - Choose Language
Figure 117: Setup Wizard - Choose Language Figure 118: Setup Wizard - Choose Time Zone 2. Detect active GVC3220 ports: • This allows users to make sure that all the connected interfaces are working properly. Figure 119: Setup Wizard - Interface Detection 3. -
Page 114: Figure 120: Setup Wizard - Ethernet
Figure 120: Setup Wizard – Ethernet • Fill in the Static IP parameters : Figure 121: Setup Wizard - Static IP • Press the Yellow shortcut key to connect a Wi-Fi Network: P a g e GVC3220 User Guide Version 1.0.0.28... -
Page 115: Figure 122: Setup Wizard - Wi-Fi Scan
Figure 122: Setup Wizard - Wi-Fi scan 4. Launch GMD wireless microphone paring process: Figure 123: Setup Wizard - SIP account 5. Remote Control Description: P a g e GVC3220 User Guide Version 1.0.0.28... -
Page 116: Figure 124: Setup Wizard - Remote Control
Click “More” for advanced options: Users can check the hardware/software version, upgrade firmware or download “GVC Remote” apk … Figure 125: Setup Wizard - Remote Control Settings 6. Introduction to IPVideoTalk Service: P a g e GVC3220 User Guide Version 1.0.0.28... -
Page 117: Figure 126: Setup Wizard - Ipvideotalk
Figure 126: Setup Wizard – IPVideoTalk 7. Completing the Setup Wizard: Figure 127: Setup Wizard – End • Click “Done” to finish the Setup Wizard and start using the GVC3220. P a g e GVC3220 User Guide Version 1.0.0.28... -
Page 118: Backup
Backup Backup Data GVC3220 BACKUP application is used to back up data or import backup files to restore data. It can be accessed from Home screen ➔ Applications ➔ File Manager → Backups Figure 128: File Manager - Backups GVC3220 supports manual backup and automatic backup: •... -
Page 119: Restore Backup Data
Settings: Figure 130: GVC3220 Automatic Backup Screen Note: Insert SD card or USB flash drive to the GVC3220 before configuring backup path/address. Restore Backup Data Select one backup data and press "OK" key to access restore screen, select the preferred data, and press... -
Page 120: Diagnosis
Diagnosis When troubleshooting GVC3220, users could go to GVC3220 home screen ➔ Applications ➔ Diagnosis Figure 132: Applications - Diagnosis Then, follow the instructions on each function to perform Camera Test, Remote Control Key Test, Built-in Speaker Test and etc. During the test, users could press the BACK key or follow the prompt to exit the test. -
Page 121: Browser
Browser Users could browse web page, view news and watch video via the built-in GVC3220 Browser. On home screen, select Application ➔ Chrome Figure 134: Applications - Chrome • First use: Figure 135: Chrome first login P a g e GVC3220 User Guide Version 1.0.0.28... -
Page 122: State Detection
Zoom in/out the page via zoom gesture. Press the MENU key to open the menu bar for more operations. State Detection The “State detection” App provides valuable information on the GVC3220 Network/Ports/Account status… Figure 136: Applications - State Detection 1. Interfaces Status:... -
Page 123: Figure 138: Other State Detection Information
Users can perform an Audio loopback test to verify if the Audio Output device if working fine. Move App to SD Card The apps that are not built-in on GVC3220 can be moved to an external SD card plugged to the GVC3220 from GVC3220 LCD ➔ Settings ➔ System ➔ Apps page. -
Page 124: Figure 139: System ➔ Apps
Figure 139: System ➔ Apps Notes: • Press to show Blocked Applications, • Press to display the allowed Applications • Press for Reset app preferences : Figure 140: Reset app preferences P a g e GVC3220 User Guide Version 1.0.0.28... -
Page 125: Uninstall Application
Uninstall Application The applications (except the system applications) on GVC3220 can be uninstalled. Go to LCD Home screen ➔ Applications, click on and select "Uninstall Mode". • Users will see the apps that can be deleted shown with icon. Select and confirm the uninstallation: Figure 141: Delete App •... -
Page 126: Gs Market
GS MARKET GVC3220 provides access to apps directly via built-in GS market. Users could download the apps from the market and install to GVC3220. Search Apps On GVC3220 Home screen, click on Applications ➔ GS Market Users could view the apps by category, or input key words and click on SEARCH icon to search the app. -
Page 127: Update Apps
Figure 143: GMS Installation Update Apps GVC3220 will detect to update automatically if there is new version available for the installed apps when the network connection is normal. Users can view the relevant information, and update apps on the “Installed” screen. -
Page 128: Ipvideotalk
IPVIDEOTALK The GVC3220 has a built-in IPVideoTalk account that requires the user to activate it before using it. The IPVideoTalk application provides an interface for the user to manage this service on the GVC3220, e.g., view enterprise directory contacts, check and reply to notices from IPVideoTalk server as well as change IPVideoTalk settings. -
Page 129: Instant Meetings
IPVideoTalk Contacts The contacts are managed centrally in the server side. Users can access by selecting . This will show the Enterprise Contacts screen. P a g e GVC3220 User Guide Version 1.0.0.28... -
Page 130: Notices
Press the yellow shortcut key on the GVC3220 remote control to search contacts in the directory. • Press the blue shortcut key on the GVC3220 remote control to select entries and make a batch call to multiple contacts in the directory. -
Page 131: Figure 148: Notices - Messages
• Click on “Notices” to access the messages. Use the navigations keys/OK keys on the GVC3220 remote control to select and read the messages. Figure 148: Notices - Messages • Press the blue shortcut key on the remote control to show details:... -
Page 132: Settings
IPVideoTalk account on GVC3220. The user can also enter the IP address of his IPVideoTalk Server, or restore it to the default, then click on “Save” to link the GVC3220 unit with the IPVideoTalk Server configured. Current IPVideoTalk version information will be shown under “Application Information”. -
Page 133: Join An Ipvideotalk Meeting
Figure 151: Current Plan used and its expiration time Join an IPVideoTalk Meeting Users can join an IPVideoTalk meeting by dialing the host GVC3220’s IPVideoTalk ID or meeting ID. Please note only after meeting starts, GVC3220 can use this method to join the conference as a participant. -
Page 134: Busy Tone Responses
Busy Tone Responses The GVC3220 can only join one IPVideoTalk meeting at a time. A specific busy response message will be displayed rather than SIP 486 busy error prompt on IPVideoTalk dialing interface when users try to invite a busy unit. -
Page 135: Conference Control
Conference Control IPVideoTalk Meeting Operations If GVC3220 joins an IPVideoTalk meeting as a participant and the host is any WebRTC client, the participant on GVC3220 LCD ➔ Call screen to raise hand to attract attention from host could click on button that he/she wants to be unmuted or needs any help. -
Page 136: Start Cloud Recording
Start Cloud Recording During an IPVideoTalk meeting/webinar, under Call Screen of host GVC the users can control cloud recording. To start/stop cloud recording, users could click on “Record” button under host GVC3220 LCD ➔ Call • screen, or press shortcut key on remote control to Open/Close server recording : Figure 156 : Server Recording •... -
Page 137: Figure 157 : Ipvideotalk Recordings
Figure 157 : IPVideoTalk Recordings Note: There are some prerequisites to enable cloud recording features on GVC3220. The subscribed IPVideoTalk plan should include cloud recording support and adequate cloud storage space for recording. Please refer to IPVideoTalk website or User Manual for the latest plan information. -
Page 138: Gvc3220 Web Ui Features
To access GVC3220 Web GUI: 1. Ensure your GVC3220 is properly powered up and connected to the Internet. 2. The IP address of the GVC3220 will show on the top status bar of the connected display device (e.g., TV) via HDMI. -
Page 139: Saving Changes
Saving Changes When changing any setting on GVC3220 web UI, users need to submit them by pressing the button on the bottom of the page, and then, click the button on the top of the page to apply the configuration changes. -
Page 140: Toolbar
GVC3220 Toolbar The web UI tool bar is on the upper right corner of the web UI page. Figure 161: GVC3220 Web UI Tool Bar • Search button : User can search Web GUI options by clicking the button to display a search bar. -
Page 141: Call Page
Call Page GVC3220 Web UI call page is shown below. Users could make calls and initiate conference from Web UI. Figure 162: GVC3220 Web UI - Call Contacts Page This page lists Contacts, Schedule, and Call History. Web GUI Contacts Users could search/add/delete/edit contacts on web page. -
Page 142: Groups
“Delete” and users can select the contacts to delete from GVC3220. Groups GVC3220 supports up to 5-way video conference. If there are more than 4 conference members, only the first 4 members in the group will be dialed. Figure 164: GVC3220 Web UI - Groups 9. -
Page 143: Call History
From web UI, users could also access Call history, which is synchronized with the call history from LCD. Figure 166: GVC3220 Web UI - Call History The call history details will be displayed on the right side when there is one entry selected. Users can move... -
Page 144: Device Control Page
Figure 167: Web GUI - Preset Control • Camera Control: Use the available Mode button and direction keys to configurations the camera position accordingly. Figure 168: GVC3220 Web UI - Camera Control P a g e GVC3220 User Guide Version 1.0.0.28... -
Page 145: Factory Reset
Reset via LCD Go to GVC3220 LCD idle screen ➔ Settings ➔ Basic ➔ Factory Reset, click on the "Reset" button to bring up the prompt box as shown below. Click "OK" to reboot the device and restore factory settings. -
Page 146: Reset Via Reset Hole
Figure 171: GVC3220 Web UI - Factory Reset Confirmation Reset via Reset Hole There is a Reset hole on the back panel of GVC3220, use a small pin to hold against the Reset hole for more than 10 seconds to restore factory settings. -
Page 147: Experiencing Gvc3220
* Android is a trademark of Google LLC. HDMI, the HDMI Logo, and High-Definition Multimedia Interface are trademarks or registered trademarks of HDMI Licensing LLC in the United States and other countries. ----------------------------------------------------------------------------------------------------------------------------- --------------- P a g e GVC3220 User Guide Version 1.0.0.28...
Need help?
Do you have a question about the GVC3220 and is the answer not in the manual?
Questions and answers