Grandstream Networks GVC3210 User Manual
Video conferencing system for android
Hide thumbs
Also See for GVC3210:
- User manual (134 pages) ,
- Administration manual (94 pages) ,
- Quick installation manual (52 pages)

Related Manuals for Grandstream Networks GVC3210


Summary of Contents for Grandstream Networks GVC3210
- Page 1 andstr ream Netw works, , Inc. C3210/ G GVC32 210RMT T T M Vide o Conf ference System m for A Android User r Guide...
- Page 2 Grandstream Networks, Inc. is not permitted. The latest electronic version of this guide is available for download here: http://www.grandstream.com/support Grandstream is a registered trademark and Grandstream logo is trademark of Grandstream Networks, Inc. in the United States, Europe and other countries. CAUTION Changes or modifications to this product not expressly approved by Grandstream, or operation of this product in any way other than as detailed by this guide, could void your manufacturer warranty.
- Page 3 FCC Authentication For Video Conference System, model: GVC3210 FCC ID: YZZGVC3210 For Bluetooth Remote Control, model: GVC3210 RMT FCC ID: YZZGVC3210RMT Any Changes or modifications not expressly approved by the party responsible for compliance could void the user’s authority to operate the equipment.
- Page 4 CE Au uthentica tion Hereby, Grandstream m Networks, Inc. declare es that the ra dio equipme ent GVC3210 0 and GVC32 210 RMT are in comp liance with D Directive 201 4/53/EU. The full text of the E U declaration...
- Page 5 GNU GPL INFORMATION GVC3210 firmware contains third-party software licensed under the GNU General Public License (GPL). Grandstream uses software under the specific terms of the GPL. Please see the GNU General Public License (GPL) for the exact terms and conditions of the license.
-
Page 6: Table Of Contents
INSTALLING GVC3210 ....................22 Equipment Package Content ....................... 22 Connecting GVC3210 .......................... 23 GETTING TO KNOW GVC3210 ................... 27 Remote Control ............................ 27 Remote Control Keys and Touchpad .................... 27 Using the Remote Control ......................30 ... - Page 7 Advanced Settings ........................41 Wi-Fi Display ............................42 Bluetooth .............................. 43 Pairing GVC3210 with a Bluetooth Device ................... 43 Connecting to a Bluetooth Device ....................43 Using Bluetooth Remote Control ....................44 Transfer Files with Bluetooth ......................45 ...
- Page 8 Initiating Conference ..........................62 Answering an Incoming Call in Conference ..................62 Conference Management ........................63 Invite Members to Conference ......................66 Conference Control ..........................66 P a g e GVC3210 User Guide Version 1.0.1.13...
- Page 9 Reschedule Conference ....................... 85 Delete Scheduled Conference ...................... 85 Voicemail .............................. 85 Call Features ............................86 ADDITIONAL FUNCTIONS ..................89 GVC Remote Client Application ......................89 P a g e GVC3210 User Guide Version 1.0.1.13...
- Page 10 Backup Data ..........................109 Restore Backup Data ......................... 112 Set Backup Path ......................... 112 Diagnosis ............................112 Browser .............................. 113 Sync Local Schedule with Google Calendar ..................113 P a g e GVC3210 User Guide Version 1.0.1.13...
- Page 11 Search Apps ............................120 Download and Install Apps ........................ 120 Update Apps ............................120 GVC3210 WEB UI FEATURES ................... 122 Accessing GVC3210 Web GUI ......................122 Saving Changes ..........................123 Definitions ............................123 ...
- Page 12 Table 11: 802.1x Mode Parameters on GVC3210 ..................48 Table 12: GVC3210 Camera Parameters ....................52 Table 13: GVC3210 IPVT Call Screen Bottom Menu Icons ................ 63 Table 14: GVC3210 Conference Member Status Descriptions ..............65 ...
- Page 13 Figure 5: Deploy GVC3210 with other Devices ..................26 Figure 6: GVC3210 Remote Control ......................27 Figure 7: GVC3210 Top Status Bar Dropdown Menu ................. 32 Figure 8: Soft Keyboard - English Input Method ..................33 ...
- Page 14 Figure 66: GVC3210 Voice Mail Application ....................86 Figure 67: “GVC Remote” apk in GVC3210 LCD Menu Settings Status Remote Control .... 89 Figure 68: GVC3210 Remote Control Application on Android Device ............90 ...
- Page 15 Figure 114: Factory Reset via LCD ......................134 Figure 115: GVC3210 Web UI - Factory Reset ..................135 Figure 116: GVC3210 Web UI - Factory Reset Confirmation ..............135 P a g e GVC3210 User Guide Version 1.0.1.13...
-
Page 16: Document Purpose
DOCUMENT PURPOSE This User Guide describes the basic concept and tasks necessary to use and configure your GVC3210. This document covers the topics of device installation, making basic conference calls and using basic call features. To learn the advanced features and configurations, please visit http://www.grandstream.com/supportto download the latest "GVC3210 Administration Guide". -
Page 17: Change Log
Minor updates for corrections or editing are not documented here. Firmware Version 1.0.1.13 Added the option to check the Participants List on GVC3210 during an IPVideoTalk meeting. Users could check all participants in the current IPVideoTalk meeting. [Participants List] Firmware Version 1.0.1.6 ... -
Page 18: Welcome
WELCOME Thank you for purchasing GrandstreamGVC3210 Android Video Conferencing System. This document introduces the LCD settings, web UI settings and advanced configurations of GVC3210. To learn the basic configuration and how to use GVC3210, please visit http://www.grandstream.com/support to download the latest "GVC3210 User Guide". -
Page 19: Product Overview
& fail-over Sample Applications Skype, Google Hangouts, Microsoft Lync, Web browser, Adobe Flash, Facebook, Twitter, YouTube,Google calendar, mobile phone data import/export via Bluetooth, etc. API/SDK available for advancedcustom P a g e GVC3210 User Guide Version 1.0.1.13... - Page 20 802.11n-HT40: 16.76dBm; 802.11ac20: 17.13dBm; 802.11ac40: 16.68 dBm; 802.11ac80: 16.58dBm; 5250-5350 MHz: 802.11a: 16.26dBm; 802.11n-HT20: 16.09 dBm; 802.11n-HT40: 16.22dBm; 802.11ac20: 16.01dBm; 802.11ac40: 16.31 dBm; 802.11ac80: 16.86dBm; 5470-5725 MHz: 802.11a: 16.18dBm; 802.11n-HT20: 15.77 dBm; P a g e GVC3210 User Guide Version 1.0.1.13...
-
Page 21: Safety Compliances
Warranty If GVC3210 is purchased from a reseller, please contact the company where the device is purchased for replacement, repair or refund. If the device is purchased directly from Grandstream, please contact Grandstream Support for a RMA (Return Materials Authorization) number before the product is returned. -
Page 22: Installinggvc3210
INSTALLINGGVC3210 Equipment Package Content Figure 1:GVC3210Package Content Table 2: GVC3210 Package List GVC3210 1x GVC3210Main Case 1x TV mount bracket (Plastic bracket) 1x Remote Control 2x screws 1x 12V Universal Power Supply 1x Lens Cleaning Cloth 1x 1.5m Ethernet Cable 1x Quick Installation Guide 1x 1.5m HDMI Cable... -
Page 23: Connectinggvc3210
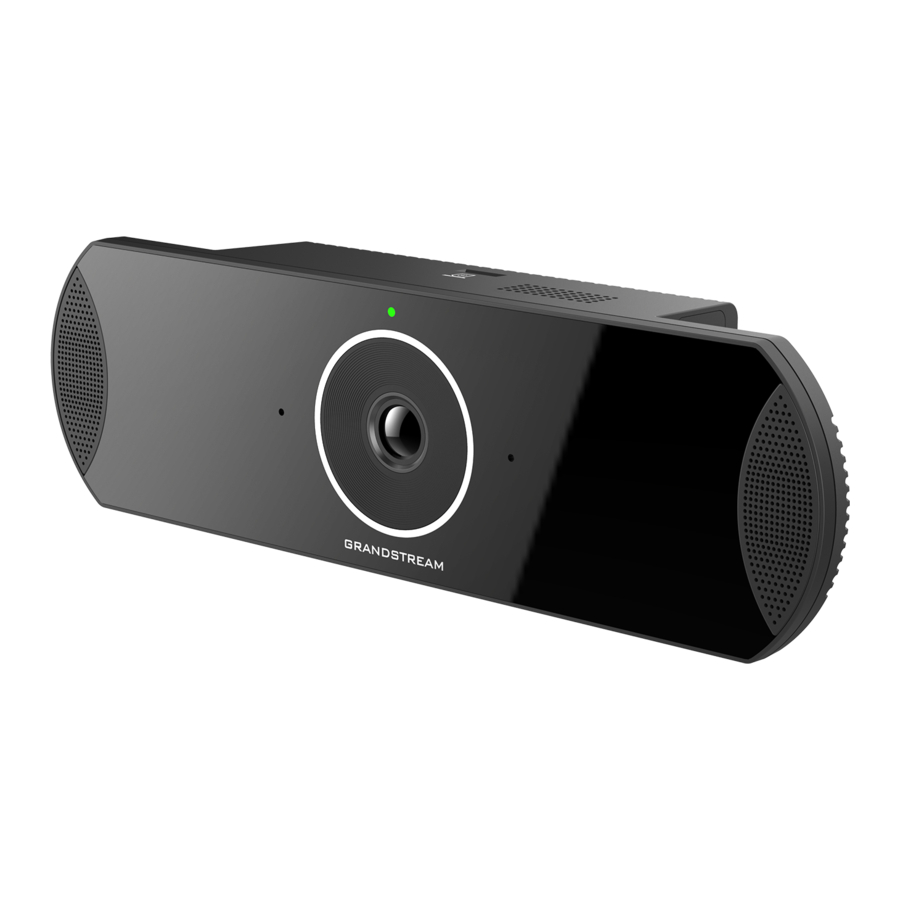
Pressing any key on the remote control - Green light flashes once. Camera 1/2.3“, 16 Megapixel CMOS, 4K (2160p) Output When GVC3210 is powered up, use a small pin to press the button one time to reboot or for more than 10 seconds to restore to factory Factory Reset settings. -
Page 24: Table 4: Gvc3210 Back Panel
Please connect GVC3210 according to the following procedures: 1. Connect the LAN port of the GVC3210 to the RJ-45 socket of a hub/switch or a router (LAN side of the router) using the Ethernet cable. P a g e GVC3210 User Guide Version 1.0.1.13... - Page 25 3. Connect the 12V DC output plug to the power jack on the GVC3210 and then plug the power adapter into an electrical outlet. 4. The LED Indicator in the front of the GVC3210 will show if the device is ready to be used by changing the color from red to green.
-
Page 26: Figure 4: Gvc3210Right/Left Panel Connection Diagram
Connect with HDMI Cable Connect with USB extension Connect with HDMI cable Figure 4: GVC3210Right/Left Panel Connection Diagram The following figure shows multiple GVC3210 devices deployed with other VoIP/network devices for video conference and collaboration. GVC3210 GVC3210 Figure 5: Deploy GVC3210 with other Devices... -
Page 27: Getting To Know Gvc3210
Call interface. For example, typing 5 (JKL), 6 (MNO), 4 (GHI), 6 (MNO) can look for John if it exists in GVC3210 contacts list. P a g e GVC3210 User Guide... - Page 28 LCD prompt shows follo owing three optionsafter pressing th key: Power On/ /Off Switch G GVC3210 int to sleep mod Power O P a g e GVC3210 Use er Guide Version 1.0 0.1.13...
- Page 29 Track kpad Using tw wo fingers t to press on n the trackp ad and slid up/down n for page up p/down. P a g e GVC3210 Use er Guide Version 1.0 0.1.13...
-
Page 30: Using The Remote Control
Using th he Remote Control GVC321 10 remote c control is c connected to o GVC3210 via Blueto ooth or infra ared connec ction, and it automat tically uses in nfrared conn ection when the user rec ceives GVC3 3210 package e, then he m... -
Page 31: Using Mouse & Keyboard
Using theLED Indicator GVC3210 LED indicator is located right above the camera lens. It can be used to notify the users with current status of the device. Please refer to the status description below. Table 6: GVC3210 LED IndicatorStatus Descriptions... -
Page 32: Status Icons
MENU key on t he GVC rem mote control o or pressing D DOWN button n when the G GVC3210 is i in home scre een. igure 7: GVC32 210Top Status Bar Dropdown n Menu For som... -
Page 33: Using The Onscreen Keyboard
Using the Onscr reen Keyb board English h Keyboard This is the default keyboard o n GVC3210 0. The Englis sh keyboard d supports m multiple lang guages input methods s. Users cou ld tap on to switc ch among dif fferent langu ages. -
Page 34: Numbers And Symbols
If there is no activity on main screen, the icons will be hidden and the video local loopback is displayed. Press OK button on the GVC3210 remote control to bring up the icons to display again. P a g e GVC3210 User Guide Version 1.0.1.13... -
Page 35: Screen Lock
2. Reboot, enter sleep mode or power off the GVC3210. 3. When the GVC3210 boots up again, a screen lock code will be required. The user can unlock the screen by entering the code using the GVC remote control. -
Page 36: Connecting To Network And Devices
If the user would like to use Ethernet connection for network access, please plug the Ethernet cable into the LAN port on the back of GVC3210. Ethernet connection is turned on as DHCP by default on both IPv4 and IPv6 protocols. -
Page 37: Using Ipv4
Go to LCD menuSettingsNetworkEthernetIPv4 Settings. Tap on "Address Type" to select DHCP, Static IP or PPPoE as the address type. For DHCP, save the setting and GVC3210 should be able to get IP address from the DHCP server in the network. -
Page 38: Wi-Fi
Figure 14: GVC3210 Add Wi-Fi Screen Once Wi-Fi is turned on, GVC3210 will automatically start the scanning within the range. A list of Wi-Fi networks will be displayed as scanning result. Tap on the SSID and enter the correct password information to connect to the selected Wi-Fi network. -
Page 39: Figure 15: Gvc3210 Push Button Wps Feature
On the Wi-Fipage, press the MENU key on the remote control, and select "PIN Entry WPS".A PIN code will be generated by GVC3210 and the user will need to enter it and register it in the “Wi-Fi Protected Setup” page of the Wi-Fi Router. -
Page 40: Add Network
Add Network The user can automatically connect the GVC3210 to the network using Wi-Fi by adding the network on your GVC3210. To do so, Please, refer to the following steps: 1. Go to the Wi-Fi page and press the MENU key on the remote control,then select "Add Network"... -
Page 41: Advanced Settings
"Advanced Settings". In this page, the user can enable/disable “Network Notifications” and to set the “Wi-Fi frequency band” to Auto, 5GHz only or 2.4 GHz only. Figure 19: GVC3210 Wi-Fi Advanced Settings page P a g e GVC3210 User Guide... -
Page 42: Wi-Fi Display
Wi‐Fi Display Wi-Fi Display feature is used for screen stream mirroring of other devices in the GVC3210 via Wi-Fi. Please refer to the following steps to display your device’s screen on the GVC3210 screen: 1. On the LCD display, go to SettingsNetworkWi-Fito turn on Wi-Fi. -
Page 43: Bluetooth
GVC3 3210. Pairing g GVC3210w with a Bluet tooth Devic Before c connecting G GVC3210 wit h other Blue etooth device e, users must t pair them f irst. They wi ll stay paired afterwar rds unless th ey are manu ually unpaired d. -
Page 44: Using Bluetooth Remote Control
LCD dis play device. If the re mote contro l is not paire ed with the G GVC3210 an nymore (e.g. , a factory re eset is made e), press OK button a and number 5... -
Page 45: Transfer Files With Bluetooth
----------------- ----------------- ---------------- ----------------- ----------------- ----------------- ----------------- ----------------- Note:Please e use the pro oprietary facto ory remote c control that co omes with th he GVC3210 packaging. ----------- ----------------- ----------------- ---------------- ----------------- ----------------- ----------------- ----------------- ----------------- Transfe er Files with h Bluetooth Users co... -
Page 46: Figure 23: Gvc3210 Add Vpn Files Screen
Figure 23: G GVC3210 Add V VPN Files Scre Fill in and save e the configu urations, go back to VP N page, you u will find th e new VPN file you just ded. p on the VPN N file to open... -
Page 47: Vlansettings
Enter DNS server address. Forwarding Enter Forwarding Routes, for example, 10.0.0.0/8. Routes VLANSettings Access GVC3210 home screen, go to ApplicationsSettingsNetworkAdditional Network SettingsVLAN to configure VLAN settings on GVC3210. Table 9: GVC3210 VLAN Configuration Parameters Parameters Descriptions Assigns the VLAN Tag of the Layer 2 QoS packets for LAN port. Default value is 0. -
Page 48: Lldp Settings
LLDP Settings Access GVC3210 home screen, go to ApplicationsSettingsNetworkAdditional Network SettingsLLDP to configure LLDP settings on GVC3210. Table 10: GVC3210 LLDP Configuration Parameters Parameters Descriptions Enable or disable LLDP. The default setting is disabled. LLDP Layer 3 QoS for This field defines the layer 3 QoS parameter for SIP packets. It is the value used for IP Precedence, Diff-Serv or MPLS. -
Page 49: Camera
Pres ss digit key o on the remote e control to a apply a pre-c configured pr reset. Figure 2 5: GVC3210 Ca amera Screen P a g e GVC3210 Use er Guide Version 1.0 0.1.13... -
Page 50: Preset
The created preset can also be renamed by pressing the yellow shortcut key on the remote control for better identification purpose. Delete Preset Access the preset editing screen, select preset and press the red shortcut key on GVC3210 remote control to delete it. P a g e GVC3210 User Guide Version 1.0.1.13... -
Page 51: Apply Preset
Position when power off: The GVC3210 will return to the last position before power off. Custom: The GVC3210 will boot up at a custom position. When chosen, users will be redirected to Preset settings page to set a custom preset. -
Page 52: Table 12: Gvc3210 Camera Parameters
Figure 28: GVC3210 Camera Parameters Setting Screen Table 12: GVC3210 Camera Parameters Parameters Descriptions GVC3210 has 4 built-in modes as well as "Manual" for customization. When set to "Manual", press "OK" key to access each setting toconfigurecontrast, saturation, and brightness. Picture Mode ... -
Page 53: Peripheral
UsingUSB Mouse/Keyboard When a USB mouse is plugged into GVC3210, users could see the cursor on the screen, move the cursor to perform operations. When a USB keyboard is plugged into GVC3210, users could use GVC3210 remote control to navigate to an input interface, and click on the keys on the keyboard to check if it is installed successfully. -
Page 54: Microphone And Speaker
GVC3210 is equipped with a built-in microphone.Alternatively, you can connect external audio devices to GVC3210 as audio input/output sources. If the external speaker supports Bluetooth, users could also pair and connect the speaker to the GVC3210 via Bluetooth. This will provide better mobility and make cabling easier when deploying the GVC3210 conference system in your conference room. -
Page 55: Making Phone Calls
This dis plays on the left side of th he top status s bar on your r LCD display device. Figure 29: GVC3210 S SIP Account Dial Sc creen Once th e account is s registered s successfully, users could... -
Page 56: Dialing A Number Directly
Figure e 30: GVC3210 Call Screen Pres ss the red sh hortcut key o on the GVC3 3210 remote control to b ring up call m mode setting g screen, set call mode to Cal l or IP call. -
Page 57: Dialing A Number Via Call History
SIP pr roxy. Direct I P calls can b be made if: Both h GVC3210 a and VoIP ph one have pu ublic IP addre esses, Or Both h GVC3210 a and VoIP ph... -
Page 58: Paging/Intercom
When the device is in idle and there is an incoming video callmade by SIP or IPVideoTalk account, the device will show the call screen as below: Figure 31: GVC3210 Single Incoming Call Screen If the incoming video call is made by H.323 account, the call screen will display as bellow:... -
Page 59: Call Hold
M icro SD card d plugged int to GVC3210 Once re ecorded, user rs can view t the recorded d video in Re ecorder appli... -
Page 60: Dnd (Do Not Disturb)
button en GVC3210 0 is in idle sc reen, users c can press on t he remote co ontrol to turn n on/off DND ... -
Page 61: Figure 33: Fecc - Remote Camera Control
Here is how to use FECC on the GVC3210 to control remote party’s camera: 1. Make sure the GVC3210 and the remote party support FECC and it’s enabled on both parties. For GVC3210, FECC setting is under web UISettingsAccountSettingsCodec: “Enable FECC”. If the remote party is another vendor’s video device, please check the documentation from the vendor to... -
Page 62: Ipvideotalk Conference
During a a conference e, user can tap on button on G GVC3210 rem mote control trackpad to o go back to HOME s screen, with t the conferen nce video dis splayed in the... -
Page 63: Conference Management
Here are e the function ns for each ic con. Tabl le 13: GVC3210 0IPVT Call Scre een Bottom Me enu Icons Icons Definit tions Add M Member Access dia... - Page 64 Presen ntation Mod de: PC The G GVC3210 th hat shares presentatio on will onl ly send presen ntation strea am, no loc cal video s stream. Th e other...
-
Page 65: Table 14: Gvc3210 Conference Member Status Descriptions
Table 14: GVC3210 C Conference Me ember Status D Descriptions Icons Desc criptions current line i is in an audio o call. -
Page 66: Invite Members To Conference
en GVC3210 0 is on confer rence screen n, press on th he remote contro l to acces ss the cal scre een. -
Page 67: Pause Conference
Once users choose Custom option, a window will show in order to customize the layout and the video feeds for each HDMI output. Figure 37: Layout Customization for multiple HDMI Outputs P a g e GVC3210 User Guide Version 1.0.1.13... -
Page 68: Presentation Sharing
GVC3210 supports dual stream video, with the presentation sharing function, you can connect HDMI input devices such as a computer, or a DVD player to GVC3210, and share the HDMI input sources with remote parties while he can still view the local video. -
Page 69: Conference Recording
---------------- ----------------- ----------------- ----------------- ----------------- ----------------- Note: When HDMI I IN interface e is connecte ed, GVC3210 0 will only di isplay the de evice connec cted to HDM IN port. Users could also press P PIP button on GVC32... -
Page 70: Call Details
On the con nference scr reen, click on select "Call Details" to c check the det tails. Figure 41: GVC3210 Call l Details Scree P a g e GVC3210 Use er Guide Version 1.0 0.1.13... -
Page 71: Participants List
IPV Videotalk mee eting, includi ng all partici pants with al ll types of cli ents. Figure 42 2: GVC3210 Pa articipants List Open D Dial Keyb board Users ca an send DTM MF during a c conference u using “Open... -
Page 72: Power Off During A Conference Call
GVC32 210 immedia ately. Choose e “Power off” to end the conferen nce call and power off the e GVC3210 immediately, , or choose “ Sleep” to go o on sleep mo ode, or choose “ “Reboot” to e... -
Page 73: Contacts
Users can also view Contacts types: a. Group. b. Regular contacts with name, phone number, Email address etc. c. Public GVC3210 Device with an IPVideoTalk ID. Select an entry in the directory and press the Green Call button on the GVC3210 remote control to call this contact. -
Page 74: Notices
Press the yellow shortcut key on the GVC3210 remote control to search contacts in the directory. Press the blue shortcut key on the GVC3210 remote control to select entries and make a batch call to multiple contacts in the directory. -
Page 75: Figure 49: Ipvideotalk ApplicationNotices: Message Prompt
Click on “Notices” to access the messages. Use the navigations keys/OK keys on the GVC3210 remote control to select and read the messages. For the messages that requires user’s reply, a prompt will pop up for the users to make a selection. -
Page 76: Settings
In the IPVideoTalk application, click on “Settings” to configure “Account Active” and “Display Name” for the IPVideoTalk account on GVC3210. The users could also click on “Device Code”, “Current plans”, “Business” for more plan details. Besides, current IPVideoTalk version information will be shown under “Application Information”. -
Page 77: Join An Ipvideotalk Meeting
Join an IPVideoTalk Meeting Users can join an IPVideoTalk meeting by dialing the host GVC3210’s IPVideoTalk ID or meeting ID. Please note only after meeting starts, GVC3210 can use this method to join the conference as a participant. Dialing host GVC3210’s IPVideoTalk ID to join an active meeting ... -
Page 78: Manually Start Ipvideotalk Tip
Figure 53: Busy Tone when the Callee is already a Meeting's Member Manually Start IPVideoTalk Tip If a meeting is scheduled from IPVideoTalk Web Portal, then the meeting will sync to host GVC3210 device LCDSchedule interface. There will be a prompt message “You are about to manually start a pre-scheduled meeting. -
Page 79: Figure 55: Hand Up - Ipvideotalk
WebRTC h host. Participant G GVC3210 co uld hand dow wn itself by c clicking on bu utton again. Figure 5 57: Hand down - IPVideoTalk ... -
Page 80: Stop Sharing Local Camera
IPVideo oTalk Server Figure e 59: Stop Cam era Sharing Stop Vi deo Upload dIcon Under G GVC3210 LC CDCall Sc reenConf f Control, us sers could p revent the G GVC3210 fro om uploading local vid deo streamin... -
Page 81: Schedule
Users could log in to IPVideoTalk Enterprise web portal Recordings page to View/Download/Delete the recordings for the cloud meetings/webinars: Figure 62 : IPVideoTalk Recordings Note: There are some prerequisites to enable cloud recording features on GVC3210: GVC3210 needs to be linked with an IPVideoTalk enterprise account. -
Page 82: View Conference Details
Figure 63 3: GVC3210 Sc hedule Screen Follow o one of the wa ays below to access sche edule confere ence screen On t the home scr reen, click on n CONFERE ENCE button On t the home scr... -
Page 83: Add Scheduled Conference
GVC3210 re emote contro ol, press the blue shortcu ut key to crea ate a new con nference. Figure 65: GV VC3210 Add C... -
Page 84: Edit Scheduled Conference
It is used to configure whether to remind users in advanced. A prompt dialog box Remind Time will pop up on GVC3210 screen 10 minutes before the conference starts. It is used to select a camera preset when the scheduled conference starts, the GVC3210’s camera will be automatically placed to the preset position. -
Page 85: Reschedule Conference
MENU U key GVC3210 re emote contro ol, and select t "Reschedul e" option. t new confere ence start tim me in the pop p out dialog b box. -
Page 86: Call Features
Figure 66: GVC3210Voice Mail Application Call Features The GVC3210 support traditional and advanced telephony features including caller ID, caller ID with caller Name, call waiting, call forward and etc for the SIP account. Before using the following feature code, please make sure "Enable... - Page 87 Enable Call Waiting (per Call). Dial *71 followed by the phone number. Unconditional Call Forward. To set up unconditional call forward: Dial *72 followed by the phone number to forward the call. P a g e GVC3210 User Guide Version 1.0.1.13...
- Page 88 Dial *92 followed by the number to forward the call. The default timeout before the call is forwarded is 20 seconds. Cancel Call Forward No Answer. To cancel Call Forward No Answer: Dial *93. P a g e GVC3210 User Guide Version 1.0.1.13...
-
Page 89: Additional Functions
Besides using GVC3210Bluetooth remote control in the package, users could also download the Grandstream GVC Remote Client application, and install it on an Android device. GVC3210 remote control application is used via Bluetooth protocol. Follow the steps below to install the remote control application:... -
Page 90: Bluejeans
BlueJ Jeans on GV VC3210, plea ase refer to th he link below http://ww ww.grandstre eam.com/site es/default/file es/Resources s/gvc320x_B BlueJeans_ap pplication_no ote.pdf P a g e GVC3210 Use er Guide Version 1.0 0.1.13... -
Page 91: Applications
Contact ts icon , or go to Ap pplications, a and select to access contacts s app. Figure 69 9: GVC3210 Co ontacts Screen It is used to disp play all conta cts. It is used to view w groups. -
Page 92: Add Contact
Micro SD c ard/USB flas sh drive and plugged into o GVC3210. P a g e GVC3210 Use er Guide Version 1.0 0.1.13... -
Page 93: Table 17: Gvc3210 Import Contacts Parameters
If it is dis sabled, both t the old conta acts and new w contacts wi Entries be kept i n GVC3210. File En ncoding Select th e encoding f format for XM ML contact fi Select th... -
Page 94: Table 18: Gvc3210 Download Contacts Parameters
If it is disabled, both the old contacts and new contacts will be kept in GVC3210. If it is enabled, when the phonebook file is imported to GVC3210, the duplicated Replace Duplicate entries will be removed. If it is disabled, both the old contacts and new contacts will Entries be kept in GVC3210. -
Page 95: Search Contacts
1. Select "Batch Remove" option. 2. Select the checkbox for the contacts to be deleted, and press the red shortcut key on GVC3210 remote control to delete them.Users could also press the yellow shortcut key on the remote control to select all contacts at once. -
Page 96: Groups
Figure 74: GVC3210 Groups Screen Call Press on GVC3210 remote control to call the first 8 members in a group to initiate a conference. Delete (red shortcut key) It is used to rename a group. ... -
Page 97: Figure 75: Gvc3210 Add Group Screen
Add New Group Select Groupstabin Contacts screen. Press the blue shortcut key on GVC3210 remote control to bring up the screen below: Figure 75: GVC3210 Add Group Screen Input a group name and tap on "OK" to add a new group. -
Page 98: Ldap Contacts
LDAP Settings Before starting using LDAP on GVC3210, the users must configure the LDAP settings first. Press the Blue shortcut key on the GVC3210 remote control to access LDAP settings, or the users can configure it under GVC3210 web UIContactsLDAP page. - Page 99 LDAP Mail Filter (mail=%) It is used to configure the entry information to be shown on phone's LCD. Up to 3fields can be displayed. LDAP Displaying Name Attributes Example: %cn %sn %telephoneNumber P a g e GVC3210 User Guide Version 1.0.1.13...
-
Page 100: Figure 77: Ldap Settings Example In Web Ui
UI. The LD DAP server i is the built-in LDAP se erver in Gran ndstream UC CM6xxx. Figure 77: LD DAP Settings E Example in Web b UI P a g e |100 GVC3210 Use er Guide Version 1.0 0.1.13... -
Page 101: Search Ldapcontacts
Add to Local On the search result screen, move the selection to the contact, then press the red shortcut key on the GVC3210 remote control to add single search result to local contacts. Click on OK to confirm Add to Local. -
Page 102: Call History
Application To acce ss Call Histo ory, go to Ho me screen ns Figure 81: GVC3210 Call History Scree P a g e |102 GVC3210 Use er Guide Version 1.0 0.1.13... -
Page 103: Add Contact From Call History
Press " "OK" key on GVC321 10 remote co ontrol to view w call details f for this numb ber. Figure 82: GVC3210 Call l History Detail ----------- ----------------- ----------------- ---------------- ----------------- ----------------- ----------------- ----------------- -----------------... -
Page 104: Delete Call History
Figure 83: GVC3210 Add Contact Scree ect existing contact or p press the blu ue shortcut key on GVC C3210 remot te control to o access edit scre een. Fill in contact in formation an nd press the yellow shortc... -
Page 105: Copy File
GVC3210 remote control and select "Send" option. 5. Select target location and press "OK" key on GVC3210 remote control to send file. If users need to send the file via Bluetooth, enable and connect Bluetooth device first. Otherwise, the interface will be redirected to the corresponding setting page to configure. -
Page 106: Rename File
GVC3210 remote control to cancel the operation. Recording GVC3210 recording application is used for the storage of call recording files in video conferencing. Users can play, export, lock/unlock, send, rename or delete these recordings and etc. The recording screen is as... -
Page 107: Recording Settings
Setup Wizard GVC3210 offers a Setup Wizard tool to guide users into configuring their units step by step, the setup wizard appears automatically at factory reset, or it can be accessed anytime from LCD P a g e... -
Page 108: Figure 86: ApplicationsSetup Wizard
Users can follow the steps using the remote control to setup fields, skip, return, or confirm the action. Setup wizard tool is useful to lead users to check and configure the GVC3210 settings such as language, accounts, interface status and etc. -
Page 109: Backup
It can be accesse ed from Hom e screenA Applications sBackup. The default screen will l list available backup files (if any) a and backup o options. P a g e |109 GVC3210 Use er Guide Version 1.0 0.1.13... -
Page 110: Figure 88: Gvc3210Backup App
Figure 88: GVC3210Backup App GVC3210 supports manual backup and automatic backup: Press the red shortcut key on the remote control to create new backup manually. The user will select data and press the blue shortcut key to start backup. -
Page 111: Figure 89: Gvc3210 Automatic Backup Screen
Figure 89: GVC3210 Automatic Backup Screen Note: Users have also the option to choose which commonly used apps need to be backed up, such as contacts, call history. Figure 90: Backup Commonly Used Apps P a g e |111 GVC3210 User Guide... -
Page 112: Restore Backup Data
Press the MENU key and select "Settings" on backup screen to access settings screen, set backup path and go back to save automatically. -------------------------------------------------------------------------------------------------------------------------------------------- Note: Insert Micro SD card or USB flash drive to the GVC3210 before configuring backup path. -------------------------------------------------------------------------------------------------------------------------------------------- Diagnosis When troubleshooting GVC3210, users could go to GVC3210home screenApplicationsDiagnosis . -
Page 113: Browser
Figure 92 : GVC3210 Dia agnosis Screen Brows ser Users co ould browse web page, v view news a and watch vid deo via the b built-in GVC 3210 Browse er. On home screen, select Appli cationBro owser Slide... -
Page 114: Figure 93: Lcd MenuSettingsSystemAccounts
2. Sign in Google Play Store using your Google account. Download and install Google Calendar to GVC3210. 3. Open Google Calendar on GVC3210. Please update Google Play services if required by the device. 4. Once Google Calendar is successfully installed and opened on GVC3210, it should automatically sign in using the same Google account in step 2. -
Page 115: Figure 95: Gvc3210 ScheduleSettings
Figure 96: Enable Google Account for Schedule and Set Sync Interval Now your GVC3210 has Google account successfully associated with schedule. The scheduled conference from GVC3210 or Google Calendar can sync with each other. Here is how to use it. P a g e... -
Page 116: Figure 97: Creating New Event In Google Calendar
97: Creat ting New Even nt in Google Ca alendar The new eve ent will be dis splayed in G GVC3210 sch hedule shortl ure 98: Google e Calendar Eve ent Synced in S Schedule P a g e... -
Page 117: Custom App On Home Screen
Users could de-select the existing custom app, or change to a different app. Move App to Micro SD Card The apps that are not built-in on GVC3210 can be moved to an external Micro SD card plugged to the GVC3210 from GVC3210 LCDSettingsSystemApps page. ... -
Page 118: Figure 100: System Apps
Choose the target app that needs to be moved to Micro SD card, it will show its detailed information, then Click on “Move to SD card” to make the change take effect. After configuration change, note that the moved app will not be listed anymore on GVC3210 device after the external Micro SD card is ejected. -
Page 119: Uninstall Application
Device Storag Uninst tall Appli cation The app plications (ex xcept the sy ystem applic ations) on G GVC3210 ca an be uninst alled. Go to o LCD Home Applications screen s, click on and select t "Uninstall M Mode". Users... -
Page 120: Gs Market
SEA ARCH iconto o search the app. Figure e 103: GVC3210 0GS Market Downl load and Install Ap pps rs could see e that if the ap... - Page 121 Installed screen. P a g e |121 GVC3210 User Guide Version 1.0.1.13...
-
Page 122: Gvc3210 Web Ui Features
Google Chrome , etc. Accessing GVC3210 Web GUI The IP address of the GVC3210 will show on the top status bar of the connected display device (e.g., TV) via HDMI. To access GVC3210 Web GUI: Connect the computer to the same network as GVC3210. -
Page 123: Saving Changes
GVC3210 for the changes to take effect. Definitions This section describes the options in the GVC3210 Web GUI. As mentioned in the previous section, you can log in as an administrator or a normal user. ... -
Page 124: Toolbar
Figure 105: GVC3210 Web UI Tool Bar Turn on/off DND mode. Once enabled, the DND text will turn into red in web UI. The LCD for GVC3210 display will shows DND indication on the top of the screen and all incoming calls will be rejected. -
Page 125: Making A Call
Figure 1 106: GVC3210 W Web UI – Call Table 22: G GVC3210 Web U UI - Call Setting Explanation Accounts Registration Latest con nference sch hedule inform mation Input Pho ne Number Dial out. Select cal l mode Display al l call history. -
Page 126: Conference Control
Recording members DTMF conference Figure 107: GVC3210 Web UI - Conference Status Click on the icon for “Conference Control”, users will see a list of control icons on the bottom which are also available in LCD call screen. Presentation Layout... -
Page 127: Contacts Page
LCD as s well. The we eb UI contac cts page is as s shown belo Figure 109 9: GVC3210 We eb UI - Contact Click k on ext to the con ntact to dial t the contact. -
Page 128: Groups
GVC321 10 will dial on nly the “N” fir rst contacts i n the group. Figure 11 0: GVC3210 W Web UI - Groups Click k on ext to the gro oup to call th e contacts in n the group. -
Page 129: Schedule
See figure below. Ple ase refer to chapterS Schedulefor r more details s for each op ption. Figure 111: GVC3210 Web b Page - Schedu Click k on and use ers will find Add Sched dule screen on the righ ht. -
Page 130: Call History
Call h istory, which h is synchron nized with the e call history from LCD. Figure 112: GVC3210 Web b UI - Call Histo The call history deta ils will be dis splayed on th he right side when there is one entry selected. -
Page 131: Device Control Page
Preset that has preset Empty preset been set before Use EPTZ Control direction keys to adjust camera Zoom Out Zoom In Figure 113: GVC3210 Web UI - Video Control P a g e |131 GVC3210 User Guide Version 1.0.1.13... -
Page 132: Audio Control
Notification Select device notification ringtone from the dropdown list. Ringtone Select the audio device that the GVC3210 will use for audio input and output during call or playing media. The options are “Auto”, “Bluetooth”, “USB”,“HDMI”, “Built-in Speaker” and “Gooseneck Mic”. - Page 133 American standard. Users could select "Low", "Medium" or "High". The default setting Gain is "Low". Configure the default ring cadence for the ring back tone. The default setting is Ring Cadence c=2000/4000; P a g e |133 GVC3210 User Guide Version 1.0.1.13...
-
Page 134: Factory Reset
FACTORY RESET Users could reset GVC3210 to factory settings via the following ways: Reset via local GUI, via Web page, via the reset hole on the back panel of GVC3210. Factory reset will delete configuration info and syslog info. -------------------------------------------------------------------------------------------------------------------------------------------- Warning: 1. -
Page 135: Resetvia Webui
Figure 116: GVC3210 Web UI - Factory Reset Confirmation Reset via Reset Hole There is a Reset hole on the bottom panel of GVC3210, use a small pin to hold against the Reset hole for more than 10 seconds to restore factory settings. -
Page 136: Experiencing Gvc3210
* Skype and Skype for Business are Registered Trademarks of Microsoft Corporation. HDMI, the HDMI Logo, and High-Definition Multimedia Interface are trademarks or registered trademarks of HDMI Licensing LLC in the United States and other countries. -------------------------------------------------------------------------------------------------------------------------------------------- P a g e |136 GVC3210 User Guide Version 1.0.1.13...
Need help?
Do you have a question about the GVC3210 and is the answer not in the manual?
Questions and answers