
Related Manuals for Peak Scientific SL 100 cc


Summary of Contents for Peak Scientific SL 100 cc
- Page 1 Precision Hydrogen SL (All Models) User Manual Copyright © Peak Scientific Instruments Ltd 2020 — Precision Hydrogen SL User Manual Rev 1 RSID 3516 EN —10/04/2020...
-
Page 2: Table Of Contents
Contents Change History How to use this Manual Introduction Health and Safety Data De-ionizer Resin Desiccant Molecular Seive Warranties and Liabilities Safety Notices Attention - Important Notice to All Users Declaration of Conformity Environmental Declaration Technical Specification Principle of Operation General Safety Generator Safety Features Unpacking... -
Page 3: Change History
Please review each of the following sections carefully. Thank you for selecting Peak Scientific to meet your gas generation needs, and should you require any further assistance or support please do not hesitate to contact Peak Scientific or the Peak Partner from which you purchased your Generator. -
Page 4: Introduction
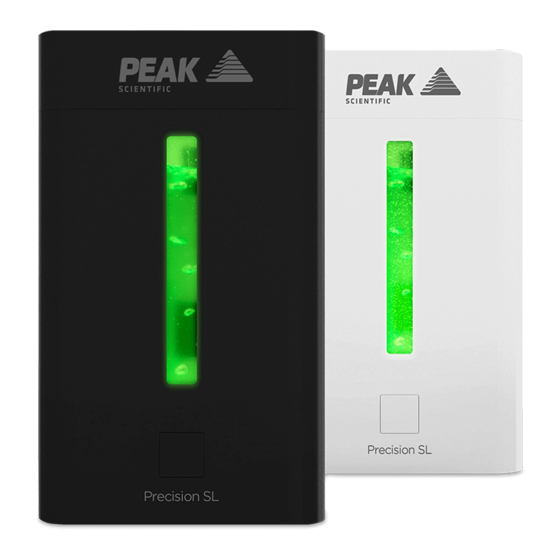
Introduction Precision Hydrogen SL has been developed to provide a source of high purity gas, suitable for GC detector gas. Features include: • Easy to use single button interface • Status indicative lighting feature • Purities of up to 99.9995% Precision Hydrogen SL is based on proven technology, producing hydrogen by electrolysis using a Proton Exchange Membrane (PEM) cell. -
Page 5: Health And Safety Data
Health and Safety Data De-ionizer Resin This sheet to be retained by the ‘Health & Safety Officer’ The recipient of this Health & Safety Data sheet is required to ensure that all personnel handling, using or likely to come into contact with the material are made aware of the Health &... - Page 6 First Aid Skin Contact Wash effected areas with soap and water. Consult doctor if irritation persists. Eye Contact Product can cause severe eye irritation. Flush eyes with large amounts of water for at least 15 minutes. Consult a doctor if irritation persists. Inhalation This product should present no hazard if operated under normal conditions.
-
Page 7: Desiccant
Desiccant This sheet to be retained by the ‘Health & Safety Officer’ The recipient of this Health & Safety Data sheet is required to ensure that all personnel handling, using or likely to come into contact with the material are made aware of the Health &... - Page 8 First Aid Skin Contact Wash spillage from skin with soap and water. Eye Contact Wash immediately with copious amounts of water and obtain medical attention. Inhalation Remove from source of exposure. Ingestion Wash out mouth with water. If large amount swallowed or symptoms develop obtain medical attention.
-
Page 9: Molecular Seive
Molecular Seive This sheet to be retained by the ‘Health & Safety Officer’ The recipient of this Health & Safety Data sheet is required to ensure that all personnel handling, using or likely to come into contact with the material are made aware of the Health &... - Page 10 First Aid Skin Contact Wash spillage from skin with soap and water. Eye Contact Wash immediately with copious amounts of water and obtain medical attention. Inhalation Remove from source of exposure. Ingestion Wash out mouth with water. If large amount swallowed or symptoms develop obtain medical attention.
-
Page 11: Warranties And Liabilities
Warranties and Liabilities 1. The Company warrants that it has title to the Goods. 2. Subject to the provisions of this clause the Company warrants that the Goods shall comply in all material respects with any specification referred to in the Order Confirmation (as the same may be amended) and shall, subject thereto, be free from defects in material and workmanship for the lesser of a period of twenty-four months from the date of delivery or twenty-five months from the date of dispatch... -
Page 12: Safety Notices
Safety Notice to Users These instructions must be read thoroughly and understood before installation and operation of your Peak Precision Hydrogen Generator. Use of the generator in a manner not specified by Peak Scientific MAY impair the SAFETY provided by the equipment. WARNING... -
Page 13: Attention - Important Notice To All Users
Nalgene in order to prevent biological growth (available from Peak Scientific). It is recommended that you check the water quality weekly to prevent biological growth developing in the tank and tubing. Failure to do this will greatly reduce the life of the generator and render the 2 year generator warranty void. -
Page 14: Declaration Of Conformity
Declaration of Conformity Peak Scientifi c Instruments Ltd. Fountain Crescent, Inchinnan, Renfrewshire, PA4 9RE Declare that: Equipment: Hydrogen Generator Models: Precision Hydrogen SL To which this declaration relates, is in conformity with the applicable EC directives, harmonized standards, and other normative requirements. •... -
Page 15: Environmental Declaration
Environmental Declaration Peak Scientifi c Instruments Ltd. Fountain Crescent, Inchinnan, Renfrewshire, PA4 9RE Declare that: Equipment: Hydrogen Generator Models: Precision Hydrogen SL Is fully compliant with the following Directives • 2012/19/EU WEEE (Waste of Electrical and Electronic Equipment) • 2011/65/EU RoHS 2 (Restriction of Hazardous Substance) Peak Scientifi c Instruments Ltd fully complies with its obligations towards the European WEEE (Waste of Electrical and Electronic Equipment) Directive 2012/19/EU. -
Page 16: Technical Specification
Technical Specification Precision Hydrogen SL Environment 100 cc 200 cc Minimum Operating Ambient Temperature 10°C (50°F) Maximum Operating Ambient Temperature 35°C (95°F) Maximum Altitude 3000 m Maximum Relative Humidity 90% Non-Condensing Minimum Storage Temperature* 10°C (50°F) Maximum Storage Temperature* 25°C (77°F) Generator Outlets Max Flow Rate 100 cc/min... -
Page 17: Principle Of Operation
The electrolyser used in the Peak Scientific hydrogen generator is known as a Proton Exchange Membrane (PEM) electrolyser. This type of electrolyser was first described in the mid-1960’s by General Electric as a method for producing oxygen for the Gemini... -
Page 18: General Safety
General Safety The generator produces gas when the application places a demand on the unit. The maximum quantity of hydrogen stored in the generator at any one time is 175ml at a pressure of 7.6bar (110psi). The unit also meets the European Electromagnetic Compatibility and Low Voltage Directives. -
Page 19: Generator Safety Features
Generator Safety Features The Precision Hydrogen range have the following safety features to ensure safe and reliable operation: • Overpressure switch. • Safe and accurate control of pressure. • Internal leak detection. • Cell shut down in critical alarm status. •... -
Page 20: Unpacking
Although Peak Scientific takes every precaution with safe transit and packaging, it is advisable to fully inspect the unit for any sign of transit damage. Any damage should be reported immediately to the carrier and Peak Scientific or the Peak Partner from where the unit was purchased. -
Page 21: Fittings Kit Contents
Fittings Kit Contents Supplied in the Fittings Kit are all the fittings required to connect the generator to the application. The contents of the Fittings Kit are as follows: 1. Tygon Tubing* x 1m 2. Barbed Hose Fitting* 3. In-line Water Filter** 4. -
Page 22: Installation
Installation Location The generator should be located on a flat, level surface for operation - this will ensure that the water level sensors within the unit operate correctly. Some components in the generator produce heat during operation and therefore an adequate airflow must be maintained around the generator to allow the ventilation system to perform efficiently. -
Page 23: Generator Overview
Generator Overview General Dimensions 160 mm / 6.3” 385 mm / 15.2” The Generator must always be placed on a flat, level surface. Failure to do so will affect the performance of the Generator. WARNING Page 23... -
Page 24: Unit Controls
Unit Controls Start Button Rear Connections Power Switch and Inlet H2 Output H2 Vent Water Fill (autofill and pressurized fill units only) Water Drain Page 24... -
Page 25: Tubing
Teflon® tape. H2 Ventilation Peak Scientific recommends that the H2 Exhaust port at the rear of the unit should be connected to an exhaust hood, or other ventilation system, to ensure safe disposal of vented gasses. Tubing sizes for the vent port are 6mm OD. -
Page 26: Manual Water Tank Filling
Manual Water Tank Filling The generator must be filled with DI water to be functional. For manual fill systems, follow the below steps. 1. Lift the hinged lid back, then remove the tank cover. 2. Fill the water tank from your lab’s supply of DI water, and ensure the tank cover is replaced, afterwards. -
Page 27: Automatic Filling (Automatic Fill Upgrade Units Only)
Automatic Filling (Automatic Fill Upgrade units only) The Precision Hydrogen generator uses an automatic water filling system as an optional upgrade, whereby sensors in the unit’s internal water tank detect when the water level reaches a minimum. This then refills the tank using a rear connection to an external DI water supply. The unit should be connected to the water supply as shown below. -
Page 28: Pressurized Filling (Automatic Fill Upgrade Units Only)
Once the low level water sensor disengages the generator will then begin producing hydrogen as before. Four and eight litre water storage bottles can be purchased from Peak Scientific, please contact your Sales Representative for more information. Pressurized Filling (Automatic Fill Upgrade units only) A pressurized feed option is available as a valve fitted to the fill inlet, instead of the load pump and has a 1-3 bar pressurised water feed. -
Page 29: Water Usage
Water Usage The water consumption rate of the Precision Hydrogen Generator is completely dependent on the rate at which the hydrogen is produced. The graphs below show an estimation of the water consumption from the generator in Stand-by mode through to maximum Hydrogen output. Page 29... -
Page 30: Electrical Connection
Electrical Connection Connect the generator into an appropriate electricity supply, between 100-240VAC. Refer to the generator serial plate for input specification and ensure your supply matches the requirements. If the appropriate power cord is not supplied; a new CSA, UL approved power cord, rated to at least 10 amps, can be fitted by a qualified electrician. -
Page 31: Start-Up Sequence
Start-up Sequence CHECK: Outlet is connected to application Mains power is connected Turn the power switch ON. The water tank will light up, the cooling fan will rotate. On power up the generator will check the water level, once the water level is at the minimum level required the generator will perform a diagnostic check including a leak test, this should take approximately six minutes and during this time the tank illumination will cycle from dim to bright... -
Page 32: Switching The Unit Off
Switching the Unit Off The unit can be switched off at any time using the following procedure. The generator may be restored to a depressurised state by pressing and holding the front button for at least three seconds. This will cause the generator to cease hydrogen production, illuminate the water tank blue, and exhaust any stored hydrogen through the exhaust port at the rear of the generator. -
Page 33: De-Ionizer Cartridge Replacement
De-ionizer cartridge Replacement DI cartridge requires an annual change, although it should also be changed if the water supply is contaminated with water of a conductivity above the specified limit. Replacement of the DI column (the column in the middle of the water tank) is by rotating 90°... -
Page 34: Replacement Of Desiccant Capsule
Replacement of Desiccant Capsule The desiccant capsule has a minimum expected life of 12 weeks. The capsule consists of molecular sieve interspersed with silica gel, viewable through the window on the side of the generator. The capsule should be replaced when all of the silica gel has visibly darkened. - Page 35 3. The cap can then be replaced ensuring not to over-tighten the cap and the hinged lid can be closed. 4. The unit can now be switched on. Page 35...
-
Page 36: Service Requirements
Note: Only Peak approved components should be used. Service Plans Peak Scientific offer two service plans. The Complete Service Plan, specifically designed for generators operated in critical environments, also includes full breakdown cover, guaranteed response times and generator upgrades if available. Our Standard Service Plan, covering the basic needs of our generators, features special deals on spare parts and breakdowns. -
Page 37: Troubleshooting
Troubleshooting Problem Possible Solution • Ensure power cord is plugged into the Generator and that the power socket is turned on. The generator will not switch on and the power switch does not illuminate • Check the fuse in the power cord plug, if fitted. - Page 38 See our enclosed Peak [Protected] leaflet for further information. Important! You have 1 month to register your Peak Scientific product from the date of installation. Once registered the warranty will be honoured for a period of 12 months. If you wish to defer the installation of your generator, you must notify Peak Scientific immediately by emailing warranty@peakscientific.com.
- Page 39 Page 39...
- Page 40 Peak Scientific has highly trained, fully certified Field Service Engineers located in over 20 countries across every continent around the world. This allows us to provide an industry-leading rapid response service to our customers. With [Peak Protected], your laboratory’s productivity becomes our top priority.
Need help?
Do you have a question about the SL 100 cc and is the answer not in the manual?
Questions and answers