Table of Contents
Advertisement
User Manual
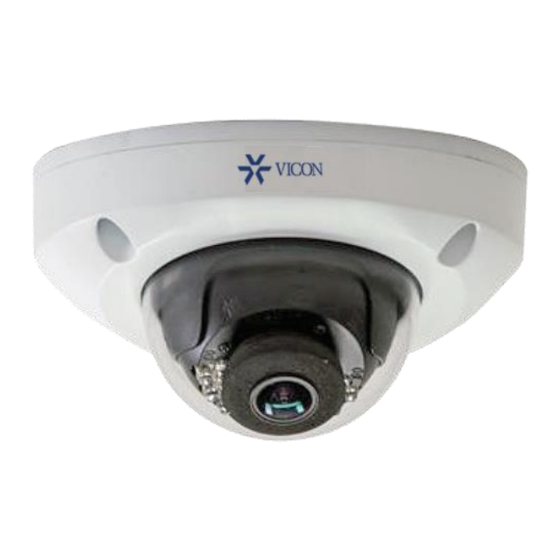
V840D Series Micro Dome Cameras
XX308-00-01
Vicon Industries Inc.
Vicon Industries Inc. does not warrant that the functions contained in this equipment will meet your
Tel: 631-952-2288)
requirements or that the operation will be entirely error free or perform precisely as described in the
Fax: 631-951-2288
documentation. This system has not been designed to be used in life-critical situations and must not be used for
Toll Free: 800-645-9116
this purpose.
24-Hour Technical Support:
800-34-VICON (800-348-4266)
Document Number: 8009-8308-00-01 Product specifications subject to change without notice. Issued: 4/19
UK: 44/(0) 1489-566300
Copyright © 2019 Vicon Industries Inc. All rights reserved.
www.vicon-security.com
Advertisement
Table of Contents

Related Manuals for Vicon V840D Series


Summary of Contents for Vicon V840D Series
- Page 1 V840D Series Micro Dome Cameras XX308-00-01 Vicon Industries Inc. Vicon Industries Inc. does not warrant that the functions contained in this equipment will meet your Tel: 631-952-2288) requirements or that the operation will be entirely error free or perform precisely as described in the Fax: 631-951-2288 documentation.
- Page 2 Trademark Acknowledgement Vicon and its logo are the property of Vicon Industries Inc. Other trademarks, company names and product names contained in this manual are the property of their respective owners. Disclaimer CAUTION! The default password is used for your first login. To ensure account security, please change the password after your first login.
- Page 3 Environmental Protection This product has been designed to comply with the requirements on environmental protection. For the proper storage, use and disposal of this product, national laws and regulations must be observed. Symbols The symbols in the following table may be found in this manual. Carefully follow the instructions indicated by the symbols to avoid hazardous situations and use the product properly.
-
Page 4: Table Of Contents
Contents 1 Network Connection ························································································································· 1 2 Login ·················································································································································· 1 Preparation ················································································································································ 1 Logging In to the Web Interface ················································································································ 3 Introduction to the Web Interface············································································································· 4 Initial Configuration ··································································································································· 5 3 Configuring Parameters ···················································································································· 5 Local Parameters ········································································································································ 5 Network Configuration ······························································································································... - Page 5 Setting the System Time ··················································································································· 45 Upgrading the Device ······················································································································· 46 Restarting the System ······················································································································ 46 Importing and Exporting System Configuration File ········································································ 47 Collecting Diagnosis Information ····································································································· 47 4 Live View ········································································································································· 48 Live View Toolbar ····································································································································· 48 Viewing Certain Area of Images ··············································································································· 49 Using Digital Zoom ···························································································································...
-
Page 6: Network Connection
Network Connection Before accessing a network camera (also known as IP Camera or IPC) from a PC, you need to connect the network camera to the PC directly with a network cable or via a switch or router. Network cable Use a Shielded Twisted Pair (STP) cable to connect the network interfaces of the network camera and the PC. - Page 7 Add the IP address as a trusted site 1.13...
-
Page 8: Logging In To The Web Interface
The device management software tool can be used to discover the camera on your network. This tool can be found on Vicon’s website under Software Downloads < Vicon Cameras/Encoders. The following uses IE as an example to describe the login procedure. -
Page 9: Introduction To The Web Interface
NOTE! To manually load the ActiveX, type http://IP address/ActiveX/Setup.exe in the address bar and press Enter. The default password is used for your first login. To ensure account security, please change the password after your first login. You are recommended to set a strong password (no less than eight characters). -
Page 10: Initial Configuration
Initial Configuration After you log in to the device, perform the following initial configuration. Item Description Reconfigure the device IP and network parameters based on Ethernet. the actual networking. Log out and log in again to the Web using the new IP address. Set the system time. - Page 11 2. Modify the settings as required. The following table describes some major parameters. Parameter Description Intelligent Untriggered When enabled, the camera will display an on-screen mark on the target (e.g., face when face detection is enabled) and track it. Mark Target Real-Time Priority: Recommended if the network is in good condition.
-
Page 12: Network Configuration
Network Configuration Ethernet Modify communication settings such as the IP address for the camera so that the camera can communicate with other devices. NOTE! After you have changed the IP address, you need to use the new IP address to log in. ... - Page 13 2. Select PPPoE from the Obtain IP Address drop-down list. 3. Enter the username and password provided by your Internet Service Provider (ISP). 4. Click Save.
-
Page 14: Port
DHCP The Dynamic Host Configuration Protocol (DHCP) is enabled by default when the camera is delivered. If a DHCP server is deployed in the network, the camera can automatically obtain an IP address from the DHCP server. To manually configure DHCP, follow the steps below: 1. -
Page 15: Ftp
All snapshots (except face detection) are saved through the general FTP service. After the configuration of FTP, you will be able to upload snapshots from network cameras to the specified FTP server. General 1. Click Setup > Storage > FTP. Go to General tab. 2. - Page 16 Smart This function is used to store snapshots taken for smart functions such as face recognition. To use smart FTP, click Setup > System > Server > Intelligent Server and set Platform Communication Type to FTP. 1. Click Setup > Storage > FTP. Go to Smart tab. 2.
-
Page 17: E-Mail
E-Mail After the configuration of E-mail, when alarms are triggered, you will be able to send messages to the specified E-mail address. 1. Click Setup > Network > E-mail. 2. Configure relevant parameters of the sender and the recipient. Some camera models support Email test. You may test email after setting the recipient address. -
Page 18: Port Mapping
Port Mapping 1. Click Setup > Network > Port. Go to Port Mapping tab. 2. Enable Port Mapping and select mapping type. If Manual is selected, then external ports must be configured (external IP is obtained automatically by the camera). If the configured port is occupied, then the Status will show Inactive. -
Page 19: 802.1X
NOTE! Two options are available: SNMPv3 (default) and SNMPv2. If you choose SNMPv2, an onscreen message will remind you of potential risks and ask if you want to continue. Click Setup > Network > SNMP Select SNMPv3 and complete settings. Click Save. -
Page 20: Image Configuration
Image Configuration Image Adjustment NOTE! You may move the sliders to adjust settings or enter values in the text boxes directly. Clicking Default will restore all the default image settings. Setting the Scene Set image parameters to achieve the desired image effects based on live video in different scenes. Click Setup >... - Page 21 3. Select a scene and then click to set it as the default scene. 4. If auto-switching is enabled, the camera can switch to the scene automatically when the condition for switching to a non-default scene is met. Otherwise, the camera remains in the default scene. When auto- switching is not enabled, the camera remains in the current scene.
- Page 22 Item Description Set the degree of difference between the blackest pixel and the whitest pixel. Contrast Low contrast High contrast Contrast of boundaries of objects in an image. Sharpness Low sharpness High sharpness Noise Reduce the noise of images. The function may cause image blurring. Reduction Noise Reduce the noise of images.
- Page 23 Item Description 90° Clockwise 90° Anti-clockwise 3. To restore default settings in this area, click Default. Exposure NOTE! The default settings are scene-adaptive. Use default settings unless modification is necessary. 1. Click Setup > Image > Image and then click Exposure. 2.
- Page 24 Parameter Description If Slow Shutter is set to Off, the reciprocal of the shutter speed must be greater than the frame rate. Control image signals so that the camera outputs standard video signals according to the light condition. Gain (dB) Note: You can set this parameter only when Exposure Mode is set to Manual or Gain Priority.
- Page 25 Smart Illumination 1. Click Setup > Image > Image and then click Smart Illumination. 2. Select the correct IR control mode and set the parameters. The following table describes some major parameters. Parameter Description Infrared: The camera uses infrared light illumination. ...
- Page 26 in Auto mode, please try Auto2. Fine Tune: Allow you to adjust the red and blue offset manually. Outdoor: Suitable for outdoor environment with a relatively greater color temperature range. Locked: Lock the current color temperature without change. ...
-
Page 27: Osd Setting
OSD Setting On Screen Display (OSD) is the text displayed on the screen with video images and may include time and other customized contents. NOTE! This function may vary with models. Please see the actual Web interface for details. 1. Click Setup > Image > OSD. 2. -
Page 28: Privacy Mask
Privacy Mask In certain circumstances, you may need to set a mask area on the camera image to protect privacy, for example, the keyboard of an ATM machine. When camera changes its position, the Privacy Mask will be adjusted accordingly to protect the area all along. NOTE! The camera supports up to 8 privacy masks. -
Page 29: Audio And Video Configuration
Audio and Video Configuration Video Configuration You can set video parameters that your camera supports; you may also enable sub-stream and third stream as required. NOTE! After enabling the sub or third stream, modify the parameters as required. The parameters for the sub and ... -
Page 30: Snapshot
Snapshot 1. Click Setup > Video & Audio > Snapshot. 2. Select On, and then set resolution, most large and schedule as needed. Some parameters are described in the table below. Parameter Description Interval between two snapshots. For example, with Snapshot Interval set to 1 and Snapshot Interval Number of Snapshot set to 2, the camera will take 2 snapshots (take one first and then take another after 1 second). -
Page 31: Media Stream Configuration
2. Click and then drag the mouse to cover the intended part of the images. To delete, select the area and then click Media Stream Configuration Media Stream You can display the established media streams from a camera. You may also set the camera so it transmits code streams by the TS/UDP or ES/UDP protocol to a specified IP address and port number. -
Page 32: Intelligent Alarm Configuration
4. Click OK to complete the operations or Cancel the setting. RTSP Multicast Address After an RTSP multicast address is configured, the third-party player can request the RTSP multicast media stream from the camera through the RTP protocol. 1. Click Setup > Video & Audio > Media Stream > RTSP Multicast Address. 2. -
Page 33: Perimeter Protection: Intrusion Detection
1. Click Setup > Intelligent > Smart Settings. Choose Cross Line and then click 2. Select Cross Line Detection. 3. In the Detection Rule area, click to add a new detection area. To delete a detection area, click 4. On the small preview window, drag the line to the intended position and set the detection range. 5. -
Page 34: Exception Protection And Statistics: Object Moving
2. Select Intrusion Detection. 3. In the Detection Rule area, click to add a new detection area. To delete a detection area, click 4. Drag the borders of the box to set the intended position and range. 5. Set time threshold, sensitivity, and percentage for the camera to decide whether to report an intrusion detection alarm. -
Page 35: Exception Protection And Statistics: Object Left
2. Select Enable Object Moving Detection. 3. In the Detection Rule area, click to add a detection area. To delete, click 4. Drag the box to set the position and effective range. 5. Set time threshold and sensitivity to decide whether to report an intrusion detection alarm. Time threshold: Minimum duration an object is detected in the specified area to trigger an alarm. -
Page 36: Exception Protection And Statistics: Defocus Detection
2. Select Enable Object Left Detection. 3. In the Detection Rule area, click to add a detection area. To delete, click 4. Drag the box to set the position and effective range. 5. Set time threshold and sensitivity to decide whether to report an intrusion detection alarm. Time threshold: Minimum duration an object is detected in the specified area to trigger an alarm. -
Page 37: Exception Protection And Statistics: Scene Change Detection
2. Select Defocus Detection. 3. Set detection sensitivity and alarm-triggered actions as required. For the detailed steps, see the descriptions of alarm-triggered actions in Configuring Motion Detection Alarm. 4. Click Save. Exception Protection and Statistics: Scene Change Detection Use Scene Change detection to detect the change of surveillance environment caused by external factors, such as intentional rotation of the camera, and to report an alarm when such an event is detected. - Page 38 2. Drag the borders to set the intended position and range. 3. Set detection parameters according to actual needs. 4. Set the alarm-triggered actions and arming schedule as required. For the detailed steps, see the descriptions of alarm-triggered actions in Configuring Motion Detection Alarm.
-
Page 39: People Counting
People Counting 1. Click Setup > Intelligent > Smart Settings. Choose People Counting and then click 2. Select Enable Passenger Flow Detection. Select a detection mode, set report interval and sensitivity. 3. Click Draw Detection Area, and then draw a detection area on the preview window on the left, e.g., a square. -
Page 40: Common Alarm Configuration
2. Set the thumbnail image clarity. 3. Click Save. NOTE! Please turn off the Face Detection before setting the photo parameter. Detection Parameters NOTE! The default detection mode is Normal Mode. Set as required. 1. Click Setup > Intelligent > Advanced Settings. Click Detection parameters tab. 2. - Page 41 Area Detection 1. Click Setup > Events > Common Alarm > Motion Detection. Set Detection Mode to Area. 2. In the Detection Area list, click to add a new detection area. To delete a detection area, click 3. A box appears on the preview screen. Click and drag the mouse to size and position a detection area. 4.
- Page 42 The following table describes the triggered actions and how to set a plan. Item Description With Recording selected, the camera will automatically start to record video when an alarm is triggered Recording Note: Make sure you have completed Recording before using this function. With Upload to FTP selected, the camera will automatically upload snapshots to the specified FTP server when an alarm is triggered.
- Page 43 example, set path as Preset No.\\IP Address\\Date, and set file name as Preset No.-PTZ Latitude-PTZ Longitude-PTZ Zoom.jpg. 4. Click Save. E-Mail before using this function. Select the check box and set the start and end times during which motion detection alarm is effective.
- Page 44 Grid Detection 1. Click Setup > Events > Motion Detection. Set Detection Mode to Grid. 2. Detection area(s) can be irregular on the grid. 3. Set detection sensitivity for the camera to decide whether to report a motion detection alarm (alarm visible on compatible NVR).
-
Page 45: Configuring Tampering Alarm
Configuring Tampering Alarm Configure tampering alarm so that the camera reports a tampering alarm when the lens is blocked for a certain length of time. 1. Click Setup > Events > Common Alarm >Tampering Alarm. 2. Select On for Tampering Alarm. 3. - Page 46 Configuring Audio Detection Alarm The camera can detect input audio signals for exceptions. When the rise or fall of volume exceeds the set limit, or when the input volume reaches the threshold, the camera reports an alarm and triggers the set actions.
-
Page 47: System Maintenance
Parameter Description Volume Scale Difference 3. Set the alarm-triggered actions and arming schedule as required. For the detailed steps, see the descriptions of alarm-triggered actions in Configuring Motion Detection Alarm. 4. Click Save. System Maintenance Security User Management There are two types of users in the system: Administrator: Referred to as “admin”... - Page 48 NOTE! Only admin can change passwords. Changing the username or password for a user when the user is still logged in will force the user to log out. The user must use the new username or password to log Only admin can add and delete users.
- Page 49 ARP Protection This function protects a camera from ARP attacks. The gateway and the MAC address must be set properly before a PC can access the camera from another network; if an incorrect MAC is set, only PCs on the same LAN can access.
-
Page 50: Setting The System Time
Access Policy NOTE! Enabling friendly password does not affect use. If you turn it off and log in with a weak password, a page will pop up, prompting you to change the password. There is no Cancel or Close button on this page. The default password is treated as weak. -
Page 51: Upgrading The Device
Setting the DST 1. Click Setup > Common > Time, and then click the DST tab. 2. Select On for DST, set the start time, end time, and DST bias. 3. Click Save. Upgrading the Device If the device is managed by the central management server and you want to upgrade the devices in batch mode, it is recommended to perform the upgrade operation on the central server. -
Page 52: Importing And Exporting System Configuration File
CAUTION! Perform this operation with caution because restarting the system interrupts the ongoing service. Importing and Exporting System Configuration File Export the current configurations of the camera and save them to the PC or an external storage medium. You can also quickly restore configurations by importing backup configurations stored on the PC or an external storage medium back to the camera. -
Page 53: Live View
Live View Live view means playing live video (real-time audio and video) received from a camera in a window through the Web interface. If you log in with the Live View check box selected, live video appears by default when you are logged in. You may double-click the window to enter or exit full screen mode. -
Page 54: Viewing Certain Area Of Images
Button Description Display packet loss rate and bit rate information at the bottom of the window. Note: After you move the mouse cursor on a live view window, this button appears on the floating toolbar. Click this button to always display the information. With another click, the information appears only when you move the mouse cursor over the window or place it at the bottom. - Page 55 Appendix FAQ What to do if no message prompts me to install ActiveX when I log in on a Windows 7 PC the first time. Answer: Follow these steps to turn off UAC and then log in again: 1. Click the Start button, and then click Control Panel. 2.
- Page 56 Shipping Instructions Use the following procedure when returning a unit to the factory: 1. Call or write Vicon for a Return Authorization (R.A.) at one of the locations listed below. Record the name of the Vicon employee who issued the R.A.
- Page 57 The warranty does not apply (a) to faulty and improper installation, maintenance, service, repair and/or alteration in any way that is not contemplated in the documentation for the product or carried out with Vicon consent in writing, operation adjustments covered in the operating manual for the product or normal...
- Page 58 Vicon product, whether resulting from breach of warranty or any other legal theory. Notwithstanding the foregoing, Vicon total liability for all claims under this warranty shall not exceed the price paid for the product. These limitations on potential liabilities have been an essential condition in setting the product.
- Page 59 VICON INDUSTRIES INC. For office locations, visit the website: www.vicon-security.com...
Need help?
Do you have a question about the V840D Series and is the answer not in the manual?
Questions and answers