Table of Contents
Advertisement
Quick Links
Quick Guide
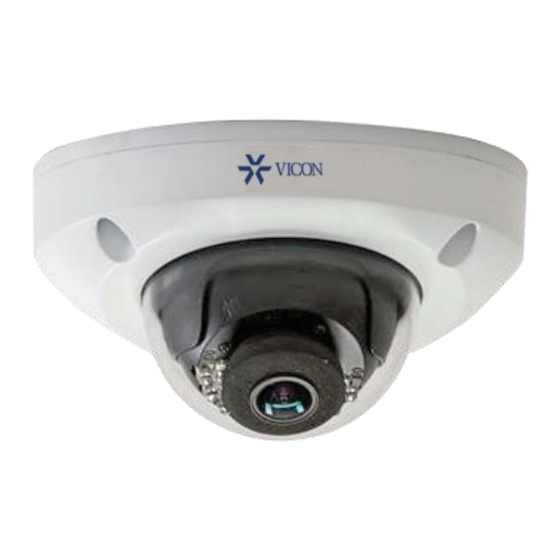
VV840D Series Dome Cameras
XX308-20-00
Vicon Industries Inc. does not warrant that the functions contained in
this equipment will meet your requirements or that the operation will be
entirely error free or perform precisely as described in the
documentation. This system has not been designed to be used in life-
critical situations and must not be used for this purpose.
Document Number: 8009-8308-20-00 Product specifications subject to
change without notice. Issued: 9/18 Copyright © 2018 Vicon Industries
Inc. All rights reserved.
Vicon Industries Inc.
Tel: 631-952-2288)
Fax: 631-951-2288
Toll Free: 800-645-9116
24-Hour Technical Support: 800-34-VICON (800-348-
4266) UK: 44/(0) 1489-566300
www.vicon-security.com
Advertisement
Table of Contents

Related Manuals for Vicon V840D Series


Summary of Contents for Vicon V840D Series
- Page 1 Quick Guide VV840D Series Dome Cameras XX308-20-00 Vicon Industries Inc. does not warrant that the functions contained in this equipment will meet your requirements or that the operation will be entirely error free or perform precisely as described in the documentation.
-
Page 2: Safety And Compliance Information
Safety and Compliance Information Installation and removal of the unit and its accessories must be carried out by qualified personnel. You must read all of the Safety Instructions supplied with your equipment before installation and operation. Installation This device is a class A product and may cause radio interference. ... -
Page 3: Maintenance
for the RJ45 plug must be used properly to protect the network cable from water. Make sure the wall or ceiling is strong enough to support the weight of the camera. If dust falls during mounting, take off the dome cover and keep it away from dust. -
Page 4: Regulatory Compliance
Make sure the lens cleaning cloth is clean itself. Never look at the transmit laser while the power is on. Never look directly at the fiber ports and the fiber cable ends when they are powered on. Use of controls or adjustments to the performance ... -
Page 5: Default Ip, Username And Password
WEEE Directive–2012/19/EU The product this manual refers to is covered by the Waste Electrical & Electronic Equipment (WEEE) Directive and must be disposed of in a responsible manner. Default IP, Username and Password By default, the camera is set to obtain an IP address via ... -
Page 6: Cable Connections
Appearance Dimensions The figures in this manual are for reference only. Use the supplied template to mark and create mounting holes. 61m m 3- Φ 4m m ( 2. 4" ) ( 0. 2" ) Φ 98m m ( 3. 9" ) SR 30m m ( 1. -
Page 7: Ceiling Mount
For specifications, see the latest product datasheets. Mounting the Camera Ceiling Mount The dome camera can be ceiling or wall mounted; mounting accessories are available separately. The following steps use ceiling mounting as an example; wall mounting is similar. 1. Loosen the captive screws and remove the dome assembly to access the mounting base. - Page 8 3. Adjust the camera position: Grasp the camera assembly and carefully rotate and tilt it to the position required. The camera can be rotated in pan 60°, tilt 90° and rotate around its axis 360°. 4. (Optional) Insert a Micro SD card in the slot provided. Micro SD card slot 5.
- Page 9 The preceding installation process is for a concealed installation, where cables are routed through the ceiling directly to the surface-mounted camera. For installations where the cabling is routed externally, via conduit (customer supplied, an optional backbox must be used. Install the conduit/backbox first and then connect all the cables and secure the camera onto the ceiling.
-
Page 10: Waterproof Components For An Rj-45 Plug
Ethernet cable into the RJ-45 connector of the camera and screw the waterproof bolt until snug. When fabricating your own Ethernet cable, Vicon recommends to crimp the inner wires of the cable with the RJ-45 plug first and then cover the waterproof components. -
Page 11: Access Your Camera
Access Your Camera Before you begin, check that: Your camera is operating properly and connected to the network. The PC you are using is installed with Internet Explorer 7.0 or later. Follow these steps to access your camera through the Web interface: 1. - Page 12 the Never Notify position and then click OK. After UAC is turned off, log in again. If the installation fails, open Internet Options in IE before login. Click the Security tab, click Trusted sites, and then click Sites to add the website. In Windows 7, you need to save the setup.exe to your PC first and then right-click the file, select Run as administrator, and then install it.
Need help?
Do you have a question about the V840D Series and is the answer not in the manual?
Questions and answers