Table of Contents
Advertisement
Quick Links
DS-PD1-EB-WS2
Wireless Panic Button
This product and - if applicable - the supplied
accessories too are marked with "CE" and comply
therefore with the applicable harmonized European
standards listed under the RE Directive 2014/53/EU,
the EMC Directive 2014/30/EU, the LVD Directive
2014/35/EU, the RoHS Directive 2011/65/EU.
E N G L I S H
Diagram References:
Appearance Description
A
Register Panic Button Locally
B
Register Panic Button Locally via APP
C
C
LEDs : General LEDs
D
(i) From power up: Not learnt
(ii) Learning process
(iii) 8 x Flashes: Learnt
(iv) 18 x Slow flashes: Fault with new battery installed
(v) Signal strength sent to control panel
(vi) Hold up alarm has been activated
(vii) Control panel has not received the signal from HUD
Specification
Setting devices technical characteristics
Hold-up function
Yes
LED indication
Red, Amber, Green
Environmental and operating features
Operating temperature
-10°C to +40°C
Dimensions (H x W x D)
72 x 30 x 20 mm
Electrical & battery
Transmission frequency
433.6MHZ
Range in open space
300m
Battery type
CR1/3N
Battery voltage
3V
Threshold
2.1V +/- 5%
Certifications and warranty
Electrical conformity
CE
Warranty
2 years
Battery Information
The battery supplied has been chosen to provide long service life
whilst, for safety reasons, having limited output current.
When disposing of the product, the battery must be removed and
disposed of separately in accordance with the local regulations.
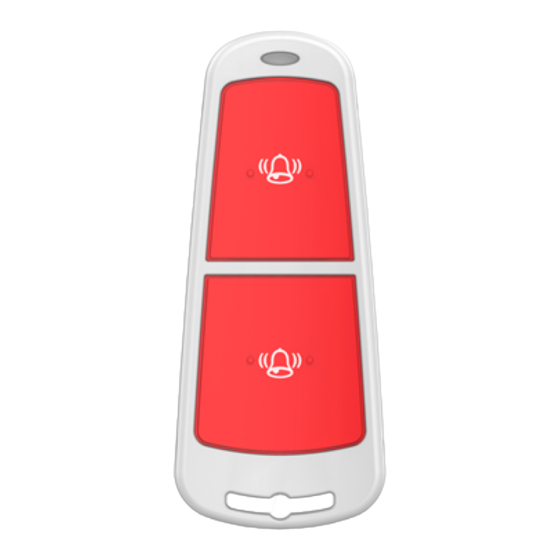
A
Appearance
Indicator
Panic Button
Panic Button
Please register the device winthin 90 seconds after it being powered on.
B
Learn Panic Button onto Control Panel
Control Panel
Register Detector
1. Make the security control panel enter the registration mode.
2. Register the panic button: Hold any one of the buttons until the
two LEDs flash alternately. The green LED will flash 8 times if the
registration is finished.
3. Communication Test: press the button to trigger the alarm .
Note:
The distance between the security control panel and the
detector should be less than 50 cm.
Unregister Detector
Initialize the Detector
1. Remove the battery to power the panic button off.
2. Hold any of the buttons and reinstall the battery to power the
detector on at the same time. Release the button while the two
LEDs flash once together. When the initialization is completed, the
indicator turns to alternately flashing red and green.
.
C
Learn Panic Button via APP
1
Log in to the APP Store and input "Hik-Connect"
With in 50cm
to search the mobile client.
2
Download and install Hik-Connect to your phone.
After installing, tap
3
Power on the security control panel.
4
Log in the Hik-Connect and ap the icon "+" at
5
the upper-right coner of the Hik-Connect page to
add the security control panel. You can scan the
QR code on the device rear panel or on the
package box, or input the device serial No.
manually to add the device when the device is in
the registration mode.
After adding the security control panel, tap the
6
arming status icon on the right of the security
control panel's name to enter the Partition page.
7
Tap the "+" icon on the Partition page to add the
peripherals.
D
LEDs - General LEDs
to run the client.
(i) From power up:
Not learnt
(ii) Learning process
(iii) 8 x flashes: Learnt
(iv) 18 x Slow flashes:
Fault with new battery
installed
(vi) Panic alarm has
been triggered
(vii) Control panel has
not received the
signal from HUD
Advertisement
Table of Contents

Subscribe to Our Youtube Channel
Related Manuals for HIKVISION DS-PD1-EB-WS2


Summary of Contents for HIKVISION DS-PD1-EB-WS2
- Page 1 DS-PD1-EB-WS2 Appearance Wireless Panic Button This product and - if applicable - the supplied Indicator accessories too are marked with "CE" and comply therefore with the applicable harmonized European standards listed under the RE Directive 2014/53/EU, the EMC Directive 2014/30/EU, the LVD Directive Panic Button 2014/35/EU, the RoHS Directive 2011/65/EU.
- Page 2 Any and all information, including, among others, wordings, user’s authority to operate the equipment. pictures, graphs are the properties of Hangzhou Hikvision FCC compliance: This equipment has been tested and found to Digital Technology Co., Ltd. or its subsidiaries (hereinafter comply with the limits for a Class B digital device, pursuant to part referred to be “Hikvision”).
Need help?
Do you have a question about the DS-PD1-EB-WS2 and is the answer not in the manual?
Questions and answers