
Related Manuals for Danfoss Turbocor TTS Series


Summary of Contents for Danfoss Turbocor TTS Series
- Page 1 Service Manual - Revision G Danfoss Turbocor® Twin-Turbine Centrifugal Series Compressors TTS, TGS, TTH, TGH Series Compressors ® http://turbocor.danfoss.com...
- Page 2 This manual covers Major Revision "F" and later compressors. If you have a Major Revision "E" or earlier compressor, we suggest downloading Service Manual Revision E from our website since there are some steps that are unique.
-
Page 3: Table Of Contents
Table of Contents Chapter 1.0 Introduction ..................................15 1.1 Application ....................................................15 1.2 Purpose ......................................................16 1.3 Organization ....................................................17 1.4 Commitment to Quality and the Environment .......................................18 1.5 Safety Summary ..................................................18 1.6 Precautions ....................................................18 1.7 Refrigerant Type ..................................................18 1.8 Electrical Isolation..................................................19 1.9 Handling Static Sensitive Devices ............................................20 1.10 DC Bus Test Harness Installation and Removal ......................................22 1.11 Compressor Fasteners ................................................27 1.12 General O-ring Handling ..............................................27... - Page 4 Table of Contents Chapter 6.0 Maintenance ..................................263 6.1 Preventative Maintenance Tasks ............................................263 6.2 Moisture Prevention Measures ............................................264 Appendix A – Acronyms/Terms ................................269 Appendix B – Compressor Troubleshooting Flowcharts ........................271 Appendix C – Compressor Test Sheet ..............................277 4 of 282 M-SV-001-EN Rev.
- Page 5 List of Tables Table 2-1 Compressor Fluid Paths ...............................................31 Table 3-1 Exterior Connection Torque Specifications ......................................45 Table 4-1 Compressor Components (Covers On) ........................................51 Table 4-2 Compressor Components Service Side (Excludes TTH/TGH Compressors) ..........................52 Table 4-3 Compressor Components Service Side (TTH/TGH Only) ................................53 Table 4-4 Compressor Components Capacitor Side (Excludes TTH/TGH) ..............................54 Table 4-5 Compressor Components Capacitor Side (TTH/TGH Only) ................................55 Table 4-6 Compressor Cover Torque Specifications ......................................60...
- Page 6 List of Figures Figure 2-1 Compressor Fluid Paths .............................................31 Figure 2-2 Cooling Inlet Adapter ..............................................32 Figure 2-3 Split Cooling Path - TTH375/TGH285 ........................................33 Figure 2-4 Split Cooling Path - (TTS/TGS (Except TTS300/TGS230 Serial Cooling) ............................33 Figure 2-5 Serial Cooling Path - TTS300/TGS230 ........................................34 Figure 2-6 Compressor Energy and Signal Flow Connections ..................................36 Figure 2-7 Compressor Energy and Control Flow Block Diagram - TTS/TGS Compressors ........................37 Figure 3-1 Compressor Power Cable Removal ........................................41...
- Page 7 List of Figures Figure 4-58 Locking Collar Removal ............................................86 Figure 4-59 Worm Gear Removal ..............................................86 Figure 4-60 Large Worm Gear Bearing Removal ........................................86 Figure 4-61 IGV Throat Removal ..............................................87 Figure 4-62 Small Worm Gear Bearing Removal ........................................87 Figure 4-63 Small Worm Gear Bearing Installation .......................................87 Figure 4-64 IGV Position Indicator Magnet ..........................................88 Figure 4-65 Large Worm Gear Bearing Installation.......................................88 Figure 4-66 Locking Collar Installation .............................................89...
- Page 8 List of Figures Figure 4-125 Soft Start SCR Gate Cable Removal at SCR - TTS/TGS/TTH/TGH Models Rev. H (Except TTS300/TGS230) ............122 Figure 4-126 Closed-Top Soft Start J8 Connector Top .......................................123 Figure 4-127 Open-Top Soft Start J2 Connector ........................................123 Figure 4-128 SCR Gate Connector Alignment ........................................124 Figure 4-129 Soft Start AC/DC Harness Connections - TTS300/TGS230 ..............................125 Figure 4-130 Soft Start AC/DC Harness Connections - TTS/TGS/TTH/TGH (Except TTS300/TGS230) .....................126 Figure 4-131 AC Input Ring Terminal Removal - TTS300/TGS230 .................................127...
- Page 9 List of Figures Figure 4-192 Inverter Connections ............................................165 Figure 4-193 Inverter Diode Measurements (Skiip 613 Shown) ..................................166 Figure 4-194 Inverter Cable Harness ............................................166 Figure 4-195 Harness Removal from Inverter ........................................167 Figure 4-196 Harness Removal from Backplane ........................................167 Figure 4-197 Inverter Connector Alignment ........................................168 Figure 4-198 Fuse Block Assemblies - TTS300/TGS230 .....................................169 Figure 4-199 Terminal Block Removal - TTS300/TGS230 ....................................169 Figure 4-200 Soft Start Harness Removal..........................................170...
- Page 10 Figure 4-259 Open Frame DC-DC .............................................204 Figure 4-260 DC-DC Converter Removal ..........................................205 Figure 4-261 DC-DC Rear Fastener Install ..........................................205 Figure 4-262 Potted DC-DC - Top View ...........................................206 Figure 4-263 Open Frame DC-DC - Top View ........................................206 Figure 4-264 Backplane ................................................207 Figure 4-265 Backplane Connections ............................................208 Figure 4-266 Backplane Test Points ............................................209 Figure 4-267 Backplane LED Locations - Left Side ......................................209...
- Page 11 Copyright laws of the United States of America (USA) and most other countries. This work is owned by Danfoss LLC, and was published as of the most recent revision of this publication, as indicated on the Title page of this document. This document is for the use Danfoss LLC customers and prospective customers only.
- Page 12 List of Changes Table 1-1 List of Changes Revision Date Page Description of Change 05-30-2019 Redevelopment of manual to include TTH/TGH and support Revision F and later compressors 6-10-2019 15/16 Upodated Typecode figures 1-1 and 1-2. 11-10-2019 18-19 Updated TGS490 compressor with R515B refrigerant. &...
- Page 13 Chapter 1: Compressor Introduction 1.1 Application ......................................15 1.2 Purpose ......................................16 1.3 Organization ...................................... 17 1.4 Commitment to Quality and the Environment ..........................18 1.5 Safety Summary ....................................18 1.5.1 Danger Notification ................................................18 1.5.2 Caution Notification ................................................18 1.5.3 Note ......................................................18 1.6 Precautions ......................................
- Page 14 THIS PAGE INTENTIONALLY LEFT BLANK 14 of 282 M-SV-001-EN Rev. G...
-
Page 15: Chapter 1.0 Introduction
Chapter 1.0 Introduction This section provides a brief introduction to the Service Manual including the Application, Purpose, Organization, Document Conventions used, Safety Information, and the Danfoss LLC Quality Policy. 1.1 Application As of May 6, 2019, the product nomenclature changed. "Figure 1-1 Old to New Type Code" maps the old structure of the Type code to the new structure. -
Page 16: Purpose
1 Kilovolt (kV) high-power alternating current (AC) and direct current (DC). Some potential safety situations may not be foreseen or covered in this manual. Danfoss LLC expects personnel using this manual and working on Danfoss Turbocor compressors to be familiar with, and carry out, all safe work practices necessary to ensure safety for personnel and equipment. -
Page 17: Organization
Danfoss LLC does sell various upgrade kits (e.g., Soft Start Upgrade Kit) and and those kits may include retrofit cabling or other hardware that are not specifically installed on production compressors. -
Page 18: Commitment To Quality And The Environment
1.4 Commitment to Quality and the Environment Danfoss Turbocor Compressors is dedicated to leading through innovation and to satisfying our customers with the best quality, value, and on-time delivery of high-efficiency oil-free centrifugal compressors. We are committed to controlling our impact on the environment demonstrated through setting goals focused on continual improvement and complying with all relevant legislation, regulation, and other requirements to protect the environment. -
Page 19: Electrical Isolation
• • • DANGER • • • • This equipment contains hazardous voltages that can cause serious injury or death. Only qualified and trained personnel should work on Danfoss LLC equipment. • Always wear appropriately-rated safety equipment when working around equipment and/or components energized with high voltage. -
Page 20: Handling Static Sensitive Devices
voltage is above 5 volts direct current (VDC), wait five (5) minutes and recheck until voltage is below 5 VDC. Refer to "Figure 1-6 DC Bus Voltage Test Points". Figure 1-6 DC Bus Voltage Test Points Place Positive (+) Meter Lead Here Place Positive Place... -
Page 21: Esd Protection/Grounding
The operator should avoid touching any components or connectors on the module and should hold the module by its edge or enclosure, as applicable. 1.9.1 ESD Protection/Grounding All parts that are susceptible to damage by ESD will be marked using the following label. Refer to "Figure 1-8 ESD Label". -
Page 22: Dc Bus Test Harness Installation And Removal
1.10 DC Bus Test Harness Installation and Removal A DC bus test harness must be used when testing the voltages of the compressor’s power electronics. The DC bus test harness is not designed to be left in the compressor during normal operation. When checks are complete, disconnect and remove the test harness. -
Page 23: Dc Bus Test Harness Installation For Closed-Top Soft Start
• • • CAUTION • • • Use your ESD wrist strap before touching the Soft Start Board or any electronic components. NOTE This would be a good time to perform a visual inspection of the top-side electronics to determine if there is any visual damage present. - Page 24 Figure 1-15 DC Bus Test Harness Connection Diagram (Closed-Top Soft Start) ORIGINAL CONNECTIONS Soft Start (Top Side) Harness to DC Bus and AC Line Harness to DC-DC Converter CONNECTIONS WITH DC BUS TEST HARNESS Soft Start (Top Side) Harness to DC Bus and AC Line Harness to DC-DC Converter 00.0 Volt...
- Page 25 Reapply AC power to the Compressor. Using an appropriately-rated voltmeter with the 1000VDC range selected, insert the positive voltmeter lead into the DC (+F) test harness lead, and the negative voltmeter lead into the DC (-) test harness lead. If the voltage corresponds to "Table 1-3 Expected DC Bus Voltage", the DC bus voltage is correct and HV DC (F1) fuse on the Soft Start is intact.
- Page 26 Figure 1-18 Connect DC Bus Test Harness (Open-Top Soft Start) To J8 on Soft Start Multimeter jacks 1 2 3 1 2 3 To harness for J8 Figure 1-19 DC Bus Test Harness Connection Diagram (Open-Top Soft Start) ORIGINAL CONNECTIONS Soft Start (Top Side) Harness to DC Link...
-
Page 27: Compressor Fasteners
When finished, remove the DC Bus Test Harness. Refer to "1.10.3 General DC Bus Test Harness Removal". 1.10.3 General DC Bus Test Harness Removal Isolate the compressor power as described in "1.8 Electrical Isolation" on page 19. • • • CAUTION • • • Use your ESD wrist strap before touching the Soft Start Board or any electronic components. - Page 28 After inspection and prior to installation, lubricate the O-ring with a light coat of Super-O-Lube. Avoid rolling or twisting the O-ring when maneuvering it into place. Keep the position of the O-ring mold line constant. NOTE It is strongly suggested that anytime an O-ring is removed, that a new O-ring is used in its place. 28 of 282 M-SV-001-EN Rev.
- Page 29 Chapter 2: Compressor Fundamentals 2.1 Main Fluid Path ....................................31 2.2 Motor and Power Electronics Cooling ............................. 31 2.3 Capacity Control ....................................34 2.4 Compressor Energy and Signal Flow ............................... 34 29 of 282 M-SV-001-EN Rev. G...
- Page 30 THIS PAGE INTENTIONALLY LEFT BLANK 30 of 282 M-SV-001-EN Rev. G...
-
Page 31: Chapter 2.0 Compressor Fundamentals
Chapter 2.0 Compressor Fundamentals Compressor operation begins with a demand signal applied to the compressor. The startup sequence is configurable in the startup settings. See the OEM Programming Manual for further details. 2.1 Main Fluid Path The compressor is a two-stage centrifugal type compressor utilizing variable speed as the principle means of capacity control with inlet guide vanes (IGVs) assisting when required. -
Page 32: Figure 2-2 Cooling Inlet Adapter
Figure 2-2 Cooling Inlet Adapter 1/2" ORFS connection with strainer Liquid refrigerant is internally channeled to two (2) solenoid valves. These valves have integral orifices that act as expansion devices to cool the compressor motor, shaft (rotor) and power electronics. TTS300 and TGS230 compressors have these solenoids arranged so that all components are cooled in series with each other and the solenoids act as two stages of cooling capacity. -
Page 33: Figure 2-3 Split Cooling Path - Tth375/Tgh285
High-Li� Cooling Circuit Flow Diagram Figure 2-3 Split Cooling Path - TTH375/TGH285 Solenoid Inverter Inlet (Liquid Refrigerant) Inverter Temp Sensor Solenoid BMCC Motor Cavity Temp. Sensor Impeller Impeller Stage Stage Radial Axial Bearing Stator/Rotor Bearing Radial Bearing Figure 2-4 Split Cooling Path - (TTS/TGS (Except TTS300/TGS230 Serial Cooling) Liquid Refrigerant Inlet... -
Page 34: Capacity Control
Figure 2-5 Serial Cooling Path - TTS300/TGS230 Liquid Refrigerant Inlet Solenoid Solenoid BMCC From SCR Temp. Sensor ORIFICE ORIFICE From Inverter Temp. Sensor Inverter BMCC From Motor From Motor Winding Temp. Cavity Temp. Sensor Sensor Motor/Rotor cooling gas and leakage 2.3 Capacity Control Capacity control of the compressor is achieved primarily by speed modulation. - Page 35 • Bearing Pulse Width Modulation (PWM) Amplifier • Compressor I/O Board • IGV • Solenoid actuators The order of power and signal flow through the compressor components is as follows. Refer to "Figure 2-6 Compressor Energy and Signal Flow Connections": A 3-phase voltage source is provided to the compressor through the voltage input terminal.
-
Page 36: Figure 2-6 Compressor Energy And Signal Flow Connections
Figure 2-6 Compressor Energy and Signal Flow Connections TTS300 Shown DC bus voltage from the SCRs Soft Start AC/DC Input Soft Start AC Output Voltage to charges the capacitors Voltage; DC Output Voltage DC-DC Converter to DC-DC Converter 3-phase Voltage Input Soft Start limits the in-rush Terminal current at power-up by... -
Page 37: Figure 2-7 Compressor Energy And Control Flow Block Diagram - Tts/Tgs Compressors
Refer to "Figure 2-7 Compressor Energy and Control Flow Block Diagram - TTS/TGS Compressors" for a block diagram summary of the energy and voltage signal flow through the compressor. NOTE TTH/TGH Compressors are very similar to "Figure 2-7 Compressor Energy and Control Flow Block Diagram - TTS/TGS Compressors". Figure 2-7 Compressor Energy and Control Flow Block Diagram - TTS/TGS Compressors External Power Components Surge... - Page 38 THIS PAGE INTENTIONALLY LEFT BLANK 38 of 282 M-SV-001-EN Rev. G...
- Page 39 Chapter 3: Compressor Removal and Installation 3.1 Refrigerant Containment .................................. 41 3.2 Compressor Removal ..................................41 3.3 Compressor Installation..................................42 3.4 Compressor Replacement Considerations for Motor Cooling Adapter ..................43 3.5 Exterior Connection Torque Specifications ............................. 45 39 of 282 M-SV-001-EN Rev.
- Page 40 THIS PAGE INTENTIONALLY LEFT BLANK 40 of 282 M-SV-001-EN Rev. G...
-
Page 41: Chapter 3.0 Compressor Removal And Installation
Chapter 3.0 Compressor Removal and Installation 3.1 Refrigerant Containment • • • CAUTION • • • Isolation and recovery of the refrigerant must be performed by a qualified service technician adhering to industry/ASHRAE standards. Close the suction, discharge, and economizer isolating valves as appropriate. Close the motor-cooling liquid line shut-off valve. -
Page 42: Compressor Installation
16. Continue the removal of the compressor and lower to the desired location in order to remove the chains/cables. 17. Using the blanking plates and bolts provided with the new compressor, seal the compressor and charge to 15 psi with a nontoxic inert gas (e.g., nitrogen) for shipment (this will prevent moisture and foreign material from entering the compressor). -
Page 43: Compressor Replacement Considerations For Motor Cooling Adapter
15. Torque the motor cooling line connection (Nut) to 11 Nm (8 ft.lb.). 16. Remove the Service Side Cover. 17. Install the I/O strain relief to the compressor housing. 18. Connect the compressor I/O cable to the Backplane I/O connector (J7). 19. - Page 44 This is done to prevent over torqueing the fitting in the compressor housing. NOTE Flexible lines are not supplied by Danfoss LLC. Selection of appropriate hose and fitting is the responsibility of OEM/installer. This information is readily available from various sources.
-
Page 45: Exterior Connection Torque Specifications
3.5 Exterior Connection Torque Specifications Table 3-1 Exterior Connection Torque Specifications Description Thread Depth (mm)Nm Ft.Lb. In.Lb. Power Cable Nut (excluding TTS300/TGS230 compressors) - Input Pressure Screws (TTS300/TGS230 compressors) Motor Cooling Body, E-housing and later Motor Cooling Compression Nut, E-housing and later Ground Post, Top Nut Ground Post, Second (Jam) Nut Ground Post, Lower Nut... - Page 46 THIS PAGE INTENTIONALLY LEFT BLANK 46 of 282 M-SV-001-EN Rev. G...
- Page 47 Chapter 4: Compressor Components 4.1 Component Identification ................................51 4.2 Compressor Covers.................................... 56 4.2.1 Mains Input Cover ..................................................56 4.2.2 Top Cover....................................................57 4.2.3 Service Side Cover..................................................58 4.2.4 Capacitor Cover ..................................................59 4.2.5 Compressor Cover Torque Specifications ........................................60 4.3 Cooling Adapter ....................................61 4.3.1 Cooling Adapter Removal and Installation ........................................62 4.3.2 Cooling Adapter Torque Specifications ..........................................62 4.4 Compressor Interface Module ................................
- Page 48 4.16 SCR DC Bus Bar - TTS300/TGS230 ..............................119 4.16.1 SCR DC Bus Bar Removal and Installation .........................................120 4.17 Soft Start SCR Gate Cable ................................121 4.17.1 Soft Start SCR Gate Cable Connections ........................................121 4.17.2 Soft Start SCR Gate Cable Removal and Installation .....................................121 4.18 Soft Start AC/DC Harness ................................
- Page 49 4.28.3 BMCC Battery and Verification ............................................215 4.28.4 BMCC Removal and Installation ...........................................217 4.29 Bearing Pulse Width Modulator Amplifier ..........................218 4.29.1 PWM Function ..................................................218 4.29.2 PWM Connections ................................................219 4.29.3 PWM Verification ................................................220 4.29.4 PWM Removal and Installation .............................................221 4.30 Magnetic Bearings ..................................223 4.30.1 Magnetic Bearings Function ............................................223 4.30.2 Magnetic Bearings Connections ..........................................223 4.30.3 Bearing Verification ................................................223...
- Page 50 THIS PAGE INTENTIONALLY LEFT BLANK 50 of 282 M-SV-001-EN Rev. G...
-
Page 51: Chapter 4.0 Compressor Components
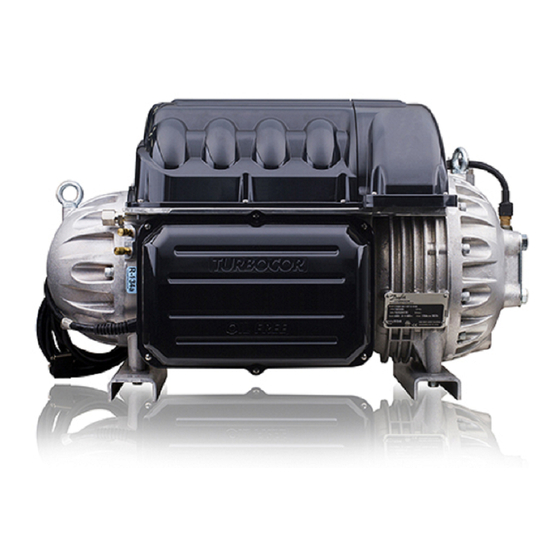
Chapter 4.0 Compressor Components This section provides compressor component locations and functional descriptions, verification and troubleshooting methods, cable connection identification, and steps necessary to replace a component. 4.1 Component Identification This section identifies the major parts of the compressor. Figure 4-1 Compressor Components Identification (Covers On) Table 4-1 Compressor Components (Covers On) Component Component... -
Page 52: Table 4-2 Compressor Components Service Side (Excludes Tth/Tgh Compressors)
Figure 4-2 Compressor Component Identification - Service Side (Excludes TTH/TGH Compressors) TT300 Shown Table 4-2 Compressor Components Service Side (Excludes TTH/TGH Compressors) Component Component Suction Pressure/Temperature Sensor Compressor Cooling Access Port Access Port #1 (NOTE: TTS300/TGS230 have only one access port) IGV Suction Port Compressor Cooling Access Port #2 (not available on TTS300/TGS230... -
Page 53: Table 4-3 Compressor Components Service Side (Tth/Tgh Only)
Figure 4-3 Compressor Component Identification - Service Side (TTH/TGH Only) Table 4-3 Compressor Components Service Side (TTH/TGH Only) Component Component PWM Amplifier Suction Pressure/Temperature Sensor BMCC Motor-Cooling Solenoids Serial Driver Motor-Cooling Connection Backplane DC-DC Converter Compressor Cooling Access Port Soft Start Board IGV Suction Port Inverter Compressor Cooling Access Port... -
Page 54: Table 4-4 Compressor Components Capacitor Side (Excludes Tth/Tgh)
Figure 4-4 Compressor Component Identification - Capacitor Side (Excludes TTH/TGH) Table 4-4 Compressor Components Capacitor Side (Excludes TTH/TGH) Component Component Capacitors Optional Pressure Regulating Port IGV Position Indicator IGV Motor Feedthrough Economizer Port Discharge Temperature/Pressure Sensor Discharge Port 54 of 282 M-SV-001-EN Rev. -
Page 55: Table 4-5 Compressor Components Capacitor Side (Tth/Tgh Only)
Figure 4-5 Compressor Component Identification - Capacitor Side (TTH/TGH Only) Table 4-5 Compressor Components Capacitor Side (TTH/TGH Only) Component Component Capacitors Economizer Port IGV Motor Feedthrough Interstage Pipe Optional Pressure Regulating Port Interstage Temperature/Pressure Sensor Suction Temperature/Pressure Sensor Discharge Port Suction Port Interstage Temperature/Pressure Sensor 55 of 282... -
Page 56: Compressor Covers
4.2 Compressor Covers The compressor covers provide protection to the internal components as well as protection for anyone that might be near the compressor while the mains power is applied and while the capacitors contain a dangerous electrical charge. Figure 4-6 Top Covers Removal Mains Input Cover Top Cover... -
Page 57: Figure 4-7 Mains Input Cover Torque Sequence
Figure 4-7 Mains Input Cover Torque Sequence Mains Cover Fastener, M5x15 4 places) Follow the sequence twice. The first time, only tighten the fasteners half way down to allow for adjustment. Tighten the # 4 fastener only once and be sure to not overtighten. Torque to 13 in.lb. -
Page 58: Figure 4-10 Service Side Cover
Ensure that no residue remains on the contact surfaces of the Mains Input Cover and casting sides. Place the new Mains Input Cover and secure it with the M5x15 fasteners. Tighten according to the sequence shown in "Figure 4-7 Mains Input Cover Torque Sequence". Follow the sequence twice. -
Page 59: Figure 4-11 Capacitor Cover
4.2.4 Capacitor Cover The Capacitor Cover provides protection for the capacitors. Figure 4-11 Capacitor Cover 4.2.4.1 Capacitor Cover Removal and Installation Capacitor Cover Removal Remove the M5x15 fasteners that secure the Top Cover and Capacitor Cover to each other. Remove the fasteners that secure the Capacitor Cover. Remove the cover. Remove the nylon nuts under the capacitor assembly, then remove the capacitor relief membrane. -
Page 60: Table 4-6 Compressor Cover Torque Specifications
Figure 4-13 Relief Membrane Position Relief membrane should be visible when Capacitor Cover is installed Figure 4-14 Recessed Holes Place the long M5x20 fastener and flat washer in position number three (3) shown in "Figure 4-15 Capacitor Cover Torque Sequence". Use the remaining M5x15 fasteners to secure the cover. -
Page 61: Cooling Adapter
4.3 Cooling Adapter To provide cooling for the motor and power electronics, a liquid feed line is connected to the compressor via the Cooling Adapter. This adapter contains a strainer to collect any debris that may be present. • • • CAUTION • • • A filter/drier must be used in conjunction with the Cooling Adapter strainer is not a replacement. -
Page 62: Table 4-7 Cooling Adapter Torque Specifications
4.3.1 Cooling Adapter Removal and Installation Cooling Adapter Removal Isolate the compressor and recover the refrigerant according to industry standards. Refer to "3.1 Refrigerant Containment" on page 41. Hold the Adapter Body with a 15/16" flare nut wrench while loosening the Connection Nut with another 15/16"... -
Page 63: Compressor Interface Module
4.4 Compressor Interface Module The Compressor Interface Module (CIM), also referred to as the Compressor I/O Board, allows the user to control the compressor and allows the compressor to return status and sensor information to the user. See "Figure 4-18 Compressor Interface Module Ports & Jumpers" for I/O board connection locations. - Page 64 • LIQT – Pin 9 & 10 – Liquid temperature sensor input • Refer to the Applications and Installation Manual for thermistor specifications J3 – Input/output • RUN – Pin 1 & 2 – compressor running indicator output. Normally Open, closes when RPM reaches specified RPM set in BMCC •...
-
Page 65: Compressor Interface Module Verification
D9 – Power LED • Green: ON: compressor is on (i.e., Compressor I/O Board and BMCC are properly connected to the Backplane) 4.4.2 Compressor Interface Module Verification 4.4.2.1 Determining if the Compressor Interface Module is Draining Energy Identify if the D9, green light-emitting diode (LED) is on. Remove the Service Side Cover. -
Page 66: Compressor Interface Cable
• The measured value at I/LOCK- should be 0VDC. – If the measured value is not 0VDC, locate and remove the source of the voltage. Open the SMT Compressor Monitor tool. With the system interlock circuit remaining closed, verify the Compressor Interlock Status states “Closed. -
Page 67: Compressor Controller Cable Harness
Figure 4-20 Compressor Interface Cable Compressor Interface Cable Grommet Notch for cable 4.5.1 Compressor Interface Cable Verification If any communication problems exist, verify the integrity of the cable assembly. This can be accomplished by performing a continuity test at each corresponding pin. 4.5.2 Compressor Interface Cable Removal and Installation 4.5.2.1 Compressor Interface Cable Removal Isolate compressor power as described in Section "1.8 Electrical Isolation"... -
Page 68: Figure 4-21 Compressor Controller Cable Harness Variants
4.6.1 Compressor Controller Cable Connections Figure 4-21 Compressor Controller Cable Harness Variants To Discharge Pressure/ To SCR Temperature Sensor All TTS/TGS Rev. G and Temperature Sensor Earlier Compressors To J19 on Backplane To J18 on Backplane To IGV Connector To J21 on Backplane To Suction Pressure/ Temperature Sensor To J17 on Backplane... -
Page 69: Figure 4-22 Backplane Connections
Remove the Terminal Block Assembly (excluding TTS300/TGS230 compressors). Refer to "4.12.2 3-Phase Main Voltage Input Terminal Block Removal and Installation" on page 98. Remove the DC Bus Bar and Capacitor Assembly. Refer to "4.22.3 DC Capacitor Bus Bar Assembly Removal and Installation" on page 158. Refer to "Figure 4-22 Backplane Connections"... -
Page 70: Figure 4-24 Pressure/Temp And Scr Temp Sensor Locations - Tts/Tgs
Figure 4-24 Pressure/Temp and SCR Temp Sensor Locations - TTS/TGS SCR Temperature Sensor Cable Cable Harness TTS350 Rev. F Shown Discharge Sensor Suction Sensor Figure 4-25 Pressure/Temperature Sensors - TTH375/TGH285 Discharge Sensor Cable Harness Suction Sensor Interstage Sensor Disconnect the SCR Manifold Sensor connector. Loosen the M5x16 fastener securing the IGV Connector Clamp and rotate the clamp out of the way. -
Page 71: Figure 4-27 Cable Passage
Figure 4-27 Cable Passage Cable Passage Route the cable harness between the DC-DC Converter and the Inverter. Lay the harness over the Inverter Plate. Bend the cable harness under the Mains Terminal Block and route it toward the capacitor side of the compressor. -
Page 72: Solenoids And Coils
4.6.3 Compressor Controller Cable Harness Torque Specifications Table 4-9 Compressor Controller Cable Harness Torque Specifications Description Ft.Lb. In.Lb. IGV Feedthrough Fastener, M5x16 Cover Fastener, M5x15 Cover Fastener, M5x20 4.7 Solenoids and Coils The solenoids pass the high-pressure liquid refrigerant to the low pressure motor and/or electronics cooling path. -
Page 73: Table 4-10 Solenoid Coil Resistance Ranges
4.7.2 Solenoid Coil Harness Figure 4-30 Solenoid Coil Harness 4.7.2.1 Solenoid Coil Harness Removal and Installation For details, refer to "4.7.4.1 Solenoid and Coil Removal" on page 75 and "4.7.4.2 Solenoid and Actuator Installation" on page 76. 4.7.3 Solenoid Verification •... -
Page 74: Figure 4-32 Compressor Cooling Solenoid Coil Cable Connector
Figure 4-32 Compressor Cooling Solenoid Coil Cable Connector 4.7.3.2 Output Voltage to Solenoid Coils Remove the Service Side Cover. Refer to "4.2.3.1 Service Side Cover Removal and Installation" on page 58. The compressor must be running and make a call to enable the cooling solenoid coils for the LEDs to turn on. -
Page 75: Figure 4-35 Solenoid Component Removal
4.7.4 Solenoid and Coil Removal and Installation NOTE On current TTS350, TTS400, TTS500, TTS700, TGS310, TGS390, TGS490, TGS520, and certain TTS300 models, the solenoid valve bodies may have different orifice sizes due to the split-cooling configuration. It is important to not get the left and right confused when removing and installing these solenoid bodies. -
Page 76: Table 4-11 Solenoid Torque Specifications
4.7.4.2 Solenoid and Actuator Installation Ensure that all components and threads are clear, clean, and oil free. Lubricate the small and large new O-rings with O-ring lubricant and install them on the Orifice Valve. Insert the Orifice Valves into the compressor housing and engage the first few threads by hand. Tighten the Orifice Valves with a 15/16"... -
Page 77: Interstage Pipe - Tth/Tgh
4.8 Interstage Pipe - TTH/TGH The Interstage Pipe may be removed if it is damaged or if there is a refrigerant leak between the mating surfaces. Figure 4-37 Interstage Pipe 4.8.1 Interstage Pipe Removal and Installation 4.8.1.1 Interstage Pipe Removal Isolate compressor power. -
Page 78: Compressor Housing End Cap
NOTE A magnet may need to be placed on the motor cooling solenoids if evacuation cannot be performed directly to the liquid line. 11. Return the compressor to normal operation. 4.8.2 Interstage Pipe Torque Specifications Table 4-12 Interstage Pipe Torque Specifications Description Ft.Lb. -
Page 79: Table 4-13 Compressor Housing End Cap Torque Specifications
4.9.1 Compressor Housing End Cap Removal and Installation 4.9.1.1 Compressor Housing End Cap Removal Isolate compressor power. Isolate the compressor and recover the refrigerant according to industry standards. Refer to "3.1 Refrigerant Containment" on page 41. Remove the Interstage Pipe (TTH/TGH compressors only). Refer to "4.8.1 Interstage Pipe Removal and Installation"... -
Page 80: Igv
4.10 IGV The IGV assembly consists of movable vanes and a motor. The IGV assembly is a variable-angle guiding device that is used to control the capacity at low-load conditions. The IGV position can vary between approximately 0% (closed/perpendicular to flow) and 100% (open/parallel to flow). The vane angle is determined by the BMCC and controlled by the Serial Driver. -
Page 81: Figure 4-43 Igv Motor Feedthrough
4.10.2 IGV Verification 4.10.2.1 IGV Stepper Motor Verification Isolate compressor power.. Disconnect the IGV Motor Cable from the suction pressure/temperature sensor and the IGV Motor power feedthrough. Refer to "Figure 4-43 IGV Motor Feedthrough" for this and the following step. Measure the resistance between terminals 1 and 2, and 3 and 4 of the IGV Motor feed through. -
Page 82: Figure 4-46 Control Mode
Set the Compressor Control Mode to Manual Control by selecting Manual Control from the Compressor Control Mode drop-down list. Refer to "Figure 4-46 Control Mode". Figure 4-46 Control Mode Open the Compressor Monitor tool. Refer to "Figure 4-47 Compressor Monitor Tool". Figure 4-47 Compressor Monitor Tool In the IGV Open Percentage parameter box, input 110%. -
Page 83: Figure 4-50 Backplane Cool Leds
Check that all four (4) LEDs are blinking. Refer to "Figure 4-50 Backplane Cool LEDs". Figure 4-50 Backplane Cool LEDs Cool-L & Cool-H LEDs IGV Stepper Motor LEDs 10. Verify the IGV position indicator moves toward closed. 11. Measure the +15V test point on the Backplane to verify voltage is supplied to the Serial Driver for the IGV. -
Page 84: Table 4-15 Igv Feedthrough Wiring Order
Isolate the compressor and recover the refrigerant according to industry standards. Refer to "3.1 Refrigerant Containment" on page 41. Remove the 12 M10x40 fasteners that secure the IGV Housing Assembly to the compressor housing and pull the housing away from the compressor. See "Figure 4-53 IGV Housing Removal". -
Page 85: Figure 4-55 Set Screw Removal
Using a Stepper Motor Driver, turn the worm shaft and Vane Drive assembly to position the motor shaft so that locking set screw is aligned with the hole shown in "Figure 4-55 Set Screw Removal". Use needle-nose pliers or similar tool to turn the worm gear if a Stepper Motor Driver is not available. -
Page 86: Figure 4-58 Locking Collar Removal
Turn the Locking Collar clockwise to remove. Refer to "Figure 4-58 Locking Collar Removal". Figure 4-58 Locking Collar Removal Drive Pin Holes Locking Collar NOTE The Locking Collar contains a left-hand thread. To remove, turn clockwise when viewing from the motor end. Remove the worm gear by rotating the IGV Throat clockwise by hand or rotate the worm shaft by hand. -
Page 87: Figure 4-61 Igv Throat Removal
Figure 4-61 IGV Throat Removal IGV Throat IGV Throat M6x55 fastener (4 places) 13. Inspect the IGV Housing assembly for residue/contamination or foreign objects. 14. Remove the small lower worm gear bearing from the housing. Perform this step by pushing the bearing out from the port below the bearing. -
Page 88: Figure 4-64 Igv Position Indicator Magnet
Ensure the IGV position indicator magnet is in place in the IGV Throat assembly. Refer to "Figure 4-64 IGV Position Indicator Magnet". Figure 4-64 IGV Position Indicator Magnet Magnet Place the IGV Throat assembly into the IGV Housing orientating the IGV Throat threads directly below the IGV Motor Mount. -
Page 89: Figure 4-66 Locking Collar Installation
Figure 4-66 Locking Collar Installation Drive Pin Holes Locking Collar 11. Rotate the worm gear by hand until the set screw hole in the worm gear is visible through the access hole in the casting. Verify that the worm gear turns freely. Do not install the set screw at this time. -
Page 90: Table 4-16 Igv Feedthrough Pin To Wire Reference
Figure 4-69 IGV Motor Alignment Align locating pin with notch Gap=0.5mm 16. Put one (1) drop of threadlocker (Loctite 243 blue or equivalent) on the threads of the small set screw. While pushing in, on the backside of the motor, secure the worm gear to the flat surface of the motor shaft using a 2.5 mm hex bit. -
Page 91: Figure 4-71 Igv Motor Wires Connected
Figure 4-71 IGV Motor Wires Connected 20. Install the Feed Through using the four (4) M5x16 fasteners and install the IGV Motor Cable Retainer Clip under one of the fasteners. Tighten only three (3) of the fasteners to 5Nm (44 in.lb.) while leaving the fourth fastener with the retainer clip slightly loose. -
Page 92: Table 4-17 Igv Torque Specifications
27. Plug in the Feed Through and Suction Pressure Temperature Sensor Harness. 28. Torque the remaining Feed Through fastener (the one securing the Motor Harness Retainer Clip) to 5Nm (44 in.lb.). 29. Return the compressor back to normal operation. 30. Test run the compressor to verify proper operation and movement of the IGV assembly. Refer to "Figure 4-74 IGV Position Indicator"... -
Page 93: Mains Plate Bracket
4.11 Mains Plate Bracket The Mains Plate is used to secure the mains cables. The Mains Plate is identical across all versions of the compressors. However, the ground post on the TTS300/TGS230 compressors is located directly behind the Mains Plate, whereas the ground post for all other compressor models goes through the Mains Plate and into the compressor housing. -
Page 94: Figure 4-76 Ground Post Nuts
Install the Soft Start ground wire on top of the lower nut and torque the jam nut to 7 Nm (62 in.lb). Install the ground cable for the mains on top of the jam nut and torque the upper nut to 10 Nm (7 ft.lb.) Refer to "Figure 4-76 Ground Post Nuts". -
Page 95: 3-Phase Main Voltage Input Terminal Block
All compressors must be fitted with class T fast-acting fuses to protect the solid-state Inverter. Danfoss Turbocor control does NOT directly measure 3-phase power values. All 3-phase voltage information displayed in the SMT is calculated from DC bus voltage and motor power as measured by the Inverter. -
Page 96: Figure 4-80 Input Terminal Block - Tts/Tgs/Tth/Tgh Rev. H (Except Tts300/Tgs230)
Figure 4-80 Input Terminal Block - TTS/TGS/TTH/TGH Rev. H (Except TTS300/TGS230) AC Bus Bars Terminal Block Figure 4-81 Input Terminal Block - TTS/TGS/TTH/TGH Rev. F and Earlier (Except TTS300/TGS230) AC Bus Bars Terminal Block 4.12.1 3-Phase Main Voltage Input Terminal Block Verification 4.12.1.1 3-Phase AC input Verification The compressor requires a 3-phase power source with UL-approved or CE-approved components in circuit with code-compliant protection. -
Page 97: Figure 4-82 Measuring The 3-Phase Ac Input Voltage On The Ac Input Terminals - Tts300/Tgs230
If the cables cannot be securely fastened to the input terminal, the Terminal Block is damaged and needs to be replaced. 4.12.1.3 Verifying the 3-Phase AC Input Turn ON the AC input power. Set the multimeter for AC voltage measurements. Place the meter probe on one phase of the AC input terminals and the other meter probe on another phase of the AC input terminals as shown in "Figure 4-82 Measuring the 3-Phase AC Input Voltage on the AC Input Terminals - TTS300/TGS230"... -
Page 98: Table 4-19 Expected Ac Voltage Range
Table 4-19 Expected AC Voltage Range AC Input Acceptable Voltage Nameplate Voltage Range 575VAC 518 to 632VAC 460VAC 414 to 506VAC 400VAC 360 to 440VAC 380VAC 342 to 418VAC 4.12.2 3-Phase Main Voltage Input Terminal Block Removal and Installation 4.12.2.1 General 3-Phase Main Voltage Input Terminal Block Removal Isolate compressor power as described in Section "1.8 Electrical Isolation"... -
Page 99: Figure 4-85 Input Terminal Block Removal - Tts/Tgs/Tth/Tgh Rev. F And Earlier (Except Tts300/Tgs230)
4.12.2.3 3-Phase Main Voltage Input Terminal Block Removal - TTS/TGS/TTH/TGH Rev. F and Earlier (Except TTS300/ TGS230) Disconnect the three (3) connectors of the Soft Start AC/DC harness from the bus bars. Remove the three (3) fasteners that secure the AC Bus Bars to the SCRs. For Revision F and earlier compressors, refer to "Figure 4-85 Input Terminal Block Removal - TTS/TGS/TTH/TGH Rev. -
Page 100: Figure 4-86 Input Terminal Block Removal - Tts/Tgs/Tth/Tgh Rev. H (Except Tts300/Tgs230)
Figure 4-86 Input Terminal Block Removal - TTS/TGS/TTH/TGH Rev. H (Except TTS300/TGS230) Mains Input Nut, 3/8 x 16, AC Bus Bar to SCR (3 places) Fastener, M8x20, (3 places) Terminal Block to SCR AC Bus Bar to Terminal Cooling Plate Fastener, Block Fastener, M5x12 M6x16, (6 places) -
Page 101: Figure 4-88 Terminal Block - Input Pressure Screws - Tts300/Tgs230
Place the Terminal Block on the compressor housing, secure with the M5x15 fasteners, and torque to 3 Nm (27 in.lb.). Place the Mylar insulator in the center section of Terminal Block. Secure the three (3) Fuse Assemblies (Bus Bar side) to the SCRs using the M6x16 fasteners. Only finger tighten at this point. -
Page 102: Figure 4-90 Input Terminal Block Installation - Tts/Tgs/Tth/Tgh Rev. H (Except Tts300/Tgs230)
Figure 4-90 Input Terminal Block Installation - TTS/TGS/TTH/TGH Rev. H (Except TTS300/TGS230) Mains Input Nut, 3/8 x 16, AC Bus Bar to SCR (3 places) Fastener, M8x20, (3 places) Terminal Block to SCR AC Bus Bar to Terminal Cooling Plate Fastener, Block Fastener, M5x12 M6x16, (6 places) -
Page 103: Input Mains Bus Bars (Except Tts300/Tgs230)
4.12.2.7 Terminal Block Torque Specifications Table 4-20 Terminal Block Torque Specifications Description Ft.Lb. In.Lb. TTS300/TGS230 AC Bus Bar to SCR fastener, M6x16 TTS300/TGS230 Terminal Block Mounting fastener, M5x15 TTS300/TGS230 Fuse Assembly to Terminal Block fastener AC Bus Bar to Terminal Block fastener - Rev F and earlier (excludes TTS300/ TGS230 compressors) AC Bus Bar to Terminal Block fastener - Rev H (excludes TTS300/TGS230 compressors) -
Page 104: Figure 4-92 Ac/Dc Bus Bus Bar Connectors - Tts/Tgs/Tth/Tgs Rev. F And Earlier (Except Tts300/Tgh230)
Remove the six (6) fasteners that secure the three (3) AC Bus Bars to the Terminal Block. Remove the AC Bus Bars. For Revision H compressors, refer to "Figure 4-93 AC/DC Bus Bus Bar Connectors - TTS/TGS/ TTH/TGS Rev. H (Except TTS300/TGH230)" and do the following: Remove the three (3) M6x16 fasteners that secure the AC Bus Bars to the SCRs. -
Page 105: Terminal Block Fuse Replacement
Loosley install the six (6) fasteners that secure the three (3) AC Bus Bars to the Terminal Block. Loosley install the three (3) M8x20 fasteners that secure the AC Bus Bars to the SCRs. Torque the six (6) fasteners to 3 Nm (27 In.lb). Torque the three (3) M8x20 fasteners to 9 Nm (80 in.lb.). -
Page 106: Figure 4-95 Terminal Block Fuse Test
Figure 4-95 Terminal Block Fuse Test Load Side 00.0 Multimeter A/C Input Side Continue for the remaining two (2) fuses. Replace any fuses that read open or have a resistance greater than 2Ω. 4.14.2 Terminal Block Fuse Removal and Installation 4.14.2.1 Terminal Block Fuse Removal Isolate the compressor power as described in Section "1.8 Electrical Isolation"... -
Page 107: Soft Start
The Rev A Open-Top Soft Starts can handle all input voltages where as there are distinct versions of the Closed-Top Soft Starts to handle specific voltages. If a Closed-Top Soft Start must be replaced, Danfoss LLC offers conversion kits to allow the use of the Open-Top Soft Start. Refer to the Spare Part Selection Guide for TTS/TGS compressors for kit details. -
Page 108: Table 4-23 Closed-Top Soft Start Connection Identification
For Closed-Top Soft Starts, the Mains AC voltage is passed through fast-acting fuses to two (2) onboard transformers that reduce the primary voltage to a secondary 15VAC. One transformer powers the Soft Start itself. The second powers the DC-DC converter after DC bus voltage levels reach the minimum level. -
Page 109: Table 4-24 Open-Top Soft Start Connection Identification
Figure 4-99 Open-Top Soft Start Connections Table 4-24 Open-Top Soft Start Connection Identification Component J7: Soft Start Temperature Sensor connector J3: Thermostatic Fan Control connector J1: AC Inputs J8: DC Link Ground J2: SCR Gate Signal connector 4.15.2 Soft Start Verification 4.15.2.1 Verifying Soft Start Voltages Before verifying Soft Start voltages, ensure that the correct 3-phase main AC voltage is present at the Mains Input terminals. -
Page 110: Figure 4-100 Soft Start Label Location
4.15.2.2 Verifying Soft Start Fuses The instructions in this section cover the revision "S" and "T" Closed-Top Soft Starts. NOTE There are no serviceable fuses on Open-Top Soft Starts. The Soft Start part numbers and revisions are identified by a label on the side of the Soft Start mounting bracket. -
Page 111: Figure 4-101 Soft Start Fuse Locations
Figure 4-101 Soft Start Fuse Locations Not present on Revision "S" and earlier Soft Starts Isolate the compressor power as described in Section "1.8 Electrical Isolation" on page 19. Remove the Soft Start. Refer to "4.15.4 Soft Start Removal (Closed-Top)" on page 112. Flip the Soft Start to access the fuses. -
Page 112: Table 4-25 Soft Start Fuse Details
Table 4-25 Soft Start Fuse Details Fuse Amperage Resistance (Ω) Circuit Class Comments Less than 1Ω HV DC to DC Fast Acting Transformer Secondary - 0.25A Less than 1Ω Fast Acting, Nano 15V AC to DC-DC Transformer Secondary - Less than 1Ω Fast Acting, Nano Soft Start Board 0.25A... -
Page 113: Figure 4-103 Ground Location
Disconnect the Soft Start ground wire by removing the nut and mains input ground wire from the ground post on the compressor housing at 3 phase connection point. Refer to "Figure 4-103 Ground Location"). Figure 4-103 Ground Location TTS350 Ground Stud Location TTS300 Ground Stud Location NOTE The ground post for TTS300/TGS230 compressors goes directly into the compressor housing and does not go through the Mains... -
Page 114: Figure 4-106 Closed-Top Soft Start Connector Removal
Figure 4-106 Closed-Top Soft Start Connector Removal Remove the Soft Start assembly and place it in a safe location. 4.15.5 Soft Start Removal (Open-Top) Isolate the compressor power as described in Section "1.8 Electrical Isolation" on page 19. Remove the Soft Start Temperature Harness. Refer to "Figure 4-107 Open-Top Soft Start J7 Connector". -
Page 115: Figure 4-109 Open-Top Soft Start Connector Removal
NOTE The ground post for TTS300/TGS230 compressors goes directly into the compressor housing and does not go through the Mains Plate. The torque specifications are the same for all TTS/TGS/TTH/TGH compressors. Unplug cable connectors J1, J2, and J8 from the Soft Start. Figure 4-109 Open-Top Soft Start Connector Removal Remove the M5x20 fasteners that secure the Soft Start mounting bracket to the compressor. -
Page 116: Figure 4-111 Closed-Top-Soft Start Installation
4.15.6 Soft Start Installation (Closed-Top) Place the Soft Start over the AC Bus Bars (board side up) with the fan toward the IGV. Install connectors J1, J7, and J8. Flip the Soft Start over and place into mounting position. Finger tighten the fasteners and then torque to 5 Nm (44 in.lb.). Refer to "Figure 4-111 Closed- Top-Soft Start Installation". -
Page 117: Figure 4-113 Open-Top-Soft Start Installation
4.15.7 Soft Start Installation (Open-Top) Place the Soft Start into mounting position. Finger tighten the fasteners and then torque to 5 Nm (44 in.lb.). Refer to "Figure 4-113 Open- Top-Soft Start Installation". Install connectors J1, J2, and J8. Figure 4-113 Open-Top-Soft Start Installation Soft Start Fastener, M5x20,... -
Page 118: Figure 4-114 Soft Start Without Adapter
Figure 4-114 Soft Start without Adapter Closed-Top Soft Start Shown Soft Start Fan 4.15.10 Soft Start Fan Installation Orient the fan so the pointing counter clockwise and toward the Soft Start. "Figure 4-115 Soft Start Fan Orientation" shows a view of the Closed-Top Soft Start where the fan arrows should be pointing. -
Page 119: Scr Dc Bus Bar - Tts300/Tgs230
Plug the connector of the new fan into the Soft Start Board. Refer to "Figure 4-117 Soft Start Fan Connector". • J5 on the Closed-Top Soft Start • J3 on the Open-Top Soft Start Figure 4-117 Soft Start Fan Connector J3 Connector J5 Connector Closed-Top Soft Start... -
Page 120: Figure 4-119 Scr Dc Bus Bar Removal - Tts300/Tgs230
4.16.1 SCR DC Bus Bar Removal and Installation 4.16.1.1 SCR DC Bus Bar Removal - TTS300/TGS230 Isolate the compressor power as described in Section "1.8 Electrical Isolation" on page 19. Using a 10 mm wrench/socket, remove the bolts that secure the (+) and (-) SCR DC Bus Bars to the DC Capacitor Bus Bars. -
Page 121: Soft Start Scr Gate Cable
Hold the two (2) M6x20 Bus Bar bolts with a wrench and torque the M6 nuts to 10 Nm (7 ft.lb.). Install the top covers. Refer to "4.2 Compressor Covers" on page 56. Return the compressor to normal operation. 4.16.1.3 SCR DC Bus Bar Torque Specifications Table 4-27 SCR DC Bus Bar Torque Specifications Description Ft.Lb. -
Page 122: Figure 4-123 Soft Start Scr Gate Cable Removal - Tts300/Tgs230
Remove the SCR Gate Cable from the Softstart. For compressors with the Closed-Top Soft Start, remove the J8 connector. For compressors with the Open-Top Soft Start, remove the J2 connector. Figure 4-123 Soft Start SCR Gate Cable Removal - TTS300/TGS230 Soft Start J8 Connector SCR Gate... -
Page 123: Figure 4-126 Closed-Top Soft Start J8 Connector Top
4.17.2.2 Soft Start SCR Gate Cable Installation Connect the SCR Gate Cable to the Softstart. For compressors with the Closed-Top Soft Start, install the J8 connector. – Be sure to align the pins properly so as not to bend them or misalign the plug. The flat portion of the connector goes to the top. -
Page 124: Soft Start Ac/Dc Harness
Figure 4-128 SCR Gate Connector Alignment Connector Alignment Notch/key Install the top covers. Refer to "4.2 Compressor Covers" on page 56. Return the compressor to normal operation. 4.18 Soft Start AC/DC Harness The Soft Start AC/DC Cable Harness provides the Mains AC voltage phases and DC Bus voltage to the Soft Start, and passes the DC Bus and 15 VAC to the DC-DC. -
Page 125: Figure 4-129 Soft Start Ac/Dc Harness Connections - Tts300/Tgs230
4305 20 Sep 2019 C. Fitch B. Pritchard Released for production. Based on 701567. Confidential: Property of Danfoss Turbocor Compressors Inc. Tallahassee, Florida. Not handed over to, copied, or used by third party. Two or three dimensional reproductio Rev ECO Date... -
Page 126: Figure 4-130 Soft Start Ac/Dc Harness Connections - Tts/Tgs/Tth/Tgh (Except Tts300/Tgs230)
Figure 4-130 Soft Start AC/DC Harness Connections - TTS/TGS/TTH/TGH (Except TTS300/TGS230) L1, L2, and L3 J1 High Voltage AC/ Spade Terminals DC Connector (3 places) J4 Connector J7: DC-DC Trigger Signal Connector DC+ and DC - J1 Connector Spade Terminals For use with potted DC-DC J8 DC Link J1 AC Inputs... -
Page 127: Figure 4-131 Ac Input Ring Terminal Removal - Tts300/Tgs230
4.18.2 Soft Start AC/DC Harness Removal and Installation NOTE For TTS300/TGS230 Compressors, it may be helful to remove the Soft Start and/or the Open-Frame DC-DC to gain better access for this procedure. 4.18.2.1 Soft Start AC/DC Harness Removal - TTS300/TGS230 Isolate compressor power as described in Section "1.8 Electrical Isolation"... -
Page 128: Figure 4-134 Dc-Dc Connectors (Potted)
Figure 4-134 DC-DC Connectors (Potted) J4 (15VAC) J3 (24VDC) J1 (High DC Bus Voltage) J2 (250VDC) If the DC-DC Converter is the potted style, remove the J7 connector from the Soft Start. Refer to "Figure 4-135 Closed-Top Soft Start J1 and J7 Removal" for this and the following step. NOTE TT/TG compressors utilizing the open frame DC-DC design do not utilize the Soft Start J7: Trigger Signal connector. -
Page 129: Figure 4-136 Open-Top Soft Start J1 And J8 Removal
Figure 4-136 Open-Top Soft Start J1 and J8 Removal Remove the harness. 4.18.2.2 Soft Start AC/DC Harness Removal - TTS/TGS/TTH/TGH (Except TTS300/TGS230) Isolate compressor power as described in Section "1.8 Electrical Isolation" on page 19. Disconnect the L1, L2, and L3 terminals from the AC Bus Bars. For Revision F and earlier compressors, refer to "Figure 4-137 AC Input Spade and DC Spade Connector Removal - TTS/TGS/TTH/TGH Rev. -
Page 130: Figure 4-138 Ac Input Ring And Dc Spade Connector Removal - Tts/Tgs/Tth/Tgh Rev. H (Except Tts300/Tgs230)
Figure 4-138 AC Input Ring and DC Spade Connector Removal - TTS/TGS/TTH/TGH Rev. H (Except TTS300/TGS230) AC Bus Bar Fastener, M6x16 (3 places) +DC Spade Connector -DC Spade Connector AC/DC Bus Bar (L1, L2, & L3) Terminals (3 places) Remove the DC-DC Connections. If the DC-DC is the potted style, remove connectors J1 and J4. -
Page 131: Figure 4-139 Soft Start Ac/Dc Harness Position - Tts300/Tgs230
4.18.2.3 Soft Start AC/DC Harness Installation - TTS300/TGS230 NOTE For TTS300/TGS230 Compressors, it may be helful to remove the Soft Start and/or the Open-Frame DC-DC to gain better access for this procedure. Place the wiring harness on top of the compressor. Refer to "Figure 4-139 Soft Start AC/DC Harness Position - TTS300/TGS230"... -
Page 132: Figure 4-140 Ac Input And Spade Connector Installation - Tts/Tgs/Tth/Tgh Rev. F And Earlier (Except Tts300/Tgs230)
For compressors with the Open-Top Soft Start, install connectors J1 and J8. Refer to "Figure 4-136 Open-Top Soft Start J1 and J8 Removal" on page 129. Install the DC-DC connections. If the DC-DC is the potted style, install connectors J1 and J4. Refer to "Figure 4-134 DC-DC Connectors (Potted)"... -
Page 133: Silicone-Controlled Rectifier
Figure 4-141 AC Input and Spade Connector Installation - TTS/TGS/TTH/TGH Rev. H (Except TTS300/TGS230) AC Bus Bar to SCR fastener, M5x16 - 5 Nm (44 in.lb.) (3 places) +DC Spade Connector -DC Spade Connector AC/DC Bus Bar (L1, L2, & L3) Terminals (3 places) Install the top covers. -
Page 134: Figure 4-142 Scr Styles
Figure 4-142 SCR Styles TTS300/TGS230 (all revisions) All TTS/TGS/TTH/TGH Series TTS/TGS/TGH Series (Rev H) compressors except TTS300/ (Two Hole Mount) TGS230 (Rev F and earlier) (Four Hole Mount) 4.19.1 SCR Connections Refer to "Figure 4-143 SCR Connections - TTS300/TGS230" and "Figure 4-144 SCR Connections - TTS/ TGS/TTH/TGH Rev. -
Page 135: Figure 4-144 Scr Connections - Tts/Tgs/Tth/Tgh Rev. F And Earlier (Except Tts300/Tgs230)
Figure 4-144 SCR Connections - TTS/TGS/TTH/TGH Rev. F and Earlier (Except TTS300/TGS230) SCR to DC Bus (+ and -) SCR Gate Cables to Soft Start (3 places) AC/DC Harness Connector (3 places) AC Input to SCR (3 places) Figure 4-145 SCR Connections - TTS/TGS/TTH/TGH Rev. H (Except TTS300/TGS230) SCR to DC Bus (+) SCR Gate Cables to Soft Start (3 places) -
Page 136: Figure 4-146 Scr Terminals - Two Hole Mount
Figure 4-146 SCR Terminals - Two Hole Mount 1 (-) 2 (+) Gate Figure 4-147 SCR Terminals - Four Hole Mount Gate (Pins 4 and 5) All other terminals should read infinity or open in both directions (polarity). Refer to "Table 4-29 SCR Diode Values"... -
Page 137: Table 4-29 Scr Diode Values
Table 4-29 SCR Diode Values Positive (+) Lead Negative (-) Lead Expected Result Infinity or Open Infinity or Open Infinity or Open 0.3V and 0.45V 4.19.2.3 Gates Verification Isolate the compressor power as described in Section "1.8 Electrical Isolation" on page 19. Remove the Top Cover. -
Page 138: Figure 4-150 Discharge Pressure/Temperature Sensor Connector Removal - Tts300/Tgs230
Using a multimeter set for resistance measurements, place the leads in terminal 1 and 2 of the cable plug. Refer to "Figure 4-149 J17 Connector". The value should correspond with a negative temperature coefficient (NTC) thermistor 10KΩ @ 70°F (21° C). 4.19.2.6 SCR Temperature Sensor General Removal Isolate the compressor power as described Section "1.8 Electrical Isolation"... -
Page 139: Figure 4-152 Scr Temperature Sensor Removal -Tts300/Tgs230
Figure 4-152 SCR Temperature Sensor Removal -TTS300/TGS230 SCR Temperature Sensor 4.19.2.8 SCR Temperature Sensor Removal - TTS/TGS/TTH/TGH Rev. F and Earlier (Except TTS300/TGS230) Disconnect the Soft Start AC wires from the AC Bus Bars. Remove the Terminal Block and AC Bus Bars as an assembly. Refer to "4.12.2.3 3-Phase Main Voltage Input Terminal Block Removal - TTS/TGS/TTH/TGH Rev. -
Page 140: Figure 4-155 Scr Temperature Sensor Removal - Tts/Tgs/Tth/Tgh Rev. F And Earlier (Except Tts300/Tgs230)
Continue to "4.19.2.10 SCR Temperature Sensor Installation - TTS/TGS/TTH/TGH Rev. F and Earlier (Except TTS300/TGS230)". Figure 4-155 SCR Temperature Sensor Removal - TTS/TGS/TTH/TGH Rev. F and Earlier (Except TTS300/TGS230) SCR Temperature Sensor 4.19.2.9 SCR Temperature Sensor Installation - TTS300/TGS230 Carefully thread the SCR Temperature Sensor into the SCR Cooling Manifold and torque to 6 Nm (53 in.lbs.). -
Page 141: Table 4-31 Scr Temperature Sensor Torque Specifications
4.19.2.12 SCR Temperature Sensor Torque Specifications Table 4-31 SCR Temperature Sensor Torque Specifications Description Ft.Lb. In.Lb. TTS300/TGS230 AC Bus Bar to SCR fastener, M6x16 TTS300/TGS230 Fuse to Terminal Block fastener Soft Start Mounting fastener, M5X15 Upper Nut, 5/16" - 18 UNC Jam Nut, 5/16"... -
Page 142: Figure 4-156 Fuse Block Assemblies - Two Hole Mount - Tts300/Tgs230
Figure 4-156 Fuse Block Assemblies - Two Hole Mount - TTS300/TGS230 SCR Gate Connectors (6 places) AC Bus Bar to SCR Fastener, M6x16 (3 places) Fuse to Terminal Block Fastener (6 places) Mylar Remove the bolts that secure the (+) and (-) SCR Bus Bars to the DC Bus Bars. Refer to "Figure 4-157 DC Bus Bar Removal - TTS300/TGS230"... -
Page 143: Figure 4-158 Scr Removal - Tts300/Tgs230
Figure 4-158 SCR Removal - TTS300/TGS230 SCR to SCR Cooling Manifold Fastener, M6x16 (2 places per SCR) (3 places) Terminal Block SCR Cooling Manifold 10. Continue to Section "4.19.3.4 SCR Installation - TTS300/TGS230". 4.19.3.3 SCR Removal - TTS/TGS/TTH/TGH (Except TTS300/TGS230) Remove the Soft Start. -
Page 144: Figure 4-161 Scr Bus Fastener Removal - Tts/Tgs/Tth/Tgh Rev. F And Earlier (Except Tts300/Tgs230)
Figure 4-160 SCR Gate Cable and AC/DC Harness Connections - TTS/TGS/TTH/TGH Rev. H (Except TTS300/TGS230) SCR Gate Connectors (6 places) AC/DC Bus Bar Connectors (3 places) Remove the AC mains input terminals and bus bars. Refer to "4.12.2 3-Phase Main Voltage Input Terminal Block Removal and Installation"... -
Page 145: Figure 4-162 Scr Bus Fastener Removal - Tts/Tgs/Tth/Tgh Rev. H (Except Tts300/Tgs230)
Figure 4-162 SCR Bus Fastener Removal - TTS/TGS/TTH/TGH Rev. H (Except TTS300/TGS230) Capacitor DC Bus Bar to SCR Fastener, M6x16 (6 places) Remove the Capacitor Assembly. Refer to "4.22.3 DC Capacitor Bus Bar Assembly Removal and Installation" on page 158. Remove the SCRs. -
Page 146: Figure 4-165 Scr Heat Sink Paste Application - Tts300/Tgs230
Continue to Section "4.19.3.5 SCR Installation - TTS/TGS/TTH/TGH (Except TTS300/TGS230)" on page 148. 4.19.3.4 SCR Installation - TTS300/TGS230 Ensure that no residue remains on the contact surface of the SCR Cooling Manifold. If the SCRs are to be reused, inspect them to ensure there is enough thermal paste on the contact surface. -
Page 147: Figure 4-167 Bus Bar Installation - Tts300/Tgs230
Figure 4-167 Bus Bar Installation - TTS300/TGS230 SCR Bus Bar Fastener, M6x16 - 5 Nm (44 in.lb.) (6 places) Positive (+) Bus Bar Curved End Negative (-) Bus Bar Facing Up Capacitor DC Bus Bar to SCR Bus Bar Bolt, M6 - 10 Nm (7 ft.lb.) (2 places) Figure 4-168 Bus Bar Locations - TTS300/TGS230... -
Page 148: Figure 4-169 Scr Thermal Paste Application - Tts/Tgs/Tth/Tgh (Except Tts300/Tgs230)
4.19.3.5 SCR Installation - TTS/TGS/TTH/TGH (Except TTS300/TGS230) Ensure that no residue remains on the contact surfaces of SCR Cooling Manifold. If the SCRs are to be reused, inspect them to ensure there is enough thermal paste on the contact surface. If they require additional thermal paste, take an SCR and spread a thin and uniform coat of Dow Corning Silicone Heat Sink paste (or equivalent) entirely over the bottom of each SCR surface. -
Page 149: Table 4-32 Scr Torque Specifications
13. Continue to Section "4.19.3.6 SCR General Installation". 4.19.3.6 SCR General Installation Apply di-electric grease at the top of SCR fasteners to prevent moisture and corrosion. Connect the two (2) SCR Gate connectors to each SCR. Install the top covers. Refer to "4.2 Compressor Covers" on page 56. Return the compressor to normal operation. -
Page 150: Scr Cooling Manifold
4.20 SCR Cooling Manifold Figure 4-171 SCR Cooling Manifold TTS350 SCR Cooling Manifold Shown 4.20.1 SCR Cooling Manifold General Removal Isolate the compressor power as described in Section "1.8 Electrical Isolation" on page 19. Isolate the compressor and recover the refrigerant according to industry standards. Refer to "3.1 Refrigerant Containment"... -
Page 151: Figure 4-173 Scr Cooling Manifold Removal - Tts300/Tgs230
NOTE "Figure 4-172 Inverter Assembly Removal - TTS300/TGS230" shows the SCRs still mounted on the cooling plate. It is suggested they are removed prior to the removal of the SCR Cooling Manifold. Carefully peel back the foam to gain access to the two (2) M6x20 fasteners. Remove the two (2) SCR Cooling Manifold fasteners and remove the assembly. -
Page 152: Figure 4-174 Scr Cooling Manifold Removal
Figure 4-174 SCR Cooling Manifold Removal SCR Cooling TTS350 Revision F SCR Manifold Cooling Manifold Shown Fasteners, M6x35 (4 places) SCR Manifold Return Brass Fitting NOTE "Figure 4-174 SCR Cooling Manifold Removal" illustrates a TTS350 compressor. The removal and installation process for TTH/TGH compressors is the same, with the exception of the SCR Temperature Sensor as that is not used on the TTH/TGH compressors. -
Page 153: Figure 4-176 Inverter Heat Sink Plate O-Ring Installation - Tts/Tgs/Tth/Tgh (Except Tts300/Tgs230)
SCR fasteners to 5 Nm (44 in.lb.). Install the DC Bus Bar and Capacitor Assembly. Install the Terminal Block and torque the M5x15 fasteners to 3 Nm (27 in.lb.). Refer to"4.12.2 3-Phase Main Voltage Input Terminal Block Removal and Installation" on page 98. 10. -
Page 154: Figure 4-178 Scr Cooling Plate Installation - Tts/Tgs/Tth/Tgh (Except Tts300/Tgs230)
Figure 4-178 SCR Cooling Plate Installation - TTS/TGS/TTH/TGH (Except TTS300/TGS230) SCR Cooling Manifold Fastener, M6x35 - 8.5 Nm (75 in.lb.) (4 places) SCR Manifold Return Brass Fitting Leak test and evacuate the compressor in accordance with standard industry practices. Connect the compressor cable harness to the IGV Motor feed through, suction and discharge sensors, and SCR Temperature sensor (if applicable). -
Page 155: Table 4-33 Scr Cooling Manifold Torque Specifications
4.20.7 SCR Cooling Manifold Torque Specifications. Table 4-33 SCR Cooling Manifold Torque Specifications. Description Ft.Lb. In.Lb. TTS300/TGS230 AC Bus Bar to SCR fastener, M6x16 TTS300/TGS230 DC Bus Bars to SCR fastener, M6x16 DC Capacitor Bus Bar to SCR Bus Bar Bolt, M6 SCR to SCR Cooling Manifold fastener, M6x16 TTS300/TGS230 SCR Cooling Manifold Fastener, M6x20 TTS300/TGS230 Fuse to Terminal Block fastener... -
Page 156: Snubber Capacitors
4.21 Snubber Capacitors Refer to "4.22 DC Capacitor Bus Bar Assembly" for details on the Snubber Capacitors. 4.22 DC Capacitor Bus Bar Assembly The DC Bus Bar Assembly includes the bus bars, DC capacitors, Snubber Capacitors, and Bleed Resistors. Refer to "Figure 4-179 DC Bus Components Identification TTS/TGS/TTH/TGH Rev. F and Earlier (Except TTS300/TGS230)"... -
Page 157: Figure 4-180 Dc Bus Components Identification Tts/Tgs/Tth/Tgh Rev. H (Except Tts300/Tgs230)
Figure 4-180 DC Bus Components Identification TTS/TGS/TTH/TGH Rev. H (Except TTS300/TGS230) Snubber Capacitors (3 places) Balance Board Bus Bar DC Capacitors (4 places) 4.22.1 DC Capacitor DC Bus Bar Connections Refer to "Figure 4-181 Soft Start Cable Harness to DC Bus" for the location of the connections listed below. -
Page 158: Dc Bus Voltage Verification
4.22.2 DC Bus Voltage Verification Use the DC Bus Test Harness to determine if DC bus voltage is within the correct range for the application. Refer to "1.10 DC Bus Test Harness Installation and Removal" on page 22. 4.22.2.1 Bleed Resistor Verification NOTE This verification step does not apply if the DC Capacitor Bus Bar Assembly contains the Balance Board. -
Page 159: Figure 4-182 Dc Bus Bar And Soft Start Harness Removal - Tts300/Tgs230
Figure 4-182 DC Bus Bar and Soft Start Harness Removal - TTS300/TGS230 SCR DC Bus Bar Fastener, M6x16 (6 places) SCR DC Bus Bars DC Capacitor Bus Bar to SCR DC Bus Bar Bolt/Nut, M6 Soft Start DC+ & DC- to DC Bus Bolt/ Nut, M6 Disconnect the snubber capacitors from the Inverter noting the leg orientation of one leg is longer than the other. -
Page 160: Figure 4-185 Capacitor Assembly Removal - Tts300/Tgs230
Carefully lift the DC Bus Bars and capacitors out as an assembly. Do not remove the bleed resistors or capacitors from the bus bars. Refer to "Figure 4-185 Capacitor Assembly Removal - TTS300/TGS230". Figure 4-185 Capacitor Assembly Removal - TTS300/TGS230 Capacitor Membrane (foam side up) -
Page 161: Figure 4-187 Scr Bus Bar Removal - Tts/Tgs/Tth/Tgh Rev. H (Except Tts300/Tgs230)
Figure 4-187 SCR Bus Bar Removal - TTS/TGS/TTH/TGH Rev. H (Except TTS300/TGS230) Capacitor DC Bus Bar to SCR Fastener, M6x16 (6 places) Disconnect the snubber capacitors from the Inverter noting the leg orientation of one leg is longer than the other. Refer to "Figure 4-188 Snubber Capacitor Removal - TTS/TGS/TTH/TGH (Except TTS300/TGS230)". -
Page 162: Figure 4-190 Capacitor Assembly Removal - Tts/Tgs/Tth/Tgh Rev. F And Earlier (Except Tts300/Tgs230)
10. Carefully lift the DC Bus Bars and capacitors out as an assembly. Do not remove the bleed resistors, Balance Board, or capacitors from the bus bars. Refer to "Figure 4-190 Capacitor Assembly Removal - TTS/TGS/TTH/TGH Rev. F and Earlier (Except TTS300/TGS230)" and "Figure 4-191 Capacitor Assembly Removal - TTS/TGS/TTH/TGH Rev. -
Page 163: Dc Capacitor Bus Bar Assembly General Installation Steps
11. Continue to "4.22.5 DC Capacitor Bus Bar Assembly General Installation Steps" on page 163. 4.22.4.3 DC Capacitor Bus Bar Assembly Installation - TTS300/TGS230 Position the DC Bus Bar and Capacitor Assembly into place. Refer to "Figure 4-185 Capacitor Assembly Removal - TTS300/TGS230" on page 160. Loosely install the Snubber Capacitors to the Inverter noting the leg orientation. -
Page 164: Table 4-34 Dc Capacitor Bus Bar Assembly Torque Specifications
4.22.6 DC Capacitor Bus Bar Assembly Torque Specifications Table 4-34 DC Capacitor Bus Bar Assembly Torque Specifications Description Ft.Lb. In.Lb. Soft Start DC+ & DC- to DC Bus Bolt/nut (TTS300/TGS230 only) DC Capacitor Bus Bar to SCR Bus Bar Bolt (TTS300/TGS230 only) DC Bus Bars to SCR fastener, M6x16 (TTS300/TGS230 only) AC Bus Bar to SCR fastener, M8x20 (Excludes TTS300/TGS230 compressors) -
Page 165: Inverter
4.23 Inverter The function of the Inverter is to take the DC bus voltage as an input and generate the AC output voltage to the compressor motor at the required fundamental frequency to generate the requested shaft speed. Voltage to the motor is also controlled to provide the appropriate motor torque. The Backplane sends +24VDC and gating signals to the Inverter from the BMCC. -
Page 166: Figure 4-193 Inverter Diode Measurements (Skiip 613 Shown)
phase 1 AC terminal and the black (-) multimeter lead on the DC+ terminal. The measured value should be 0.275V – 0.4V. Refer to "Figure 4-193 Inverter Diode Measurements (Skiip 613 Shown)" for this and the following three (3) steps. Keeping the red (+) multimeter lead on the phase 1 AC terminal, place the black (-) multimeter lead on the DC- terminal. -
Page 167: Figure 4-194 Inverter Cable Harness
Use two fingers to simultaneously push outward on the Inverter Cable Harness latches. Refer to "Figure 4-195 Harness Removal from Inverter". Figure 4-195 Harness Removal from Inverter Harness Connector Connector Latch Verify there are no bent or broken pin connectors. Use the same process to disconnect the Inverter Cable Harness from the Backplane J6 connection. -
Page 168: Table 4-35 Inverter Cable Harness Torque Specifications
Align the Inverter Cable Harness using the alignment tab on the connector. Refer to "Figure 4-197 Inverter Connector Alignment". Figure 4-197 Inverter Connector Alignment Alignment Tab Alignment Notch Using minimal force, push in on the Inverter Cable Harness connector. While doing this, the latches should fold in once the cable connector has reached the proper depth. -
Page 169: Figure 4-198 Fuse Block Assemblies - Tts300/Tgs230
4.23.6.1 Inverter Specific Removal Steps - TTS300/TGS230 Disconnect the two (2) SCR Gate connectors from each rectifier. Remove the three (3) M6x16 fasteners that connect the Fast-Acting Fuses to the SCRs. Refer to "Figure 4-198 Fuse Block Assemblies - TTS300/TGS230" for this and the following two (2) steps. Remove the two (2) fasteners from each of the three (3) fuse block assemblies. -
Page 170: Figure 4-200 Soft Start Harness Removal
Disconnect the DC+ and DC- of the Soft Start harness from the DC bus assembly noting the orientation. Refer to "Figure 4-200 Soft Start Harness Removal". Figure 4-200 Soft Start Harness Removal Soft Start DC+ & DC- to DC Bus Bolt/nut , M6 Remove the M6 bolts that secure the (+) and (-) SCR Bus Bars to the DC Bus Bars. -
Page 171: Figure 4-203 Inverter Copper Tube Removal
Figure 4-202 DC Bus Bar Mylar Removal - TTS300/TGS230 Mylar 14. Remove the M8x70 Motor Bus Bar fasteners from the Inverter. Refer to "Figure 4-203 Inverter Copper Tube Removal" and the note below. NOTE It is not necessary to completely remove the Motor Bus Bars. 15. -
Page 172: Figure 4-204 Inverter Cable Harness Removal - Tts300/Tgs230
16. Remove the Inverter cable harness from the top of the Inverter. Refer to "Figure 4-204 Inverter Cable Harness Removal - TTS300/TGS230". Figure 4-204 Inverter Cable Harness Removal - TTS300/TGS230 Harness Connector 17. Disconnect all wiring connections from the DC-DC Converter. Refer to "Figure 4-205 Open- Frame DC-DC"... -
Page 173: Figure 4-207 Dc-Dc Removal (Potted Dc-Dc Shown)
18. Remove the M3x10 fasteners from that secure the DC-DC. There are eight (8) fasteners that secure the Potted DC-DC and six (6) that secure the Open Frame DC-DC. Refer to "Figure 4-207 DC-DC Removal (Potted DC-DC Shown)". 19. Remove the DC-DC from the Inverter Heat Sink Plate. Figure 4-207 DC-DC Removal (Potted DC-DC Shown) DC-DC Mounting Fastener, M3x10... -
Page 174: Figure 4-210 Compressor Cable Harness Removal - Tts300/Tgs230
22. Disconnect the compressor cable harness from the IGV Motor Feedthrough, Suction and Discharge Sensors, and SCR Temperature Sensor. Refer to "Figure 4-210 Compressor Cable Harness Removal - TTS300/TGS230". Figure 4-210 Compressor Cable Harness Removal - TTS300/TGS230 SCR Temperature Sensor Harness Cable Harness IGV Motor Feedthrough Suction Sensor... -
Page 175: Figure 4-212 Scr Cooling Manifold Removal - Tts300/Tgs230
24. Carefully peel back the foam to gain access to the two (2) M6x20 fasteners. Remove the two (2) SCR Cooling Manifold fasteners and remove the assembly. Refer to "Figure 4-212 SCR Cooling Manifold Removal - TTS300/TGS230" for this and the following step. 25. -
Page 176: Figure 4-214 Scr Connections - Tts/Tgs/Tth/Tgh Rev. H (Except Tts300/Tgs230)
Figure 4-214 SCR Connections - TTS/TGS/TTH/TGH Rev. H (Except TTS300/TGS230) SCR Gate Cables to Soft Start (3 places) AC Bus Bar Connectors (3 places) AC Input to SCR (3 places) SCR to DC Bus SCR to DC Bus ( -) Remove the Terminal Block and AC Mains input Bus Bars. -
Page 177: Figure 4-216 Input Terminal Block Removal - Tts/Tgs/Tth/Tgh Rev. H (Except Tts300/Tgs230)
Figure 4-216 Input Terminal Block Removal - TTS/TGS/TTH/TGH Rev. H (Except TTS300/TGS230) Mains Input Nut, 3/8 x 16, AC Bus Bar to SCR (3 places) Fastener, M8x20, (3 places) Terminal Block to SCR AC Bus Bar to Terminal Cooling Plate Fastener, Block Fastener, M5x12 M6x16, (6 places) -
Page 178: Figure 4-218 Retainer Clip Rotation
Figure 4-218 Retainer Clip Rotation Retainer Clip IGV Feedthrough Fastener, M5x16 Disconnect the compressor cable harness from the IGV Motor, Suction and Discharge Sensors, and SCR Temperature Sensor (if equiped). Refer to "Figure 4-219 Compressor Cable Harness Removal - TTS/TGS/TTH/TGH (Except TTS300/TGS230)" or to "Figure 4-220 Compressor Cable Harness Removal - TTH/TGH Only"... -
Page 179: Figure 4-221 Scr Manifold Removal - Tts/Tgs/Tth/Tgh (Except Tts300/Tgs230)
If the SCR Cooling Plate is to be replaced, remove the four (4) M6x35 SCR Cooling Manifold fasteners that secure the SCR Cooling Manifold to the Inverter Heat Sink Plate and remove the SCRs. (Refer to "Figure 4-221 SCR Manifold Removal - TTS/TGS/TTH/TGH (Except TTS300/ TGS230)". -
Page 180: Figure 4-223 Dc-Dc Removal - Tts/Tgs/Tth/Tgh Rev. F And Earlier (Except Tts300/Tgs230)
11. Disconnect all wiring connections from the DC-DC. Refer to "Figure 4-205 Open-Frame DC-DC" on page 172 and "Figure 4-206 Potted DC-DC" on page 172 for the connection locations of the two (2) variants. 12. Remove the M3x10 fasteners from that secure the DC-DC. There are eight (8) fasteners that secure the Potted DC-DC and six (6) that secure the Open Frame DC-DC. -
Page 181: Figure 4-226 Inverter O-Ring Removal - Tts/Tgs/Tth/Tgh (Except Tts300/Tgs230)
16. Remove and discard the large Inverter O-ring from the compressor housing. Refer to "Figure 4-226 Inverter O-ring Removal - TTS/TGS/TTH/TGH (Except TTS300/TGS230)"). Figure 4-226 Inverter O-ring Removal - TTS/TGS/TTH/TGH (Except TTS300/TGS230) O-ring 17. Carefully remove the two (2) O-rings from the SCR Manifold Return Brass Fitting. Use caution to not damage the surface of the fitting. -
Page 182: Figure 4-228 Scr Cooling Plate O-Ring Installation - Tts300/Tgs230
Figure 4-228 SCR Cooling Plate O-ring Installation - TTS300/TGS230 SCR Cooling Manifold O-rings (2 places) Install the SCR Cooling Manifold to the Inverter Cooling Manifold using the two (2) M6x20 fasteners. Torque to 7 Nm (62 in.lb.). Secure the insulation onto the backside of the SCR Cooling Manifold. Remove the backing material from the cooling manifold of the new Inverter. -
Page 183: Figure 4-230 Dc Bus Installation - Tts300/Tgs230
12. Install the three (3) Copper Tubes and torque the M8x70 Motor Bus Bar fasteners to 14 Nm (10 in.lb.). 13. Place the DC-DC Converter onto the Inverter cooling manifold. NOTE If a Potted DC-DC Converter is being installed, ensure there is adequate thermal paste applied to the contact surface before installation. -
Page 184: Figure 4-231 Terminal Block Installation - Tts300/Tgs230
22. Install the fuse assemblies. Torque the six (6) fasteners to 4 Nm (35 in.lb.). Figure 4-231 Terminal Block Installation - TTS300/TGS230 Fuse to Terminal AC Bus Bar to SCR Block Screw, Fastener, M6x16 - 4 Nm (35 in.lb.) 5 Nm (44 in.lb.) (6 places) (3 places) Fuse Assembly... -
Page 185: Figure 4-233 Inverter Heat Sink Plate O-Ring Installation - Tts/Tgs (Except Tts300/Tgs230)
Once the Inverter is in place, finger-tighten the Inverter fasteners in a diagonal pattern and torque to 3 Nm (27 in.lb.) on the first pass, then to 7 Nm (62 in.lb.) on the second pass. Clean the O-ring groove on top of the Inverter Cooling Manifold with a lint-free cloth. Apply O-Lube to a new Inverter Heat Sink O-ring and place in the O-ring grove in the Inverter Heat Sink Plate and install. -
Page 186: Figure 4-236 Dc Bus Capacitor Assembly Installation - Tts/Tgs/Tth/Tgh (Except Tts300/Tgs230)
13. Install the three (3) Copper Tubes and torque the M8x70 fasteners to specification. 14. Install the DC-DC Converter to the Inverter cooling manifold. 15. Reconnect all electrical connections to the DC-DC Converter. 16. Verify the compressor cable harness and the SCR Temperature Sensor Cable is properly placed across the cooling manifold. -
Page 187: Figure 4-237 Driver Board Fasteners
Connect the Inverter cable harness to the top of the Inverter. Install the mains input cables to the Terminal Block and torque to 21 Nm (15 ft.lb.). Install the Soft Start. Refer to "4.15.3 Soft Start Removal and Installation" on page 112. Install the top covers. -
Page 188: Figure 4-238 Driver Board Removal
10. Carefully lift the Driver Board vertically. Figure 4-238 Driver Board Removal 11. Set aside the Driver Board fasteners for re-use. 12. Discard the old Driver Board in accordance with local regulations. • • • CAUTION • • • Do not move or touch any spring pins unless they are not in proper alignment. Damage or misalignment of spring pins can cause failure of the entire Inverter module. -
Page 189: Table 4-36 Spring Identification Table
Table 4-36 Spring Identification Table Spring Numbers Length Springs 1-6 Short Springs 7-13 Long Figure 4-241 Spring Pin Identification Replace any defective spring pins (bent pin head or inconsistent height on top with others) with new ones. Only do this when absolutely necessary. When removing the spring pins, use small needle-nose pliers and gently pull straight up with no lateral movement. -
Page 190: Table 4-37 Inverter Torque Specifications
Figure 4-243 Initial Tightening Pass Sequence 11. Using an appropriately-rated torque wrench, tighten the fasteners from center outward (same sequence as previous step) to 1.5 Nm (13.2 in. lb.). NOTE It is recommended to verify Inverter functionality using an inverter tester prior to reassembly of the top-side electronics. 12. -
Page 191: Motor Components
Description Ft.Lb. In.Lb SCR Cooling Manifold to Inverter Cooling Manifold fastener, M6x20 (TTS300/ TGS230 only) SCR Cooling Manifold to Inverter Cooling Manifold fastener, M6x35 (Excludes TTS300/TGS230 compressors) AC Bus Bar to SCR fastener, M8x20 (Excludes TTS300/TGS230 compressors) Terminal Block Mounting fastener, M5x45 (Excludes TTS300/TGS230 compressors) Capacitor DC Bus Bar to SCR fastener, M8x20 (Excludes TTS300/TGS230 compressors) -
Page 192: Figure 4-244 Connection To Stator
4.24.3 Motor Connections Refer to "Figure 4-244 Connection to Stator" for details on the connections and serviceable components. Figure 4-244 Connection to Stator Inverter to Motor Bus Bar fastener, M8x70 (3 places) Motor Bus Bar Motor Thermistor Terminals High Power Feedthrough 4.24.4 Motor Verification •... -
Page 193: Figure 4-245 Stator Thermistor R/T Curve 1
4.24.4.3 Stator Thermistor Resistance Verification Isolate the compressor power as described in Section "1.8 Electrical Isolation" on page 19. Disconnect the DC supply cable harness from the motor thermistor terminals. Refer to "Figure 4-244 Connection to Stator" on page 192. Using a multimeter set for resistance measurements, place the red (+) multimeter lead on one motor thermistor terminal and the black (-) multimeter lead on the other motor thermistor terminal. -
Page 194: Figure 4-246 Motor Bus Bar Removal - Pps Feedthroughs
Refer to "Figure 4-246 Motor Bus Bar Removal - PPS Feedthroughs" and "Figure 4-247 Motor Bus Bar Removal - Stainless-Steel Feedthroughs". • • • CAUTION • • • While removing the M10 nuts for the Stainless-Steel High-Power Feedthrough, it is important to hold the inner nut with a wrench. Fail- ure to do so could place an excessive load on the feedthrough causing internal damage. -
Page 195: Figure 4-248 Copper Tube Removal
• • • CAUTION • • • While torqueing the High-Power Feedthrough Nuts, it is important to hold the inner nut with a wrench. Failure to do so could place an excessive load on the feedthrough causing internal damage. Also, the feedthrough itself could move which could allow it to loosen or be over torqued. -
Page 196: Figure 4-249 Motor Cover Plate Removal
Disconnect the two (2) connectors from thermistor sensor feedthrough. Refer to "Figure 4-249 Motor Cover Plate Removal". Figure 4-249 Motor Cover Plate Removal Cover Plate Fastener, M8x25 (10 places) Thermistor connectors (2 places) Remove the 10 M8x25 fasteners that secure the Cover Plate to the Main housing. Refer to "Figure 4-249 Motor Cover Plate Removal". -
Page 197: Figure 4-251 Cover Plate Torque Sequence
Lower the Cover Plate onto the Main housing. Using the 10 M8x25 fasteners, install the Cover Plate. Finger-tighten and then, according to "Figure 4-251 Cover Plate Torque Sequence", tighten in a crisscross pattern in two (2) stages. • Stage 1: Tighten to 10 Nm (7 ft.lb.) •... -
Page 198: Figure 4-252 High-Power Feedthrough (Pps)
Remove the three (3) M10x16 fasteners and ring terminal connections from the feedthrough in order to be able to release feedthrough assembly. Refer to "Figure 4-252 High-Power Feedthrough (PPS)". Figure 4-252 High-Power Feedthrough (PPS) Ring Terminal to Feedthrough O-ring Fastener, (3 places) M10x16 (3 places) - Page 199 Remove the three (3) high-power feedthroughs using a 36mm wrench. 10. Remove the three (3) high-power feedthrough O-rings from the Main housing if they did not come out with the old feedthroughs. 11. Inspect the sealing area for any residue or debris and clean the threads with a lint-free cloth if needed.
-
Page 200: Table 4-38 Motor Assembly Torque Specifications
11. Connect the two (2) connectors to the thermistor sensor feedthrough. Refer to "Figure 4-254 Connection to Stator". Figure 4-254 Connection to Stator Inverter to Motor Bus Bar fastener, M8x70 Motor Bus Bar Motor Thermistor Terminals High Power Feedthrough 12. Install the Motor Bus Bars. Refer to "4.24.5 Motor Assembly Removal and Installation" on page 193. -
Page 201: High Voltage Dc-Dc Converter
4.25 High Voltage DC-DC Converter There are two (2) variants of the DC-DC Converter mentioned in this manual. There is a potted style which has been in production for years and there is the open frame DC-DC converter that was released to production as replacement of the potted style in April 2019. -
Page 202: Figure 4-255 J3 - 24Vdc Output Connector
4.25.2.3 Input Resistance Measurement Isolate the compressor power as described in Section "1.8 Electrical Isolation" on page 19. Unplug all connectors to the DC-DC Converter. Using a multimeter set for resistance measurements, place the multimeter leads in the J1, HV DC input plug terminals. -
Page 203: Figure 4-257 Dc-Dc Harness Routing
NOTE J4 for the Potted DC-DC is not shown 4.25.4 DC-DC Harness Removal and Installation 4.25.4.1 DC-DC Harness Removal Isolate the compressor power as described in Section "1.8 Electrical Isolation" on page 19. Remove the Service Side Cover. Refer to "4.2.3.1 Service Side Cover Removal and Installation" on page 58. -
Page 204: Figure 4-258 Potted Dc-Dc
Connect the two (2) motor thermistor connections. Install any cable ties as necessary. Install the Service Side Cover. Refer to "4.2.3.1 Service Side Cover Removal and Installation" on page 58. Install the top covers. Refer to "4.2 Compressor Covers" on page 56. Return the compressor to normal operation. -
Page 205: Figure 4-260 Dc-Dc Converter Removal
Figure 4-260 DC-DC Converter Removal DC-DC Mounting fastener M3x10 (3 -4 places depending on version) Installation Clean the Inverter Heat Sink Plate where the original DC-DC was mounted. Apply additional thermal paste to the DC-DC if it is to be reused. NOTE Open Frame DC-DC Converters do not require thermal paste. -
Page 206: Table 4-39 Dc-Dc Torque Specifications
Figure 4-262 Potted DC-DC - Top View Figure 4-263 Open Frame DC-DC - Top View Connect the DC-DC cables. Install the Soft Start. Refer to "4.15.3 Soft Start Removal and Installation" on page 112. Install the top covers. Refer to "4.2 Compressor Covers" on page 56. Return the compressor to normal operation. -
Page 207: Backplane
4.26 Backplane Figure 4-264 Backplane 4.26.1 Backplane Function The Backplane is powered by +24VDC (with respect to 0V) from the DC-DC Converter. The DC-DC Converter also provides the Backplane with HV+ (+250VDC with respect to HV-) for the Bearing PWM Amplifier. The Backplane connects the onboard plug-in modules with the power electronics, expansion valves, IGV stepper motor, motor-cooling solenoids, bearing sensors, and pressure/ temperature sensors. -
Page 208: Table 4-40 Backplane Connections
4.26.2 Backplane Connections and Test Points The Backplane connections and test points are indicated in "Figure 4-265 Backplane Connections" and "Figure 4-266 Backplane Test Points" on page 209. Figure 4-265 Backplane Connections Table 4-40 Backplane Connections Component Component J1: PWM Connection Port J20: Motor-Winding Sensor Port J2 and J3: BMCC Connection Port J21: IGV Motor Control Port... -
Page 209: Table 4-41 Backplane Test Points
Figure 4-266 Backplane Test Points Table 4-41 Backplane Test Points Component Component HV- Test Point +5V Test Point HV+ Test Point +15V Test Point +17HV Test Point +24V Test Point 0V Test Point -15V Test Point 4.26.2.1 LED Locations The Backplane LEDs are indicated in "Figure 4-267 Backplane LED Locations - Left Side" on page 209 and "Figure 4-268 Backplane LED Locations - Right Side"... -
Page 210: Table 4-42 Backplane Led Locations
Figure 4-268 Backplane LED Locations - Right Side Table 4-42 Backplane LED Locations Component Component D2: +17 VDC D10: Cool-L power to solenoid D1: +5VDC D11: Run contact is closed when on D12: Compressor Status: Red indicates alarm or D6: + 15 VDC reset, Green indicates normal D13-D16: IGV Stepper Motor Indicator;... -
Page 211: Table 4-43 Backplane Test Point Values
Table 4-43 Backplane Test Point Values Test Point Test Point Reference DC Voltage Range Minimum Resistance 220 to 280 250Ω +17HV 16.5 to 17.85 28Ω +24V 22 to 26 9Ω +15V 14.75 to 15.25 20Ω -15V -14.75 to -15.25 150Ω 4.75 to 5.25 8Ω... -
Page 212: Serial Driver
10. Remove the Backplane Frame from the compressor housing. 4.26.3.2 Backplane Installation Align the Backplane with the mounting holes, ensuring the cavity temperature sensor connector is available. Insert and torque the fasteners at the top of the Backplane Frame to 3 Nm (27 in.lb.). Insert and torque the Backplane Ground fastener at the bottom right of the Backplane to 3 Nm (27 in.lb.). -
Page 213: Serial Driver Connections
4.27.2 Serial Driver Connections The Serial Driver is connected to J8 of the Backplane. All components that communicate with the Serial Driver are connected to the Backplane. Refer to "Figure 4-265 Backplane Connections" on page 208. 4.27.3 Serial Driver Verification 4.27.3.1 Serial Driver Input Voltage Remove the Service Side Cover. -
Page 214: Bmcc
Figure 4-271 Serial Driver Removal 4.27.4.2 Serial Driver Installation Carefully align the Serial Driver on top of the BMCC. Refer to "Figure 4-272 Insertion Guides". Figure 4-272 Insertion Guides SERIAL DRIVER BEARING MOTOR COMPRESSOR CONTROLLER (BMCC) BEARING PWM Slide the Serial Driver onto the J8 connector on the Backplane. Install the Service Side Cover. -
Page 215: Bmcc Connections
Figure 4-273 BMCC BMCC 4.28.1 BMCC Connections The BMCC is connected to J2 and J3 on the Backplane. Refer to "Figure 4-265 Backplane Connections" on page 208. 4.28.2 BMCC Verification 4.28.2.1 BMCC Power Verification Remove the Service Side Cover. Refer to "4.2.3.1 Service Side Cover Removal and Installation" on page 58. -
Page 216: Figure 4-274 Bmcc Case Separation
The battery used in the BMCCs is a coin type lithium style. The part number is BR1225. This battery is not sold by Danfoss LLC but can be locally sourced at most stores that sell coin-type batteries. • • • DANGER • • •... -
Page 217: Figure 4-275 Bmcc Battery Measurement
Set the multimeter for voltage measurements and place the red (+) probe on the battery itself (top)and the black (-) probe on the ground terminal shown below. • The measurement should be between 2.85V and 3.15V Figure 4-275 BMCC Battery Measurement Top side (+) Ground Terminal... -
Page 218: Bearing Pulse Width Modulator Amplifier
Align the two lower insertion guides of the BMCC so that they are on the inside of the two upper insertion guides on the Bearing PWM Amplifier. Refer to "Figure 4-277 BMCC Insertion Guides". Figure 4-277 BMCC Insertion Guides SERIAL DRIVER BEARING MOTOR COMPRESSOR CONTROLLER (BMCC) BEARING PWM Slide the BMCC straight into the connector until firmly seated in the Backplane connector. -
Page 219: Figure 4-279 Bearing Control Signal Flow
The Backplane provides the PWM with +5VDC with respect to 0VDC, along with +17VDC and HV+ (at 250VDC) both with respect to HV-. Figure 4-279 Bearing Control Signal Flow Position Feedback Bearing‐Motor‐ Position Feedback Compressor Controller (BMCC) Channel Assignments Axi s Bea ri ng Cha nnel Position Command ... -
Page 220: Pwm Verification
4.29.3 PWM Verification NOTE A faulty PWM Amplifier may be the result of a bearing failure and may cause a failure of the DC-DC resulting in a blown F1 fuse on the Soft Start. If a PWM Amplifier is found to be faulty, the bearing actuator coils, DC-DC and F1 Fuse must also be verified. Several verification methods are available for the PWM: •... -
Page 221: Figure 4-281 Connecting Leads To Pwm Connector And Hv- And Hv+ Test Points
4.29.3.3 Verify Functionality of the Five Diode Sets To verify the diode sets within the PWM channels, complete the following steps: Isolate compressor power as described in Section "1.8 Electrical Isolation" on page 19. Remove the Service Side Cover. Refer to "4.2.3.1 Service Side Cover Removal and Installation" on page 58. -
Page 222: Table 4-45 Pwm Torque Specifications
Figure 4-282 Removing the PWM Amplifier Backplane Ground Screw, M5x10 PWM Mounting/ heatsink Screw, M5x10 (3 places) Remove the bearing PWM amplifier from J1 of the Backplane. Figure 4-283 PWM Amplifier Installation NOTE Prior to replacing a PWM, verify the bearing coils. Check that the M5x10 ground fastener at the lower right of the Backplane is tight before replacing the PWM. -
Page 223: Magnetic Bearings
4.30 Magnetic Bearings 4.30.1 Magnetic Bearings Function The compressor shaft and impellers levitate during operation and float on a magnetic cushion created by the magnetic bearings. Permanent magnets do most of the work and electromagnets are used for trimming the shaft position within 0.0003” (7 microns). One axial (Z axis) and two radial (X & Y axis) magnetic bearings are used to maintain shaft position. -
Page 224: Table 4-46 Magnetic Bearing Coil Resistance Values
Remove the Serial Driver, BMCC, and PWM. Set multimeter for resistance checks. Test resistance on bearing power feed through pins defined in "Table 4-46 Magnetic Bearing Coil Resistance Values". Refer to "Figure 4-285 Front and Rear Bearing Feed Through Connectors" on page 224 for pin locations. Compare the resistance values to those defined in "Table 4-46 Magnetic Bearing Coil Resistance Values". -
Page 225: Table 4-47 Bearing Amperage Nominal Ranges
Figure 4-286 Compressor Monitor Tool Table 4-47 Bearing Amperage Nominal Ranges Bearing Position Force Range Axial Force -1 to 1 Amp Front X Force -1 to 1 Amp Front Y Force -1 to 1 Amp Rear X Force -1 to 1 Amp Rear Y Force -1 to 1 Amp 4.30.3.3 Bearing Sensor Cable Removal... -
Page 226: Figure 4-287 Bearing Power Feedthrough Assembly
Install the cable to J10 on the Backplane. Ensure that plug is inserted in correct polarity. Refer to the locating keys on the plug and slots in the connector. Gently squeeze the connector retainers to snap the connectors in place. Install the 9-pin connector at the Rear Bearing Sensor Feedthrough and tighten the fasteners. -
Page 227: Figure 4-288 Bearing Power Feedthrough Alignment Pin
4.30.4.2 Bearing Power Feedthrough Installation If necessary, clean both mating surfaces with a lint-free cloth. Apply Super-O-Lube on the new O-ring. Install the lubricated O-ring onto the new feedthrough. Install the new feed through into the compressor housing. Check connector orientation with the Alignment Pin as well as the internal female connector of the bearing. -
Page 228: Bearing Sensors
4.30.4.3 Magnetic Bearing Torque Specifications Table 4-48 Magnetic Bearing Torque Specifications Description Ft.Lb. In.Lb. Inverter and Backplane Ground fastener, M5x25 Backplane Mounting fastener, M5x25 PWM Mounting/heatsink fastener, M5x10 Bearing Power Feedthrough fastener, M5x16 Cover fastener, M5x15 4.31 Bearing Sensors 4.31.1 Bearing Sensor Function Bearing sensors feed back real-time shaft orbit information to the bearing control loop. -
Page 229: Table 4-49 Bearing Sensor Coil Resistance
4.31.3 Bearing Sensor Verification 4.31.3.1 Bearing Sensor Resistance Verification Isolate compressor power and wait for the LEDs on the Backplane to turn off. Remove the bearing sensor cable from the bearing sensor feed through. Refer to "Figure 4-290 Bearing Sensor Feedthroughs" on page 228. Set the multimeter for resistance measurement. -
Page 230: Figure 4-292 Bearing Sensor Feed Through Removal
Remove the BMCC. Refer to "4.28.4 BMCC Removal and Installation" on page 217. Remove the bearing sensor cable from the 9-pin feed through. Refer to "Figure 4-292 Bearing Sensor Feed Through Removal". Using a hex socket, remove the four (4) M5x16 fasteners that secure the 9-pin feed through. Refer to "Figure 4-292 Bearing Sensor Feed Through Removal". -
Page 231: Cavity Temperature Sensor
Leak test and evacuate compressor in accordance with standard industry practices. Install the bearing sensor cable onto the new 9-pin feed through. Carefully, insert the BMCC back into its slot. Align the BMCC module’s two (2) lower guides so they are aligned on the inside of the Bearing PWM module’s two upper guides. Note the insertion guides shown in "Figure 4-294 BMCC Insertion Guides". -
Page 232: Figure 4-296 Cavity Temperature Sensor Terminal
4.32.2 Cavity Temperature Sensor Connections The Cavity Temperature sensor is located behind the Backplane. Refer to "Figure 4-298 Cavity Temperature Sensor Removal" on page 233. The Cavity Temperature Sensor is connected to the J23 connector on the Backplane. Refer to "Figure 4-265 Backplane Connections"... -
Page 233: Table 4-51 Cavity Sensor Torque Specifications
"3.1 Refrigerant Containment" on page 41. Remove the Service Side Cover (refer to Figure "4.2.3.1 Service Side Cover Removal and Installation" on page 58). Verify the LEDs on the Backplane have turned off. Remove the Serial Driver. Refer to "4.27.4 Serial Driver Removal and Installation" on page 213. Remove the BMCC. -
Page 234: Pressure/Temperature Sensor
4.33 Pressure/Temperature Sensor 4.33.1 Pressure/Temperature Sensor Function The suction and discharge pressure/temperature sensors are used to inform the compressor of the operating pressures and temperatures at the suction and discharge ports. These values are used to calculate pressure ratios, saturated temperatures, superheat and the location within the operating envelope where the compressor is running. -
Page 235: Figure 4-297 Temperature Vs. Resistance
Remove the Service Side Cover. Refer to "4.2.3.1 Service Side Cover Removal and Installation" on page 58. Disconnect the pressure/temperature cable clip (SUCTION – J18 or DISCHGE – J19) from the Backplane board. Refer to "Figure 4-303 Pressure/Temperature Cable Terminals" for this and the following step. -
Page 236: Figure 4-305 Suction Pressure/Temperature Sensor Removal
Install the top covers. Refer to "4.2 Compressor Covers" on page 56. Return the compressor to normal operation. 4.33.4 Pressure/Temperature Sensor Removal and Installation 4.33.4.1 Suction Pressure/Temperature Sensor Removal Isolate the compressor power. Isolate the compressor and recover the refrigerant according to industry standards. Refer to "3.1 Refrigerant Containment"... -
Page 237: Table 4-52 Pressure/Temperature Sensor Torque Specifications
4.33.4.4 Discharge Pressure/Temperature Sensor Installation Check and clean O-ring, housing thread, and O-ring sealing surface in the compressor housing. Apply lube to O-ring. Insert the sensor and engage the first few threads by hand. Using a deep 15/16" socket, tighten the sensor to 10 Nm (7 ft.lb). Reconnect the sensor connector. - Page 238 THIS PAGE INTENTIONALLY LEFT BLANK 238 of 282 M-SV-001-EN Rev. G...
- Page 239 Chapter 5: Troubleshooting 5.1 Alarm and Fault Indications ................................241 5.1.1 Alarm Types ....................................................241 5.1.2 Fault Types ....................................................241 5.2 Troubleshooting with the Service Monitoring Tools Software ....................243 5.2.1 Compressor Fault Troubleshooting ..........................................244 5.2.2 Motor Faults/System Status ..............................................248 5.2.3 Bearing Status ..................................................250 5.3 Bearing Calibration ..................................
- Page 240 THIS PAGE INTENTIONALLY LEFT BLANK 240 of 282 M-SV-001-EN Rev. G...
-
Page 241: Chapter 5.0 Troubleshooting
Chapter 5.0 Troubleshooting 5.1 Alarm and Fault Indications The first step in troubleshooting is to gather as many facts as possible. Compressor fault and event logs provide factual historical information that will indicate the exact reason that the compressor shut down, the frequency of faults and compressor starts, as well as the value of pertinent parameters at the time of the fault. -
Page 242: Table 5-3 Compressor Status 2 Faults
Compressor Description If a motor fault type or a bearing fault type is present, then the bearing/ motor fault active is triggered. Bearing/Motor Fault Active This is not an actual fault, only an indication that a motor or bearing fault has occurred. -
Page 243: Troubleshooting With The Service Monitoring Tools Software
Table 5-4 Motor Fault Types Compressor Description Motor Single Phase Overcurrent Measured peak current value of any single phase to motor (from Inverter) Fault exceeds the fault limit. The measured DC bus voltage has exceeded the Maximum Bus Voltage DC Bus Overvoltage Fault limit. -
Page 244: Figure 5-1 Fault Trigger Methods
5.2.1 Compressor Fault Troubleshooting When troubleshooting a compressor fault, detailed analysis of this data should be made (in conjunction with a Yenta compressor recording file, if possible) to determine the specific fault and determine the root cause of fault occurrence. Downloading fault and event logs every time a compressor is visited is useful for documenting compressor operational history. -
Page 245: Table 5-6 Compressor Status
The Clear Faults button in the SMT Compressor Monitor can be used in software versions 4.0.0 and later. Also see the OEM Programming Guide for additional fault reset options. A fault demanding a power cycle (Lock-Out Fault) is resettable by cycling the mains power to the compressor. - Page 246 Motor Fault Trigger Troubleshooting Description Method High Pressure Ratio • Suggests the condenser may be faulty, not enough load on the evaporator, or insufficient water flow in either Fault condenser or evaporator. • Check the condenser, evaporator loads and water flow. •...
-
Page 247: Table 5-7 Compressor Status 2 Faults
Table 5-7 Compressor Status 2 Faults Motor Fault Trigger Troubleshooting Description Method Suction Pressure • Sensor errors occur when the sensor is providing a reading that is outside the normal readable Sensor Fault temperature range and therefore must have an error in the reading or functional problem with the sensor •... -
Page 248: Table 5-8 Motor Status
5.2.2 Motor Faults/System Status Table 5-8 Motor Status Motor Fault Trigger Troubleshooting Descritpion Method Motor Single Phase • One phase of the Inverter to motor is generating high current. Overcurrent Fault • Review Fault and Event Log details to determine conditions related to the fault. This fault can be a result of liquid carryover, a loss of shaft magnetic strength, see Back EMF is Low fault, or Inverter failure, see Inverter Error fault. - Page 249 Motor Fault Trigger Troubleshooting Descritpion Method DC Bus Under/Over • At 0 RPM: If the measured DC Bus voltage is lower than Soft Start charge voltage, a DC bus voltage fault is Voltage Fault recorded. All 3-phase voltage information displayed in the SMT is calculated from DC bus voltage, as measured by the Inverter.
-
Page 250: Bearing Calibration
5.2.3 Bearing Status Table 5-9 Bearing Status Bearing Fault Trigger Troubleshooting Description Method Startup Calibration • During compressor start-up, the stored bearing calibration is verified. Indicates that the calibration failed during Check Fault compressor start-up. Manually calibrate the bearings and save to EEPROM, cycle the power. •... -
Page 251: Figure 5-2 Bearing Calibration Tool
5.3.1.4 BMCC Change If a replacement BMCC is installed in a compressor, a calibration must to be performed, saved to EEPROM, and repeated to match the BMCC to the specific compressor. 5.3.2 Performing a Calibration Once opened, the Calibration Tool will automatically change the Compressor Control Mode to Calibration Mode and send a delevitate shaft signal to the bearing control. -
Page 252: After Calibration Is Complete
• Ensure there are no faults present; the shaft will not levitate for validation if a fault is present. • Ensure the RS485 at J1 on the I/O board is disconnected from external communication; if the chiller controller automatically sets the control mode, it will stop the calibration process prematurely. -
Page 253: Calibration Report Analysis
5.3.5 Calibration Report Analysis Data in Report: The difference between the “Latest Calibration” and “Stored Calibration” is less than 30 percent. • Interpretation: Successful calibration. Data in Report: Only one of the gain values equals zero. • Interpretation: Bearing or bearing sensor electrical fault, or one channel of the PWM Amplifier is faulty. -
Page 254: Figure 5-3 Bearing Calibration Flow
Figure 5-3 Bearing Calibration Flow Start Begin bearing Bearings pass? Replace compressor calibration Create a calibration Verify the bearing Could shaft run and report but do not sensors. Refer to levitate without issue save calibration to Section 4.28.3 prior to calibration? EEPROM “Verification”... -
Page 255: Compressor Connection Status Indications
5.4 Compressor Connection Status Indications • Disconnected: no connection exists with a compressor or remote compressor host • Ready to Connect: a connection with a remote host (if applicable) has been established, but no compressor connection has yet been established •... - Page 256 • If DC Bus voltage is correct, proceed to Step 13. • If DC Bus voltage is not correct, verify the SCRs. • If the SCRs pass test, replace the Soft Start then repeat Step 13. • If one or more of the SCRs test faulty, replace all three of the SCRs then repeat Step 12. 13.
-
Page 257: Determining The Cause Of An Energy Drain
5.5.2 Determining the Cause of an Energy Drain 5.5.2.1 Determining if Serial Driver is Draining Energy Remove the Service Side Cover. Test the Backplane voltages at the +24V, +15, +5, and -15 VDC test points. • If all voltages are within +/- 10%, the Serial Driver is not draining energy. •... - Page 258 Verify the bearings and bearing sensors. Refer to "4.31.3 Bearing Sensor Verification" on page 229. Re-apply the compressor power. 10. Test the Backplane voltages at the HV+, +17HV, +24V, +15, +5, and -15 VDC test points. • If all voltages are within (+/- 10%) the PWM is draining energy. •...
-
Page 259: Troubleshooting An Open Interlock
5.5.3 Troubleshooting an Open Interlock Verify the interlock. Refer to "4.4.2.3 Interlock Verification" on page 65. Ensure there is 0VDC (no external power applied) on the interlock circuit. If the Interlock circuit is determined damaged and will not close, remove the wire from the I/ LOCK-(neg) at the J2 connector of the I/O Board. - Page 260 THIS PAGE INTENTIONALLY LEFT BLANK 260 of 282 M-SV-001-EN Rev. G...
- Page 261 Chapter 6: Maintenance 6.1 Preventative Maintenance Tasks ..............................263 6.2 Moisture Prevention Measures ..............................264 261 of 282 M-SV-001-EN Rev. G...
- Page 262 THIS PAGE INTENTIONALLY LEFT BLANK 262 of 282 M-SV-001-EN Rev. G...
-
Page 263: Chapter 6.0 Maintenance
Chapter 6.0 Maintenance 6.1 Preventative Maintenance Tasks "Table 6-1 Preventative Maintenance Tasks" identifies tasks that should be performed on a regular basis to maintain optimal performance of the system. Table 6-1 Preventative Maintenance Tasks Frequency Item Task 6 Mos 12 Mos Other General Check physical condition of compressor. -
Page 264: Moisture Prevention Measures
• Dielectric grease (Danfoss LLC part # 901982 or equivalent) • Dielectric grease spray NOTE The Danfoss LLC part # 901982 Dielectric Grease is a natural lanolin-based product which is non-toxic. Application of Dielectric Grease The dielectric grease can be applied by: •... -
Page 265: Figure 6-2 Motor Cooling Valve Solenoids
Remove the Motor-Cooling Valve Solenoid Coils by removing the retaining nut on each solenoid. • • • CAUTION • • • The solenoid actuators are dedicated on all models except TT300/TG230. Provide a position reference mark before removal. Dry off any condensate around the solenoids. Figure 6-2 Motor Cooling Valve Solenoids Remove any debris or dust from Backplane Board and solenoids using a soft-bristle brush. -
Page 266: Figure 6-3 Motor Component Dielectric Grease Application
Figure 6-3 Motor Component Dielectric Grease Application Motor Bus Bar to Inverter Screw Motor Thermistor Terminals High Power Feedthrough Dry off any condensate around the SCR fasteners. 10. For TTS300/TGS230 compressors, carefully inspect the inside SCR fastener. If any debris or oxidation is found, remove the applicable fuse assembly. -
Page 267: Table 6-2 Scr Fastener Torque Specifications
12. Spray greaseless lubricant on the SCR fasteners to remove any trace of moisture. Refer to "Figure 6-5 SCR Fastener Dielectric Grease Application" for the locations that should be cleaned and prepared. Figure 6-5 SCR Fastener Dielectric Grease Application All TTS/TGS/TTH/TGH Models Except TTS300/TGS230 TTS300/TGS230 13. - Page 268 THIS PAGE INTENTIONALLY LEFT BLANK 268 of 282 M-SV-001-EN Rev. G...
-
Page 269: Appendix A - Acronyms/Terms
Appendix A – Acronyms/Terms Table A-1 Acronyms/Terms Acronym / Term Definition Alternating Current Ascending fault triggering Alarms indicate a condition at the limit of the normal operating envelope. Compressor alarms will still allow the Alarms Compressor to run, but speed is reduced to bring the alarm condition under the alarm limit. American Society of Heating Refrigeration and Air-Conditioning Engineers ASHRAE (www.ashrae.org). - Page 270 Acronym / Term Definition Service Monitoring Tool Volts Direct Current or Volts DC º C Degrees Celsius º F Degrees Fahrenheit 270 of 282 M-SV-001-EN Rev. G...
-
Page 271: Appendix B - Compressor Troubleshooting Flowcharts
Appendix B – Compressor Troubleshooting Flowcharts This appendix contains flowcharts for Compressor Operation Troubleshooting ("Figure B-20 Compressor Operation Troubleshooting Flowchart (Sheet 1)") and Compressor Voltage Troubleshooting ("Figure B-22 Compressor Voltage Troubleshooting Flowchart (Sheet 1)" on page 273.). Figure B-20 Compressor Operation Troubleshooting Flowchart (Sheet 1) Start Is the compressor ... - Page 272 Figure B-21 Compressor Operation Troubleshooting Flowchart (Sheet 2) Is there a demand % displayed? Is DC Bus voltage is fault be reset by within spec cycling the power? Refer to Section 5.0 Are I/O cable and “Troubleshooting” BMCC board securely Restore demand connected? input to the compressor Refer to Section Close interlock 4.14.2 “Soft Start circuit Verification” Note the IGV settings Has the IGV reset? Disconnect power, secure component(s) Refer to Section 4.23.2 “DC‐DC Verification” Wait until IGV reset Is Inverter Temp below Maximum Start Refer to Section ...
- Page 273 Figure B-22 Compressor Voltage Troubleshooting Flowchart (Sheet 1) Start Are there any signs of visible damage? Carefully remove Mains Input Cover Replace damaged components With an appropriately rated meter, verify all 3 phases of voltage before the mains Verify Soft Start fuses fuses (Closed‐Top Soft Start Only) All three phases of voltage Replace fuse and present after mains fuses? Are the Soft Start refer to Determining fuses within the Cause of the specification? Blown Fuse 5.5.2.6 Verify and, if Electrically isolate Verify IGBT cable to needed,replace compressor – Refer the IGBT connectors Fuses – Refer to to Electrical Isolation are installed Terminal Block Fuse ...
- Page 274 Figure B-23 Compressor Voltage Troubleshooting Flowchart (Sheet 2) Install DC Bus Test Harness – Refer to Installation of the DC Bus Test Harness 1.9.1 Disconnect J2 and J3 Potted DC‐DCs J3/J4 outputs from J4 Open‐Frame DC‐DCs DC‐DC Re‐install Top Cover, then re‐apply mains power Verify the DC bus through the Test Harness Applicable for Potted DC‐DCs only Verify the 15VAC Is DC bus voltage through the test correct? harness Isolate power, remove cover, test 15VAC present? all SCRs, and refer to SCR Verification 4.18.2 Replace all three SCRs and re‐install SCRs pass test? Top Cover Replace Soft Start ...
- Page 275 Figure B-24 Compressor Voltage Troubleshooting Flowchart (Sheet 3) Re‐install all Electrically isolate Remove Serial connectors and the compressor – Refer Driver, BMCC, and PWM, BMCC and to Electrical Isolation Serial Driver to Backplane Re‐apply mains Re‐apply Remove Top Cover power compressor power Remove DC Bus Test Verify the HV+ and Harness and re‐ 24V test points on Verify the +17V, install the J2 and J3 Backplane +15V, +5 and ‐15 outputs to DC‐DC voltages Re‐install Top Cover and remove Service Are voltages Side Cover within +/‐ 10%? Are all voltages within +/_ 10%? Re‐apply mains ...
- Page 276 THIS PAGE INTENTIONALLY LEFT BLANK 276 of 282 M-SV-001-EN Rev. G...
-
Page 277: Appendix C - Compressor Test Sheet
Appendix C – Compressor Test Sheet Component Test Point Expected Value Verification Section Measured Value "4.26.2.2 Backplane Backplane DC Voltage 0V to 24V 22 to 26 VDC Verification" "4.26.2.2 Backplane 0V to +15V 14.75 to 15.25 VDC Verification" -14.75 to -15.25 "4.26.2.2 Backplane 0V to -15V Verification"... - Page 278 Component Test Point Expected Value Verification Section Measured Value Phase 2: + Lead on AC Output "4.23.2 Inverter Open to - DC input Verification" Phase 2: + Lead on AC Output to "4.23.2 Inverter 0.275v - 0.4v + DC input Verification"...
- Page 279 Component Test Point Expected Value Verification Section Measured Value >1Ω and <25Ω (all models) "4.19.2.3 Gates SCR Gate Resistance Gate Terminals Verification" "4.19.2.5 SCR Temperature SCR Temperature Sensor J17 Sensor connector 10KΩ @ 70°F (21°C) Sensor Verification" "4.15.2.2 Verifying Soft Soft Start Fuses <1Ω...
- Page 280 THIS PAGE INTENTIONALLY LEFT BLANK 280 of 282 M-SV-001-EN Rev. G...
- Page 281 Quick access to Danfoss Turbocor® troubleshooting. compressor The new version of the Danfoss TurboTool® 2.0 app for all your full service 24/7 Danfoss Turbocor® compressor needs. Access to Danfoss Turbocor® The user can select from a list The TurboTool® app makes...
- Page 282 Our products can be found in a variety of applications such as rooftops, chillers, residential air conditioners, heatpumps, coldrooms, supermarkets, milk tank cooling and industrial cooling processes. http://turbocor.danfoss.com Danfoss Turbocor 1769 E. Paul Dirac Drive 1769, Tallahassee FL 32310 USA | +1 850 504 4800 © Danfoss | DCS (CC) | 2020.05 M-SV-001-EN Rev. G...
Need help?
Do you have a question about the Turbocor TTS Series and is the answer not in the manual?
Questions and answers