Advertisement
Quick Links
Advertisement

Summary of Contents for Durafly GOBLIN
- Page 1 Instruction Manual...
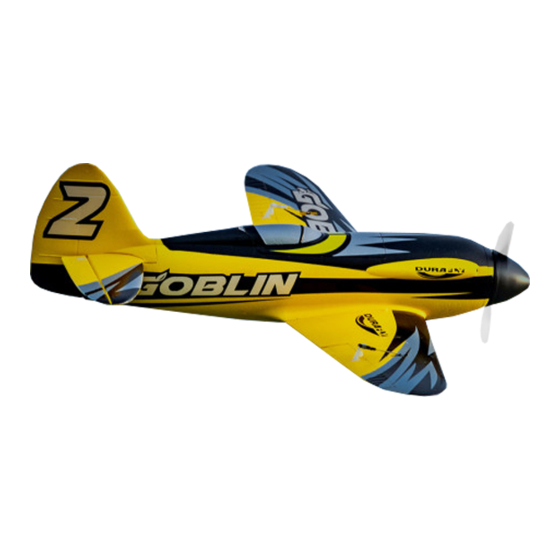
- Page 2 So why not get a bunch of your flying mates to also purchase a Goblin, set up some pylons and do a bit of inexpensive pylon racing, it's great fun. There is no need to modify the Goblin and large individual race numbers are supplied to tell who is who.
- Page 3 - This is a radio controlled flying model and as such must always be flown with caution and care. This is not a toy. - The Goblin Racer is designed for intermediate to advanced pilots. - Alway exercise great caution when using the recommended battery to power this product.
- Page 4 Components: 1. Main Wing with 2 x pre-installed 9g servos, fitted pushrods and control horns . 2. Fuselage with pre-installed motor, prop, spinner, ESC, 1 x 9g servo and fitted pushrod. 3. One piece fin and rudder. 4. Tailplane and hinged elevator with fitted control horns. 5.
- Page 5 ESC. The Goblin is a one piece model so the wing is permanently attached to the fuselage. If your model has any residue paint on the surfaces to be glued then either lightly sand or prick the surfaces with a pin to help the adhesion.
- Page 6 Feed the aileron Y lead connector through the opening behind the ESC. Carefully tuck the leads and connectors through into the receiver/battery bay and position the wing onto the fuselage wing seat.
- Page 7 Ensure the wing fits snuggly and stays perfectly aligned to the fuselage as the glue sets. Once again remove any residue paint or prick with a pin the rear of the fuselage and the underneath of the tailplane where the 2 surfaces are to be joined together.
- Page 8 Apply a good foam adhesive or slow setting CA to the rear of the fuselage and the underneath of the tailplane where the 2 surfaces are to be joined. Carefully position the tailplane onto the seat at the rear of the fuselage, ensure the tailplane remains perfectly aligned with the fuselage and wing as the glue sets.
- Page 9 Again remove any residue paint or prick with a pin the area where the fin/rudder assembly is to be attached to the fuselage. Do the same with the underneath of the fin/rudder assembly and the locating tongue on the bottom of the rudder. Apply a good foam adhesive or slow setting CA to the rear of the fuselage and the underneath of the fin/rudder assembly and locating tongue where the 2 surfaces are to be joined.
- Page 10 Install the receiver of your choice, minimum of 4 channels. Important Note: As the Goblin is quite a fast model we recommend that the EPO hinges of the ailerons and elevator are reinforced with a good quality hinge tape such as 3M Blenderm tape. With the control surface fully deflected down apply the tape to the top surface and ensure it is firmly pushed down into the gap.
- Page 11 You will find a packet of 4 clevises with keepers in the box. The clevises improve the control authority of the Goblin. When fitting the clevises slide the clear plastic keeper over the pushrod first then screw on the clevis.
- Page 12 Do the same with the ailerons and replace the ball links with the clevises. Again remove any residue paint or prick with a pin the area where the underbelly pan is to be attached. Apply some medium or slow setting CA to the area.
- Page 13 Carefully position the underbelly pan and hold in place until the glue sets. The assembly of your Goblin Racer is now complete.
-
Page 14: Important Notes
Important Notes : We highly recommend that you follow these important steps before flying your Goblin Racer and you may wish to do these before you start the assembly. The down thrust on the motor needs checking, the gap between the spinner and the top of the fuselage should be between 4-4.5mm as shown in the picture below. -
Page 15: Flying Tips
Setting Up. Now that your Durafly Goblin Racer is built you are ready to set up the model for its maiden flight. When setting up please use a battery as recommended further on in the manual (max battery weight is 170g). -
Page 16: Recommended Batteries
Measure for the Center of Gravity from the leading edge of the wing at the center section. Balance the Goblin nearer the forward 45mm mark for initial flights then it can be moved rearwards as you get used to the flying characteristics. Do not go beyond the 50mm max rearward position. - Page 17 Accessories. Turnigy Nano-Tech Turnigy Graphene Turnigy Nano-Tech Plus ZIPPY Compact 1300mAh 4S 45~90C 1300mAh 4S 45C Lipo 1300mAh 4S 70C Lipo 1000mAh 4S 35C Lipo Lipo Pack Pack w/ XT60 Pack w/XT60 Pack SKU: N1300.4S.45 SKU:9067000127-0 SKU: 9210000263-0 SKU: ZC.1000.4S.35 Turnigy TGY-i6S Digital Turnigy TGY-i6 Mode 2 OrangeRx Tx6i 6ch 2.4GHz...
-
Page 18: Replacement Parts
Replacement Parts. Tailplane Main Wing Fuselage Yellow: 9310000420-0 Yellow: 9310000418-0 Yellow: 9310000419-0 Pink: 9310000427-0 Pink: 9310000425-0 Pink: 9310000426-0 Fin/Rudder Underbelly Pan 7 x 6 Propeller Yellow: 9310000421-0 ????????? ??????? Pink: 9310000428-0 Motor Yellow Decals Spinner 9310000423-0 9310000424-0 9310000422-0 Pink Decals 9310000429-0...


Need help?
Do you have a question about the GOBLIN and is the answer not in the manual?
Questions and answers