Table of Contents
Advertisement
Quick Links
Advertisement
Table of Contents

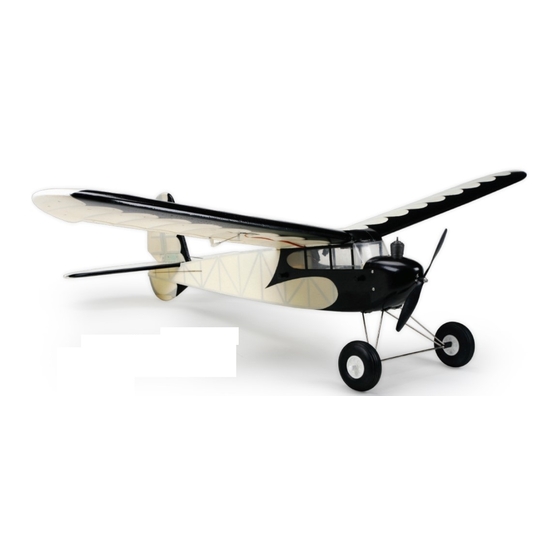
Summary of Contents for Durafly Retro Series Junior models Plug and Fly
- Page 1 Instruction Manual...
-
Page 2: Table Of Contents
CONTENTS Introduction Specification Required to complete model 3 - 4 warnings Assembly 5 - 9 Setting up the model 10 - 12 Model flying precautions Pre-flight checks Flying the Junior General flight tips Spare parts listing Trouble shooting Contact... -
Page 3: Introduction
With the Retro series Junior, you'll be rewarded with an extremely relaxing model to both build and fly, with all the levels of quality and value you've come to love from a Durafly model. Look out for more 'Retro' series models coming soon from Durafly. -
Page 4: Required To Complete Model
Please pay close attention to the warnings and guidance outlined in this manual. Failure to do so could result in damage to the product, property and cause serious injury. Durafly shall not be held responsible for any damage or harm caused by the misuse of its products. -
Page 5: Assembly
JUNIOR Assembly Temporarily remove the undercarriage mounting Locate the pre-assembled undercarriage and plates and screws from the bottom of the place in the moulded slots on the fuselage fuselage using the supplied screw driver, as underside as shown. shown. 'x 8 PA2x8x3mm screws' 'x 4 Mounting plates' Using the mounting plates and screws you've just removed, mount the undercarriage firmly... - Page 6 Assembly Install the vertical stabilizer to the tail as shown, 'x 2 PA2.5x8x4.5mm screws' using the screws detailed. Now connect the pre-installed push rod clevises to the tail control horns as shown. Insert the aluminum dihedral spar into one Insert the remaining wing panel onto the side of a wing panel as shown.
- Page 7 JUNIOR Assembly Note : F “ ” front connector. Mounting Plate (Front) (Rear) Mounting Plate 9. Locate and install the wing mounting plate as shown. Make note of the correct orientation of these. PM4*20MM PM4*30MM Connect the aileron servo's to the pre-installed Y-lead in the fuselage.
- Page 8 Assembly Ensure that no servo wires are caught between the wing and the fuselage. *Optional Wing Bands. The Junior comes with optionl wing mounting rubber bands and pre-installed pegs for a truly authentic look. Please note, this wing mounting system is not functional and should only be used in conjunction with the wing mounting bolts detailed previously.
- Page 9 JUNIOR Assembly With the model turned over and the battery Then install your receiver in the moulded access hatch open, connect all servo wires in pocket under the servo's by pushing it the order stipulated by your receiver rewards as shown. (OrangeRx R615 shown). manufacturer.
-
Page 10: Setting Up The Model
Setting up the model Once you have established a connection between 2. Now that the electronics are powered up your receiver and transmitter, turn on your and the servo's centered, ensure that all transmitter followed by your receiver (by connecting control surfaces are level, if not, adjust by your 1300mah 3s lipo to the speed controller (ESC). - Page 11 JUNIOR Setting up the model DOWN ELEVATOR ELEVATOR LEFT RUDDER RIGHT RUDDER FR GER...
-
Page 12: Control Throws
Setting up the model The suggested CG for the Junior is approximately 55-60 mm from the leading edge of the wing. With a 1300mah 3S lipo installed, the model should balance between these points. The C/G given makes for a truly authentic vintage model flying experience, though you maybe want to adjust this later to better suit your own flying style. -
Page 13: Model Flying Precautions
JUNIOR Model flying precautions Select your flight area carefully. Always choose an open space that is unobstructed but tree's and buildings and away from crowed area's. Avoid flying in area's with roads, electric/telephone poles /wires and water near by or within close proximity to full size air traffic. Do not fly this model in poor weather. -
Page 14: Pre-Flight Checks
Before flying Always range check your model before any flight (especially when flying a new model for the first time). Follow your radio manufacturers guideline for performing this check. Check all screw/bolts and mounting points are firmly secured, including control horns and clevis's. Only fly with a fully charged batteries (both in your radio and model). -
Page 15: Flying The Junior
With the fixed tail skid, ground control/taxing is possible, but you'll be flying quicker if you walk out and collect the model from the landing strip! Happy flying and thank you for choosing Durafly. FR GER... -
Page 16: General Flight Tips
Junior Flying tips It is generally not recommended to fly the Junior in winds of 10mph or more. Though the model will handle these stronger wind conditions, the Junior is best suited to, and most enjoyable in, those lazy calm afternoon's for which its predecessors where originally designed. Too much aileron input can result in a less enjoyable flying experience. -
Page 17: Spare Parts Listing
JUNIOR Spare parts listing Wing Set Fuselage Horizontal stabilizer/ No.:041000156-0 No.:041000155-0 elevator and tail mount No.: 041000158-0 Vertical stabilizer/rudder Undercarriage Set Wing accessories No.:041000157-0 No.:041000159-0 No.:041000160-0 Dummy Motor Motor DST-1100 Cowl No.:041000162-0 No.: 9031000158 No.:041000161-0 - Spare parts are avaible directly from hobbyking.com FR GER... -
Page 18: Trouble Shooting
Trouble shooting Problem Cause Solution 1. Charge the batteries. 1. Battery is not fully charged. 2. Install a full charged battery. 2. Transmitter battery low. 3. Check for connection between 3. Motor wires not connected. Motor does the ESC and motor. 4. -
Page 19: Contact
JUNIOR Contact For more information on this model and the entire range from Durafly please visit us at Durafly.com or see our Facebook page Facebook.com/durafly. For your next Durafly purchase, be sure to visit hobbyking.com" Notes: FR GER...


Need help?
Do you have a question about the Retro Series Junior models Plug and Fly and is the answer not in the manual?
Questions and answers