Table of Contents
Advertisement
Advertisement
Table of Contents

Subscribe to Our Youtube Channel
Related Manuals for Durafly EXCALIBUR


Summary of Contents for Durafly EXCALIBUR
-
Page 1: Instruction Manual
Instruction manual Please read this manual carefully before operating this plane. -
Page 3: Table Of Contents
Introduction Specifications Contents Of Box Required To Complete Model Optional Parts Assembly (PNF) Setting Up Your Model Additional Parts Included 9-10 Model Flying Precautions Pre-flight Checks Flying the Excalibur Excalibur Tips Spare Parts Listing Trouble Shooting Useful Links and Notes... -
Page 4: Introduction
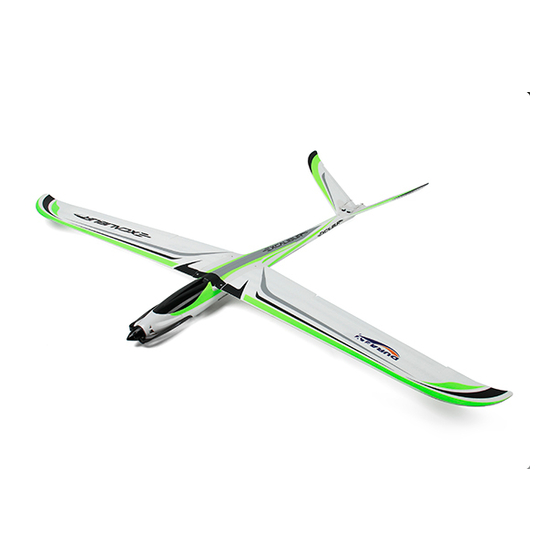
PCB wing plugs, efficient ball links on all surfaces and a simple screw together assembly. This, is all wrapped up in the sleekest looking warmliner to date. The Excalibur's forward swept wing and V-tail design coupled with the mighty pre-install high torque power system, impresses on every single level. -
Page 5: Contents Of Box
The ‘FPV canopy hatch’ is a free to download 3D file of the canopy from the files tab of the listing for those that with to 3D print their own canopy and FPV the Excalibur. -
Page 6: Assembly (Pnf)
SKU: 445000071-0 here. 1. Out of the box your Excalibur comes with reinforced foam hinges. However before assembly can begin, each hinge line must be flexed back and forth 5-6 times to reduce tension and load on the servo. Do this for all control surfaces before continuing. - Page 7 2.3x6mm Center the aileron servo’s and connect the ball link to the ball end on each control horn using the push clip to secure the rod to the servo horn as show (A,B). Screw or unscrew the ball link as required to get the aileron level with the wing trailing edge with the servo center.
- Page 8 Maintaining their aligned position, slide one wing panel onto the spars and into place on the fuselage. Handle with care, as you may need a good firm push to get the wing fully into position. Repeat with the remaining panel (A). With both panels firmly in place, secure with four of the 2.3x6mm screws as shown (B).
- Page 9 Congratulations, basic assembly of your Excalibur is now complete. Please perform a final check on all screws, bolts and components, ensuring all are secure and firmly in place.
-
Page 10: Setting Up Your Model
SETTING UP YOUR MODEL:... -
Page 11: Control Throws
2. The Excalibur handles exceptionally in flight and that’s not down to good design alone, but a good pre-flight set-up too. Before you fly your Excalibur please follow the recommended settings below for optimum handling and performance. Control throws: 6-12mm... -
Page 12: Additional Parts Included
If you are fortunate enough to have access to a good moderate to strong wind slope site, you will definitely want to slope the Excalibur. In fact after you slope the Excalibur, you may never want to fly it with power again! To help streamline the Excalibur and turn it into a sloping dream machine we’ve included a slope nose cone. - Page 13 Excalibur...
-
Page 14: Model Flying Precautions
mODEL fLYING PRECAUTIONS: ● Select your flight area carefully. Always choose an open space that is unobstructed from trees and buildings and away from crowed areas. Avoid flying in area’s with roads, electric/telephone poles/wires and water near by or within close proximity to full size air traffic. ●... -
Page 15: Flying The Excalibur
When it does come to time to land, the Excalibur does as all good gliders should and that's glide. So to bleed speed and reduce height when landing, fly an 'S' type approach or mix flapperons into your model. - Page 16 * Set ‘Break On’ on the ESC if it is not done so already out of the box. The prop will not fold if the brake is not set to ‘On’. To set the brake ‘on’ use the Durafly or Aerostar programming card (see...
-
Page 17: Spare Parts Listing
Part No: 9499000130-0 9499000132-0 9499000133-0 9499000134-0 Stock Prop Motor Prop Adaopter Control Rods/Screws Part No: Part No: Part No: Part No: 9499000135-0 9499000136-0 9499000137-0 9499000138-0 Decals Aerostar ESC card Durafly ESC card Part No: Part No: Part No: 9499000139-0 9164000041-0 9164000024-0... -
Page 18: Trouble Shooting
TROuBLE SHOOTING: Problem Cause Solution 1. Charge the batteries. 1. Battery is not fully charged. 2. Install a full charged battery. 2. Transmitter battery low. 3. Check for connection 3. Motors not connected. between the ESC and motor. 4. Replace motor. Motor does 4. -
Page 19: Useful Links And Notes
USEFUL LINKS: http://www.hobbyking.com http://www.facebook.com/durafly See the product video of Excalibur in action: https://youtu.be/PIn6xsyRl8w For a closer look at the Excalibur out of the box, watch the daily below: https://youtu.be/XWYDmCxQLgA http://www.durafly.com durafly@hobbyking.com... - Page 20 facebook.com/durafly...
Need help?
Do you have a question about the EXCALIBUR and is the answer not in the manual?
Questions and answers