Table of Contents
Advertisement
Quick Links
Advertisement
Table of Contents

Related Manuals for Duplo DF-999


Summary of Contents for Duplo DF-999
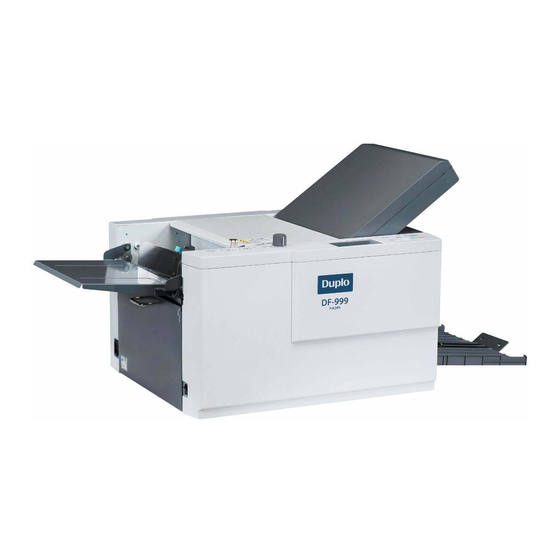
- Page 1 INSTRUCTION MANUAL FOLDER DUPLO FOLDER DF-999/DF-999A DF-990/DF-990A Original instructions Be sure to read this manual prior to use. Please leave this manual at the site of use for easy reference. Copyright © 2019 Duplo Corporation All Rights Reserved...
- Page 2 The product name and company name used in this manual are trademarks or registered trademarks of the respective companies. Copyrights Reproduction or reprinting of this document in part or in whole without permission is prohibited. Copyright © 2019 Duplo Corporation All Rights Reserved...
-
Page 3: Safety Precautions
100 W Rated current: 1.0 to 0.5 A Operating environment Operate this unit in the following environment. • where the temperature range is between 5 and 35°C/41 and 95°F (–10 to 50°C/14 to 122°F in storage) • where the humidity range is between 20 and 80% RH (10 to 90% RH in storage, however no condensation) • which is not subject to direct sunlight • where the outside light does not exceed 1,500 lx • which is subject to little or no vibration • where the unit is kept away from air-borne salt • where the unit is kept away from harmful chemicals • where the unit is not exposed to water Copyright © 2019 Duplo Corporation All Rights Reserved... -
Page 4: Warning/Caution Labels
When the labels become dirty or are lost, be sure to contact your dealer for a new one. For EU For NA When DF HAND FEED KIT (option) is attached: For EU For NA Copyright © 2019 Duplo Corporation All Rights Reserved... -
Page 5: Table Of Contents
6. Stacker Roller ........... 58 9. Options ............. 31 6-1. Changing stacker roller height ......58 DF HAND FEED KIT ..............31 6-2. Adjusting stacker roller position ......59 10. Workflow ..........32 7. Stacking the Folded Paper ..... 60 8. Function Setting ........61 8-1. Thick paper mode .............61 Copyright © 2019 Duplo Corporation All Rights Reserved... - Page 6 Adjustment folding misalignment in up and down direction ............79 5-2. Adjustment folding misalignment in right and left direction ............80 5-3. Abnormal folding ............80 Chapter 5 Cleaning the Machine Cleaning paper feed rings and folding rollers ................81 Cleaning sensor ............82 Cleaning LCD touch panel ........83 Cleaning stacker belt ..........83 Cleaning paper separator ........83 Copyright © 2019 Duplo Corporation All Rights Reserved...
-
Page 7: Before Operation
• Use the cross fold lever to fold single folded paper further into standard folding. • Use the DF HAND FEED KIT (option) to bind and fold at maximum three sheets of paper simultaneously. Setting Up the Machine 2-1. Before installation • Do not fall down the folding plates. Make sure the folding plates are not subject to shock. Otherwise, the folding plates may damage, resulting in poor folding accuracy. • The machine may make loud sounds while operating according to the processing speed and paper used due to its paper-folding mechanism. • Be sure to move this machine with the bottom surface of this machine held by two persons. Copyright © 2019 Duplo Corporation All Rights Reserved... -
Page 8: Accessories
Used when moving the auxiliary paper feed ring. Do not use the T-handle hexagonal wrench for a purpose other than handling the auxiliary paper feed ring as instructed in this manual. Scale label Used to measure non-standard size paper. Attach the scale. Instruction manual This manual Safety Guide A Contains information for correct and safe use of this machine. [10] DECLARATION OF For EU CONFORMITY [11] WEEE Statement For EU [12] Statement of For NA Electromagnetic Compatibility (EMC) [13] Power cord For EU [14] Power cord For NA Copyright © 2019 Duplo Corporation All Rights Reserved... -
Page 9: Installation Procedures
Do not hold the belt section of the folding plate 2. Doing so will result in malfunction of the machine. Hold the folding plate 2 as shown in the figure, and insert it into the machine. Hold the areas that are indicated with the labels on the folding plate 2. Insert the folding plate 2 with its rollers [A] moving along the rails [B] of the machine. Copyright © 2019 Duplo Corporation All Rights Reserved... - Page 10 Attach the folding plate 1 holding with both hands. Check that the gear on the reverse side of the folding plate 1 rotates in the front-back direction, if it is not easy to attach the folding plate 1. Attach the folding plate 1 to this machine after rotating the gear by 360 degree in a rotating direction, when it does not rotate either in the front direction or in the back direction. Copyright © 2019 Duplo Corporation All Rights Reserved...
- Page 11 Close the top cover. Open the paper receiving tray to the right side seen on the operator’s side. Attach the auxiliary paper ejection guide to the stacker roller. Copyright © 2019 Duplo Corporation All Rights Reserved...
-
Page 12: Connecting Power Cord
Names and Functions of Components 3-1. External parts [10] Name Function Control panel Use this panel to enter information to operate the machine. Power switch Chapter 2 “1. Turning On/Off the Power” (p.33) Copyright © 2019 Duplo Corporation All Rights Reserved... -
Page 13: Internal Parts (Paper Ejecting Section)
Paper receiving tray For stacking ejected paper. Stacker belt For ejecting folded paper. Stacker roller It holds down the ejected paper and supports conveyance of paper. Auxiliary paper ejection guide Used to hold the ejected paper. Paper support guide A4/LT size fine quality paper of 64 g/m /43.52 lbs, 81.4 g/m /55.35 lbs will be well in alignment by using this paper support guide at the time of paper ejection for letter fold or accordion fold. Copyright © 2019 Duplo Corporation All Rights Reserved... -
Page 14: Internal Parts (Top Cover Section)
These rollers are used to fold paper. This machine is equipped with four rollers to make six types of folding. [11] Jam correction knob For rotating the folding rollers when paper has jammed inside the machine or when cleaning the machine. [12] Separating pressure adjustment For adjustment the paper separating pressure. dial Copyright © 2019 Duplo Corporation All Rights Reserved... -
Page 15: Df Hand Feed Kit (Option)
Auxiliary feed guide Subordinately guides sheets so that the paper will be fed properly. (magnet type). Manual feed guide Guides sheets so that the paper will be fed properly. Names of Control Panel Name Function LCD touch panel Menu and error messages are displayed. Touch to operate. Press and hold to forcibly eject paper from inside the folding plate. (folding plate paper ejection) key Copyright © 2019 Duplo Corporation All Rights Reserved... -
Page 16: Lcd Touch Panel
The following terms are used when explaining screen operation in this document. Terms Description Touch Lightly touching an item such as a key once with your finger. Press and hold Pressing an item such as a key for more than 1 second. The press-and-hold key is surrounded by a double frame ( Copyright © 2019 Duplo Corporation All Rights Reserved... -
Page 17: Screen Configuration
The name of the displayed page. The name is displayed on all the screens except the screen when an error occurs and the processing screen. 6-1-1. Touch panel display [Ready] screen [Ready] screen (custom fold) [2] [3] [10] [10] Copyright © 2019 Duplo Corporation All Rights Reserved... - Page 18 Folding dimension B position Displays the position adjustment value of folding plate B. adjustment When in custom folding or stopper fixed mode, folding dimension B is displayed. Setting range: -5.0 to +5.0 (mm)/-0.197 to +0.197 (inch) Counter Displays current counter. Setting range: 0 to 99999 (sheet) Count mode Displays counter mode (addition or subtraction). Count up Count down Folding mode Displays the folding mode currently set. When in custom folding or stopper fixed mode, displays a brief shape of the folding form. Copyright © 2019 Duplo Corporation All Rights Reserved...
- Page 19 The refold mode is set. Hand feed is set (*3) The stopper fixation mode is set. Double-feed detection is set. State where the test folding is performed. Double-feed detection is set. (ultrasonic sensor) (*1) (*3) Double-feed detection is set. (optical sensor) Double-feed detection is not performed because the paper length is 148.0 mm/5.83 inches or less. [11] Processing display Displays current processing content. Testing Processing Idling Ejecting Paper (*1) DF-999/DF-999A (*2) DF-990/DF-990A (*3) Option Copyright © 2019 Duplo Corporation All Rights Reserved...
- Page 20 Adjustable range: 1- to 6+ The processing speed is sped up each time the key is touched. (Processing speed up) When processing speed is set to [6+], the key is grayed out and cannot be operated. Adjustable range: 1- to 6+ When the key is touched, the [Folding Mode] screen is displayed. (Folding mode selection) When the machine is set in custom folding mode, you can switch the folding mode to standard folding of non-standard paper by using this key. (No. of Sheet setting) key The [No. of Sheet] screen is displayed when the key is touched. Press and hold to clear the counter. (clear) key When a numerical value is entered, the value is set to the initial value. Copyright © 2019 Duplo Corporation All Rights Reserved...
- Page 21 (Custom folding) However, it is not displayed when custom folding, stopper fixed mode, manual feed mode (*) is set. Settings can be saved such as position adjustment of standard fold, (Save) key position of stacker roller, new non-standard paper setting and folding setting of custom fold. However, when adjustment values is not changed, the key is grayed out and cannot be operated. However, it is not displayed when stopper fixed mode (*) is set. [10] The [Fold Position] screen is displayed. (Adjustment) key Locked custom fold, stopper fixed mode and can also be adjusted. When automatic paper size detection (DF-999/DF-999A) is turned on, paper size is not detected, and the key is grayed out and cannot be operated. [11] The [Paper Length] input screen is displayed when the machine is in one (Paper size) key of these modes: Standard folding of standard paper (DF-999/DF-999A), standard folding of non-standard paper, custom folding or manual feed (*). However, it is not displayed in custom folding mode. When in standard folding of standard paper (DF-990/DF-990A), the [Standard Size] screen is displayed. (*) Option Copyright © 2019 Duplo Corporation All Rights Reserved...
-
Page 22: Basic Settings] Screen
STD Fold for Non-STD Size Sets the standard folding mode for non-standard paper. The [Paper Length] input screen is displayed. Custom Fold Sets the custom folding mode. The [Custom Fold] screen is displayed. Returns to the previous screen. (Cancel) key The [Function Settings] screen is displayed. (Function settings) key (*1) DF-999/DF-999A (*2) DF-990/DF-990A 6-3. [Standard Size] select screen DF-990/DF-990A displays this screen, but DF-999/DF-999A does not display this screen since it has a paper size detection function. However, when automatic paper size detection is turned off, it will be displayed. Copyright © 2019 Duplo Corporation All Rights Reserved... -
Page 23: Folding Mode] Select Screen
Set the folding mode as letter fold. (letter fold) key (*) Set the folding mode as accordion-fold. (Accordion fold) key (*) Set the folding mode as gate fold. (Gate fold) key (*) Returns to the previous screen without saving the input content. (Cancel) key (*) Depending on the paper length that you set, the keys that cannot be used are grayed out and cannot be operated. Copyright © 2019 Duplo Corporation All Rights Reserved... -
Page 24: Paper Length] Input Screen
Returns to the previous screen without saving the input content. (Cancel) key Press and hold to return to the [Ready] screen. 6-6. [No. of Sheet] input screen Name Function Sheets to be folded setting Displays the currently set number of sheets to be folded. value Copyright © 2019 Duplo Corporation All Rights Reserved... -
Page 25: Fold Position] Screen
[-] Lowers the position of folding A. When pressed and held, the value continues to decrease automatically within the setting range. Folding B position adjustment Displays the Standard folding: Folding B position adjustment value. value/Folding dimension B Displays the Custom folding: Folding dimension B. position (*) When you touch the key, the numeric keypad is displayed, which enables you to input values. Copyright © 2019 Duplo Corporation All Rights Reserved... -
Page 26: Stacker Roller] Screen
Function Stacker roller position Displays position of stacker roller. Stacker roller adjustment key [+] Raises the position of stacker roller. When pressed and held, the value continues to decrease automatically. [-] Lowers the position of the stacker roller. When pressed and held, the value continues to increase automatically. Saves the input value and returns to the previous screen. (Return) key Copyright © 2019 Duplo Corporation All Rights Reserved... -
Page 27: Custom Fold] Screen
Reads the selected saved data and returns to the top screen. (Open) key When non-saved data is selected, the key is grayed out and cannot be operated. Displays the [Paper Length] input screen for the selected saved data. (Edit) key Creates new data. (Create new) key (Lock/Unlock) key Locks or unlocks the selected saved data. Locked data cannot be deleted. When non-saved data is selected, the key is grayed out and cannot be operated. Moves to the previous page. (Page backward) key [10] Moves to the next page. (Page forward) key Copyright © 2019 Duplo Corporation All Rights Reserved... - Page 28 A and folding B that you have input are temporarily saved, and the values are restored when you save the paper length. When you touch the key on the [Paper Length] input screen, however, the temporarily stored values are discarded. Press and hold to return to the [Ready] screen. Copyright © 2019 Duplo Corporation All Rights Reserved...
- Page 29 Returns to the custom fold edit screen. (Cancel) key Press and hold to return to the [Ready] screen. “6-9. [Custom Fold] screen” (p.23) (Page backward) key (Page forward) key Press and hold to delete the selected saved data. (Delete) key While non-saved data or locked data is selected, the key is grayed out and cannot be operated. Displays the saved data selection screen. (Switch to the saved data selection screen) key Copyright © 2019 Duplo Corporation All Rights Reserved...
-
Page 30: 6-10. Folding A/Folding B Input Screen
Sets the input value to "0". (Clear) key Numeric keypad Inputs the value. Setting range Folding A: 42.0 to *** mm/1.65 to *** inches ***: 325.0 mm/12.80 inches or “Paper length + 5.0 mm/+0.197 inch”, whichever is shorter. Folding B: 0/47.0 to *** mm/1.85 to *** inches ***: 217.0 mm/8.54 inches or “Paper length + 5.0 mm/+0.197 inch”, whichever is shorter. Returns to the previous screen without saving the input content. (Cancel) key Press and hold to return to the [Ready] screen. Copyright © 2019 Duplo Corporation All Rights Reserved... -
Page 31: 6-11. [Function Settings] Screen
Sets whether to use manual feed mode. (Manual Feed Mode) Displayed only when the DF HAND FEED KIT is registered as an optional item. Chapter 4 “3. Manual Feed Mode Setting” (p.77) Display screen switching key Touching this key switches the screen to the 2nd page. When touched, the display returns to the [Basic Settings] screen. (Cancel) key Press and hold to return to the [Ready] screen. Copyright © 2019 Duplo Corporation All Rights Reserved... - Page 32 Chapter 3 “8-15. Power saving” (p.73) Alarm (*) Sets whether or not to use an alarm to prevent forgetting to switch off the power. Chapter 3 “8-16. Alarm (DF-999/DF-999A)” (p.74) Display switching key Touching this key switches the screen to the 1st page. [10] When touched, the display returns to the [Basic Settings] screen. (Cancel) key Press and hold to return to the [Ready] screen. (*) DF-999/DF-999A Copyright © 2019 Duplo Corporation All Rights Reserved...
-
Page 33: 6-12. Classification Of Buzzer Sounds
“pii”: At the start of folding operation or end of normal folding operation. Saves changes in various settings. The time when you set the alarm has come. “piipii”: At the occurrence of an error such as paper jam “piipiipiipii”: At the occurrence of an error to be asked for Duplo dealer’s assistance Paper Types and Sizes Paper type Fine quality paper : 46.5 to 157 g/m... -
Page 34: Handling Paper
[b] Do not stack paper on the paper feed tray with the lead and trail edges unaligned or some sheets protruding out. • Processing with sheets unaligned on the right or left side may cause such trouble as folding misalignment and jamming. • Processing with sheets unaligned on the lead and trail edges may lead to unstable feed causing such trouble as miss-feed and double-feed. Copyright © 2019 Duplo Corporation All Rights Reserved... -
Page 35: Options
Chapter 1 Before Operation Options DF HAND FEED KIT Name Function Hand feed tray Insertion inlet for feeding paper manually to fold. Auxiliary feed Subordinately guides sheets so guide that the may be fed properly. Copyright © 2019 Duplo Corporation All Rights Reserved... -
Page 36: 10. Workflow
Basic settings (p.36) Paper size setting (DF-990/DF-990A) Folding mode selection Adjustment of feed pressure/ separating pressure Processing speed setting Positioning of paper receiving tray Test folding Counter setting Process start Process end Turning off the power (p.33) Disconnect the power cord Copyright © 2019 Duplo Corporation All Rights Reserved... -
Page 37: Basic Operation
Set the power switch to the “ I ” side. Do not touch the power switch with wet hands. Otherwise electric hazards may occur. 1-2. Turning off power Set the power switch to the “ ” side. Copyright © 2019 Duplo Corporation All Rights Reserved... -
Page 38: Stacking The Paper
It could cause injury. Steps 1 and 6 are not necessary with the DF-999/DF-999A. Move on to steps 2 to 5. Raise the paper set lever. The paper feed stand will come down to the paper stacking position when the paper set lever is raised. Loosen the guide fixing screw. Copyright © 2019 Duplo Corporation All Rights Reserved... - Page 39 • If the guides are positioned incorrectly, the automatic paper size detection function will not work, and the test key and start key,etc. will not operate. (DF-999/DF-999A) Tighten the guide fixing screws. Make sure to tighten the guide fixing screws on both right and left sides.
-
Page 40: Standard Folding Of Standard Paper
Do not put ngers inside during operation. Keep away long hair, ties, jewelry and loose clothing. It could cause injury. Automatic detection of standard paper size (DF-999/DF-999A) When paper for all paper sizes is stacked in the machine direction shown in the figure, paper is detected as standard paper. When paper of standard paper size is... - Page 41 Return to the Ready screen. Set the feeding pressure adjustment lever to [0]. • As the value of the scale increases, the paper feed pressure increases. As the value decreases, the paper feed pressure decreases. • When paper mis-feed occurs, increase the paper feed pressure to [1] instead of [0]. • When double-feed occurs, lower the paper feed pressure from [0] to [-1]. Copyright © 2019 Duplo Corporation All Rights Reserved...
- Page 42 • Match the concave sections [b] (two points) on the reverse side of the paper support guide [A] with the convex section [c] on the paper receiving tray to attach the paper support guide. Copyright © 2019 Duplo Corporation All Rights Reserved...
- Page 43 Check the last sheet of test folded paper for folding misalignment. When folding misalignment occurs, refer to Chapter 3 “1. C orrecting Folding Misalignment” (p.42). <along vertical length of paper> <along sides of paper> <Deformed folding> Touch the key. Displays the number of sheets input screen. Copyright © 2019 Duplo Corporation All Rights Reserved...
- Page 44 Press the key again to restart operation. • If the paper in the paper feed tray runs out, the machine is put on standby. After stacking paper, press the key to restart the operation. • When double-feed or paper size error occurs during folding operation, the fed paper is processed and ejected, but the number of processed sheets will not be counted. • When paper jams at the ejecting section, the paper detected as paper jam will be counted, but the following paper will not be counted. Copyright © 2019 Duplo Corporation All Rights Reserved...
-
Page 45: Storage Of Machine
Chapter 3 “6-1. Changing stacker roller height” (p.58) Hang the hook section of the paper receiving tray. Hang the auxiliary paper ejection guide on the paper receiving tray. Copyright © 2019 Duplo Corporation All Rights Reserved... -
Page 46: Advanced Operation
Remove the paper stacked on the paper feed tray. Adjustments cannot be made effectively by adjusting folding misalignment with skew correction knob when the leading edge of paper is in contact with the guide plate. Copyright © 2019 Duplo Corporation All Rights Reserved... -
Page 47: Adjustment Folding Misalignment In Up And Down Direction
Round hole 1-2. Adjustment folding misalignment in up and down direction When the folded paper is misaligned along the vertical length, adjust the positions of the folding stopper of folding plates 1 and 2 to Ejection correct the misalignment. direction Copyright © 2019 Duplo Corporation All Rights Reserved... - Page 48 A is long Irregular B is long accordion accordion A is short B is short fold-out fold-out Letter fold A is long Letter fold B is long A is short B is short Copyright © 2019 Duplo Corporation All Rights Reserved...
- Page 49 —> Press and hold the key to save the adjustment value. • For standard folding or custom folding of non-standard paper, touch the key. —> Touch the key. —> Select and save the saved data number of custom folding. “3. Custom Folding” (p.47) Copyright © 2019 Duplo Corporation All Rights Reserved...
-
Page 50: Deformed Folding
• The paper sizes which can be used may vary with the paper type, thickness, and printing state. Example: When performing letter fold on 300.0 mm length paper Touch the key on the [Ready] screen —> Touch [Standard Fold for Non-Standard Size]. Using the numeric keypad, enter the paper length [300] —> Touch the key. Copyright © 2019 Duplo Corporation All Rights Reserved... -
Page 51: Custom Folding
3-1. Operation As an example of accordion-fold, operation procedures for custom folding are described with the following setting. Paper size: A4 (210 x 297.0 mm/8.27 x 11.69 inches) Fold1: 85.0 mm/3.35 inches (length A) Fold2: 95.0 mm/3.74 inches (length B) Prepare a folding sample manually using the paper to be folded. Measure the length of the folding Paper feed position of the sample. direction Copyright © 2019 Duplo Corporation All Rights Reserved... - Page 52 To continue working without saving, touch key. When you touch the key, [Save] screen is displayed. Proceed to step 10. When you touch the key, the display returns to the [Ready] screen with the input value reflected. • The input value is reflected but not saved. • When the power is turned off without performing save operation, the input number is cleared. You can save the data before turning off the power. “3-6. Directly saving folding value under processing” (p.50) • When the stacker roller position is changed while in custom fold, the changed value is saved automatically. Touch the key. The input value is saved, and the display returns to the [Ready] screen with the input value reflected. Copyright © 2019 Duplo Corporation All Rights Reserved...
-
Page 53: Editing Saved Data
3-3. Using saved data Example: When using saved data number [06] Touch the key on the [Ready] screen —> Touch [Custom Fold]. The [Custom Fold] saved data selection screen is displayed. Touch the key —> Touch [06] of custom fold data —> Touch the key. The saved data number [06] is saved, and the display returns to the [Ready] screen. Copyright © 2019 Duplo Corporation All Rights Reserved... -
Page 54: Locking Saved Data
To save, perform test folding or folding processing to check folding misalignment, carry out the fine adjustments and then save. Touch the key on the [Ready] screen. The [Save] screen is displayed. Select the number of the data you want to save —> Touch the key. The input value is saved and the display returns to the [Ready] screen. Copyright © 2019 Duplo Corporation All Rights Reserved... -
Page 55: Cross Fold
Keep away long hair, ties, jewelry and loose clothing. It could cause injury. 4-1. Cross fold of standard paper The following describes the cross fold of standard paper, taking cross single folding shown in the figure as an example. Copyright © 2019 Duplo Corporation All Rights Reserved... - Page 56 25 mm/ 0.98 inch half (25 mm/0.98 inch) of the height of the paper feed guide on the folding side. Attach the paper feed guide lightly to the side of the paper and tighten the fixing screws. Lower the paper set lever. (DF-990/DF-990A) Copyright © 2019 Duplo Corporation All Rights Reserved...
- Page 57 Fire, electri cation, injury, malfunction, or breakdown may be caused by disassembling the parts which are not speci ed in this manual. Move the auxiliary paper feed ring. Move the auxiliary paper feed ring so that it will be on the folding line of the paper. Tighten the screw loosened. Store the T-handle hexagonal wrench in the original position after adjustment the auxiliary paper feed ring. Copyright © 2019 Duplo Corporation All Rights Reserved...
- Page 58 Close the top cover. 4-1-3. Operation procedures Turn on the power. Touch the key on the [Ready] screen —> Touch the key. Return to the [Ready] screen. Press the key to execute test folding. Check the finishing. Copyright © 2019 Duplo Corporation All Rights Reserved...
-
Page 59: Cross Fold Of Non-Standard Paper
Using the numeric keypad, enter the paper length —> Touch the key. Touch the key. Return to the [Ready] screen. Perform step 2 of “4-1-1. Stacking paper” to “4-1-3. Operation procedures” of “4-1. Cross fold of standard paper” (p.51). Copyright © 2019 Duplo Corporation All Rights Reserved... -
Page 60: Cross Fold Paper At Desired Folding Position
25 mm 0.98 inch The amount of stacked sheets should be about half the weight of the paper feed guide (approx. 25 mm/0.98 inch). Copyright © 2019 Duplo Corporation All Rights Reserved... -
Page 61: Rough Paper, Recycled Paper
If set to high, wrinkles or deformed folding will result. • Set the paper feed pressure as low as possible. If set to high, double-feed will result. • Set the paper separating pressure as low as possible. If set to high, the center of the lead edge of the paper may be scratched or turned over. Copyright © 2019 Duplo Corporation All Rights Reserved... -
Page 62: B7, A7, A6 Size Paper (For Eu)
After completing folding operations, be sure to return the stacker roller to the standard position. Leaving it in the raised state will result in poor alignment of ejected paper. Copyright © 2019 Duplo Corporation All Rights Reserved... -
Page 63: Adjusting Stacker Roller Position
Depending on the type and size of paper, the adjustable range in the gate fold mode is limited. Be sure to decrease the setting values one scale at a time in this mode and check the results. Touch the key on the [Ready] screen. The [Fold Position] screen is displayed. Copyright © 2019 Duplo Corporation All Rights Reserved... -
Page 64: Stacking The Folded Paper
Straight stacking Diagonally stacking If you use the paper support guide when diagonally stacking paper satisfying the following conditions, the paper will be ejected and stacked neatly. • Paper size: A4/LT • Thickness of paper: Fine quality paper 64 g/m /43.52 lbs, 81.4 g/m /55.35 lbs • Folding mode: Letter fold, Accordion fold Copyright © 2019 Duplo Corporation All Rights Reserved... -
Page 65: Function Setting
Take out ejected paper during interruption, and another operation after paper folding such as distribution or enclosure can be prepared. Touch the key on the [Ready] screen —> Touch the key —> Touch the [Interval]. The [Interval] screen is displayed. Copyright © 2019 Duplo Corporation All Rights Reserved... - Page 66 [Function Settings] screen. [Interval_No. of Sheets] screen/[Interval_No. of Seconds] screen Saves the input value and returns to the [Interval] screen. [Interval] screen – (Cancel) key Returns to the [Function Settings] screen without saving the input content. [Interval_No. of Sheets] screen/[Interval_No. of Seconds] screen Returns to the [Interval] screen without saving the input value. Press and hold to return to the [Ready] screen. Interval sheet number Displays the input value. – input value Interval time input value [10] Numeric keypad Inputs the value. – Copyright © 2019 Duplo Corporation All Rights Reserved...
-
Page 67: Double-Feed Detection
Saves the double feed detection setting and returns to the – (Return) key [Function Settings] screen. Returns to the [Function Settings] screen without saving the input – (Cancel) key content. Press and hold to return to the [Ready] screen. (*) Displayed only when the DF ULTRASONIC SENSOR KIT is registered as an optional item. (DF-999/DF-999A) After setting, an icon is displayed on the touch panel display section. Chapter 1 “6-1-2. Touch panel operation section” (p.16) Copyright © 2019 Duplo Corporation All Rights Reserved... - Page 68 Double-feed will not be detected correctly if paper is processed with the same settings as when double-feed is detected on test folding. When mis-detection occurs Double-feed or miss-feed may sometimes be detected although the paper is fed normally. • If false double-feed detection occurs when paper thickness is set to [Thin], repeat test folding after setting paper thickness to [Thick]. If double-feed is detected mistakenly after selecting [Thick], double-feed detection function cannot be used. Set the double-feed detection to [OFF]. • If false miss-feeding detection occurs when paper thickness is set to [Thick], repeat test folding after setting paper thickness to [Thin]. If mis-feed is detected mistakenly after selecting [Thin], double-feed detection function cannot be used. Set the double-feed detection to [OFF]. Copyright © 2019 Duplo Corporation All Rights Reserved...
-
Page 69: Detection
Set the setting content of the following functions when the power is turned on. • [Oper Mode] • [D-Feed Detect] • [Interval] • Processing speed • Paper size (DF-990/DF-990A only) Touch the key on the top screen —> Touch the key —> Touch the [When Turned On]. The [When Turned On] screen is displayed. Copyright © 2019 Duplo Corporation All Rights Reserved... - Page 70 After setting, an icon ( ) is displayed on the touch panel display section. D-Feed “8-4. Double-feed detection” (p.63) Interval Sets whether to enable the interval. Processing speed up/down Speed 5 Chapter 1 “6-1-2. Touch panel operation section” (p.16) Copyright © 2019 Duplo Corporation All Rights Reserved...
-
Page 71: Initial Screen
Chapter 1 “6-4. [Folding Mode] select screen” (p.19) Basic Settings Sets the displayed screen when power is turned on to the [Basic – Settings] screen. Chapter 1 “6-2. [Basic Settings] screen” (p.18) STD Fold for Non-STD Size Sets the displayed screen when power is turned on to the [Paper – Length] input screen. Chapter 1 “6-5. [Paper Length] input screen” (p.20) Copyright © 2019 Duplo Corporation All Rights Reserved... -
Page 72: Custom Screen
Function Default value Standard Fold (*1) DF-999/DF-999A: The [Folding Mode] screen of [Standard Fold] is – displayed. However, when automatic paper size detection is turned off, the [Standard Size] screen is displayed. DF-990/DF-990A: The [Folding Mode] screen of [Standard Size] is displayed. Function Settings (*1) The [Function Settings] screen is displayed. – Language (*2) The [Language] setting screen is displayed. – Chose your language. STD Fold for Non-STD Size The [Paper Length] input screen of [Standard Fold for Non- – (*1) Standard Size] is displayed. Custom Fold (*1) The saved data selection screen of [Custom Fold] is displayed. – Saves the setting of the custom screen and returns to the [Function – (Return) key Settings] screen. Copyright © 2019 Duplo Corporation All Rights Reserved... -
Page 73: Idling
—> Touch the [Idling]. The [Idling] screen is displayed. Name Function Default value Idling Set on/off of idling. Saves the idling setting and returns to the [Function Settings] – (Return) key screen. Returns to the [Function Settings] screen without saving the input – (Cancel) key content. Press and hold to return to the [Ready] screen. Idling operation will stop when the control panel is not operated more than 30 seconds in the idling state. Press the key to stop the machine during idling. Copyright © 2019 Duplo Corporation All Rights Reserved... -
Page 74: 8-10. Tone
– (Return) key screen. Returns to the [Function Settings] screen without saving the input – (Cancel) key content. Press and hold to return to the [Ready] screen. 8-11. mm/inch According to the usage environment, units of numerical input saved for the paper size, folding dimensions (folding stopper adjustment value), and custom folding can be changed. Touch the key on the [Ready] screen —> Touch the key —> Touch the key —> Touch the [mm/inch]. The [mm/inch] screen is displayed. Copyright © 2019 Duplo Corporation All Rights Reserved... -
Page 75: 8-12. Lcd Bright
[-]: Makes the screen dimmer. When the set value is at the lower limit, the key is grayed out and cannot be operated. Setting range: 1 to 5 Screen brightness display Displays the values currently set. – Saves the screen brightness setting and returns to the [Function – (Return) key Settings] screen. Returns to the [Function Settings] screen without saving the input – (Cancel) key content. Press and hold to return to the [Ready] screen. Copyright © 2019 Duplo Corporation All Rights Reserved... -
Page 76: 8-13. Number Of Test Sheets
– (Return) key Settings] screen. (Cancel) key Returns to the [Function Settings] screen without saving the input – content. Press and hold to return to the [Ready] screen. 8-14. Language Changes the language displayed on the touch panel. However, the language setting returns to the initial setting when the power is turned off. Touch the key on the [Ready] screen —> Touch the key —> Touch the key —> Touch the [Language]. The [Language] screen is displayed. Copyright © 2019 Duplo Corporation All Rights Reserved... -
Page 77: 8-15. Power Saving
Displays the time currently set. – Input range display. Displayed when trying to input a value that exceeds the input – range. Saves the power saving setting and returns to the [Function – (Return) key Settings] screen. Sets the input value to "0". When the power saving setting is turned – (Clear) key off, the key is grayed out and cannot be operated. Returns to the [Function Settings] screen without saving the input – (Cancel) key content. Press and hold to return to the [Ready] screen. Copyright © 2019 Duplo Corporation All Rights Reserved... -
Page 78: Alarm (Df-999/Df-999A)
Displayed when trying to input a value that exceeds the input – range. Saves the alarm setting and returns to the [Function Settings] – (Return) key screen. Sets the input value to "0". When the alarm setting is turned off, the – (Clear) key key is grayed out and cannot be operated. Returns to the [Function Settings] screen without saving the input – (Cancel) key content. Press and hold to return to the [Ready] screen. Copyright © 2019 Duplo Corporation All Rights Reserved... -
Page 79: Using The Df Hand Feed Kit
This is not a malfunction of the machine. • When folding single-folded paper by manual feeding, folding may not be completed properly depending on the paper thickness and stiffness at the folded section. Check in advance using the paper to be used. Copyright © 2019 Duplo Corporation All Rights Reserved... -
Page 80: Staples
1.5 mm/0.05 inch or less in the 5.0 mm/ 1.5 mm/0.05 inch stapled state. 0.20 inch or less 2-3. Stitching with stapler Stitch the paper with stapler in parallel with the paper. Front surface Front surface of paper of paper Copyright © 2019 Duplo Corporation All Rights Reserved... -
Page 81: Manual Feed Mode Setting
Set on/off of the manual feed mode. Timing Sets the time from insertion of paper into the manual feed inlet to Normal starting of the folding operation. Size Sets the paper size to be inserted manually. Saves the manual feed mode setting and returns to the [Function – (Return) key Settings] screen. Returns to the [Function Settings] screen without saving the input – (Cancel) key content. Press and hold to return to the [Ready] screen. Copyright © 2019 Duplo Corporation All Rights Reserved... -
Page 82: Operation
Set the auxiliary guide to the paper side. Set the auxiliary guide leaving some clearance between the guide and paper. Too much pressure may cause a paper feed error such as mis-feed, etc. Copyright © 2019 Duplo Corporation All Rights Reserved... -
Page 83: Correcting Folding Misalignment
Keep away long hair, ties, jewelry and loose clothing. It could cause injury. 5-1. Adjustment folding misalignment in up and down direction Chapter 3 “1-2. Adjustment folding misalignment in up and down direction” (p.43) Copyright © 2019 Duplo Corporation All Rights Reserved... -
Page 84: Adjustment Folding Misalignment In Right And Left Direction
• Use paper with grains of long grain. (if the paper with grains of short grain is used, the number of sheets to be used is up to 2 sheets.) • If the paper curls, flatten the paper to use. • Set the auxiliary guide leaving a small clearance between the guide and paper. • Use the stapler and staples as specified. Do not use any other staplers and staples which are not specified. Copyright © 2019 Duplo Corporation All Rights Reserved... -
Page 85: Cleaning The Machine
Clean with a cloth moistened with alcohol rotating the paper feed ring by hand. Folding roller Remove the folding plate 1. Clean with a cloth moistened with alcohol rotating the jam correction knob. Copyright © 2019 Duplo Corporation All Rights Reserved... -
Page 86: Cleaning Sensor
Remove dust with an air duster. Paper ejection jam sensor lower Open the side cover. Remove the folding plate 2. Remove dust with an air duster or wipe with a dry cloth. Copyright © 2019 Duplo Corporation All Rights Reserved... -
Page 87: Cleaning Lcd Touch Panel
Remove the auxiliary paper ejection guide. Wipe the stacker belt with a cloth moistened with alcohol while rotating it by hand. Cleaning paper separator When the paper separator is dirty, mis-feed or double-feed may occur, and paper feeding cannot be normally performed. For the cleaning of paper separator, contact Duplo dealer. Copyright © 2019 Duplo Corporation All Rights Reserved... -
Page 88: Trouble Guide
Check if the paper size setting is correctly set. Touch the key to release the error. U2007 (*2) The paper feed tray is not set. Raise the paper feed tray. Touch the key to release the error. (*1) DF-999/DF-999A (*2) DF-990/DF-990A Copyright © 2019 Duplo Corporation All Rights Reserved... -
Page 89: Motor Error
E2419 jamming, etc. E2420 Folding plate 2 is not attached Make sure that folding plate 2 is attached properly. properly. E2421 Remove jammed paper and touch the key to release Motor for moving the folding stopper the error. E2422 is not functioning due to paper E2429 jamming, etc. (*) DF-999/DF-999A Copyright © 2019 Duplo Corporation All Rights Reserved... -
Page 90: Paper Jam Error
Error code and error message Guide Error Code Cause Solution E1903 An incorrect program is included. Touch the key to release the error. E1904 Incorrect data is included in the SD card. Copyright © 2019 Duplo Corporation All Rights Reserved... -
Page 91: Errors Requiring A Service Call
Paper feed ring Open the top cover. Remove slowly the jammed paper near the paper feed ring. Close the top cover. If paper cannot be pulled out easily, first remove all the paper on the paper feed tray and pull out the jammed paper. Copyright © 2019 Duplo Corporation All Rights Reserved... -
Page 92: Folding Roller
Press the key. Eject forcibly the paper inside the folding plate. Forcible ejection in the folding plate will not stop until the folding stopper returns to the home position, as the folding stopper moves, even if the key is not held. Even if the paper is not removed after forcible ejection, check the position of paper jam to remove the paper with the following method. Copyright © 2019 Duplo Corporation All Rights Reserved... -
Page 93: Ejecting Section
Close the side cover. The side cover will not be closed if the folding plate 2 is not attached correctly. 2-4. Ejecting section Press the key. The paper is forcibly ejected. Paper is ejected forcibly as long as the key is held down. Forcible ejection will stop by releasing the key. Copyright © 2019 Duplo Corporation All Rights Reserved... -
Page 94: Troubleshooting
Clean with a cloth moistened with alcohol. (p.81) The stacker roller is not positioned Re-set the position of the stacker roller. (p.59) correctly. Static electricity is built up on paper. • Use a commercially available static electricity removal spray. • Separate the paper well. (p.30) • Humidify with a humidifier as required. Copyright © 2019 Duplo Corporation All Rights Reserved... - Page 95 . (p.42) out of position. Paper is not cut properly. Correct the folding misalignment along the sides of the paper using the skew correction knob. (p.42) Copyright © 2019 Duplo Corporation All Rights Reserved...
- Page 96 (p.51) The cross fold lever is not attached. Attach the cross fold lever. (p.51) Mis-feed has occurred in Paper feed pressure is low. Set the paper feed pressure to [3] or more cross fold. using the feed pressure adjustment lever. Copyright © 2019 Duplo Corporation All Rights Reserved...
-
Page 97: Appendix
A-weighted sound pressure level L (*3) Machine weight (Main body + Folding plate 1 + Folding plate 2) (*4) Including accessories (1.0 kg/2.2 lb) Copyright © 2019 Duplo Corporation All Rights Reserved... - Page 98 Paper type Sheet Single fold Paper quality Fine quality paper 46.5 to 157.0 (*2) (thickness) 31.62 to 106.76 (*2) Art paper/coated 84.9 to 127.9 (*3) paper 57.73 to 86.97 (*3) (*1) For paper that is less than 128 mm/5.04 inches (length direction), the following conditions apply. ty: Fine quality paper 64 to 81.4 g/m /43.52 to 55.35 lbs Paper quali Processing speed: 3 to 4 speed Paper jogging at the paper exit stacker section shall not be considered. (*2) Depending on the paper manufacturing conditions, groundwood paper, stencil paper, recycled paper and medium quality paper are outside the specifications. Confirm using the folding test. (*3) Paper feed tray stacking height is 25 mm/0.98 inch or less. Depending on the paper manufacturing conditions, it will be outside the specifications. Confirm using the folding test. Copyright © 2019 Duplo Corporation All Rights Reserved...
- Page 99 (*6) Paper quality: Fine quality paper 81.4 g/m /55.35 lbs (Vertical) Paper size: A4 Folding mode: Single fold Standard setting range: 1 to 6 speed (1 to 6) Thin paper mode: 0 speed (1-) Thick paper mode: 7 speed (6+) Option specifications Model DF ULTRASONIC SENSOR KIT Item Unit Paper quality Fine quality paper (*) Paper type Sheet Paper size(W x L) 100.0 x 148.0 to 311.0 x 457.2 inch 3.93 x 5.83 to 12.24 x 18.0 (*) 46.5 to 157 g/m /31.62 to 106.76 lbs Copyright © 2019 Duplo Corporation All Rights Reserved...
- Page 100 4-1-6 Oyama, Chuo-ku, Sagamihara-shi, Kanagawa 252-5280, Japan TEL: +81-42-775-3602 FAX: +81-42-775-3606 E-mail: info@duplo.com 18H-90040-0 19030000D Copyright © 2019 Duplo Corporation All Rights Reserved...
Need help?
Do you have a question about the DF-999 and is the answer not in the manual?
Questions and answers