
Related Manuals for Duplo DF-1000


Summary of Contents for Duplo DF-1000
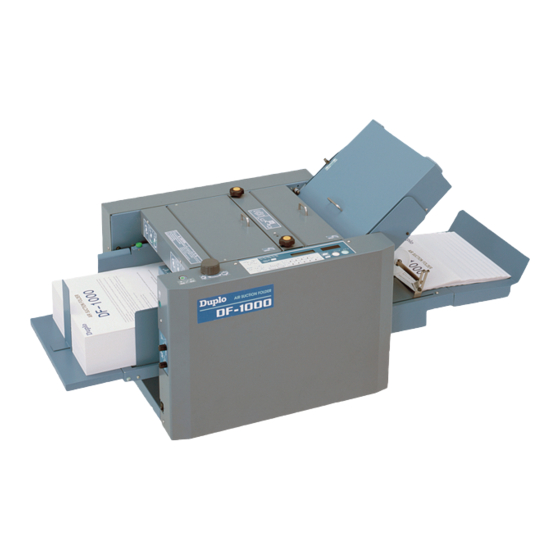
- Page 1 INSTRUCTION MANUAL AIR SUCTION PAPER FOLDER DF-1000 Be sure to read this manual prior to use. Please leave this manual at the site of use for easy reference.
- Page 2 EN61000-3-3: 1995 + A1: 2001 KONFORMITÄTSERKLÄRUNG Die Duplo Corporation mit Sitz in 1-6, Oyama 4 chome, Chuo-ku, Sagamihara, Kanagawa 252-5280 Japan, erklärt hiermit, dass das Produkt (oder die Produkte) die in den Vorschriften definierten Bestimmungen erfüllt. Die Bezugstabelle ist unten aufgeführt.
- Page 3 Disposal of Old Electrical & Electronic Equipment Eliminación de residuos de aparatos eléctricos y electrónicos This symbol (the symbol of the crossed out wheeled bin) indicates that in European countries this product Este símbolo (un cubo de basura tachado) indica should not be disposed of as household waste.
- Page 4 Memo...
- Page 5 INTRODUCTION Thank you for purchasing a Duplo product. Be sure to read this manual prior to using the product. After reading, leave the manual at the site of use for easy reference whenever questions related to the product arise in the future.
-
Page 6: Safety Precautions
SAFETY PRECAUTIONS In this manual, operations and handling of the unit which are hazardous are described using the following marks to prevent personal injury or property damage to the user and others. WARNING Ignoring this mark could result in the possibility of serious injury or even death. - Page 7 SAFETY PRECAUTIONS Operating Environment Operate this unit in the following environment. where the temperature range is between 5 and 35°C (–10 to +50°C in storage) where the humidity range is between 20 and 80% RH (10 to 90% RH in storage, however no condensation) which is not subject to direct sunlight which is reasonably free from dust...
- Page 8 SAFETY PRECAUTIONS Maintenance, etc. WARNING Do not damage the power cord or power plug. Do not scratch, alter, bend, twist, pull or place heavy objects on the power cord or power plug. This could result in damage, a fire or an electrical shock. Do not handle the power plug with wet hands.
- Page 9 SAFETY PRECAUTIONS Caution Label Location...
-
Page 10: Table Of Contents
TABLE OF CONTENTS Chapter 1 Chapter 4 Before Operation Troubleshooting 1. Names and Operation of Parts ..1-2 1. Correcting Folding Misalignment ...4-2 1-1. Correcting Folding Misalignment 2. Names and Operation of Control Along Sides of Paper ...... 4-2 Panel ..........1-6 1-2. -
Page 11: Before Operation
Chapter 1 BEFORE OPERATION... -
Page 12: Names And Operation Of Parts
1. NAMES AND OPERATION OF PARTS... - Page 13 1. NAMES AND OPERATION OF PARTS Name Operation Folding plate Guide plate for deciding the paper folding position. Composed of folding plates 1 and 2. Top cover L When paper is jammed at the paper feed section, open this cover to remove the paper.
- Page 14 1. NAMES AND OPERATION OF PARTS...
- Page 15 1. NAMES AND OPERATION OF PARTS Name Operation Side guide dial Turn this dial to move the side guide. Control panel For operating the unit “2. NAMES AND OPERATION OF CONTROL PANEL” ( p.1-6) Skew roller spring For switching the roller spring pressure when folding misalignment occurs. pressure adjusting knob Normally, use at the “bottom”...
-
Page 16: Names And Operation Of Control Panel
2. NAMES AND OPERATION OF CONTROL PANEL Name Operation Start key Press to start paper folding. Stop key Press to stop paper folding. Pressing this key at the function setting mode screen registers that setting. Test key Press to test fold two sheets of paper. Mode key Press to switch the function setting mode. -
Page 17: Description Of Lcd
3. DESCRIPTION OF LCD The LCD displays standard paper size, various registration data, operation modes, operation states, and error messages, etc. The backlight of the LCD will go off automatically if the unit is not used for a certain period of time. A area B area +3.0/-1.0... -
Page 18: Handling Of Paper
4. HANDLING OF PAPER 4-1. Paper Used If using folded or curled paper, flatten first prior to use. Make sure that the printing ink on the paper has dried completely prior to use. If used without the ink completely dried, the folding roller or paper may become dirty. Use paper that has been cut at right angles. -
Page 19: Precautions On Stacking Paper
4. HANDLING OF PAPER 4-2. Precautions on Stacking Paper Stack the paper so that the lead edge Shutter touches the shutter gently. Stack so that there is no gap. Paper I f t h e r e i s a g a p b e t w e e n t h e lead edge and shutter, the paper detection sensor will not function properly. - Page 20 Memo 1-10...
-
Page 21: Basic Operation
Chapter 2 BASIC OPERATION... -
Page 22: Standard Folding Of Standard Paper
1. STANDARD FOLDING OF STANDARD PAPER 1-1. Standard Paper There are six types of standard paper sizes; A3, B4, A4, B5, A5, and B6. All these sizes are detected as standard paper only when stacked in the short edge feeding direction (direction shown in the figure). -
Page 23: Operation Procedure
1. STANDARD FOLDING OF STANDARD PAPER 1-3. Operation Procedure Turn on the power switch. WARNING Do not touch the power switch with wet hands. Otherwise electric hazards may occur. Power switch Stack paper on the paper feed tray. Maximum stacking height Push in the paper until the lead edge touches the shutter below the paper feed inlet slightly. - Page 24 1. STANDARD FOLDING OF STANDARD PAPER Set the rear guide at the trail edge of the paper. Rear guide Be sure to set the rear guide. Starting the unit without setting it will cause the separating air to blow away the paper. Check the paper size displayed at the <LCD message in standard paper/standard folding>...
- Page 25 1. STANDARD FOLDING OF STANDARD PAPER Adjust the separating air amount Separating air adjusting knob using the separating air adjusting knob. The standard amount of the separating air is “2”. The larger the figure, the stronger the separating air blown will be. When using large art paper or coated paper, adjust the knob to a large value.
- Page 26 1. STANDARD FOLDING OF STANDARD PAPER P r e s s t h e s p e e d k e y t o s e t t h e processing speed. Five speed can be selected (Speed 1 to 5). Every time the “+”...
- Page 27 1. STANDARD FOLDING OF STANDARD PAPER Press the test key to perform test folding. Test folding feeds two sheets of paper and allows the finish to be checked. When the test key is pressed, the LCD displays “WAIT” and the folding stopper starts moving to the set position.
- Page 28 1. STANDARD FOLDING OF STANDARD PAPER The following description is based on the subtract count method. Press the numerical keys to enter the number of sheets to be processed. Press the start key to start folding. To cancel operations halfway through, press the stop key.
-
Page 29: Applied Use
Chapter 3 APPLIED USE... -
Page 30: Standard Folding Of Non-Standard Paper
1. STANDARD FOLDING OF NON-STANDARD PAPER Paper that is not A3, B4, A4, B5, A5, or B6 are considered non-standard paper. Standard paper that is fed in the long edge feeding direction is also considered as non-standard paper. When using non-standard paper, the length must be entered and registered before beginning folding operation. - Page 31 1. STANDARD FOLDING OF NON-STANDARD PAPER P r e s s t h e m o d e k e y t o d i s p l a y “LENGTH” on the LCD. � ������ � ��� Using the numerical keys, enter the length of the paper.
- Page 32 1. STANDARD FOLDING OF NON-STANDARD PAPER Press the folding mode key to select the desired fold. Adjust the level sensor height. Adjust the separating air amount. Adjust the separator height. Set the thin paper feed button to ON or OFF according to the paper thickness. Press the speed key to set the processing speed.
-
Page 33: Custom Folding
2. CUSTOM FOLDING Custom folding is the method of folding paper by specifying and registering the positions (folding positions) of the folding stoppers of folding plates 1 and 2. 2-1. Paper Size Restrictions Paper sizes which can be used are the sizes Paper feed direction within the range shown on the right. - Page 34 2. CUSTOM FOLDING Set the rear guide at the trail edge of the paper. For details of steps 3 to 6, refer to “1-3. Operation Procedure” in Chapter 2 BASIC OPERATION “1. STANDARD FOLDING OF STANDARD PAPER” ( p.2-3). Press the custom folding registration key 1 or 2 until the buzzer sounds “pi.pi...”...
- Page 35 2. CUSTOM FOLDING Adjust the level sensor height. Adjust the separating air amount. Adjust the separator height. Set the thin paper feed button to ON or OFF according to the paper thickness. Press the speed key to set the processing speed. Press the test key to perform test folding.
-
Page 36: Using Special Paper
3. USING SPECIAL PAPER 3-1. Art Paper, Coated Paper Fan the paper well before stacking. Set the separating air adjusting knob to a Separating air adjusting knob larger value. Set the separator adjusting knob to a smaller value. Separator adjusting knob If the paper is folded abnormally, lower the processing speed. -
Page 37: Recycled Paper
3. USING SPECIAL PAPER 3-2. Recycled Paper Fan the paper well before stacking. Set the separating air adjusting knob to a Separating air adjusting knob smaller value. Set the separator adjusting knob to a larger value. Separator adjusting knob Set the processing speed to a low speed. If paper feed error occurs frequently, set the processing speed slower than speed 1. -
Page 38: B6 Size Paper
3. USING SPECIAL PAPER 3-3. B6 Size Paper Paper may jam more easily at the stacker roller according to the paper thickness, type, and folding mode. Perform the following procedure if paper jams frequently. Loosen the two knob screws and remove the paper ejection guide. -
Page 39: Function Setting Mode
4. FUNCTION SETTING MODE The function setting mode is a function for shortening the operation procedure or adjusting according to the paper used based on the purpose of the user. The function setting mode consists of the following eight types. Mode Purpose Default setting... -
Page 40: Operation Mode Setting
4. FUNCTION SETTING MODE 4-2. Operation Mode Setting Setting to the last time fold mode or folding stopper fixed mode enables setting operations after power ON to be omitted, thus shortening the time to the start of work. At shipment, this is set to the normal mode. - Page 41 4. FUNCTION SETTING MODE The following shows the recommended operation modes by purpose. Change the operation mode according to purpose. <Example of purpose> <Recommended operation mode> When the paper size and folding mode differs Normal mode (Default setting) each time When various people use the machine When the paper size and folding mode are Last time fold mode...
- Page 42 4. FUNCTION SETTING MODE <Returning to the normal mode> 1) Press the mode key and select “MODE”, and then < MODE > select “NORMAL” using the speed key. NORMAL 2) Pressing the stop key switches to the normal mode, and “REF” or “FIX” on the LCD disappears. ��...
-
Page 43: Interval Setting
4. FUNCTION SETTING MODE 4-3. Interval Setting When this setting is set to ON, the unit will automatically repeat pause and restart at the specified number of sheets as shown in the figure below. At shipment, this is set to “OFF”. <Example>... - Page 44 4. FUNCTION SETTING MODE Press the stop key and register the 0.0/ 0.0 STAND BY setting. “I” is displayed at the bottom of the LCD. The setting is erased when the power is turned OFF. <Returning setting to “OFF”> 1) Press the mode key and select “SET INTERVAL”, <...
-
Page 45: Separating Air Strength Setting
4. FUNCTION SETTING MODE 4-4. Separating Air Strength Setting Function for adjusting the air amount for separating paper. At shipment, this is set to “NORMAL”. <Example> To weaken the air as paper feed error occurs frequently when thin paper or small paper is used Press the mode key and select “AIR POWER”. -
Page 46: Paper Feed Interval Setting
4. FUNCTION SETTING MODE 4-5. Paper Feed Interval Setting Function for changing the processing speed when single folding, double folding, or letter folding standard paper. At shipment, this is set to “NORMAL”. <Example> To raise the processing speed when the paper used and folding mode are restricted to the above three types (This setting is valid only when the speed 5 lamp is blinking. -
Page 47: Stacking Amount Setting
4. FUNCTION SETTING MODE 4-6. Stacking Amount Setting Function which changes the amount of paper stacked on the paper feed tray in three levels. The distance descended by the paper feed tray when paper runs out changes according to the setting. At shipment, this is set to “HIGH”. The number of sheets stacked for each setting is as follows for fine quality paper 81.4 g/m equivalent. -
Page 48: Stacker Belt Setting
4. FUNCTION SETTING MODE 4-7. Stacker Belt Setting Function for changing the operation mode of the stacker belt. At shipment, this is set to “NORMAL”. At this time, the stacker belt operates according to the paper ejection timing. The mode can be changed so the stacker belt operates continuously, according to the paper and folding mode. -
Page 49: Thick Paper Stopper Correction Setting
4. FUNCTION SETTING MODE 4-8. Thick Paper Stopper Correction Setting Setting this setting to “CORRECTED” correct the folding stopper positions of both folding plates 1 and 2 by +0.5 mm. At shipment, this is set to “NOT CORRECTED”. <Example> When using thick paper, it is often necessary to correct the folding stopper position to the + direction. - Page 50 Memo 3-22...
-
Page 51: Troubleshooting
Chapter 4 TROUBLESHOOTING... -
Page 52: Correcting Folding Misalignment
1. CORRECTING FOLDING MISALIGNMENT Folding misalignment consists of “folding misalignment along the sides of the paper” and “folding misalignment along the vertical length of the paper”. Other than this, “deformed folding” may also occur due to paper characteristics, etc. 1-1. Correcting Folding Misalignment Along Sides of Paper Before correcting, check that the skew roller spring pressure adjusting knobs are set at the same position for the left and right sides. - Page 53 1. CORRECTING FOLDING MISALIGNMENT Tighten the side guide adjusting knobs and secure the side guides. Perform test folding and check that the folding misalignment has improved. If folding misalignment is not improved <Trimming misalignment of paper> due to trimming misalignment, perform (2) Adjusting the skew correction knob.
- Page 54 1. CORRECTING FOLDING MISALIGNMENT Close the top cover L. Tighten the skew roller fixing knobs. Perform test folding and check that the folding misalignment has improved. After completing folding operations, be sure to return the needle back to the standard position.
-
Page 55: Correcting Folding Misalignment Along Vertical Length Of Paper
1. CORRECTING FOLDING MISALIGNMENT 1-2. Correcting Folding Misalignment Along Vertical Length of Paper When the folded paper is misaligned along Ejection direction the vertical length as shown in the figure, adjust the positions of the folding stoppers of folding plates 1 and 2 to correct the Folding misalignment. - Page 56 1. CORRECTING FOLDING MISALIGNMENT Length A of the folded plane is the length from the trail edge of the paper to the center of paper slack. Length B of the folded plane is the length from the center of paper slack to the folding stopper. Therefore by changing the position of the folding stopper, length B of the folded plane can be adjusted.
- Page 57 1. CORRECTING FOLDING MISALIGNMENT <Example 2> When folded plane length B is 3 mm longer than folded plane length A 3 mm In this example, by shortening the folded plane length B by 1.5 mm, A will become 1.5 mm longer, and as a result, folding misalignment of 3 mm in total can be improved. To shorten B, press the “–”...
- Page 58 1. CORRECTING FOLDING MISALIGNMENT (3) Correction range and restrictions The correction range of standard folding is +5.0 mm –5.0 mm within ±5 mm (to folding misalignment of 10 mm). For double fold and irregular accordion fold, the correction range may be restricted and cannot be corrected for some paper lengths.
- Page 59 1. CORRECTING FOLDING MISALIGNMENT (4) Correction method by folding mode Correct folding misalignment using the folding stopper adjusting keys of folding Folding plate 1 folding stopper adjusting key plates 1 and 2 referring to the following table. Folding plate 2 folding stopper adjusting key Adjusting key of folding plate 1 Adjusting key of folding plate 2...
- Page 60 1. CORRECTING FOLDING MISALIGNMENT (5) Registering folding misalignment correction values The adjustment value of folding misalignment along the vertical length of the paper can be registered using the adjustment registration key for each standard paper size and standard folding mode. (6 standard paper sizes ×...
- Page 61 1. CORRECTING FOLDING MISALIGNMENT After adjusting folding misalignment, Blinking (End of adjustment registration) press the adjustment registration key until the buzzer sounds “pi.pi...”. When adjustment registration completes, the lamp of the folding mode selected stops lighting and starts to blink. <Changing/erasing adjustment registration data>...
-
Page 62: Correcting Deformed Folding
1. CORRECTING FOLDING MISALIGNMENT 1-3. Correcting Deformed Folding Check the following when deformed folding <Example of deformed folding> occurs. Set the processing speed to a low speed. If paper feed error occurs frequently, set the processing speed slower than speed 1. Press and hold the “–”... -
Page 63: Adjusting The Stacker Roller
2. ADJUSTING THE STACKER ROLLER 2-1. Changing the Stacker Roller Position The position of the stacker roller is automatically set in standard folding. However, if the alignment of paper ejected to the paper receiving tray is poor, change the position. While pressing the stop key, press a numerical key between 1 and 7. -
Page 64: Changing The Stacker Roller Height
2. ADJUSTING THE STACKER ROLLER 2-2. Changing the Stacker Roller Height If paper jams frequently at the stacker roller in the use of thick paper, change the height of the stacker roller. Lift up the stacker roller. Turn down the lever of the stacker support in the arrow direction. -
Page 65: When Paper Jamming Occurs
3. WHEN PAPER JAMMING OCCURS When paper jams and operations stop, the LCD will show the location of the jam. “JAM FEED SECT” or “FEED ERROR” Near paper feed tray “ 3-1. When Paper Jams at Paper Feed Tray” ( this page) “JAM INSIDE”... - Page 66 3. WHEN PAPER JAMMING OCCURS Press the test key while pressing the stop key to forcibly eject the paper. If the error message “MOTOR ERROR 1” or “MOTOR 1 OVERLOAD” is displayed on the LCD without the unit moving, proceed to step 3, remove the f o l d i n g p l a t e a n d r e m o v e t h e paper.
- Page 67 3. WHEN PAPER JAMMING OCCURS If paper near the folding rollers is difficult to remove, remove the folding plate according to the following procedure and remove the paper. 1) Turn OFF the power. Power switch 2) Disconnect the folding plate connector from the main body.
-
Page 68: When Paper Jams At Stacker Unit
3. WHEN PAPER JAMMING OCCURS 3-3. When Paper Jams at Stacker Unit Remove the paper jammed near the stacker roller. Paper If the paper is difficult to remove, perform the following procedure. 1) Loosen the two knob screws and remove the paper ejection guide. -
Page 69: Error Messages
4. ERROR MESSAGES When paper feed errors and malfunctions occur during operations, the jam location and other details are displayed on the LCD. Likewise, details and instructions will be displayed when operation errors and key input errors occur. 4-1. Paper Jam Messages The following error message will be displayed according to the jam location on the LCD. - Page 70 4. ERROR MESSAGES (2) When paper runs out on the paper feed tray “NO PAPER” <Solution> Stack paper on the paper feed tray. Paper (3) When the folding plate is not set correctly “F.PLATE SET ERR” Folding plate <Solution> Set the folding plate again. “3-2.
-
Page 71: Key Input Error Messages
4. ERROR MESSAGES 4-3. Key Input Error Messages When setting non-standard paper length, folding stopper position during custom folding, and folding misalignment adjustment values, entering a value exceeding the scope of specifications displays the following error messages on the LCD. “TOO SHORT”... - Page 72 4. ERROR MESSAGES (2) Folding motor malfunction “MOTOR ERROR 4” “MOTOR ERROR 5” <Cause> The folding plate connector is not connected properly. The folding motor 1 or 2 is locked due to paper jamming. <Solution> First, turn OFF the power. Check that the folding plate connector is connected to the main body properly.
- Page 73 4. ERROR MESSAGES (4) Paper feed tray malfunction (When rising) “TRAY UP ERROR” <Cause> There are foreign objects between the paper feed tray and suction belt. There is a clearance between the paper lead edge and shutter. <Solution> Check for foreign objects on the paper feed tray. Stack the paper on the paper feed tray again so that the lead edge touches the shutter lightly.
-
Page 74: Troubleshooting
5. TROUBLESHOOTING Problem Check Correct 1) The unit does not start Is paper stacked properly on the Stack paper properly. even when the start paper feed tray? key is pressed. Has paper jammed? Remove jammed paper. Is a cover open? Close open covers. - Page 75 5. TROUBLESHOOTING Problem Check Correct 4) Paper jam occurs. Has the paper been fanned well? Fan the paper well. Is the paper curled? Correct the paper curl before use. Is the inside of the unit jammed Inspect the inside of the unit, and with paper chips, etc.? remove paper chips.
- Page 76 5. TROUBLESHOOTING Problem Check Correct 7) Folding misalignment Is there clearance between the Align paper neatly and stack, then along sides of paper side guides and paper? push the side guides lightly against the occurs. paper. Is the side guide adjusting knob Tighten the knob firmly.
-
Page 77: Maintenance
Chapter 5 MAINTENANCE... -
Page 78: Cleaning The Unit
1. CLEANING THE UNIT Dirty folding rollers and suction belts can cause problems such as folding misalignment, and paper feed errors. Adherence of paper dust near sensors will also cause misdetection. Therefore clean periodically. Clean the paper feed inlet sensor and paper ejection outlet sensors with canned air recommended for computers, key boards, and similar products. - Page 79 1. CLEANING THE UNIT Open the top cover R. Top cover R Jam correction knob While rotating the folding rollers with the jam correction knob, clean them with a cloth moistened with alcohol. Return the folding plate to its original position.
-
Page 80: Cleaning The Suction Belts
1. CLEANING THE UNIT 1-2. Cleaning the Suction Belts Prior to cleaning, move the side guides out to the sides and lower the paper feed tray. Open the top cover L. Top cover L Paper feed shaft Rotate the suction belts by rotating the paper feed shaft by hand. -
Page 81: Cleaning The Paper Sensor
1. CLEANING THE UNIT 1-4. Cleaning the Paper Sensor Clean the protection film of the paper Protection film of paper sensor sensor under the paper feed tray with a dry and soft cloth. 1-5. Cleaning the Paper Feed Inlet Sensor Open the top cover L. -
Page 82: Cleaning The Paper Ejection Outlet Upper Sensor
1. CLEANING THE UNIT 1-6. Cleaning the Paper Ejection Outlet Upper Sensor Remove the folding plate and open Top cover R Folding plate the top cover R. For details on removing the folding plate, refer to “1-1. Cleaning the Folding Rollers” ( p.5-2). -
Page 83: Appendix
Appendix... -
Page 84: Specifications
1. SPECIFICATIONS Model DF-1000 Type For office use/desktop Paper size Max. 297 (W) × 432 (L) mm (Along paper feed direction) Maximum paper width: A3 Min. 120 (W) × 182 (L) mm (Along paper feed direction) Paper quality Fine quality paper, recycled paper, art paper, coated paper... - Page 85 Memo...
- Page 86 4-1-6 Oyama, Chuo-ku, Sagamihara-shi, Kanagawa 252-5280, Japan TEL: +81-42-775-3602 FAX: +81-42-775-3606 E-mail: info@duplo.com This manual is printed on recycled paper to help protect the environment. 12T-90058-0 10110000D...
Need help?
Do you have a question about the DF-1000 and is the answer not in the manual?
Questions and answers