
Related Manuals for iWave iW-RainboW-G15S


Summary of Contents for iWave iW-RainboW-G15S
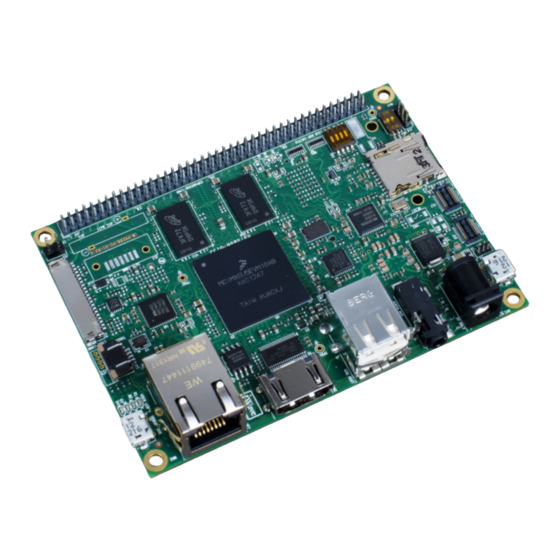
- Page 1 Pico ITX - SBC Hardware User Guide iW-RainboW-G15S i.MX6 Pico ITX – Single Board Computer Hardware User Guide Rev 1.1 iWave Systems Technologies Pvt. Ltd. Page 1 of 61...
- Page 2 STRICTLY PROHIBITED. Thank you. “iWave Systems Tech. Pvt. Ltd.” Rev 1.1 iWave Systems Technologies Pvt. Ltd.
- Page 3 Pico ITX - SBC Hardware User Guide Disclaimer iWave Systems reserves the right to change details in this publication including but not limited to any Product specification without notice. No warranty of accuracy is given concerning the contents of the information contained in this publication.
-
Page 4: Table Of Contents
USB Micro AB Connector for Debug console ................ 39 2.7.2 JTAG Connector ........................40 2.7.3 4bit DIP Switch ........................42 2.7.4 Status Indication LEDs ......................43 Expansion Connector ......................... 44 Rev 1.1 iWave Systems Technologies Pvt. Ltd. Page 4 of 61... - Page 5 Pico ITX SBC Numbering ....................55 i.MX6 Pico ITX SBC Revision History ..................56 Mechanical Specification ......................57 APPENDIX I ..........................60 i.MX6 Pico ITX-SBCSilk Screen ....................60 Rev 1.1 iWave Systems Technologies Pvt. Ltd. Page 5 of 61...
- Page 6 Figure 26: .MX6 Pico ITX – SBC PCB Dimension Bottom Side ..............59 Figure 27: Silk Screen Top View ........................60 Figure 28: Silk Screen Bottom View ......................61 Rev 1.1 iWave Systems Technologies Pvt. Ltd. Page 6 of 61...
- Page 7 Table 25: SATA Connector - BOM ....................... 51 Table 26: Power Jack Pin Out ........................53 Table 27: 2-Pin Power Connector Pin Out (Optional) ................. 54 Table 28: i.MX6 Pico ITX SBC Revision History .................... 56 Rev 1.1 iWave Systems Technologies Pvt. Ltd. Page 7 of 61...
-
Page 8: Introduction
This document is the Hardware User Guide for the i.MX6 Pico-ITX SBC which is based on the Freescale’s i.MX6 Applications Processor. This board is fully supported by iWave Systems Technologies Pvt. Ltd. This Guide provides detailed information on the overall design and usage of the i.MX6 Pico-ITX SBC from a Hardware Systems perspective. -
Page 9: References
Serial Peripheral Interface UART Universal Asynchronous Receiver/Transmitters Universal Serial Bus References i.MX6 Applications Processors Products Datasheet i.MX6 Applications Processor Reference Manual iW-RainboW-G15S Quick Start Guide R3.0 Rev 1.1 iWave Systems Technologies Pvt. Ltd. Page 9 of 61... -
Page 10: Important Note
In this signal, GPIO7_0 is the GPIO number,SD1_CD (SD1 card detect) is the functionality which we are using and SD3_DAT5 is the CPU pad name. Note: The above naming is not applicable for other signals which are not connected to CPU. Rev 1.1 iWave Systems Technologies Pvt. Ltd. Page 10 of 61... -
Page 11: I.mx6 Pico Itx - Sbc Architecture And Design
Mini PCIE GPIOs, UARTs, SPI, CAN, Conn* Status LEDs Connector I2C, CSI, MIPI DSI, MLB*, LVDS1 Expansion Header 100mm *Not Supported Figure 1: i.MX6 Pico ITX – SBC Block Diagram Rev 1.1 iWave Systems Technologies Pvt. Ltd. Page 11 of 61... -
Page 12: I.mx6 Pico Itx - Sbc Features
USB OTG 2.0 through Micro AB Connector USB Host 2.0 through Dual Stack Type A Connector Half Mini PCIe Gen2.0 Connector(with PCIe & USB interface) CAN Header (CAN1 with PHY) Rev 1.1 iWave Systems Technologies Pvt. Ltd. Page 12 of 61... - Page 13 Temperature Supported: -20°C to +85°C Form factor: Pico ITX (100 x 72mm) *Note: MLB & SATA signals will be available only in i.MX6 Quad & Dual CPU. Rev 1.1 iWave Systems Technologies Pvt. Ltd. Page 13 of 61...
-
Page 14: I.mx6 Cpu
Figure 2: i.MX6 CPU Simplified Block Diagram Note: Please refer the latest i.MX6 Datasheet& Reference Manual from Freescale website for Electrical characteristics of i.MX6 Application CPU which may be revised from time to time. Rev 1.1 iWave Systems Technologies Pvt. Ltd. Page 14 of 61... -
Page 15: Boot Mode Setting
In this mode, i.MX6 boot media is selected by i.MX6 Boot From eFuses eFUSE settings Note: i.MX6 eFuse setting is NOT modified by iWave from silicon shipped value. In this mode, i.MX6 boot Serial Downloader device can be Programmed Mode... -
Page 16: Memory
4-bit data transfer along with card detect feature. The main power to Micro SD Card Connector is 3.3Voltage. Micro SD Connector is physically located on top of the i.MX6 Pico ITX – SBC as shown below.. Figure 3: Micro SD Connector Rev 1.1 iWave Systems Technologies Pvt. Ltd. Page 16 of 61... -
Page 17: Standard Sd Connector
The Standard SD connector can support SD memory cards, SDIO cards (Wi-Fi, BT etc.) which are designed to fit in a standard SD connector. Standard SD connector is physically located on bottom of the board. Rev 1.1 iWave Systems Technologies Pvt. Ltd. Page 17 of 61... -
Page 18: Figure 4: Standard Sd Connector
Data Line (bit7) Optional, Not supported by default. VSS1 Power Ground SD1_DAT6(NANDF_D2) Input / Output 3.3V CMOS Data Line (bit6) Optional, Not supported by default. SD1_CLK Output 3.3V CMOS Clock Rev 1.1 iWave Systems Technologies Pvt. Ltd. Page 18 of 61... -
Page 19: Audio/Video Features
AUDMUX channel 3 of the i.MX6 CPU. i.MX6 Pico ITX – SBC supports 3.5mm stereo Headphone Out Jack and 3pin MIC In header which are physically located on top of the board. Figure 5: Audio Jack Rev 1.1 iWave Systems Technologies Pvt. Ltd. Page 19 of 61... -
Page 20: Table 5: Audio Out Jack Pin Out
3.3V CMOS Microphone 0_DAT13) Detection MIC1P_ESD Analog Input 1Vrms MIC Positive Input Number of Pins - 03 Connector Part Number - GRPB031VWVN-RC Mating Connector - LPPB031NGCN-RC from Sullins Connector Solutions Rev 1.1 iWave Systems Technologies Pvt. Ltd. Page 20 of 61... -
Page 21: Hdmi Interface
25 MHz up to 297 MHz (4k x 2k and 3Dvideo modes), but HDMI can support higher rates up to 340 MHz HDMI port is physically located on top of the board. Figure 6: HDMI Port Rev 1.1 iWave Systems Technologies Pvt. Ltd. Page 21 of 61... -
Page 22: Table 7: Hdmi Port Pin Out
4.7K Pull-up HDMI_SDVO_CTL_DAT Input/Output 3.3V CMOS/ EDID I2C Data 4.7K Pull-up Power Ground VOUT_5 Power 5V Power Supply HDMI_HPD# Input 3.3V CMOS/ HDMI Cable Hot plug 15K Pull-down detect Rev 1.1 iWave Systems Technologies Pvt. Ltd. Page 22 of 61... -
Page 23: Lvds Connector
Description: 10.39 inch LVDS 6 bits with 800 x 600 (RGB) resolution Manufacturer Name: OPTREX Corporation 3. Part Number:TLM-TA40T3130-01 Description: 10.4 inch LVDS 6 bits with 800 x 600 (RGB) resolution Manufacturer Name: Varitronix Rev 1.1 iWave Systems Technologies Pvt. Ltd. Page 23 of 61... -
Page 24: Figure 7: Lvds Connectors
Power 3.3V Supply voltage for TFT TFT1_VCC_3V3 Power 3.3V Supply voltage for TFT Power Ground Power Ground LVDS0_TX0_N Output LVDS LVDS primary channel LVDS0_TX0_P Output LVDS differential pair 0 Rev 1.1 iWave Systems Technologies Pvt. Ltd. Page 24 of 61... -
Page 25: Table 9: Lvds Backlight Connector Pin Out
= Current required for LCD backlight LEDs. 2. Change D14 Zener Diode from 15V to required voltage. (Populated diode part number is BZT52C20-7-F) Note: For i.MX6 Pico ITX SBC Silkscreen identifier details, refer APPENDIX I Rev 1.1 iWave Systems Technologies Pvt. Ltd. Page 25 of 61... -
Page 26: Resistive Touch Connector
Touch Right Signals TSC_X1 Input Analog Touch Down Signals Number of Pins - 04 Connector Part Number - SFW4R-4STE1LF from FCI Mating Connector - Touch panel FPC cable with 1mm pitch Rev 1.1 iWave Systems Technologies Pvt. Ltd. Page 26 of 61... -
Page 27: Cmos Camera Connector
Camera connector is physically located on top of board. Number of Pins - 24 Connector Part Number - AXK724147G Mating Connector - AXK824245WG from Panasonic Electric Works Figure 9: Camera Connector Rev 1.1 iWave Systems Technologies Pvt. Ltd. Page 27 of 61... -
Page 28: Table 11: Camera Connector Pin Out
Camera Data6 CSI1_D[12](EIM_A17) Input 3.3V CMOS Camera Data2 CSI1_D[15](EIM_A20) Input 3.3V CMOS Camera Data5 CSI1_D[13](EIM_A18) Input 3.3V CMOS Camera Data3 CSI1_D[14](EIM_A19) Input 3.3V CMOS Camera Data4 No Connection No Connection Rev 1.1 iWave Systems Technologies Pvt. Ltd. Page 28 of 61... -
Page 29: Mipi Camera Connector
Compatible MIPI Camera: Part Number - LI-OV5640-MIPI-AF Description - 5Mega Pixel OV5640 MIPI camera Manufacturer Name - Leopard Leopard MIPI Camera Module link: https://www.leopardimaging.com/LI-OV5640-MIPI-AF.html Figure 10: MIPI Camera connector Rev 1.1 iWave Systems Technologies Pvt. Ltd. Page 29 of 61... -
Page 30: Table 12: Mipi 5M Camera Interface Pin Out
No Connection CSI_D0P Input 2.5V CMOS CSI0 Positive Data No Connection CSI_D0M Input 2.5V CMOS CSI0 Negative Data MIPI_AF_VDD Power 1.8V MIPI AF Power 1.8V AF_GND Power Analog Field Ground Rev 1.1 iWave Systems Technologies Pvt. Ltd. Page 30 of 61... -
Page 31: Communication Features
PHY is interfaced with i.MX6 using RGMII interface. A RJ45 Mag Jack with LED indicators is provided for Gigabit Ethernet interface. This RJ45 Mag jack can work with 10/100/1000 Mbps Ethernet operation and physically located on top of the board. Figure 11: Gigabit Ethernet Connector Rev 1.1 iWave Systems Technologies Pvt. Ltd. Page 31 of 61... -
Page 32: Table 13: Rj45 Magjack Connector Pin Out
Interface (MDI) differential pair D GPHY_ACTIVITY_LED1 Output 3.3V CMOS/ LED1 Cathode 1K Pull-down VCC_3V3 Power 3.3V LED1 Anode VCC_3V3 Power 3.3V LED2 Anode GPHY_LINK_LED2 Output 3.3V CMOS/1K LED2 Cathode Pull-down Rev 1.1 iWave Systems Technologies Pvt. Ltd. Page 32 of 61... -
Page 33: Usb Otg Connector
USB differential Signal USB OTG Differential data pair USB_OTG_DP Input/Output USB differential Signal 3.3V CMOS/ USD ID signal USB ID Input Open(float): Device 10K Pull-up Ground Power USB OTG Ground Rev 1.1 iWave Systems Technologies Pvt. Ltd. Page 33 of 61... -
Page 34: Usb Host Connector
A connector and 1USB Port is connected to Mini PCIe. This Dual Stack Connector is located on top of the board as shown below. Figure 13: USB Dual Stack Connector Rev 1.1 iWave Systems Technologies Pvt. Ltd. Page 34 of 61... -
Page 35: Mini Pcie Connector
PCIe signals from i.MX6 CPU and USB Host signals from USB hub is connected to the Mini PCIe Connector. Mini PCIe Connector is physically located on the bottom of the board. Figure 14: Mini PCIe Slot Rev 1.1 iWave Systems Technologies Pvt. Ltd. Page 35 of 61... -
Page 36: Table 16: Mini Pcie Slot Pin Out
3.3V CMOS Wireless Disable E(DISP0_DAT7) Input Power Ground GPIO2_07_PCIe_RST( Output 3.3V CMOS PCIe Reset NANDF_D7) PCIe_RXM Input Differential/ PCIe Receiver Lane- 0.1uf AC coupling(C366) 3G_3V3 Power 3.3V 3.3V Power Supply Rev 1.1 iWave Systems Technologies Pvt. Ltd. Page 36 of 61... - Page 37 LED_WPAN# Output 3.3V CMOS LED Connection No Connection 3G_1V5 Power 1.5V 1.5V Power Supply No Connection 3G_1V5 Power Ground No Connection 3G_1V5 3G_3V3 Power 3.3V 3.3V Power Supply 3G_1V5 Rev 1.1 iWave Systems Technologies Pvt. Ltd. Page 37 of 61...
-
Page 38: Can Header
Table 17: CAN Header Pin Out Pin No Signal Name Signal Type Voltage Level/ Description Termination Power Ground CAN0L Output CAN Differential CAN Differential Low Side CAN0H Output CAN Differential CAN Differential High Side Rev 1.1 iWave Systems Technologies Pvt. Ltd. Page 38 of 61... -
Page 39: Debug Features
Signal Type Voltage Level/ Description Termination DBUG_VBUS Power VBUS 5V Power DBUG_USB_DM Input/Output Differential USB Negative Data DBUG_USB_DP Input/Output Differential USB Positive Data USD ID signal Power Ground Open(float): Device Rev 1.1 iWave Systems Technologies Pvt. Ltd. Page 39 of 61... -
Page 40: Jtag Connector
JTAG connector is physically located on bottom of the board. Number of Pins - 20 Connector Part Number - GRPB102VWQP-RC Mating Connector - LPPB102CFFN-RC from Sullins Connector Solutions Figure 17: JTAG Connector Rev 1.1 iWave Systems Technologies Pvt. Ltd. Page 40 of 61... -
Page 41: Table 19: Jtag Connector Pin Out
Ground Power Ground Ground JTAG_TDO Output 3.3V CMOS Test Data Output Power Ground JTAG_RESETB Input 3.3V CMOS Reset Power Ground VCC_3V3 Power 3.3V Supply Voltage Power Ground Power Ground Rev 1.1 iWave Systems Technologies Pvt. Ltd. Page 41 of 61... -
Page 42: 4Bit Dip Switch
On – CPU GPIO Pin will go SP0_DAT4) High Bit 3 GPIO4_26_STAT_PIN3(DI Input to 3.3V CMOS Off - CPU GPIO Pin will go SP0_DAT5) Bit 4 GPIO4_27_STAT_PIN4(DI Input to 3.3V CMOS SP0_DAT6) Rev 1.1 iWave Systems Technologies Pvt. Ltd. Page 42 of 61... -
Page 43: Status Indication Leds
Status LED2 _DAT19) GPIO5_14_STA Active Low 3.3V CMOS Green colour T_LED3(DISP0 LED Enable Status LED3 _DAT20) GPIO5_15_STA Active Low 3.3V CMOS Green colour T_LED4(DISP0 LED Enable Status LED4 _DAT21) Rev 1.1 iWave Systems Technologies Pvt. Ltd. Page 43 of 61... -
Page 44: Expansion Connector
Number of Pins - 84 Connector Part Number - TMM-142-01-T-D (Single 84 pin connector is used) Mating Connector - M22-3022100 from Harwin Inc (Use single of this 84 Pin connector) Rev 1.1 iWave Systems Technologies Pvt. Ltd. Page 44 of 61... -
Page 45: Figure 19: Expansion Connector
Power 3.15V 3.15Voutput Supply Voltage UART1_RTS(EIM_D20) Input 3.3V CMOS UART1 RTS input I2C1_SDA(EIM_D28) Input/ 3.3V CMOS/ I2C1 Data signal Output 4.7K Pull-up UART1_CTS(EIM_D19) UART1 CTS output Output 3.3V CMOS Rev 1.1 iWave Systems Technologies Pvt. Ltd. Page 45 of 61... - Page 46 UART1 Receive data line CSI0_HSYNC Input 3.3V CMOS Camera0 HSYNC I2C2_SCL(KEY_COL3) Output 3.3V CMOS/ I2C2 clock signal 4.7K Pull-up I2C2_SDA(KEY_ROW3) Input/ 3.3V CMOS/ I2C2 Data signal Output 4.7K Pull-up Rev 1.1 iWave Systems Technologies Pvt. Ltd. Page 46 of 61...
- Page 47 Power Ground Power Ground CLK2_p Output Differential General purpose high speed differential clock2 positive from CPU. CLK2_n Output Differential General purpose high speed differential clock2 negative from CPU. Rev 1.1 iWave Systems Technologies Pvt. Ltd. Page 47 of 61...
- Page 48 LVDS Media Local Bus differential Output data line negative MLB_CP Output LVDS Media Local Bus differential clock line positive MLB_CN Output LVDS Media Local Bus differential clock line negative Rev 1.1 iWave Systems Technologies Pvt. Ltd. Page 48 of 61...
-
Page 49: Optional Features
CPU is connected to standard 7pin SATA connector.7pin SATA connector is physically located on top of the board. This is the optional feature and not populated by default. Note: SATA is not supported in i.MX6 Dual-Lite & Solo CPU. Rev 1.1 iWave Systems Technologies Pvt. Ltd. Page 49 of 61... -
Page 50: Figure 20: Sata0 22Pin Connector
Serial ATA Transmit Output 0.01uF AC differential pair Coupling (C386) & 100E parallel termination between Pair Output Differential/ SATA_TXM 0.01uF AC Coupling (C387) & 100E parallel termination between Pair Power Ground Rev 1.1 iWave Systems Technologies Pvt. Ltd. Page 50 of 61... -
Page 51: Table 25: Sata Connector - Bom
RES 100 OHM 1/10W 5% RC0402JR-07100RL R306,R307 0402 0402 SMD CONN HEADER 7POS VERT 0678005001(from Molex) 7Pin Note: For i.MX6 Pico ITX SBC Silkscreen identifier details, refer APPENDIX I Rev 1.1 iWave Systems Technologies Pvt. Ltd. Page 51 of 61... -
Page 52: Electrical Specification
From the Power input, the 5V supply is directly sent to a 3A fuse (F1) for over current protection. The power input circuit is shown in below Figure. Figure 21: Power In Circuit 3.1.1 Power Jack Figure 22: Power Jack Rev 1.1 iWave Systems Technologies Pvt. Ltd. Page 52 of 61... -
Page 53: Pin Power Connector
Ground Ground Number of Pins Connector Part Number - PJ -002BH Mating Connector Diameter - 2.5mm ID, 5.5mm OD 3.1.2 2 Pin Power connector Figure 23: 2Pin Power Connector Rev 1.1 iWave Systems Technologies Pvt. Ltd. Page 53 of 61... -
Page 54: Table 27: 2-Pin Power Connector Pin Out (Optional)
Power Rail Min (V) Typical (V) Max(V) Max Input Ripple 4.75V 5.25V ±50mV Ground Number of Pins Connector Part Number - 284391-2 Mating Connector Details - 2Pos Horizontal, 3.5mm Pitch Rev 1.1 iWave Systems Technologies Pvt. Ltd. Page 54 of 61... -
Page 55: Board Numbering & Revision History
Pico ITX SBC Numbering In all i.MX6 Pico ITX SBC, unique number is pasted as a label with Barcode readable format on the bottom side of SBC as shown below. Rev 1.1 iWave Systems Technologies Pvt. Ltd. Page 55 of 61... -
Page 56: I.mx6 Pico Itx Sbc Revision History
STMPE811 Touch controller is Change controller is supported supported Two 40pin connector (M22- Single 84pin connector (TMM- Expansion 2521005) used 142-01-T-D) used Connector part change expansion connector expansion connector. Rev 1.1 iWave Systems Technologies Pvt. Ltd. Page 56 of 61... -
Page 57: Mechanical Specification
Pico ITX – SBC is based on standard Pico ITX form factor which is 100 × 72 x 17.2 mm (3.94 × 2.835 0.68 in) as shown below. Figure 24: i.MX6 Pico ITX – SBC PCB Dimension Rev 1.1 iWave Systems Technologies Pvt. Ltd. Page 57 of 61... -
Page 58: Figure 25: I.mx6 Pico Itx - Sbc Pcb Dimension Top Side
Pico ITX - SBC Hardware User Guide Physical placement dimension of each connector in i.MX6 Pico-ITX SBC is shown in the below Figures. Figure 25: i.MX6 Pico ITX – SBC PCB Dimension Top Side Rev 1.1 iWave Systems Technologies Pvt. Ltd. Page 58 of 61... -
Page 59: Figure 26: .Mx6 Pico Itx - Sbc Pcb Dimension Bottom Side
Pico ITX - SBC Hardware User Guide Figure 26: .MX6 Pico ITX – SBC PCB Dimension Bottom Side Rev 1.1 iWave Systems Technologies Pvt. Ltd. Page 59 of 61... -
Page 60: I.mx6 Pico Itx-Sbcsilk Screen
Pico ITX-SBC silkscreen top view and bottom view with Optional Feature’s Identifier highlighted are shown in the below Figures. This will be useful while mounting the Optional Features in i.MX6 Pico ITX-SBC. Figure 27: Silk Screen Top View Rev 1.1 iWave Systems Technologies Pvt. Ltd. Page 60 of 61... -
Page 61: Figure 28: Silk Screen Bottom View
Pico ITX - SBC Hardware User Guide Figure 28: Silk Screen Bottom View Rev 1.1 iWave Systems Technologies Pvt. Ltd. Page 61 of 61...
Need help?
Do you have a question about the iW-RainboW-G15S and is the answer not in the manual?
Questions and answers