Norac UC4 Installation Manual
Total control automatic boom height system hagie sts12
Hide thumbs
Also See for UC4:
- Operator's manual (60 pages) ,
- Installation manual (46 pages) ,
- Quick manual (40 pages)
Table of Contents
Advertisement
Quick Links
Total Control
Automatic Boom Height
Installation Manual
Canada
NORAC Systems International Inc.
CALL TOLL FREE: 1-800-667-3921
(306) 664-6711
SHIPPING ADDRESS:
3702 Kinnear Place
Saskatoon, SK
S7P 0A6
For other service locations please view our website:
Improving the Competitiveness of Industry and Agriculture
UC
System
Hagie STS12
www.norac.ca
through Precision Measurement
4
United States
NORAC, Inc.
CALL TOLL FREE: 1-866-306-6722
(763) 786-3080
SHIPPING ADDRESS:
1290 Osborne Rd. NE, Suite F
Fridley, MN
55432-2892
Advertisement
Table of Contents

Subscribe to Our Youtube Channel
Related Manuals for Norac UC4


Summary of Contents for Norac UC4
- Page 1 Total Control Automatic Boom Height System Hagie STS12 Installation Manual Canada United States NORAC Systems International Inc. NORAC, Inc. CALL TOLL FREE: 1-800-667-3921 CALL TOLL FREE: 1-866-306-6722 (306) 664-6711 (763) 786-3080 SHIPPING ADDRESS: SHIPPING ADDRESS: 3702 Kinnear Place 1290 Osborne Rd. NE, Suite F...
- Page 2 Reorder P/N: UC4-BC-HG1-INST Rev B (Hagie STS12) NOTICE NORAC Systems International Inc. reserves the right to improve products and their specifications without notice and without the requirement to update products sold previously. Every effort has been made to ensure the accuracy of the information contained in this manual.
-
Page 3: Table Of Contents
TABLE OF CONTENTS INTRODUCTION ..........................2 GENERAL SYSTEM DESCRIPTION ....................3 PARTS LISTS ............................4 INSTALLATION PROCEDURE ......................8 4.1 E ........................ 8 LECTRICAL NSTALLATION 4.2 H ........................ 12 YDRAULIC NSTALLATION 4.3 W ......................15 ENSOR NSTALLATION 4.4 M ...................... 20 OUNTING THE ENTER ENSOR... -
Page 4: Introduction
1 INTRODUCTION Congratulations on your purchase of the NORAC UC4 Automated Sprayer Boom Height Control System. This system is manufactured with top quality components and is engineered using the latest technology to provide operating features and reliability unmatched for years to come. -
Page 5: General System Description
ATTENTION: When installing the UC4 System please be aware that at a point in the installation your sprayer booms will be inoperative until the installation is complete. Any installation procedure requiring boom movement will need to be done first. -
Page 6: Parts Lists
3 PARTS LISTS The parts that come with your UC4 Sprayer Boom System are listed in Table 1. In this document, the item number shown on the left side of this table references each part. Please ensure that all parts in your kit are present before proceeding with your installation. - Page 7 Item Part Number Description * HYDRAULIC PARTS * 44933 VALVE PACKAGE PROP STATION EXPANDABLE W/FILTER VALVE BLOCK ASSEM UC4-BC 2-STATION CC/LS 44933S VARIABLE RATE 104369 COUPLING HYD 6MBP 103779 COUPLING HYD PLUG 6MJP 103071 COUPLING HYD 8MB 6MJ90 44928 ORIFICE INSERT .047 IN ONE WAY...
- Page 8 The parts that come with your UC4 System are shown below in their general installation configuration. Figure 2 – UC4 Boom Control Components...
- Page 9 Figure 3 – Hydraulic Plumbing Schematic...
-
Page 10: Installation Procedure
In the Hagie STS12 cab, a good spot to mount the UC4 control panel is on the right hand side of the cab, near the front window (Figure 4). - Page 11 2. Locate the small access holes in the floor of the cab. These holes should be utilized to route cables from inside the cab to the exterior. 3. Route the free-hanging wires with ring terminals from the UC4 power cable (Item C10) out the floor of the cab.
-
Page 12: Hydraulic Installation
4.2 H YDRAULIC NSTALLATION 1. Install the fittings and orifices into the hydraulic valve. On a clean surface remove the plastic plugs from the "A", "B", "P", "T" and "S" ports. Install the 6MB-6MJ (Item H51) fittings on the "P" and "T" ports and tighten to 18 ft-lbs 2. - Page 13 (plumbed). The plumbing for the hydraulic circuit is shown schematically in Figure 3. The “B” lines leading from the NORAC valve blocks are the “raise” lines, and must be connected to the side of the cylinders which raise the booms.
- Page 14 Figure 8 – Valve Cable Connections...
-
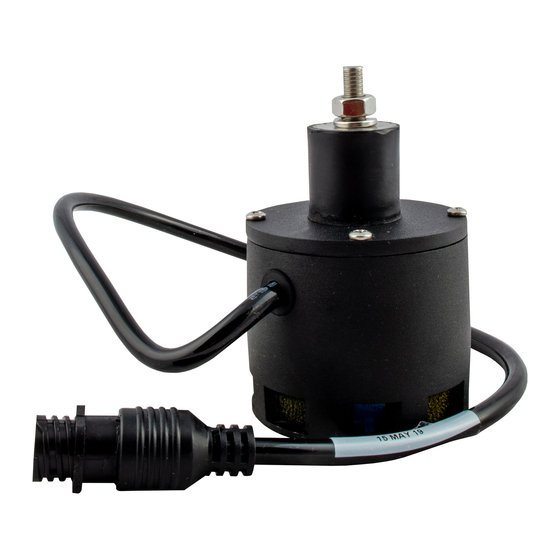
Page 15: Wing Sensor Installation
4.3 W ENSOR NSTALLATION 1. Assemble the Breakaway Sensor Mounting Brackets as show in Figure 9 and Figure 10. Figure 9 – Breakaway Sensor Bracket Exploded View Figure 10 – Breakaway Sensor Mounting Bracket Assembly a) Assemble the bolt and nut into the collar of the bracket. b) Grease the bottom edge of the collar and the angled tube of the base. - Page 16 e) Install the tube as shown and, for now, lightly tighten collar around the tube you will need to aim the sensor bracket later. NOTE: When installing the Sensors (Item E2) start with the smallest serial number on the left hand side proceeding to the largest serial number on the right hand side.
- Page 17 UC4 controller to force the boom closer to the ground. Please refer to the UC4 system warranty at the end of the Operator’s Manual (Item M1) for implications.
- Page 18 Figure 13 – Preferred Mounting Figure 14 – Another Acceptable Mounting 5. The sensor cable should be run down through the tube of the mounting bracket and then behind the member the bracket is mounted onto. Cable-tie the connector in place. The cable must not be allowed to hang below the boom. (See Figure 13 or Figure 14)
- Page 19 6. Once the sensor brackets are mounted to the boom you can make adjustments to fine-tune you particular sprayer installation. You may wish to mount the sensors starting at a small angle to allow for easier "breakaway". This will allow the sensor to "breakaway"...
-
Page 20: Mounting The Center Sensor
Also refer to Section 4 of this manual for the electrical pin-outs of the Norac cables. You can use this information to try to pinpoint where the problem is occurring. If you still have... - Page 21 3. The procedure for the installation of the UC4 system is now complete. Begin the software setup portion of the system as described in the UC4 Sprayer Boom Operator’s Manual (Item M1).
-
Page 22: Electrical Reference - Cable Drawings
5 ELECTRICAL REFERENCE – CABLE DRAWINGS 5.1 I C1: 44662B-40 – S ENSOR RUNK ABLE 5.2 I C2: 44668 – S ENSOR RANCH ABLE... -
Page 23: Item C3: 44656
5.3 I C3: 44656 – V ALVE ABLE ARIABLE 5.4 I C4: 44651 – V ALVE XTENSION ABLE... -
Page 24: Item C10: 44650-13 - Power Cable Hagie Sts12
5.5 I C10: 44650-13 – P STS12 OWER ABLE AGIE...
Need help?
Do you have a question about the UC4 and is the answer not in the manual?
Questions and answers