Anet A8 Instructions Manual
Hide thumbs
Also See for A8:
- Quick user manual (48 pages) ,
- Installation manual (44 pages) ,
- Installation manual (38 pages)
Advertisement
Address:
Qinghu Community, Longhua District, Shenzhen,
Guangdong, China
Telephone: +86 755 2373 6621
Email:
Website:
Facebook: www.facebook.com/anet3dtech
YouTube:
After sales support
No. 341 Xiangli Ind Zone, Huaqing Road,
anet@anet3d.com
www.anet3d.com
www.youtube.com/c/anet3dprinter
A8 3D Printer Instructions
Advertisement
Table of Contents

Related Manuals for Anet A8


Summary of Contents for Anet A8
- Page 1 A8 3D Printer Instructions Address: No. 341 Xiangli Ind Zone, Huaqing Road, Qinghu Community, Longhua District, Shenzhen, Guangdong, China Telephone: +86 755 2373 6621 Email: anet@anet3d.com Website: www.anet3d.com Facebook: www.facebook.com/anet3dtech YouTube: www.youtube.com/c/anet3dprinter After sales support...
- Page 2 3. In Anet Facebook page, you can also join our after-sales group: Follow above two methods, you can find Anet Facebook page, then on the left side click “ Groups ”, you would see “ Official Anet 3D Printer After-sales Group ”, click “ Join Group ” to join us;...
-
Page 3: Table Of Contents
Attention: 1.Please make sure the package not broken when you receive it. 2.Please check the printer parts according to the packing list. 3. Please contract your supplier if any questions. 1.1 A8 assembly parts list Item Material number Picture Name 1. - Page 4 Item Material number Picture Name Item Material number Picture Name 1-6-1 1700200003 40*10 Fan 1700200004 Mainboard 1-6-2 1101200002 40*11 Cooling fin Left Z axis nut 1700300005 support 1-6-3 1101700001 Fan cover Right Z axis nut M3*45 Screw 2pcs 1700300006 1-6-4 1700100003 support M3 Spacer...
- Page 5 Item Material number Picture Name Item Material number Picture Name M8 Nut 16pcs 1700200005 5015 Air blower 1-7-3 1700100007 M8 Spacer 12pcs M4*8 Screw 28pcs Y axis belt 1700300002 1-7-4 1700100008 bearing support M4*14 Screw 4pcs Five parts below 1700300003 1-7-5 1700100009 M3*30 Screw 14pcs...
- Page 6 Item Material number Picture Name Item Material number Picture Name Guide rod back 2-9-5 1300100010 1-8-1 1202100006 Wire 65CM up plate 1700200013 Z Limit switch A 20CM Slide support 2-10 1300100020 1-8-2 1700200014 X Limit switch B 50CM plate Y Limit switch C 50CM 1700200014 Pillar washer Filament support...
- Page 7 Item Material number Picture Name Item Material number Picture Name Botton support 1300100017 plate Four parts below 1-10 1300500005 in this bag Top support 1300100016 plate 4.5M Winding 1-10-1 1300500001 pipe 1300100011 Back plate 1-10-2 1300900001 Belting 1300100015 Front plate Support plate 1700300024 1-10-3...
- Page 8 Item Material number Picture Name Item Material number Picture Name 1-11 1700200011 LCD 2004 screen 1700100016 Extruder X Motor line 40cm Y Motor line 40cm Left Z Motor line 40cm 1-12 1202100031 Right Z Motor line 90cm Extruder Motor line 90cm 1700200008 X axis motor 1-13...
-
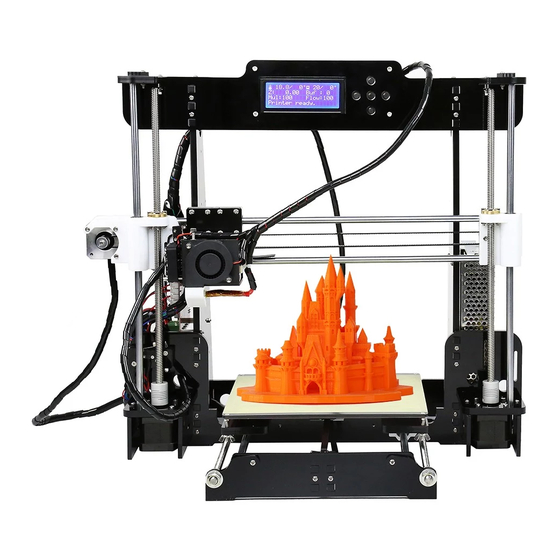
Page 9: Name Of Each Printer Part
1.2 Name of each printer part 1.3 Assembly Step Step 1 Please be aware the screw holes is in orange circles. Item Name of parts QTY. Bottom support plate Top support plate Side support plate M3*18 M3*18 Screw Screen M3 Nut Z Leading Rod 40 Fan Step 1... - Page 10 Step 3 Step 5 Item Name of parts QTY. Item Name of parts QTY. Item Name of parts QTY. Back plate Y axis Limit switch C50 CM Y axis belt bearing support Y axis motor M3*12 screw Front plate Y axis motor support M2*12 screw M3*18 M3*18 screw...
- Page 11 Step 7 Step 9 Item Name of parts QTY. Item Name of parts QTY. M4*8 Step 6 Step 7 Y axis Guide rod Step 8 Guide rod back up plate M4*8 screw Front plate M3*18 Attention: Please diagonally tighten the screws when M3*18 screw all are in there place.
- Page 12 Step 11 Step 13 Item Name of parts QTY. Item Name of parts QTY. Item Name of parts QTY. Step 9 Step 11 M3*18 screw Hot bed Step 12 M3 Nut M3*30 screw Right Z axis nut support M2.3*10 screw Spring Guide rod back up plate M3 wing nut...
- Page 13 Step 14 Step 16 Item Name of parts QTY. Step 13 T type lead screw 345mm Attention: loose the jackscrew of elastic coupling to place T lead screw to the bottom, then tighten the jackscrew. Before disassembly After disassembly Loose M4*6 screws first, then separate extruder from L black T lead screw 345mm aluminum parts, remember to...
- Page 14 Step 18 Step 20 Item Name of parts QTY. Item Name of parts QTY. Step 15 Step 19 The black aluminum removed from step 16 5015 Air blower M3*18 M4*8 screw Wind mouth M3*18 screw Before Assembly After Assembly Before Assembly After Assembly Step 19 Item...
- Page 15 Step 22 Step 24 Item Name of parts QTY. Item Name of parts QTY. M3*7 LCD 2004 screen Belt Pillar washer M3*7 M3*18 screw Screen baffle plate M3*30 M3 Nut 4 M3*30 screw M3 Nut Attention: Belt is for X,Y axis transmitting . The length of belt is 1.5m in total.
- Page 16 Name of parts QTY. M3*12 wire & limited switch wire. Step 25 Power supply 12V M3*12 screw Length of A8 Components Wire Orange circles stand for the power screw holes. Option Length(mm) Power Supply Power supply wire 650mm X motor wire...
- Page 17 Step 30 Step 29 Attention: Please connect the electronics wire to each Item Name of parts QTY. components correspondingly. Filament support plate Filament support plate connecting plate Threaded rod 150mm M3*18 M8 Screw M3*18 screw Z2 axis motor Y axis motor M3 Nut X axis motor Z1 axis motor...
-
Page 18: A8 Quick User Guide
●Self-disassembly or modification may cause damage or abnormal performance, and your Status machine will no longer enjoy warranty service. Cache Down ●It is recommended to use A8 in a well-ventilated environment. Please cut off the power supply Instruction Current extrusion rate after using. Back... - Page 19 Choose Print File: Main Menu “SD Card” → “Print file” → “Model File” Confirm. After the extruder and hot bed reach the setting temperature, the extruder starts moving and print. More details about operation and user guide, welcome to visit www.anet.com. 2.4.2.2 Filament Installation(take PLA for example)...
Need help?
Do you have a question about the A8 and is the answer not in the manual?
Questions and answers