Advertisement
Quick Links
Advertisement

Related Manuals for Anet A2


Summary of Contents for Anet A2
- Page 1 All manuals and user guides at all-guides.com A2 3D Printer Installation Instruction...
- Page 2 All manuals and user guides at all-guides.com Introduction Attention: 1.Please make sure the package not broken when you receive it. 2.Please check the printer parts according to the packing list. 3. Please contract your supplier if any questions.
- Page 3 All manuals and user guides at all-guides.com...
- Page 4 All manuals and user guides at all-guides.com...
- Page 5 All manuals and user guides at all-guides.com...
- Page 6 All manuals and user guides at all-guides.com...
- Page 7 All manuals and user guides at all-guides.com...
- Page 8 All manuals and user guides at all-guides.com Please check printer parts quantity when you receive it .
-
Page 9: Components Name
All manuals and user guides at all-guides.com Components Name... - Page 10 All manuals and user guides at all-guides.com Name Note Installation of Bottom Aluminium Profile 2040*150 Aluminium Profile 2040*400 Aluminium Profile Header Corner Attention: M5*12 Screw Keep the Aluminium Profile at the same level during assembly . It’s better to hold the Aluminium Profile when you lock the Cambox. M5 Pillar M5 T Nut 2040*400...
- Page 11 All manuals and user guides at all-guides.com Name Note Installation of Left & Right Aluminium Profile 2020*400 Aluminium Profile 2040*400 Aluminium Profile Header Corner M5*12 Screw M5 Pillar M5 T Nut 2040*400 2020*400 Aluminium Profile Aluminium Profile...
- Page 12 All manuals and user guides at all-guides.com Installation of Y Belt Bearing Support Fixing Plate M3 Nut Name Note M3*30 Screw Y Belt Bearing Support Fixing Plate M3*30 Screw M3*7 Pillar M3 Nut M3*7 Pillar Y Belt Bearing Unilateral Flange Bearing Support Fixing Plate Unilateral Flange Bearing...
- Page 13 All manuals and user guides at all-guides.com Name Note Installation of Y Motor Fixing Plate Y Motor Fixing Plate Y Motor M3*12 cross screw M3*30 Screw M3*30 Scrwe Unilateral Flange Unilateral Flange Bearing Bearing M3*7 M3*7 Pillar Pillar M3*12 cross screw Motor Fixing Plate Y Motor...
- Page 14 All manuals and user guides at all-guides.com Installation of Hotbed Fixing Plate Name Note Hotbed Fixing Pulley M5*10 Pillar Plate Hotbed Fixing Plate M5*10 Pillar M5*30 Screw M5 Nut M5*30 Screw M5 Nut Plastic Bearing...
- Page 15 All manuals and user guides at all-guides.com Installation of Hotbed Fixing Plate Pay attention to the Fluency , if it’s not smooth enough please adjust the degree of screw tightness...
- Page 16 All manuals and user guides at all-guides.com Name Note Installation of Y Axis M5*14 Screw M5 T Nut Attention : Y support plate should be at the same side M5*14 Screw Hole M5*14 Screw Hole...
- Page 17 All manuals and user guides at all-guides.com Name Note Installation of Y Y Limited Switch Fixing Plate Y Limited Switch Attention: Keep the hotbed fixing plate and motor fixing plate M2 Self-tapping at the same level . The adge of hotbed fixing plate Screw is the position of the limited switch.
- Page 18 All manuals and user guides at all-guides.com Installation of Y Axis Belt Let belt go through the hole and lock it with ribbon.
- Page 19 All manuals and user guides at all-guides.com Name Note Installation of Hotbed 220*270 Let the yellow paper Aluminium Profile side on the top M3*30 Screw M3 Butterfly Nut Spring Press the Spring during installation Direction of Aluminium Profile...
- Page 20 All manuals and user guides at all-guides.com Name Note Name Note Installation of X Belt Bearing Fixing Plate X Belt Bearing M5 T Nut Fixing Plate M5*30 Screw M3 Nut M5*14 Screw M5*10 Pillar M3*30 Screw M3*7 Pillar M5 Nut Plastic Bearing Unilateral Flange Bearing...
- Page 21 All manuals and user guides at all-guides.com Name Note Name Note Installation of X Motor Fixing Plate X Motor Fixing M5 T Nut Plate M5*30 Screw M3 Nut M5*14 Screw M5*10 Pillar M3*30 Screw M3*7 Pillar M5 Nut X Motor Unilateral Flange M3*12 Screw Bearing...
- Page 22 All manuals and user guides at all-guides.com Name Note Installation of Extruder pc4-01 Gas-type Fitting Heat Sink Nozzle parts 40*10Fan M3*25 Screw M3 Pillar Fan Cover PC4-01 Gas-type Fitting Cover Nozzle Parts...
- Page 23 All manuals and user guides at all-guides.com Name Note Installation of Extruder Fixing Plate Extruder Fixing Plate M5*30 Screw M5*10 Pilalr M5 Nut Plastic Bearing...
- Page 24 All manuals and user guides at all-guides.com Name Note Installation of Extruder and Fixing Plate M3*12 Screw...
- Page 25 All manuals and user guides at all-guides.com Name Note Installation of Extruder Fixing Plate 2040*400 Aluminium Profile Adjust the fixing plate until it can slide smoothly , or you need to adjust the degree of tightness. (Before the operation , ensure that the slider is well tightened and cannot be shaked )
- Page 26 All manuals and user guides at all-guides.com Installation of X Axis Don’t lock the belt bearing support now , it needs adjustment in next steps.
- Page 27 All manuals and user guides at all-guides.com Installation of X Axis Don’t tighten the 4 M5*16 screw now Pay attention to the installation direction...
- Page 28 All manuals and user guides at all-guides.com Name Note Installation of 2020*380 Aluminium Profile 2020*380 Aluminium Alloy Header Corner M5*12 Screw M5 Pillar M5 T Nut Keep the two sides at the same level during installation...
- Page 29 All manuals and user guides at all-guides.com Adjustment of X Axis Attention: Adjust belt support fixing plate to enable Y axis to move smoothly . Meanwhile lock the 4 nut when it’s level. (screws in above)
- Page 30 All manuals and user guides at all-guides.com Name Note Installation of Brass Nut Fixing Plate Z Axis Nut Fixing Plate M5*14 Scrwe M5 T Nut M3*18 Screw M3 Nut Keep the both side aluminium profile at the same level during installation M3 Screw Hole...
- Page 31 All manuals and user guides at all-guides.com Name Note Installation of X Limited Switch X Limited Switch Fixing Plate X Limited Switch M2*12 Self-tapping Screw M5*12 Scrwe M5 T Nut Keep the limited switch fixing plate align at X motor fixing plate...
- Page 32 All manuals and user guides at all-guides.com Installation of X Belt Let belt go through the hole and lock with ribbon.
- Page 33 All manuals and user guides at all-guides.com Name Note Name Note Installation of Z Motor Fixing Plate Z Motor M3*12 Screw Fixing Plate Z Motor M4*12 Screw Feeder Gas-type Fitting...
- Page 34 All manuals and user guides at all-guides.com Name Note Installation of Z Axis Motor Fixing Plate M5*14 Screw M5 T Nut The edge is almost level...
- Page 35 All manuals and user guides at all-guides.com Name Note Installation of Z Axis Rod M8 Rod Loose the screw on the coupling , stick rod in and then tighten the screw.
- Page 36 All manuals and user guides at all-guides.com Name Note Name Note Installation of Z Axis Limited Switch Z Axis Limited Switch M5*12 Fixing Plate Screw Z Axis Limited Switch M5 T Nut M2 Self-tapping Screw Install the Limited Switch Fixing Plate in the location above...
- Page 37 All manuals and user guides at all-guides.com Name Note Name Note Installation of Screen Fixing Plate Screen Fixing Plate M3*7 Pillar Screen Protecting Plate M3 Nut 12864LCD Screen M5*12 Screw M3*30 Screw M5 T Nut...
- Page 38 All manuals and user guides at all-guides.com Installation of Screen Fixing Plate...
- Page 39 All manuals and user guides at all-guides.com Name Note Installation of Mainboard Fixing Plate Mainboard Fixing Plate M5*12 Scrwe M5 T Nut...
-
Page 40: Mainboard Installation
All manuals and user guides at all-guides.com Name Note Mainboard Installation Mainboard M3*14 Scrwe M3*7 Pillar M3 Nut... -
Page 41: Mainboard Connection
All manuals and user guides at all-guides.com Mainboard Connection Attention: Please connect compenents with corresponding wires... - Page 42 All manuals and user guides at all-guides.com Installation of Mainboard Protecting Plate...
- Page 43 All manuals and user guides at all-guides.com Please refer to the picture during connection. Please ensure you the connection is right!!!
- Page 44 All manuals and user guides at all-guides.com...
- Page 45 All manuals and user guides at all-guides.com...
-
Page 46: Installation Complete
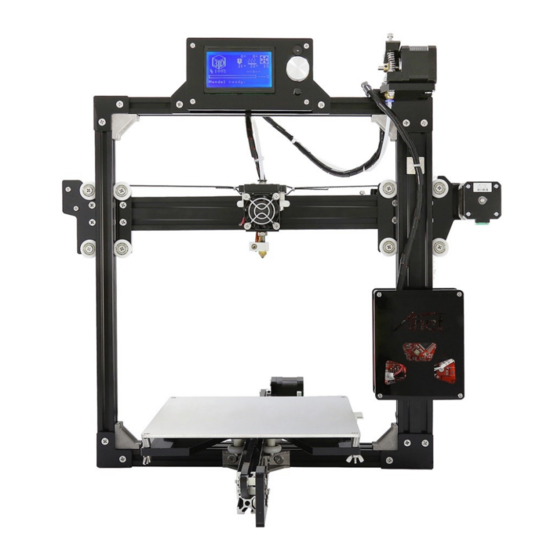
All manuals and user guides at all-guides.com Installation Complete Congratulations ! You have just made yourself a 3D printer ! Please contact your 3D printer supplier if any puzzles during using process. Thank you for choosing our products, we will always provide you more services.
Need help?
Do you have a question about the A2 and is the answer not in the manual?
Questions and answers