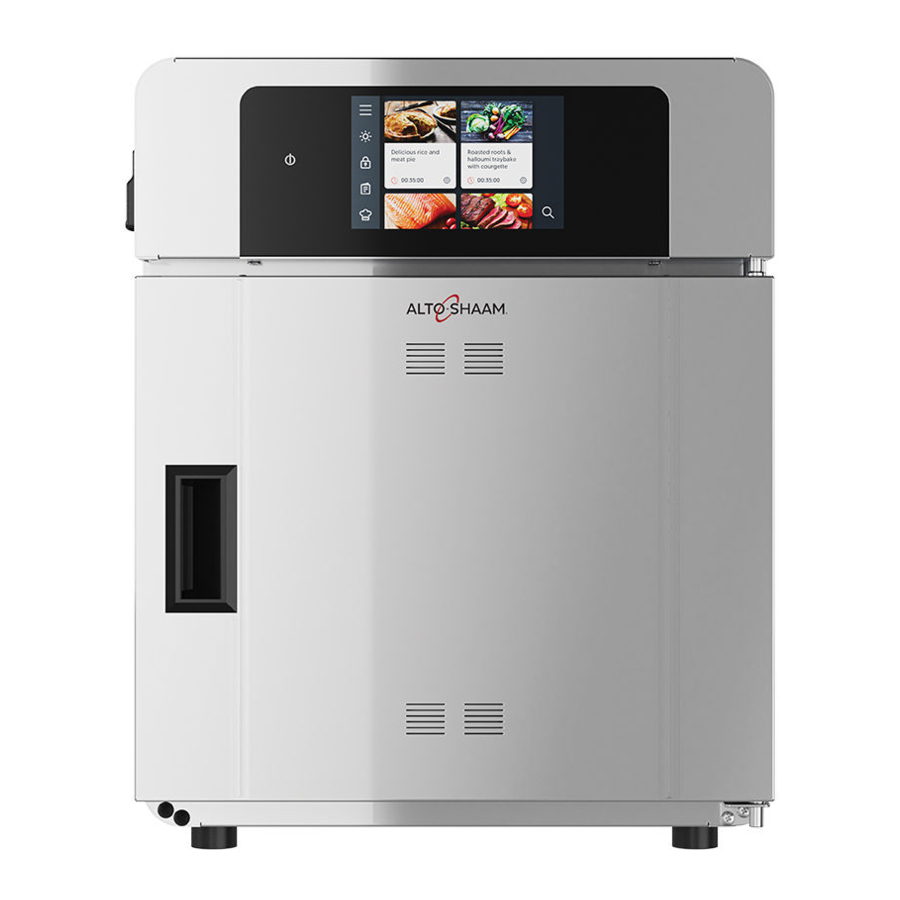
Alto-Shaam 300-TH Service Manual
Deluxe control cook & hold and smoker ovens
Hide thumbs
Also See for 300-TH:
- Operator's manual (116 pages) ,
- Service manual (68 pages) ,
- Operator's manual (88 pages)

Related Manuals for Alto-Shaam 300-TH


Summary of Contents for Alto-Shaam 300-TH
- Page 1 Service Manual Cook & Hold Ovens Smoker Ovens Deluxe Control 300-TH 750-SK 500-TH 1000-SK 750-TH 1200-SK 1000-TH 1750-SK 1200-TH 1750-TH MN-46712-EN REV.01 11/20 alto-shaam.com...
-
Page 2: Manufacturer's Information
© Copyright 11/20 by Alto-Shaam, Inc. All rights reserved. This manual or any portion thereof may not be reproduced or used in any manner whatsoever without the express written permission of Alto-Shaam, Inc. Trademarks All trademarks referenced in this documentation are the property of their respective owners. -
Page 3: Foreword
Call 800-558-8744 to reach our 24-hour emergency service call center for immediate access to local authorized service agencies outside standard business hours. The emergency service access is provided exclusively for Alto-Shaam equipment and is available throughout the United States through Alto-Shaam’s toll free number. - Page 4 OREWORD This page intentionally left blank. D e l u xe Co n tr o l Co ok & Ho ld Ser vi c e M an u a l MN- 4 6 71 2 Re v 0 1 1 1/ 2 0 ▪...
-
Page 5: Table Of Contents
Manufacturer’s Information ......2 Foreword Alto-Shaam 24/7 Emergency Repair Service ....3 Table of Contents Safety The Meaning of Signal Words . - Page 6 Cheflinc.alto-shaam.com is Not Available on Your Device ..56 Cannot Connect to cheflinc.alto-shaam.com ....57 The Oven is not Displayed on the Dashboard ....58...
-
Page 7: Safety
AFETY The Meaning of Signal Words This manual contains signal words where needed. These signal words must be obeyed to reduce the risk of death, personal injury, or equipment damage. The meaning of these signal words is explained below. DANGER Danger indicates a hazardous situation which, if not avoided, will result in serious injury or death. -
Page 8: Safety Precautions
AFETY Safety Precautions Before you begin Read and understand all instructions in this manual. Electrical precautions Obey these electrical precautions when using the appliance: ▪ Connect the appliance to a properly grounded outlet. Do not use the appliance if it is not properly grounded. Consult an electrician if there is any doubt that the outlet used is properly grounded. - Page 9 ▪ Contact Alto-Shaam for the authorized service partner in your area. De l u x e C on t ro l Co o k & Ho l d Se r vi ce Man u a l...
- Page 10 AFETY Personal Protective Wear the following Personal Protective Equipment (PPE) while cleaning the Equipment (PPE) appliance: ▪ Protective gloves ▪ Protective clothing ▪ Eye protection ▪ Face protection Use of restraining A restraining device (tether) must be installed to any appliance that is hard-wired devices and mounted on casters.
-
Page 11: Operation
Shut down To cancel and return to previous screen, press “Power” button again. TH-TS-011417 Choose the desired shut-down option. On 300-TH ovens, the power switch to the OFF position. Result The oven is now off. De l u x e C on t ro l Co o k & Ho l d... -
Page 12: How To View And Set Up Wifi Connection
PERATION How to View and Set up WiFi Connection ▪ Before you begin The facility must have WiFi. ▪ Do not connect to a guest network. Procedure To set up WiFi, do the following. Step Action Touch the menu icon . - Page 13 PERATION Continued from previous page Scroll to “Connection settings”. Touch the Setup Network icon Connections Settings Setup Network XXXXX XXXXX SSID XXXXX XXXXX XXXXX XXXXX XXXXX Install certificates TH-TS-011444 Touch the WiFi icon Network Status XXXXX XXXXX Connection type Wifi Internet XXXXX XXXXX...
- Page 14 PERATION Continued from previous page If the network is not displayed, touch the “Add network” icon Add network TH-TS-011446 Enter the SSID using the keypad. Then, touch the arrow key. Enter the security type. Then, touch the check mark. Enter the password using the keypad.
-
Page 15: How To Set Up An Ethernet Connection
PERATION How to Set up an Ethernet Connection ▪ Before you begin The facility must have an Ethernet port. ▪ You will need an Ethernet cable. Procedure To set up an Ethernet connection, do the following. Step Action Plug the Ethernet cord into the Ethernet port on the oven and the wall outlet. TH-TS-011438 Touch the menu icon... - Page 16 PERATION Continued from previous page Touch the WiFi icon . The Network Status screen displays. Network Status XXXXX XXXXX Connection type Wifi Internet Connected XXXXX XXXXX Cloud Connected XXXXX XXXXX Update Server Connected XXXXX XXXXX XXXX XXXXX XXXXX AS-TS-009332 Scroll to “Connection settings”.
-
Page 17: How To Update Software With A Usb Drive
Before you begin You will need a USB drive with the updated software. To download the most up to date oven software and register for email notifications when new software versions are released, please visit https://www.alto-shaam.com/en/customer- support/software-downloads. ▪ Do not remove the USB drive during the update process. - Page 18 PERATION Continued from previous page Scroll to System Backup & Update. Touch the Update system software setting. TH-TS-009967 Touch Control Board (CB) to update the control board. The oven loads the selected software. The oven verifies the file and then updates the CB. NOTICE Do not remove the USB drive during the update process.
-
Page 19: Components
OMPONENTS Component Identification De l u x e C on t ro l Co o k & Ho l d Se r vi ce Man u a l MN -4 6 7 12 Rev 0 1 1 1 / 20 ▪... -
Page 20: Front Panel Identification
OMPONENTS Front Panel Identification TH-PHD-011505 Ref. Description ON/OFF button USB port Control panel display D e l u xe Co n tr o l Co ok & Ho ld Ser vi c e M an u a l MN- 4 6 71 2 Re v 0 1 1 1/ 2 0 ▪... -
Page 21: Back Panel Identification
OMPONENTS Back Panel Identification TH-PHD-011509 Ref. Description Circuit breakers ON/OFF switch (TH-300 only) High limit(s) Electrical supply Tether ring De l u x e C on t ro l Co o k & Ho l d Se r vi ce Man u a l MN -4 6 7 12 Rev 0 1 1 1 / 20... -
Page 22: Component Access Panels Identification
Right side panel Door switch (left hand hinge door) Heating element terminal blocks (all except the 300-TH) D e l u xe Co n tr o l Co ok & Ho ld Ser vi c e M an u a l... -
Page 23: Control Panel
OMPONENTS Control Panel VMC-PHD-007596 Ref. Description WIFI antenna (Not serviceable) Capacitive touch controller board (Not serviceable) Interface board Liquid Crystal Display (LCD) (Not serviceable) ON/OFF board (Not serviceable) USB port De l u x e C on t ro l Co o k & Ho l d Se r vi ce Man u a l MN -4 6 7 12 Rev 0 1... -
Page 24: Interface Board
OMPONENTS Interface Board INTERFACE BOARD INTERFACE BOARD SIDE A SIDE B TOP of TOP of OVEN OVEN BATT DO NOT USE WIFI TH-PHD-011518 Ref. Description BATT Clock battery 5V IN 12V IN Capacitive touch cable USB connector Display back light LCD interface Speaker 12 VDC power... -
Page 25: 300-Th-Electrical Component Identification
OMPONENTS 300-TH—Electrical Component Identification TH-PHD-011521 Ref. Description Ref. Description USB port ON/OFF switch Control board High limit switch 12VDC power supply Solid State Relay (SSR) Terminal blocks (L1, GND, L2/N) Speaker — Cooling fan — De l u x e C on t ro l Co o k & Ho l d... -
Page 26: 500-Th, 750-Th, 1000-Th-Electrical Component Identification
OMPONENTS 500-TH, 750-TH, 1000-TH—Electrical Component Identification TH-PHD-011524 Ref. Description Ref. Description USB port High limit switch Control board Circuit breakers Terminal blocks Solid State Relay (SSR) 12VDC power supply Voltage monitor Terminal blocks (L1, GND, L2/N) Speaker Cooling fan — —... -
Page 27: 1250-Th, 1750-Th-Electrical Component Identification
OMPONENTS 1250-TH, 1750-TH—Electrical Component Identification TH-PHD-011527 Ref. Description Ref. Description USB port Cooling fan Daughter board High limit switch(es) Control board Circuit breakers Terminal blocks Solid State Relay (SSR) 12VDC power supply Voltage monitor Terminal blocks (L1, GND, L2/N) Speaker De l u x e C on t ro l Co o k &... - Page 28 OMPONENTS Control Board (CB) and Daughter Board (DB) CONTROL BOARD DAUGHTER BOARD TH-PHD-011530 Ref. Description (CB) Ref. Description (CB) Ref. Description (DB) RY1-D1 Smoker - bottom oven 5 VDC RY2-D2 Smoker - top oven Voltage monitor Cooking probes Bottom cavity temperature sensor RY3-D3 Not used 12VDC power supply...
- Page 29 OMPONENTS Terminal Blocks TB4B TB3B TB10B TB3A TB4A TB10A TH-PHD-011533 Ref. Description Model TB3A 750-TH, 1000-TH, 1200-TH, 1750-TH TB3B Smoker option 1200-TH, 1750-TH TB4A L2/N 750-TH, 1000-TH, 1200-TH, 1750-TH TB4B Smoker option 1200-TH, 1750-TH DC - Lights, top cavity 1200-TH DC - Lights, bottom cavity 1200-TH TB10A...
-
Page 30: 12Vdc Power Supply
OMPONENTS 12VDC Power Supply Supplies DC voltage to the control board and the ON/OFF switch. TH-PHD-011536 Ref. Description 120–240VAC terminals 12VDC terminals Terminal Blocks (L1, GND, L2/N) TH-PHD-011539 D e l u xe Co n tr o l Co ok & Ho ld Ser vi c e M an u a l MN- 4 6 71 2 Re v 0 1... - Page 31 OMPONENTS Circuit Breakers TH-PHD-011542 Ref. Description Circuit breaker L1 Circuit breaker L2/N De l u x e C on t ro l Co o k & Ho l d Se r vi ce Man u a l MN -4 6 7 12 Rev 0 1 1 1 / 20 ▪...
-
Page 32: Solid State Relay (Ssr)
OMPONENTS Solid State Relay (SSR) Single cavity Heater element control. TH-PHD-011545 Ref. Description L1 terminal, AC line voltage into the SSR T1 terminal, AC load voltage to the heating element Call for heat indicator light A2 (-) terminal, DC control voltage from the control board to the SSR A2 (+) terminal, DC control voltage from the control board to the SSR Continued on next page D e l u xe Co n tr o l Co ok &... - Page 33 OMPONENTS Continued from previous page Dual cavity TH-PHD-011548 Ref. Description Terminal A1 - Circuit A Terminal B1 - Circuit B Connector Terminal B2 - Circuit B Terminal A2 - Circuit A Circuit B DC- from control board Circuit B DC+ from control board Circuit B call for heat indicator Circuit A call for heat indicator Circuit A DC- from control board...
- Page 34 OMPONENTS Voltage Monitor (208–240V Ovens Only) + – TH-PHD-011551 Input DC Range 200–209 4.58–5.00 210–219 4.17–4.53 220–229 3.82–4.13 230–239 3.51–3.78 240–249 3.22–3.48 250+ 3.20 Ref. Description J5 DC output J1 AC input J2 AC input D e l u xe Co n tr o l Co ok & Ho ld Ser vi c e M an u a l MN- 4 6 71 2 Re v 0 1...
- Page 35 OMPONENTS High Limit Switches Resettable Contacts open at 300°F (149°C) VMC-PHD-001987 Ref. Description Reset button Temperature bulb Chamber Air Temperature Probe 100 Ohm at 0°C TH-PHD-011554 De l u x e C on t ro l Co o k & Ho l d Se r vi ce Man u a l MN -4 6 7 12 Rev 0 1...
- Page 36 OMPONENTS Speaker 8 Ohms VMC-PHD-001995 Door Switch ▪ Door closed 0 Ohms; 0 VDC across terminals 1 and 2 (top oven) or 5 and 6 (bottom oven) of connector J9 on the control board. ▪ Door open Infinite Ohms; 8 VDC across terminals 1 and 2 (top oven) or 5 and 6 (bottom oven) of connector J9 on the control board.
- Page 37 OMPONENTS ▪ Impedance protected ▪ 240 Volt ▪ 581 Ohm VMC-PHD-002011 De l u x e C on t ro l Co o k & Ho l d Se r vi ce Man u a l MN -4 6 7 12 Rev 0 1 1 1 / 20 ▪...
-
Page 38: Internal Components Identification
OMPONENTS Internal Components Identification TH-PHD-011557 Ref. Description Cavity lights D e l u xe Co n tr o l Co ok & Ho ld Ser vi c e M an u a l MN- 4 6 71 2 Re v 0 1 1 1/ 2 0 ▪... -
Page 39: Internal Components
OMPONENTS Internal Components Cavity Light 12 VDC VMC-PHD-007587 De l u x e C on t ro l Co o k & Ho l d Se r vi ce Man u a l MN -4 6 7 12 Rev 0 1 1 1 / 20 ▪... - Page 40 OMPONENTS This page intentionally left blank. D e l u xe Co n tr o l Co ok & Ho ld Ser vi c e M an u a l MN- 4 6 71 2 Re v 0 1 1 1/ 2 0 ▪...
-
Page 41: Maintenance
AINTENANCE Maintenance Schedule ▪ Requirements See topic How to Clean the Oven. ▪ Make sure the oven is cooled down and off—inside of chamber 140°F (60°C) or less. Daily For daily maintenance, do the following. ▪ See topic How to Clean the Oven, and follow the Daily Cleaning procedure. ▪... - Page 42 AINTENANCE Continued from previous page ▪ Check and tighten the cord connection inside of the appliance control area. ▪ Inspect the control cooling fans (if applicable). ▪ Measure the site voltage. ▪ Inspect and adjust voltage monitor board if needed. ▪...
-
Page 43: How To Clean The Oven
AINTENANCE How to Clean the Oven Before you begin WARNING: Electric shock hazard. Set the power switch to the OFF position and unplug the oven before cleaning it. CAUTION: Burn hazard. Allow the oven, drip pans, and racks to cool before cleaning. CAUTION: Corrosive materials hazard. - Page 44 AINTENANCE Continued from previous page Weekly cleaning To clean the oven weekly, do the following. procedure Step Action the power switch to the OFF position and unplug the appliance. Wipe the exterior areas of the oven with a non-abrasive nylon scrub pad. Spray the exterior areas of the oven with stainless steel polish.
-
Page 45: Troubleshooting
High Limit Switch Limit Switch and Control Board authorized Alto-Shaam service provider. 3.High Limit Switch De l u x e C on t ro l Co o k & Ho l d Se r vi ce Man u a l... -
Page 46: High Limit Alarm
ROUBLESHOOTING High Limit Alarm Test the oven to make sure the Reset the high limit for the corresponding cavity. cavity is not overheating. See Does the alarm clear? Troubleshooting Tree for Overheating scenario if necessary. Reset the high limit again. If Remove power to the oven. -
Page 47: The Display Does Not Illuminate
ROUBLESHOOTING The Display does not Illuminate WARNING: Electric shock and arc flash hazard. Use caution when measuring line voltage. Wear Personal Protective Equipment (PPE). Do you have 12VDC to the interface board? See steps below. Do you have 1 LED illuminated on the interface Replace the interface board. - Page 48 Do you read line voltage? Measure the AC voltage between the output of the Inspect/repair wiring and connections circuit breakers (or power switch for 300-TH). Do between circuit breakers/power switch and you read line voltage? the power supply. Retest.
-
Page 49: The Oven Does Not Heat
Inspect the wiring between A1/B1 Is there L1 voltage at A1 (upper/single cavity SSR) or and the circuit breaker/on-off power B1 (lower cavity SSR)? Measure in reference to a switch (300-TH). Inspect and repair known N/L2 the connections and wiring as needed. -
Page 50: The Product Probe Does Not Work
ROUBLESHOOTING The Product Probe does not Work Check the condition of the product probe and product probe wiring. Is there any damage, kinks, or cuts to Utilize an undamaged probe and go the wiring, damage to the probe sensing tip, or to the next step. -
Page 51: The Smoke Function Does Not Operate
ROUBLESHOOTING The Smoke Function does not Operate WARNING: Electric shock and arc flash hazard. Use caution when measuring line voltage. Wear Personal Protective Equipment (PPE). Check dipswitch settings on the control board. Dipswitch 4 needs to in the ON position. Cycle Is the smoke icon available to be selected on cook power to the oven after setting dipswitch. - Page 52 ROUBLESHOOTING Measure the incoming voltage at the L1 and L2/N No power coming to the oven. Recheck facility terminal block. Do you have line voltage? breaker to the oven and power cord. Inspect and repair wired connections. Measure voltage at the circuit breakers. D e l u xe Co n tr o l Co ok &...
-
Page 53: The Screen Is Not Responsive/Incorrect Response To The Selected Icon
ROUBLESHOOTING The Screen is not Responsive/Incorrect Response to the Selected Icon Is the touch glass damaged? (cracked, scratched, cut, Replace the touch screen/display panel etc). assembly. Inspect the touch controller board on the back of the Replace the touch screen/display panel display. -
Page 54: The Oven Overheats
ROUBLESHOOTING The Oven Overheats WARNING: Electric shock and arc flash hazard. Use caution when measuring line voltage. Wear Personal Protective Equipment (PPE). Measure the internal oven temperature with an Measure the ohm value of the cavity sensor: independent thermometer. Is this measured 100±2Ω... - Page 55 ROUBLESHOOTING Replace CB. Does the J11 plug continue outputting Measure and monitor current draw to heat cable 12VDC to the SSR while the registered temperature is wraps to ensure oven is now cycling at the set above the set temperature? temperature.
-
Page 56: Cheflinc.alto-Shaam.com Is Not Available On Your Device
ROUBLESHOOTING Cheflinc.alto-shaam.com is Not Available on Your Device If other websites are not available, Are other websites available on your device from the contact your network provider or IT same network being used to access Cheflinc? department. If the website is blocked, contact... -
Page 57: Cannot Connect To Cheflinc.alto-Shaam.com
A recovery link will be sent to the email associated with the Cheflinc account. If you are still unable to log in, contact Alto-Shaam technical support. De l u x e C on t ro l Co o k & Ho l d... -
Page 58: The Oven Is Not Displayed On The Dashboard
ROUBLESHOOTING The Oven is not Displayed on the Dashboard Prerequisite: The operator is on a device connected to the Internet and is able to login to cheflinc.alto-shaam.com. See topic The Oven will not Power Up Does the oven power up? troubleshooting tree in the Service Manual. -
Page 59: Unable To Assign Recipes From The Dashboard To Ovens In The Field
Dashboard troubleshooting connected (yes) or offline (no)? tree. Contact Alto-Shaam technical support for assistance. De l u x e C on t ro l Co o k & Ho l d Se r vi ce Man u a l... - Page 60 ROUBLESHOOTING This page intentionally left blank. D e l u xe Co n tr o l Co ok & Ho ld Ser vi c e M an u a l MN- 4 6 71 2 Re v 0 1 1 1/ 2 0 ▪...
Need help?
Do you have a question about the 300-TH and is the answer not in the manual?
Questions and answers