Table of Contents
Advertisement
Quick Links
Advertisement
Table of Contents

Related Manuals for Avaya E129


Summary of Contents for Avaya E129
- Page 1 Using Avaya E129 SIP Deskphone Release 1.0 Issue 1 September 2013...
-
Page 3: Table Of Contents
Unblocking the caller ID for a particular call....................24 Disabling call waiting for a particular call....................24 Enabling call waiting for a particular call....................25 Enabling unconditional call forwarding...................... 25 Disabling unconditional call forwarding..................... 26 Enabling busy call forwarding........................26 Using Avaya E129 SIP Deskphone September 2013... - Page 4 Setting a ring tone............................. 42 Setting the ring tone volume........................42 Setting the phone screen contrast......................42 Setting a display language........................43 Setting the date and time.......................... 43 Setting call forwarding..........................43 Index............................. Using Avaya E129 SIP Deskphone September 2013...
-
Page 5: Chapter 1: Introduction
This document describes how to use product features and capabilities. Intended audience This document is intended for people who want to learn how to use a product’s features and capabilities. Releated resources Documentation See the following related documents at support.avaya.com. Document Title Use this document to: Audience number... -
Page 6: Support
Supporting Using Support Visit the Avaya Support website at http://support.avaya.com for the most up-to-date documentation, product notices, and knowledge articles. You can also search for release notes, downloads, and resolutions to issues. Use the online service request system to create a service request. -
Page 7: Chapter 2: Getting Started
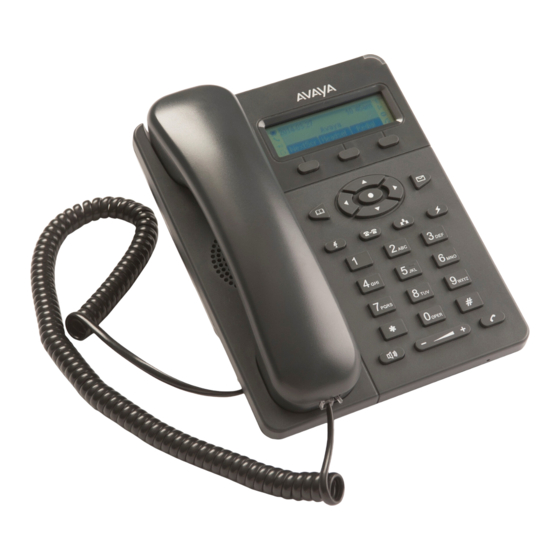
Chapter 2: Getting started Feature description Avaya E129 is a SIP-based IP phone that small-to-medium business can use for enterprise communication. The phone provides single SIP account with advanced security protection for privacy and broad interoperability with most of the third-party SIP devices. -
Page 8: Connection Ports
An RJ9 port to connect the handset. Headset port An EHS-suported RJ9 port to connect to Plantronics headset. Deskphone stand You can either wall mount your phone or attach the stand to the phone that Avaya provides. Using Avaya E129 SIP Deskphone September 2013 Comments? infodev@avaya.com... -
Page 9: Attaching The Stand
2. Simultaneously pull out the hooks of the opposite side from the slots. Button layout Button Name Description Call Dials the number you entered. Speaker Activates and deactivates the speakerphone. Volume Increases and decreases audio volume. Mute Mutes and unmutes the microphone. Using Avaya E129 SIP Deskphone September 2013... -
Page 10: Icons
The headset is enabled. Do not disturb The Do Not Disturb feature is enabled. Call forward The call forward feature is enabled. Mute The phone is on mute. SRTP The phone is using SRTP. Using Avaya E129 SIP Deskphone September 2013 Comments? infodev@avaya.com... -
Page 11: Navigation Terms
Navigation terms Navigation terms Term Description Scroll Move between menu options using the Up and Down Navigation keys. Select Highlight the required option. Using Avaya E129 SIP Deskphone September 2013... - Page 12 Getting started Using Avaya E129 SIP Deskphone September 2013 Comments? infodev@avaya.com...
-
Page 13: Chapter 3: Outgoing Calls
Use the following procedure to make another call when you are already on an active call. You can make only two calls simultaneously. Procedure 1. Press Flash. 2. Use the keypad to enter a phone number. 3. Press Call. Using Avaya E129 SIP Deskphone September 2013... -
Page 14: Moving Between Calls
Making a call using the call history Procedure 1. Press Menu > Call History. 2. Select from the following call types: • Answered Calls • Dialed Calls • Missed Calls • Transferred Calls • Forwarded Calls Using Avaya E129 SIP Deskphone September 2013 Comments? infodev@avaya.com... -
Page 15: Making A Call Using The Ip Address
Use the following procedure when you want the deskphone to call a preconfigured autodial number as soon as you lift the handset. Only your administrator can configure an autodial number and enable the autodial feature. You can make a frequently dialed number the autodial number. Using Avaya E129 SIP Deskphone September 2013... - Page 16 Outgoing calls Procedure Lift the handset. The deskphone dials the number that your administrator configured as the autodial number. Using Avaya E129 SIP Deskphone September 2013 Comments? infodev@avaya.com...
-
Page 17: Chapter 4: Incoming Calls
About this task If you get an incoming call while you are on an active call, the deskphone plays a call waiting tone to indicate the incoming call. Procedure Press Flash or press Answer. Using Avaya E129 SIP Deskphone September 2013... -
Page 18: Making A Blind Transfer Of A Call
Procedure 1. Press Flash. The phone puts the active call on hold. 2. Use the keypad to enter the number to which you want to transfer the call. Using Avaya E129 SIP Deskphone September 2013 Comments? infodev@avaya.com... - Page 19 Making an attended transfer of a call 3. Press Call. 4. Announce the call when the contact answers your call. 5. Press Transfer. 6. Press Flash. Your phone transfers the active call to the selected number and disconnects. Using Avaya E129 SIP Deskphone September 2013...
- Page 20 Incoming calls Using Avaya E129 SIP Deskphone September 2013 Comments? infodev@avaya.com...
-
Page 21: Chapter 5: Call-Related Features
Use the following procedure to unmute your phone so that the contacted person can hear you. Procedure Press Mute. Putting a call on hold About this task Use the following procedure to put an active call on hold. Using Avaya E129 SIP Deskphone September 2013... -
Page 22: Resuming A Call On Hold
• Lift the handset. • Press Speaker. • Press Headset. 2. Use the keypad to enter *30. Your phone activates the block caller ID feature and displays the caller ID blocked message. Using Avaya E129 SIP Deskphone September 2013 Comments? infodev@avaya.com... -
Page 23: Unblocking The Caller Id For All Calls
• Press Headset. 2. Use the keypad to enter *67 followed by the number that you want to call. 3. Press Call. Your phone activates the block caller ID feature for only the current call. Using Avaya E129 SIP Deskphone September 2013... -
Page 24: Unblocking The Caller Id For A Particular Call
1. Perform one of the following actions: • Lift the handset. • Press Speaker. • Press Headset. 2. Use the keypad to enter *70 followed by the number that you want to call. 3. Press Call. Using Avaya E129 SIP Deskphone September 2013 Comments? infodev@avaya.com... -
Page 25: Enabling Call Waiting For A Particular Call
• Lift the handset. • Press Speaker. • Press Headset. 2. Use the keypad to enter *72 followed by the phone number to which you want to forward the call. 3. Press Call. Using Avaya E129 SIP Deskphone September 2013... -
Page 26: Disabling Unconditional Call Forwarding
• Lift the handset. • Press Speaker. • Press Headset. 2. Use the keypad to enter *90 followed by the number to which you want to forward the call. 3. Press Call. Using Avaya E129 SIP Deskphone September 2013 Comments? infodev@avaya.com... -
Page 27: Disabling Busy Call Forwarding
1. Perform one of the following actions: • Lift the handset. • Press Speaker. • Press Headset. 2. Use the keypad to enter *92 followed by the number to which you want to forward the call. 3. Press Call. Using Avaya E129 SIP Deskphone September 2013... -
Page 28: Disabling Delayed Call Forwarding
1. Perform one of the following actions: • Lift the handset. • Press Speaker. • Press Headset. 2. Use the keypad to enter *93. The phone displays the message to cancel all delayed call forwards. Using Avaya E129 SIP Deskphone September 2013 Comments? infodev@avaya.com... -
Page 29: Chapter 6: Voice Mail
MWI (Message Waiting Indicator) blinks red to indicate that you have a voice mail. Procedure 1. Press Message or dial the number of the voice mail server. 2. Follow the IVR instructions to listen to your voice mail message. Using Avaya E129 SIP Deskphone September 2013... - Page 30 Voice mail Using Avaya E129 SIP Deskphone September 2013 Comments? infodev@avaya.com...
-
Page 31: Chapter 7: Phone Book
The group, if any, to which the contact belongs. Adding a contact from the call history Procedure 1. Press Menu > Call History. 2. Select from one of the following call types, and press Menu. Using Avaya E129 SIP Deskphone September 2013... -
Page 32: Editing Contact Details
31 Searching a contact Procedure 1. Press Phone Book > Search. 2. Enter the number or the name or part of the name of the contact. 3. Press OK. Using Avaya E129 SIP Deskphone September 2013 Comments? infodev@avaya.com... -
Page 33: Deleting A Contact
Procedure 1. Press Phone Book > Groups > New Group. 2. Enter a name for the group. 3. Press OK. The phone adds the group and displays it in the group list. Using Avaya E129 SIP Deskphone September 2013... -
Page 34: Editing A Group
Use the following procedure to delete a group that you created. You cannot delete default groups. Procedure 1. Press Phone Book > Groups. 2. Select the group that you want to delete, and press Menu. 3. Press Delete Group. Using Avaya E129 SIP Deskphone September 2013 Comments? infodev@avaya.com... -
Page 35: Chapter 8: Call History
2. Select from one of the following call types, and press Menu. • Answered Calls • Dialed Calls • Missed Calls • Transferred Calls • Forwarded Calls 3. Select the entry that you want to delete, and press Menu. 4. Scroll and select Delete. Using Avaya E129 SIP Deskphone September 2013... -
Page 36: Deleting All Entries Of A Specific Call Type
Next steps Deleting all entries from the call history Procedure 1. Press Menu > Call History. 2. Scroll and select Delete All. 3. Press Menu. 4. Press Delete to confirm the deletion. Using Avaya E129 SIP Deskphone September 2013 Comments? infodev@avaya.com... -
Page 37: Chapter 9: Conference Calls
Procedure 1. Press Conference. 2. Press Flash. The deskphone starts the conference between you and the two active calls. Putting a conference on hold Before you begin You must have an active conference. Using Avaya E129 SIP Deskphone September 2013... -
Page 38: Resuming A Conference On Hold
1. Press Hold. The phone puts the participants on hold. 2. Press Flash. The phone resumes the second call. Ending a conference Before you begin You must have an active conference. Using Avaya E129 SIP Deskphone September 2013 Comments? infodev@avaya.com... - Page 39 Ending a conference Procedure Press EndCall. The phone ends the conference and disconnects the participants. Using Avaya E129 SIP Deskphone September 2013...
- Page 40 Conference calls Using Avaya E129 SIP Deskphone September 2013 Comments? infodev@avaya.com...
-
Page 41: Chapter 10: Deskphone Customization
When you disable the Do Not Disturb feature, the phone accepts all incoming calls and provides a ringing alert. Procedure Press Menu > Preference > Do Not Disturb > Disable DND. The phone removes the Do Not Disturb icon from the screen. Using Avaya E129 SIP Deskphone September 2013... -
Page 42: Setting A Ring Tone
3. Press OK. Setting the phone screen contrast Procedure 1. Press Menu > Preference > LCD Contrast. 2. Use the Right or Left Navigation keys to select the contrast level. 3. Press OK. Using Avaya E129 SIP Deskphone September 2013 Comments? infodev@avaya.com... -
Page 43: Setting A Display Language
2. Select the required language, and press Menu. Setting the date and time Procedure 1. Press Menu Preference > Time Settings. 2. Enter the date and time. 3. Press OK. Setting call forwarding Before you begin About this task Procedure Using Avaya E129 SIP Deskphone September 2013... - Page 44 Deskphone customization Using Avaya E129 SIP Deskphone September 2013 Comments? infodev@avaya.com...
-
Page 45: Index
..............delete ..............resume ..............all call history entries ..........unmute ..............all entries of specific call type ......call history ............. call history entry ........... delete all entries ........... delete all ..............Using Avaya E129 SIP Deskphone September 2013... - Page 46 ..............icons ................enable ..............incoming call ............... answering while on another call ......answering ............. rejecting ............... voice mail ..............voice mail: ..............retrieving .............. keypad layout ............... moving between calls ..........Using Avaya E129 SIP Deskphone September 2013...
Need help?
Do you have a question about the E129 and is the answer not in the manual?
Questions and answers