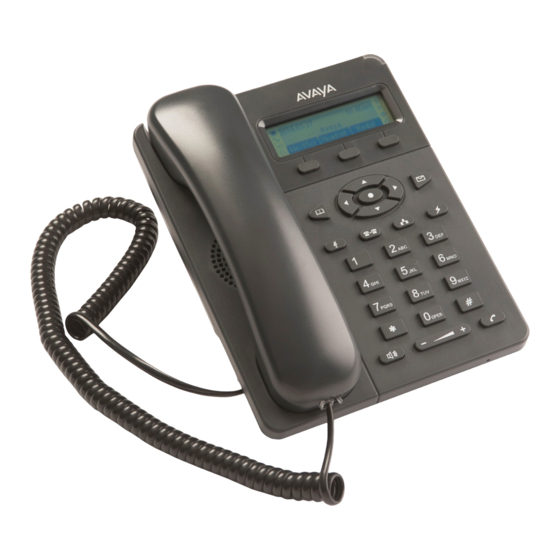
Avaya E129 Manual
Sip deskphone
Hide thumbs
Also See for E129:
- Administering (108 pages) ,
- User manual (59 pages) ,
- Using manual (44 pages)
Table of Contents
Advertisement
Advertisement
Table of Contents

Related Manuals for Avaya E129


Summary of Contents for Avaya E129
- Page 1 Using Avaya E129 SIP Deskphone Release 1.0 February 2014...
- Page 2 Avaya can be a criminal, as well as a civil offense Warranty under the applicable law.
- Page 3 Care should be taken to avoid personal injury. as granting, by implication, estoppel, or otherwise, any license or right in and to the Marks without the express written permission of Avaya or EU Countries the applicable third party.
- Page 4 Using Avaya E129 SIP Deskphone February 2014 Comments? infodev@avaya.com...
-
Page 5: Table Of Contents
Deactivating Call Forward......................... 27 Chapter 6: Conference calls....................Starting a conference..........................29 Starting a conference by joining two calls....................29 Putting a conference on hold........................30 Resuming a conference on hold....................... 30 Splitting a conference..........................30 Using Avaya E129 SIP Deskphone February 2014... - Page 6 Setting the screen contrast........................46 Setting a display language........................47 Setting the date and time.......................... 47 Chapter 12: Deskphone diagnostics................. Performing audio check..........................49 Checking deskphone keys........................49 Checking deskphone dial pad........................50 Index............................. Using Avaya E129 SIP Deskphone February 2014...
-
Page 7: Chapter 1: Introduction
Chapter 1: Introduction Purpose ® This document describes how to use AvayaE129 SIP Deskphone features in Avaya Aura Communication Manager and IP Office environments. Intended audience This document is intended for people who want to learn how to use product features and capabilities. - Page 8 See frequently used tasks. Users and Deskphone Quick administrators Reference Implementing 16–604370 Installing and Maintaining See the installation and Administrators and Avaya E129 SIP upgrade procedures for network engineers Deskphone Avaya E129 SIP Deskphone. Using Avaya E129 SIP Deskphone February 2014 Comments? infodev@avaya.com...
-
Page 9: Chapter 2: Getting Started
Chapter 2: Getting started Feature description Avaya E129 SIP Deskphone is a SIP-based IP phone that small-to-medium businesses can use for communication. Physical specifications • Two call appearances • A 128 x 40 graphical LCD • Three softkeys • Dual network ports with integrated Power over Ethernet (PoE) •... -
Page 10: Connection Ports
An EHS-suported RJ9 port to connect to a Plantronics headset Deskphone stand You can either wall mount your deskphone or attach the stand that Avaya provides. The stand includes four hooks that fit into four slots in the rear of the deskphone. Using Avaya E129 SIP Deskphone February 2014 Comments? infodev@avaya.com... -
Page 11: Attaching The Stand
The stand fits into the back of the deskphone. Detaching the stand Procedure On the arrow-marked side, press the hooks, and pull up from the lower two slots. The hooks in the upper two slots detach simultaneously. Using Avaya E129 SIP Deskphone February 2014... -
Page 12: Button Layout
Increases and decreases the volume. Call Dials the number that you enter. Flash Puts the current call on hold and brings up the second line for dialing or answering the second call. Using Avaya E129 SIP Deskphone February 2014 Comments? infodev@avaya.com... -
Page 13: Icons
The Do Not Disturb feature is enabled. disturb Call forward The Call Forward feature is enabled. Mute The deskphone is on mute. SRTP The deskphone is using Secure Real-time Transport Protocol (SRTP ). Using Avaya E129 SIP Deskphone February 2014... -
Page 14: Logging In To The Deskphone
Lock the deskphone if you are moving away from your desk and do not want anyone to use the deskphone in your absence. The emergency dialing feature is unavailable if the deskphone is locked. Using Avaya E129 SIP Deskphone February 2014 Comments? infodev@avaya.com... -
Page 15: Unlocking The Deskphone
The deskphone displays the message Keypad is locked. Unlocking the deskphone Procedure 1. Press the star (*) key for four seconds. The deskphone displays the Password field. 2. Enter the password to unlock the deskphone. Using Avaya E129 SIP Deskphone February 2014... - Page 16 Getting started Using Avaya E129 SIP Deskphone February 2014 Comments? infodev@avaya.com...
-
Page 17: Chapter 3: Outgoing Calls
You must be on two calls simultaneously. Procedure 1. Press Flash. Your deskphone puts the current call on hold and resumes the other call. 2. To return to the previous call, press Flash again. Using Avaya E129 SIP Deskphone February 2014... -
Page 18: Making A Call Using On-Hook Dialing
3. Press Call. Making a call using the phone book Before you begin You must have at least one entry in the phone book. Procedure 1. Perform one of the following actions: Using Avaya E129 SIP Deskphone February 2014 Comments? infodev@avaya.com... -
Page 19: Making A Call Using The Ldap Directory
6. Edit the number if required, else press the OK softkey. Making a call using the call history Procedure 1. Press Menu > Call History. 2. Select from the following call types: • Answered Calls • Dialed Calls • Missed Calls Using Avaya E129 SIP Deskphone February 2014... -
Page 20: Redialing The Last Dialed Number
You can make a frequently dialed number the autodial number. To call other numbers, use on-hook dialing. Procedure Perform one of the following actions: • Lift the handset. • Press Speaker. • Press the Headset softkey. Using Avaya E129 SIP Deskphone February 2014 Comments? infodev@avaya.com... -
Page 21: Making An Emergency Call
Procedure 1. Perform one of the following actions: • Lift the handset. • Press Speaker. • Press the Headset softkey. 2. Enter the emergency number. 3. Press Call. Using Avaya E129 SIP Deskphone February 2014... - Page 22 Outgoing calls Using Avaya E129 SIP Deskphone February 2014 Comments? infodev@avaya.com...
-
Page 23: Chapter 4: Incoming Calls
If you get another call while you are on a call, the deskphone plays a call waiting tone and displays the call on the phone screen. Procedure Perform one of the following actions: Using Avaya E129 SIP Deskphone February 2014... -
Page 24: Making A Blind Call Transfer
Your deskphone transfers the call to the selected number. Making an attended call transfer Before you begin • Ensure that the administrator enabled the Auto- Attended Transfer feature for your deskphone. • Answer the call before transferring the call. Using Avaya E129 SIP Deskphone February 2014 Comments? infodev@avaya.com... - Page 25 5. Press Transfer. Result Your deskphone transfers the active call to the selected number and disconnects. Using Avaya E129 SIP Deskphone February 2014...
- Page 26 Incoming calls Using Avaya E129 SIP Deskphone February 2014 Comments? infodev@avaya.com...
-
Page 27: Chapter 5: Call Forward
Chapter 5: Call Forward Use the Call Forward feature to divert incoming calls to another number. The Avaya E129 SIP Deskphone supports the following Call Forward types: Call Forward type Description Forward All Forwards all incoming calls to another number. - Page 28 Call Forward Procedure 1. Press Menu > Call Features. 2. Select the account, and press Menu. 3. Select the required Call Forward type, and press Menu. 4. Press the Disable softkey. Using Avaya E129 SIP Deskphone February 2014 Comments? infodev@avaya.com...
-
Page 29: Chapter 6: Conference Calls
Use the following procedure to start a conference. This conference is a local conference that the E129 deskphone manages. If one of the participants puts the call on hold and music-on- hold is configured for that participant, then the other two participants hear the music. The other participants can also converse with each other. -
Page 30: Putting A Conference On Hold
Procedure 1. Press the Hold softkey. The deskphone puts the participants on hold. 2. Press Flash. Result The deskphone resumes the second call. Using Avaya E129 SIP Deskphone February 2014 Comments? infodev@avaya.com... -
Page 31: Ending A Conference
Ending a conference Ending a conference Before you begin You must have an active conference. Procedure Press the EndCall softkey. The deskphone ends the conference and disconnects the participants. Using Avaya E129 SIP Deskphone February 2014... - Page 32 Conference calls Using Avaya E129 SIP Deskphone February 2014 Comments? infodev@avaya.com...
-
Page 33: Chapter 7: Call-Related Features
Unmuting a call Before you begin You must have a call on mute. About this task Use the following procedure to unmute your deskphone so that the contacted person can hear you. Procedure Press Mute. Using Avaya E129 SIP Deskphone February 2014... -
Page 34: Putting A Call On Hold
Procedure Press the Hold softkey. Resuming a call on hold Before you begin You must have a call on hold. Procedure Press the Resume softkey. Using Avaya E129 SIP Deskphone February 2014 Comments? infodev@avaya.com... -
Page 35: Chapter 8: Call History
2. Select one of the following call types: • Answered Calls • Dialed Calls • Missed Calls • Transferred Calls 3. Press Menu. 4. Select the entry that you want to delete, and press Menu. 5. Scroll and select Delete. Using Avaya E129 SIP Deskphone February 2014... -
Page 36: Deleting All Entries Of A Specific Call Type
Deleting all entries from the call history Procedure 1. Press Menu > Call History. 2. Scroll and select Clear All. 3. Press Menu. 4. Press the Delete softkey to confirm the deletion. Using Avaya E129 SIP Deskphone February 2014 Comments? infodev@avaya.com... -
Page 37: Chapter 9: Voice Mail
Message Waiting Indicator (MWI) blinks red to indicate that you have a voice mail. Procedure 1. Perform one of the following actions: • Press Message. • Dial the number of the voice mail server. 2. Follow the voice prompts to listen to your messages. Using Avaya E129 SIP Deskphone February 2014... - Page 38 Voice mail Using Avaya E129 SIP Deskphone February 2014 Comments? infodev@avaya.com...
-
Page 39: Chapter 10: Contacts
Chapter 10: Contacts Avaya E129 SIP Deskphone provides the facility to save contacts locally on the deskphone. You can also assign contacts to groups. You can manage contacts through: • A contact XML file. Only an administrator can manage contacts through the XML file. -
Page 40: Contact Field Descriptions
The deskphone displays all matching contacts. 4. Scroll and select the required contact. 5. Scroll and press the Save to Phonebook softkey. The deskphone displays the contact details. 6. Scroll and press the Confirm Add softkey. Using Avaya E129 SIP Deskphone February 2014 Comments? infodev@avaya.com... -
Page 41: Adding A Contact From The Call History
Procedure 1. Press Phonebook > Local Phonebook. 2. Select the contact whose details you want to edit, and press Menu. 3. Update the contact details. 4. Scroll and select Save. 5. Press Menu. Using Avaya E129 SIP Deskphone February 2014... -
Page 42: Searching A Contact
Phonebook > Local Phonebook. 2. Select the contact that you want to delete, and press Menu. 3. Scroll and select Delete. 4. Press Menu. 5. Press the Delete softkey to confirm the deletion. Using Avaya E129 SIP Deskphone February 2014 Comments? infodev@avaya.com... -
Page 43: Deleting All Contacts
The deskphone adds the group and displays it in the group list. Editing a group About this task Use the following procedure to edit a group that you created. You cannot edit default groups. Procedure 1. Press Phonebook > Local Group. Using Avaya E129 SIP Deskphone February 2014... -
Page 44: Deleting A Group
Use the following procedure to delete a group that you created. You cannot delete default groups. Procedure 1. Press Phonebook > Local Group. 2. Select the group that you want to delete, and press Menu. 3. Select Delete Group, and press Menu. Using Avaya E129 SIP Deskphone February 2014 Comments? infodev@avaya.com... -
Page 45: Chapter 11: Deskphone Customization
About this task When you deactivate the Do Not Disturb feature, the deskphone accepts all incoming calls and provides a ringing alert. Procedure Press Menu > Preference > Do Not Disturb > Disable DND. Using Avaya E129 SIP Deskphone February 2014... -
Page 46: Setting A Ring Tone
Setting the screen contrast Procedure 1. Press Menu > Preference > LCD Contrast. 2. Use the Right or Left navigation keys to select the contrast level. 3. Press the OK softkey. Using Avaya E129 SIP Deskphone February 2014 Comments? infodev@avaya.com... -
Page 47: Setting A Display Language
2. Select the required language, and press Menu. Setting the date and time Procedure 1. Press Menu > Preference > Time Settings. 2. Enter the date and time. 3. Press the OK softkey. Using Avaya E129 SIP Deskphone February 2014... - Page 48 Deskphone customization Using Avaya E129 SIP Deskphone February 2014 Comments? infodev@avaya.com...
-
Page 49: Chapter 12: Deskphone Diagnostics
Chapter 12: Deskphone diagnostics The Avaya E129 SIP Deskphone provides the option to check the audio and the dial pad of the deskphone. Performing audio check About this task Use the following procedure to check whether the audio of the deskphone is functional. -
Page 50: Checking Deskphone Dial Pad
The deskphone removes the name of the key that you pressed. 3. Repeat Step 2 for all the keys on the dial pad. The deskphone ends the check when you finish pressing all the keys on the dial pad. Using Avaya E129 SIP Deskphone February 2014 Comments? infodev@avaya.com... -
Page 51: Index
....deskphone stand ..........view ..............attaching .............. call muting ..............detaching ............. call unmuting .............. dial pad check ............calling ..............– disable ................ emergency number ..........Using Avaya E129 SIP Deskphone February 2014... - Page 52 ....rejecting ............... support ................. contact ..............keypad layout ............. transfer ............... attended ............... LDAP directory ............blind ..............unlocking the deskphone ..........unmuting ..............voice mail ..............retrieving .............. Using Avaya E129 SIP Deskphone February 2014...
Need help?
Do you have a question about the E129 and is the answer not in the manual?
Questions and answers