
Related Manuals for OLIMEX AVR-ISP-MK2


Summary of Contents for OLIMEX AVR-ISP-MK2
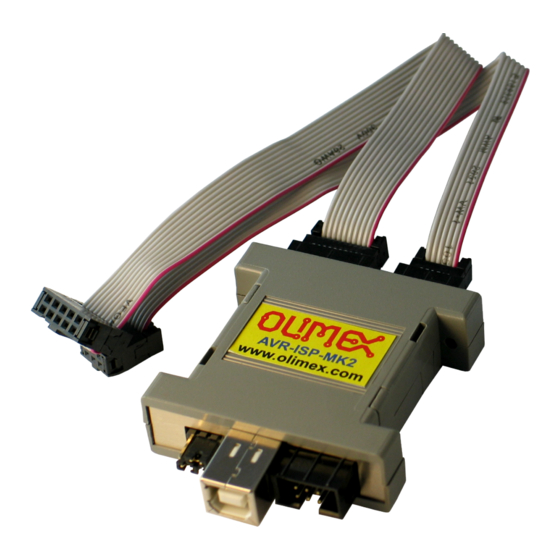
- Page 1 AVR-ISP-MK2 programmer USER’S MANUAL Revision G, May 2013 Designed by OLIMEX Ltd, 2012 All boards produced by Olimex LTD are ROHS compliant...
-
Page 2: Disclaimer
This document is intended only to assist the reader in the use of the product. OLIMEX Ltd. shall not be liable for any loss or damage arising from the use of any information in this document or any error or omission in such information or any incorrect use of the product. - Page 3 OLIMEX© 2012 AVR-ISP-MK2 user's manual The product is based on Dean Camera's LUFA USB stack. More info at: http://www.fourwalledcubicle.com/ The LUFA library is currently released under the MIT license, included below. Copyright 2013 Dean Camera (dean [at] fourwalledcubicle [dot] com)
-
Page 4: Table Of Contents
1.1 Features ............................. 5 1.2 Target market and purpose of the board ................5 1.3 Organization ..........................6 CHAPTER 2 SETTING UP THE AVR-ISP-MK2 BOARD ........7 2. Introduction to the chapter ....................... 7 2.1 Electrostatic warning ....................... 7 2.3 Requirements ........................... 7 CHAPTER 3 AVR-ISP-MK2 BOARD DESCRIPTION .......... -
Page 5: Chapter 1 Overview
Thank you for choosing the AVR-ISP-MK2 programmer from Olimex! This document provides a user’s guide for the Olimex AVR-ISP-MK2 programmer. As an overview, this chapter gives the scope of this document and lists the programmer’s features. The document’s organization is then detailed. -
Page 6: Organization
– Chapter 2 provides a guide for quickly setting up the board – Chapter 3 contains the general board diagram and layout – Chapter 4 mentions the main software tools used with AVR-ISP-MK2 – Chapter 5 is an explanation of the interfaces, the LEDs and the jumpers position –... -
Page 7: Chapter 2 Setting Up The Avr-Isp-Mk2 Board
The AVR-ISP-MK2 comes in a plastic cover but make sure boards and devices interfacing with the programmer are properly grounded. 2.3 Requirements In order to set up the AVR-ISP-MK2 optimally, you might need to update your set of hardware and/or software tools. The major needed components are listed below. Hardware tools: - USB-A to USB-B cable - Atmel board or chip that can be programmed by AVR-ISP-MK2. -
Page 8: Chapter 3 Avr-Isp-Mk2 Board Description
3. Introduction to the chapter Here you get acquainted with the main parts of the board. Note the names used on the board differ from the names used to describe them. For the actual names check the AVR-ISP-MK2 itself. 3.1 Layout (top view) -
Page 9: Chapter 4 Recommended Software Tools
There is a way to use AVR-ISP-MK2 with Arduino/AVRDude using the LibUSB drivers and changing the firmware BUT it is not possible at the moment to use the AVR-ISP-MK2 both at Arduino/AVRDude and AVR Studio. It would depend on you which one you prefer. You need to change the firmware of AVR-ISP-MK2 (using the Atmel Flip program) AND the Windows drivers every time you switch between Arduino and AVR Studio (or vice versa). - Page 10 OLIMEX© 2012 AVR-ISP-MK2 user's manual 3. After that run the Atmel Flip and select AT90USB162 in Device -> Select 4. Slect Settings -> Communication -> USB -> Open 5. From File -> Load hex files choose either AVR456-studio-AVRISP-MKII.hex or libUSB- AVRISP-MKII.hex - the first hex is the firmware for AVR/Atmel Studio, the second one is for...
- Page 11 AVR-ISP-MK2 user's manual AVRdude/Linux/Arduino. 6. Click Run 7. Unplug and plug again AVR-ISP-MK2 from the USB 8. Uninstall any previous drivers (selecting delete option) from device manager and scan for hardware changes or plug/unplug again 9. Install the new drivers corresponding for your needs (the picture below shows how to install the LibUSB drivers over the Jungo ones –...
- Page 12 OLIMEX© 2012 AVR-ISP-MK2 user's manual Page 12 of 19...
-
Page 13: Chapter 5 Interfaces And Hardware
In this chapter are presented the interfaces found on the programmed that can be found on the board. Jumpers functions are described. 5.1 Programming interfaces AVR-ISP-MK2 has three programming interfaces aiming at different processors 5.1.1 10-pin ICSP The ICSP (in-circuit serial programming) interface is suitable for programming tinyAVR and megaAVR chips. -
Page 14: Jumpers Description
(CLICK FOR DOWNLOAD) and click "RUN" in the "Operations Flow" section 7) Disconnect the AVR-ISP-MK2 from the USB and connect it again Please refer to 4.2 Arduino, AVRDude, Linux for more detailed description. 5.3 Jumpers description Please note that the two jumpers on the board are PTH (plated-through hole) type and should be easy to mount/dismount. -
Page 15: Leds Explained
OLIMEX© 2012 AVR-ISP-MK2 user's manual 5.4 LEDs explained There are two 3mm LEDs – ORANGE and a double colored GREEN/RED. Green – when GREEN LED is on – USB connection is active Green – GREEN LED on and RED blink - USB connection active and programming activity (erasing, flashing, programming) –... -
Page 16: Chapter 6 Revision History And Support
OLIMEX© 2012 AVR-ISP-MK2 user's manual CHAPTER 6 REVISION HISTORY AND SUPPORT 6. Introduction to the chapter In this chapter you will find the current and the previous version of the document you are reading. Also the web-page for your device is listed. Be sure to check it after a purchase for the latest available updates and examples. -
Page 17: Useful Web Links And Purchase Codes
ORDER CODES: AVR-ISP-MK2 – assembled and tested AVR-ISP compatible programmer How to purchase Olimex products? You can order from our web-shop or from any of our distributors. The list of official Olimex distributors might be found at: https://www.olimex.com/Distributors/. Check https://www.olimex.com/ for more info. - Page 18 3. If you are using a custom made board or you connect the microcontroller directly with wires make sure you follow the AVR ICSP programming standards. 4. Make sure you are using the ISP interface of AVR-ISP-MK2. If your target board has a 6 pin connector instead of the 10 pin on AVR-ISP-MK2 make appropriate adapter.
-
Page 19: Product Support
AVR-ISP-MK2 user's manual 6.4 Product support For product support, hardware information and error reports mail to: support@olimex.com. Note that we are primarily a hardware company and our software support is limited. Please consider reading the paragraph below about the warranty of Olimex products.
Need help?
Do you have a question about the AVR-ISP-MK2 and is the answer not in the manual?
Questions and answers