Table of Contents
Advertisement
Quick Links
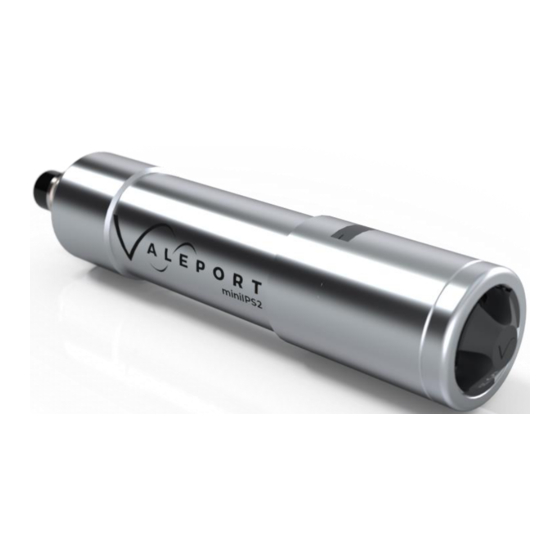
miniIPS2 and 2e Operating Manual
Document ID
MANUAL-383434403-1
Date:
September 2020
This confidential document was prepared by the staff of Valeport Limited, the Company, and is the
property of the Company, which also owns the copyright therein. All rights conferred by the law of the
copyright and by virtue of international copyright conventions are reserved to the Company. This document
must not be copied, reprinted or reproduced in any material form, either wholly or in part, and the
contents of this document, and any method or technique available there from, must not be disclosed to
any other person whatsoever without the prior written consent of the Company.
© 2020 Valeport Ltd
Valeport Ltd
St Peter's Quay
Totnes TQ9 5EW
United Kingdom
As part of our policy of continuous development, we reserve the right to alter, without prior notice, all
specifications, designs, prices and conditions of supply for all our equipment
Phone:
+44 1803 869292
email:
sales@valeportwater.co.uk
Web:
www.valeportwater.co.uk
Advertisement
Table of Contents

Related Manuals for Valeport miniIPS2


Summary of Contents for Valeport miniIPS2
- Page 1 Date: September 2020 This confidential document was prepared by the staff of Valeport Limited, the Company, and is the property of the Company, which also owns the copyright therein. All rights conferred by the law of the copyright and by virtue of international copyright conventions are reserved to the Company. This document...
-
Page 2: Table Of Contents
Data Output Formats ........................... 19 Data String Formatting ........................19 Format: Valeport CSV ........................19 Format: Valeport (Standard) ......................20 Format: Valeport NMEA ($PIPS) ....................20 Format: Valeport NMEA ($PVIPS2) ....................21 Format: CSV ..........................21 Format: Digiquartz ........................22 Format: Digiquartz CDL ......................... - Page 3 Setup Using DataLog X2 ........................ 25 8.1.1 Interface to the miniIPS 2 ....................25 8.1.2 Configure the miniIPS 2 ....................... 26 Setup Using Valeport Configure App ....................32 Interface the instrument ....................... 32 9.1.1 Valeport Configure Without an Instrument ................. 32 Configure the Instrument......................33 10 Care &...
-
Page 4: Introduction
2e Operating Manual: MANUAL-383434403-1 1 Introduction The Valeport miniIPS2 and 2e “Intelligent Pressure Sensor” builds on the success of the industry standard miniIPS. • The miniIPS2 operates over serial comms - RS232 and RS485. • The miniIPS2e operates over Ethernet (TCP/IP). -
Page 5: Sensors
Sensors 2 Sensors 2.1 Pressure Sensor The miniIPS2 and 2e are fitted with the following sensors: • A high accuracy, 0.01% of full scale, temperature compensated piezo-resistive pressure transducer. • The Pressure Module is interchangeable Sensor Type Strain Gauge Range:... - Page 6 2e Operating Manual: MANUAL-383434403-1 The three prongs should be carefully inserted into the lock screw cap of the Pressure Module and turned counter-clockwise (when looking directly at the module) to loosen it. Keep turning until the Pressure Module gently pops out of the socket. The tool will engage with the Pressure Module and allow you to very gentle pull if required.
-
Page 7: Physical Characteristics
Standard is SubConn type MCBH6F (titanium) miniIPS2e: Standard is SubConn type DBH13F (titanium) Alternatives may be supplied on request Weight: <0.75kg (in air) 3.2 Dimensions - miniIPS 2 3.3 Dimensions - miniIPS 2e © 2020 – Valeport Ltd Page | 4... -
Page 8: Communications
4 Communications 4.1 Introduction Control of the miniIPS2 and 2e is achieved through the use of “# codes”, as described in the sections below. All commands must be “sent” by pressing the Enter key with the exception of the single ‘#’ character required to enter set up mode 4.2 Serial Comms - RS 232 and RS485... -
Page 9: Ethernet
Click on the IP Address in the left hand panel to reveal more information in the right hand panel Select Web Configuration Select the green arrow to reveal the password entry dialogue Do not enter a Username or Password - simply select OK © 2020 – Valeport Ltd Page | 6... - Page 10 2e Operating Manual: MANUAL-383434403-1 • Select Connection, ensure settings are similar to below do not select or accept a Local Port number 23 Local Port number 23 is reserved for TelNet • Select Apply Settings • Perform a new search after the settings have been completed.
- Page 11 • Perform a new search after the settings have been completed and applied. 4.3.1.1 Fixed IP To set a fixed IP address for the unit follow the wizard in the Lantronix App © 2020 – Valeport Ltd Page | 8...
-
Page 12: Operation With Datalog X2
Load the latest version of Valeport's configuration software DataLog x2. It can be downloaded from here search for miniIPS2 then look for the software section towards the bottom of the page. Setup the TCP Client windows to match the data from the Lantronix Device Installer. The instrument can be configured using the software or with individual #commands as required. - Page 13 Communications Code Description #701 Read Modbus activation status #702;nnn Set RS 485 address to any number from 01 to 247 this function is password protected #703 Read current address © 2020 – Valeport Ltd Page | 10...
-
Page 14: Setting Up The Mniips2
# Code Description When the instrument is running, the miniIPS2 and 2e may be put into set up mode at any time by typing the ‘#’ character followed by the ENTER key. The device will respond with a command prompt ‘>’ and wait the next instruction. -
Page 15: Welcome Message
Setting Up the mniIPS2 5.2 Welcome Message When the miniIPS2 or 2e is put into a run mode (#028), if the welcome message is enabled (#209;1), it will output a welcome message Code Description #209;n Enable | Disable the Welcome Message #209;0 disables the warning... -
Page 16: Warning Message
2e Operating Manual: MANUAL-383434403-1 5.3 Warning Message If a Pressure Module is not fitted and the uvSVX is deployed, damage can be caused to the instrument. In order to bring this situation to your notice a warning is transmitted on power up and putting the uvSVX into run mode: #028 or the watch dog. -
Page 17: Sampling Modes
Setting Up the mniIPS2 5.5 Sampling Modes The miniIPS2 and 2e will operate in a number of different modes: Code Sampling Mode Description #011;0 HOLD The miniIPS2 or 2e will be powered but make no observations #028 will cause an observation to be taken but no data will be output until a #015 command is sent to recover the last observation made. -
Page 18: Units
2e Operating Manual: MANUAL-383434403-1 5.6 Units • The default output units for the miniIPS2 and 2e are deciBar (dBar), equivalent to 0.1Bar, or approximately 1m of seawater • The miniIPS2 and 2e can also output pressure in a number of different units •... -
Page 19: Pressure Tare
Setting Up the mniIPS2 5.7 Pressure Tare The Interchangeable pressure sensor fitted in the miniIPS2 and 2e measures absolute pressure, that is, it includes atmospheric pressure. The pressure Tare function allows the atmospheric pressure (as measured by the sensor, normally before deployment) to be removed from the observations so the output is simply the pressure of water. -
Page 20: Set Latitude
2e Operating Manual: MANUAL-383434403-1 5.8 Set Latitude The Latitude is required for an accurate pressure / depth conversion - the relationship is partially dependent on local gravity, which varies with distance from the equator. Positive / negative signing for North / South of the equator is not relevant... -
Page 21: Information #Codes
Read Pressure module calibration date #200 Read Pressure sensor serial number #202 Read maximum transducer pressure range #210 Read startup message status - on/off #701 Reads Modbus activation status #703 Reads Modbus address © 2020 – Valeport Ltd Page | 18... -
Page 22: Data Output Formats
2e Operating Manual: MANUAL-383434403-1 6 Data Output Formats The miniIPS2 and 2e have a selection of different data output formats built in, allowing easy interface to software packages and third-party instrumentation. 6.1 Data String Formatting The default setting is for the unit character to be enabled This function is only available in the following data strings: 1. -
Page 23: Format: Valeport (Standard)
(#026) The units displayed in the string can be enabled | disabled (#020) Output String Examples with units 0009.996,M,0.000 0000.996,M,0.000 without units 0009.996,0.000 0000.996,0.000 6.4 Format: Valeport NMEA ($PIPS) Command: #013;2 Format: $PIPS,xxxx.xx,y,*zz<CR><LF> Notes: Field Format NMEA Identifier $PIPS Pressure or Depth xxxx.xx... -
Page 24: Format: Valeport Nmea ($Pvips2)
Pressure or Depth xxxx.x Spare Spare 0.00 The miniIPS2 does not have a real time clock so the Time and Date fields are not populated. The fields are maintained for compatibility purposes Output String Example 00/00/00, 00:00:00, 0010.0,0.0,0.00 00/00/00, 00:00:00, 0010.1,0.0,0.00 ©... -
Page 25: Format: Digiquartz
Pressure or Depth +xxxx.xxxxxxx Output String Examples *0001+0010.9960251 *0001+0010.9958134 6.9 Format: Hypack Command: #013;3 Format: xxx.x 0000.0<CR><LF> Notes: Field Format Pressure or Depth xxx.x Spare field 0000.0 Output String Examples 009.9 0000.0 009.9 0000.0 © 2020 – Valeport Ltd Page | 22... -
Page 26: Format: Impact Subsea
$ISDPT, 0.988,, 0.0997,B,00.00,C*6b 6.11 Modbus RTU over RS485 Modbus RTU as implemented in the miniIPS2 and 2e is an industry standard interface protocol that will run over RS232 or RS485. The Baud rate is variable 4800 to 19200 with 8N1 or 8E1 framing. -
Page 27: Electrical
7 – 28V DC input (isolated) Draws approximately 125mA at 12V DC 7.3 Wiring Information A miniIPS2 systems are supplied with a short (50cm) lead for splicing or testing and a USB\Power cable for interface to a PC for setup. 7.3.1 Serial Connection... -
Page 28: Software
Any compatible Terminal program can be used to send individual # commands. 8.1 Setup Using DataLog X2 DataLog X2 can be used to setup a miniIPS2 or 2e. The following example uses a miniIPS2e but once interfaced the process is identical. -
Page 29: Configure The Miniips 2
You will be presented with the following dialogue. The Comms settings will be filled in automatically from the Connect settings already configured (TCP/IP in the example below): choose miniIPS2 from the Instrument Type drop down menu click © 2020 – Valeport Ltd... - Page 30 2e Operating Manual: MANUAL-383434403-1 You will be presented with the following dialogue. Leave all the settings as standard unless told to change them by Valeport. Click and wait for the system to read all the current configuration setting.
- Page 31 • measure the current pressure value and set it as the Tare value or manually program a Tare value • input the present Latitude (decimal degrees) as required for conversion to depth Set the required units before observing a Tare value © 2020 – Valeport Ltd Page | 28...
- Page 32 2e Operating Manual: MANUAL-383434403-1 To measure the current atmospheric data and use that as the Tare value press take note of the warning. By taking the Tare value at the surface you will remove atmospheric pressure and all measurements will be relative to that sea level.
- Page 33 • It will collect a dataset of 16 samples at a rate of 16Hz • It will, therefore, output a discreet data string once a second as an average of 16 observations Click © 2020 – Valeport Ltd Page | 30...
- Page 34 Click to send the commands to the instrument to set it up as required. The instrument is interrupted so either you must wait the watchdog period before the miniIPS2 will start automatically or press the Run button on the ribbon: You can see the #028 command to set the instrument into run mode followed by the header and then data.
-
Page 35: Setup Using Valeport Configure App
Setup Using Valeport Configure App 9 Setup Using Valeport Configure App 9.1 Interface the instrument Connect the uvSVX to a suitable comm port and power. Use the drop-down lists to select your port, baud rate and Instrument SetUp file as required. -
Page 36: Configure The Instrument
2e Operating Manual: MANUAL-383434403-1 9.2 Configure the Instrument The Information Tab will open. It contains read only fields that will display relevant information on the interfaced instrument Press the button interrogate the instrument to upload all the current settings ©... - Page 37 Setup Using Valeport Configure App Click on the other Tabs to see relevant information and fine tune your set up, for example, Communication: and calibration details: © 2020 – Valeport Ltd Page | 34...
- Page 38 2e Operating Manual: MANUAL-383434403-1 Hover over the label with your mouse to see the pop-up information window on a particular field: In the example below select a new Sampling Rate and the field label and Tab title will be bold to indicate the change.
- Page 39 Setup Using Valeport Configure App Hover over the field you have just updated to see what the current setting is in the software and what is set in the instrument (Device): Select the Output Setup: output string, units and character display and messages...
- Page 40 If you would like to save the configuration for future use click on the File menu (top left) and save the Profile, file. You will use the same menu to open the file into the Valeport Configure App to load into an instrument ©...
-
Page 41: Care & Maintenance
Do not attempt to remove the acetal Lock Screw Cap from the Pressure Module. If debris is caught under the cover attempt to remove it under slowly flowing water, use no tools. If this fails contact Valeport for further advice. If the sensor diaphragm is damaged in any way it will have to be replaced. -
Page 42: Ordering And Part Numbers
2e Operating Manual: MANUAL-383434403-1 11 Ordering and Part Numbers Part No. Description 0760012-XX miniIPS2 - RS232, RS485, Modbus Fitted with: 0.01% accuracy Interchangeable piezo-resistive pressure sensor - Titanium diaphragm Supplied with: Interface lead USB Y lead Operating manual and transit case... -
Page 43: Eu Declaration Of Conformity - Ce Marking
12 EU Declaration of Conformity - CE Marking Any changes or modifications to the product or accessories supplied, that are not authorised by Valeport Ltd, could void the CE compliance of the product and negate your authority to operate it. This product has demonstrated CE compliance under conditions that include the use of shielded cables. -
Page 44: Miniips2
2e Operating Manual: MANUAL-383434403-1 12.1 miniIPS2 © 2020 – Valeport Ltd Page | 41... -
Page 45: Miniips2E
EU Declaration of Conformity - CE Marking 12.2 miniIPS2e © 2020 – Valeport Ltd Page | 42... -
Page 46: Interchangeable Pressure Module
2e Operating Manual: MANUAL-383434403-1 12.3 Interchangeable Pressure Module © 2020 – Valeport Ltd Page | 43...
Need help?
Do you have a question about the miniIPS2 and is the answer not in the manual?
Questions and answers