Table of Contents
Advertisement
Quick Links
Professional Series – 2020
Seed Treater
Operator's Manual
Original Instructions
Read this manual before using product. Failure to
follow instructions and safety precautions can
result in serious injury, death, or property
damage. Keep manual for future reference.
Part Number: 4400-90006 R0
Revised: January 2020
Advertisement
Table of Contents

Related Manuals for AGI STORM Professional 2020 Series


Summary of Contents for AGI STORM Professional 2020 Series
- Page 1 Professional Series – 2020 Seed Treater Operator’s Manual Original Instructions Read this manual before using product. Failure to Part Number: 4400-90006 R0 follow instructions and safety precautions can Revised: January 2020 result in serious injury, death, or property damage. Keep manual for future reference.
- Page 2 We strongly recommend that all personnel associated with this equipment be trained in the correct operational and safety procedures required for this product. This product has been designed and constructed according to general engineering standards, other local regulations may apply and must be followed by the operator. Use the sign-off sheet below to record initial and periodic reviews of this manual with all such personnel.
-
Page 3: Table Of Contents
PROFESSIONAL SERIES – 2020 – SEED TREATER CONTENTS 1. Introduction ............................5 1.1 Serial Number Location......................5 1.2 Intended Use ..........................5 1.2.1 Misuse ........................6 2. Safety............................... 7 2.1 Safety Alert Symbol and Signal Words..................7 2.2 General Product Safety ......................7 2.3 Rotating Flighting Safety ...................... - Page 4 PROFESSIONAL SERIES – 2020 – SEED TREATER 7.3 Conveyor Break-In ........................38 7.4 Treating Seed........................... 39 7.4.1 Create a Job......................39 7.4.2 Calibrate the Pumps....................40 7.4.3 Operate the Treater & Treat Seed ................41 7.4.4 Update the Calibration..................... 42 7.5 Emergency Stop........................
-
Page 5: Introduction
PROFESSIONAL SERIES – 2020 – SEED TREATER 1. INTRODUCTION 1. Introduction Thank you for purchasing a STORM Seed Treater. This equipment will allow safe and efficient operation when you read and follow all of the instructions contained in this manual. With proper care, your seed treater will provide you with many years of trouble-free operation. -
Page 6: Misuse
1. INTRODUCTION PROFESSIONAL SERIES – 2020 – SEED TREATER operation and maintenance as specified by the manufacturer, also constitute essential elements of the intended use. The seed treater should be operated, maintained, serviced, and repaired only by persons who are familiar with its particular characteristics and who are acquainted with the relevant safety procedures. -
Page 7: Safety
PROFESSIONAL SERIES – 2020 – SEED TREATER 2. SAFETY 2. Safety 2.1. Safety Alert Symbol and Signal Words This safety alert symbol indicates important safety messages in this manual. When you see this symbol, be alert to the possibility of injury or death, carefully read the message that follows, and inform others. -
Page 8: Rotating Flighting Safety
2. SAFETY PROFESSIONAL SERIES – 2020 – SEED TREATER 2.3. Rotating Flighting Safety • KEEP AWAY from rotating flighting. • DO NOT remove or modify flighting guards, doors, or covers. Keep in good working order. Have replaced if damaged. • DO NOT operate the seed treater without all guards, doors, and covers in place. -
Page 9: Rotating Parts Safety
PROFESSIONAL SERIES – 2020 – SEED TREATER 2. SAFETY • Before treating seed, follow and have a written plan in place to manage volumes of contaminated water and/or other liquids used in the cleaning/flushing of the seed treating equipment. • Use personal protective equipment as described on the seed treatment product label. •... -
Page 10: Raising And Lowering The Seed Treater
2. SAFETY PROFESSIONAL SERIES – 2020 – SEED TREATER 2.10. Raising and Lowering the Seed Treater • Before raising/lowering/moving/adjusting the seed treater, make sure the area around the seed treater is clear of obstructions and/or untrained personnel. Never allow anyone to stand on or beneath the seed treater when it is being placed. -
Page 11: Drives And Lockout Safety
PROFESSIONAL SERIES – 2020 – SEED TREATER 2. SAFETY 2.13. Drives and Lockout Safety Inspect the power source(s) before using and know how to shut down in an emergency. Whenever you service or adjust your equipment, make sure you shut down the power WARNING source and follow lockout and tagout procedures to prevent inadvertent start-up and hazardous energy release. -
Page 12: Electric Motor Safety
2. SAFETY PROFESSIONAL SERIES – 2020 – SEED TREATER 2.13.2 Electric Motor Safety Power Source • Electric motors and controls shall be installed and serviced by a qualified electrician and must meet all local codes and standards. • Guards must be in place and secure. •... -
Page 13: Tire Safety
PROFESSIONAL SERIES – 2020 – SEED TREATER 2. SAFETY 2.14. Tire Safety Failure to follow proper procedures when mounting a tire on a wheel or rim can produce an explosion that may result in serious injury or death. • DO NOT attempt to mount a tire unless you have the proper equipment and experience to do the job. -
Page 14: Personal Protective Equipment
2. SAFETY PROFESSIONAL SERIES – 2020 – SEED TREATER 2.16. Personal Protective Equipment The following Personal Protective Equipment (PPE) should be worn when operating or maintaining the equipment. Safety Goggles • Wear safety goggles at all times to protect eyes from chemicals. Coveralls •... -
Page 15: Safety Equipment
PROFESSIONAL SERIES – 2020 – SEED TREATER 2. SAFETY 2.17. Safety Equipment The following safety equipment should be kept on site: Fire Extinguisher • Provide a fire extinguisher for use in case of an accident. Store in a highly visible and accessible place. -
Page 16: Safety Decal Locations And Details
2. SAFETY PROFESSIONAL SERIES – 2020 – SEED TREATER 2. Decide on the exact position before you remove the backing paper. 3. Align the decal over the specified area and carefully press the small portion with the exposed sticky backing in place. - Page 17 PROFESSIONAL SERIES – 2020 – SEED TREATER 2. SAFETY 9909-00023 9909-00030 9909-00031 9909-00032 9909-00033 9909-00034 9909-00041 P1513001 P1513003 P1513037 4400-41123 8110-00056 4400-90006 R0...
- Page 18 2. SAFETY PROFESSIONAL SERIES – 2020 – SEED TREATER Table 1. Safety Decals Part Number Description P1513001 WARNING To prevent serious injury or death: • Read and understand the manual before assembling, operating, or maintaining the equipment. • Only trained personnel may assemble, operate, or maintain the equipment.
- Page 19 PROFESSIONAL SERIES – 2020 – SEED TREATER 2. SAFETY Table 1 Safety Decals (continued) Part Number Description P1513003 DANGER ELECTROCUTION HAZARD To prevent death or serious injury: • When operating or moving, keep equipment away from overhead power lines and devices. •...
- Page 20 2. SAFETY PROFESSIONAL SERIES – 2020 – SEED TREATER Table 1 Safety Decals (continued) Part Number Description 9909-00030 9909-00031 4400-90006 R0...
- Page 21 PROFESSIONAL SERIES – 2020 – SEED TREATER 2. SAFETY Table 1 Safety Decals (continued) Part Number Description 9909-00032 9909-00033 4400-90006 R0...
- Page 22 2. SAFETY PROFESSIONAL SERIES – 2020 – SEED TREATER Table 1 Safety Decals (continued) Part Number Description 9909-00034 NOTICE Do not weld anywhere on this equipment. If welding is required for repair, remove the component to be welded. If removing the component is not possible, call 1-855-662-6609 for STORM support.
- Page 23 PROFESSIONAL SERIES – 2020 – SEED TREATER 2. SAFETY Table 1 Safety Decals (continued) Part Number Description P1513101 20 HOURS P1513016 DANGER ROTATING FLIGHTING HAZARD To prevent death or serious injury: • KEEP AWAY from rotating auger flighting. • DO NOT remove or modify auger flighting guards, doors, or covers.
- Page 24 2. SAFETY PROFESSIONAL SERIES – 2020 – SEED TREATER Table 1 Safety Decals (continued) Part Number Description 9909-00017 9909-00026 WARNING Keep guards in place when operating. 9909-00036 NOTICE To prevent equipment damage, insert pin before transporting. 4400-90006 R0...
- Page 25 PROFESSIONAL SERIES – 2020 – SEED TREATER 2. SAFETY Table 1 Safety Decals (continued) Part Number Description 9909-00041 4400-41117 4400-41118 4400-90006 R0...
- Page 26 2. SAFETY PROFESSIONAL SERIES – 2020 – SEED TREATER Table 1 Safety Decals (continued) Part Number Description 4400-41119 4400-41123 WARNING ROLLAWAY HAZARD To prevent equipment from rolling and potential serious injury: • Fully lower mover drive wheels before disconnecting from tow vehicle. •...
-
Page 27: Features
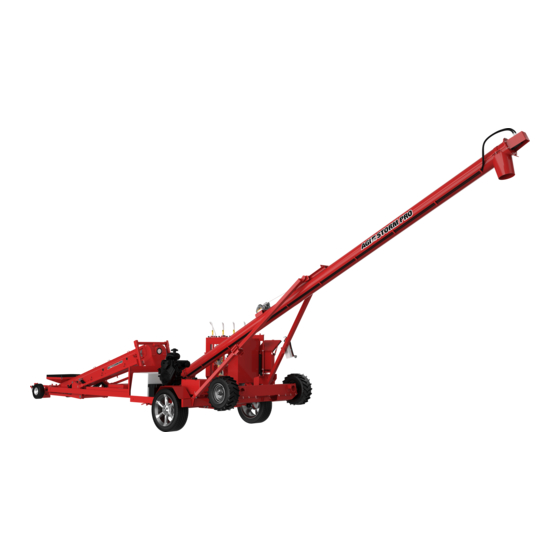
PROFESSIONAL SERIES – 2020 – SEED TREATER 3. FEATURES 3. Features This section covers the main features of the seed treater. 3.1. Main Components The figure and table below covers the main components of the seed treater. Figure 1. Main Components Table 2. - Page 28 3. FEATURES PROFESSIONAL SERIES – 2020 – SEED TREATER Figure 2. Operator Station 4400-90006 R0...
-
Page 29: Controls
PROFESSIONAL SERIES – 2020 – SEED TREATER 3. FEATURES Figure 3. Mover Controls 3.2. Controls The STORM mixer section has the following controls: Mechanical Controls • Engine throttle with variable RPM. • Gas generator for control system (start/stop/prime switch and hour display) •... - Page 30 3. FEATURES PROFESSIONAL SERIES – 2020 – SEED TREATER When operating remotely, make sure you have a clear view of the seed treater and surrounding area and ensure that no one is in the work area. 4400-90006 R0...
-
Page 31: Preparation
PROFESSIONAL SERIES – 2020 – SEED TREATER 4. PREPARATION 4. Preparation 4.1. Emergency Response Plan A response plan must be developed before using the seed treater the first time to be prepared in the event of an emergency. Keep a copy of the plan in the safety products storage box. This section provides guidance on developing your emergency response plan. -
Page 32: Containment
4. PREPARATION PROFESSIONAL SERIES – 2020 – SEED TREATER Explain the established procedures for the use and care of emergency and safety equipment including: • Personal Protective Equipment (PPE) • The first aid kit • The eyewash station • The fire extinguisher Explain procedures for: •... -
Page 33: Transport
PROFESSIONAL SERIES – 2020 – SEED TREATER 5. TRANSPORT 5. Transport Before continuing, ensure you have completely read and understood this manual’s Safety section, in addition to the safety information in the section(s) below. 5.1. Transport Safety • Check with local authorities regarding transport on public roads. Obey all applicable laws and regulations. - Page 34 5. TRANSPORT PROFESSIONAL SERIES – 2020 – SEED TREATER 4. Use the joystick to move the seed treater and align the hitch and tow vehicle ball hitch. 5. Remove the pin and slide the hitch lock into the unlocked position on the seed treater. 6.
- Page 35 PROFESSIONAL SERIES – 2020 – SEED TREATER 5. TRANSPORT Figure 5. Transport Position/ Location of Transport Pin Figure 6. Correct Safety Cable Connection 4400-90006 R0...
-
Page 36: Placement
6. PLACEMENT PROFESSIONAL SERIES – 2020 – SEED TREATER 6. Placement Before continuing, ensure you have completely read and understood this manual’s Safety section, in addition to the safety information in the section(s) below. 6.1. Placement Safety • Anchor intake end before using. •... - Page 37 PROFESSIONAL SERIES – 2020 – SEED TREATER 6. PLACEMENT Figure 7. Positioning Controls Figure 8. Placement Position 4400-90006 R0...
-
Page 38: Operation
7. OPERATION PROFESSIONAL SERIES – 2020 – SEED TREATER 7. Operation Before continuing, ensure you have completely read and understood this manual’s Safety section, in addition to the safety information in the section(s) below. 7.1. Operation Safety • Keep away from rotating and moving parts, including the conveyor belt, auger flighting, drive components, shafts, and bearings. -
Page 39: Treating Seed
If any unusual noises or vibrations are encountered, determine the source, shut the mixer off, lock out the power source, and adjust. If unsure of the problem, or the procedure to fix it, contact AGI. 7.4. Treating Seed... -
Page 40: Calibrate The Pumps
7. OPERATION PROFESSIONAL SERIES – 2020 – SEED TREATER 7.4.2 Calibrate the Pumps Calibrating the pumps enables the seed treater to provide the correct amount of treatment for the anticipated seed. Calibration requires the use of the calibration cylinders, treatment products, and the calibration control screens accessed via the touchscreen display. -
Page 41: Operate The Treater & Treat Seed
PROFESSIONAL SERIES – 2020 – SEED TREATER 7. OPERATION 5. The pump will run, filling the cylinder until it is fully extended. 6. Follow the prompts on the screen. Figure 9. Setting the Pump RPM Note To disengage a hose, close that hose’s valve and put its shoe in the storage position. 7. -
Page 42: Update The Calibration
7. OPERATION PROFESSIONAL SERIES – 2020 – SEED TREATER 5. Jog the conveyor until seed is at the atomizing chamber / nozzles. 6. Continue to the operation screen. 7. Set the minimum mixer speed. 8. Start the mixer empty and set it at 400 rpm (forward direction) by adjusting the engine throttle knob. 9. -
Page 43: Restarting A Full Seed Treater
PROFESSIONAL SERIES – 2020 – SEED TREATER 7. OPERATION 7.6. Restarting a Full Seed Treater The seed treater may be filled with material if it is shut down inadvertently or for an emergency. To restart: 1. Stop treating. 2. Run the mixer tube until empty. If that isn’t possible, lower the discharge. If lowering the discharge doesn’t work, lift the mixer boot, place a catch pan underneath, open the boot clean-out, and then run mixer flighting backwards. - Page 44 7. OPERATION PROFESSIONAL SERIES – 2020 – SEED TREATER 1. Go to the cleanout screen on the HMI. 2. Run the mixer forward until empty. 3. Lift the mixer boot off ground and place a catch pan under the boot clean-out door. Note Run the mixer at a low speed with the engine at idle.
-
Page 45: Chemical Spill Cleanup
PROFESSIONAL SERIES – 2020 – SEED TREATER 7. OPERATION 15. Dispose of collected waste in accordance to local standards and/or as defined by seed treatment product labels. Figure 12. Cleanout Access Item Description Mixer Inspection Door Atomizer Latches Mixer Boot Cleanout Door 7.8. -
Page 46: Storage
7. OPERATION PROFESSIONAL SERIES – 2020 – SEED TREATER 2. Dispose of waste as per seed treatment manufacturer’s label instructions or at an approved chemical waste disposal site. Treated Seed Spill Use shovel and broom to retrieve and dispose of treated seed as per the treatment manufacturer’s label recommendations. -
Page 47: Maintenance
PROFESSIONAL SERIES – 2020 – SEED TREATER 8. MAINTENANCE 8. Maintenance Before continuing, ensure you have completely read and understood this manual’s Safety section, in addition to the safety information in the section(s) below. 8.1. Maintenance Safety • Keep components in good condition. Follow the maintenance procedures. -
Page 48: Visually Inspect The Seed Treater
8. MAINTENANCE PROFESSIONAL SERIES – 2020 – SEED TREATER Item Pre- Dai- Weekly Yearly Sea- Weeks quired end of Sea- son) Section 8.3 – Visually Inspect the Seed Treater on page 48 Check motor oil, generator oil, hydraulic oil, and fuel. Section 8.15 –... -
Page 49: Grease The Bearings
PROFESSIONAL SERIES – 2020 – SEED TREATER 8. MAINTENANCE 2. Examine the seed treater for damage or unusual wear. 3. Check tightness of bolts/nuts, fasteners, and hardware (re-torque if necessary). 4. Be sure all safety decals are in place and are legible. 5. -
Page 50: Remove And Clean The Calibration Cylinder
8. MAINTENANCE PROFESSIONAL SERIES – 2020 – SEED TREATER 8.5. Remove and Clean the Calibration Cylinder 1. Remove the actuator lock knob. 2. Rotate the actuator out of the way. 3. Loosen the two hold down knobs and slide them out of the way. 4. -
Page 51: Check The Chemical Pump Rollers And Main Pump Bearing
PROFESSIONAL SERIES – 2020 – SEED TREATER 8. MAINTENANCE 2. Open all clean-out doors and covers. 3. Use the system pumps to run water to flush the hoses and clean out the atomizer. 4. Use an additional water hose to flush out the atomizer chamber. Figure 14. -
Page 52: Clean The Filter Strainers
8. MAINTENANCE PROFESSIONAL SERIES – 2020 – SEED TREATER Figure 15. Chemical Pump Rollers 8.9. Clean the Filter Strainers 1. Unscrew the cap and rinse residue from strainer and replace. Replace the cartridge if it is damaged. Note Watch for the rubber seal that seals the cup to the body, it can get lost easily when cleaning. Figure 16. -
Page 53: Drain Antifreeze From The System
PROFESSIONAL SERIES – 2020 – SEED TREATER 8. MAINTENANCE 2. Turn the pumps on, run antifreeze through the system. Note Use the sensor test screen to router liquid through the calibration cylinder. 8.11. Drain Antifreeze from the System At the start of each treating season, drain antifreeze by flushing the Pumps, Hoses, Filters, and Coupler. Run the pumps until clear. -
Page 54: Check And Maintain The Containment System
8. MAINTENANCE PROFESSIONAL SERIES – 2020 – SEED TREATER Figure 17. Clean-Out Position 8.13. Check and Maintain the Containment System Chemical Hoses Ensure nothing is caught in the hoses, if there is, flush out with water or replace the line if necessary. Catch Containers Replace if these are worn or contain cracks/holes. -
Page 55: Advanced Mixer Clean-Out
PROFESSIONAL SERIES – 2020 – SEED TREATER 8. MAINTENANCE Figure 18. Mixer Boot Clean-out Door Seal 8.14. Advanced Mixer Clean-Out Complete this procedure as required to keep the seed treater operating effectively. 1. Position the equipment to provide access to the end of the mixer/discharge spout. 2. -
Page 56: Check And Replace The Pump's Chemical Hoses
8. MAINTENANCE PROFESSIONAL SERIES – 2020 – SEED TREATER Figure 19. Location of Crossbolt Figure 20. Removing the Flighting 8.15. Check and Replace the Pump’s Chemical Hoses To prevent chemical leaks/spills and ensure accurate metering, change pump tubing annually or if there are kinks, wear, or leaks. -
Page 57: Pump Tubing Break-In
PROFESSIONAL SERIES – 2020 – SEED TREATER 8. MAINTENANCE To replace the pump’s chemical hoses: 1. Remove clamps and hoses. 2. Check the length of the new hose is identical to the hose being replaced. Important Replacement hoses must be identical in type and length or the pump may not meter treatment correctly. -
Page 58: Inspect/Replace The Conveyor Rollers And Bearings
8. MAINTENANCE PROFESSIONAL SERIES – 2020 – SEED TREATER 3. Connect a male coupler to the dry-break coupler of the associated pump, and place the couplers in a suitably large-volume container of water. 4. Route the hoses from the top of the calibration cylinders into the pail of water. 5. -
Page 59: Tension The Conveyor Belt
PROFESSIONAL SERIES – 2020 – SEED TREATER 8. MAINTENANCE 8.17. Tension the Conveyor Belt A correctly tensioned conveyor belt is essential for metering accuracy. Ensure the belt is thoroughly clean prior to tensioning or aligning the belt. Foreign materials may affect tension and alignment. -
Page 60: Align The Conveyor Belt
8. MAINTENANCE PROFESSIONAL SERIES – 2020 – SEED TREATER Figure 23. Conveyor Hopper Item Description Bearing Bolt and Nut Spout Roller Jam Nut Tightener Bolt 8.18. Align the Conveyor Belt Basic Conveyor Belt Alignment: The conveyor belt will run straight when all of the rollers are straight. Loosen or tighten the adjustment bolt(s) to align the conveyor belt. -
Page 61: Adjust The Rollers
PROFESSIONAL SERIES – 2020 – SEED TREATER 8. MAINTENANCE Figure 24. Roller out of Alignment Before Aligning the Belt: • The conveyor must be empty of all grain. • Wait until the belt makes a complete revolution before adjusting the rollers. Some belts may have uneven edges, appearing misaligned. -
Page 62: Clean And Wash The Equipment
8. MAINTENANCE PROFESSIONAL SERIES – 2020 – SEED TREATER Figure 26. Loosen the Bearing Nuts 2. Rotate adjustment bolt 1/2 turn. Figure 27. Rotate the Adjustment Bolt 3. Restart conveyor and run empty for 1 minute. 4. Stop the conveyor and remove ignition key or lock out the power source. 5. -
Page 63: Replace The Conveyor Belt
PROFESSIONAL SERIES – 2020 – SEED TREATER 8. MAINTENANCE 8.21. Replace the Conveyor Belt 1. Remove the conveyor cover and rotate the conveyor belt until the lacing is by the hopper or is easily accessible. 2. Move the tension roller to its loosest position. 3. -
Page 64: Troubleshooting
9. TROUBLESHOOTING PROFESSIONAL SERIES – 2020 – SEED TREATER 9. Troubleshooting 9.1. Shut down and lock out all power sources before diagnosing any of the causes or attempting any of the solutions below. In the following section, we have listed some causes and solutions to some of the problems you may encounter. If you encounter a problem that is difficult to solve, even after having read through this section, please contact STORM Customer Service at 1-855-662-6609. - Page 65 PROFESSIONAL SERIES – 2020 – SEED TREATER 9. TROUBLESHOOTING Conveyor intake wiper is out Hopper bent, call customer service. of adjustment. Inaccurate Density Perform density test as perSection 10.1 – . Measurement on page 71 Contaminated Seed Dust and fines will affect metering densities.
- Page 66 9. TROUBLESHOOTING PROFESSIONAL SERIES – 2020 – SEED TREATER container, but is going into the atomizer, then valve is faulty. Check wiring and connections. Potentially replace valve. Build-up in the calibration Remove and clean the calibration cylinder. cylinder Inspect seal for damage. Attach couplers to provide an open flow path and test cylinder.
- Page 67 PROFESSIONAL SERIES – 2020 – SEED TREATER 9. TROUBLESHOOTING Check for filter seal and that filter body is tight. The line is restricted on the Check the condition of the pump hose. intake or output side of the Ensure it has not collapsed, has become pump.
- Page 68 9. TROUBLESHOOTING PROFESSIONAL SERIES – 2020 – SEED TREATER Product is too thick to meter Dilute product, if possible, to reduce properly. viscosity. Re-calibrate as required to ensure accuracy of application. Some treatment products change in viscosity with temperature. Ensure calibrations are performed for the conditions at the time of treating.
- Page 69 PROFESSIONAL SERIES – 2020 – SEED TREATER 9. TROUBLESHOOTING Build-up of treatment Treatment is flowing when Check for interrupted seed flow. Do not on metering conveyor seed is not. operate the pumps with no seed flow. belt. Seed is dusty. Seed treatment will readily bind to the dust in the seed.
- Page 70 9. TROUBLESHOOTING PROFESSIONAL SERIES – 2020 – SEED TREATER Relief pressure set low. Ensure relief setting is 2,800 – 2,900 psi. Too much treatment liquid in Ensure when priming the system that only boot at start-up. a small amount of liquid is pumped into the atomizing chamber.
-
Page 71: Appendix
PROFESSIONAL SERIES – 2020 – SEED TREATER 10. APPENDIX 10. Appendix 10.1. Test Weight Procedure Follow this procedure to achieve highly accurate seed density and highly accurate seed treatment application. Repeat this procedure five times for best accuracy. Eliminate the highest and lowest value and average the three middle measurements for best results. -
Page 72: Updating System Software
10. APPENDIX PROFESSIONAL SERIES – 2020 – SEED TREATER Figure 29. Test Weight Procedure Steps 10.2. Updating System Software To Ensure your STORM is operating at optimum levels, always install the most up-to-date software found on the "Downloading Software" tab. The STORM control uses a USB Flash Drive to transfer treating history and to install new software. -
Page 73: Viewing Treating History (All Jobs)
PROFESSIONAL SERIES – 2020 – SEED TREATER 10. APPENDIX 10.2.1 Viewing Treating History (All Jobs) From the main screen, tap Jobs — History: The treating history maintains the details of the 100 most recent jobs. The treating history can be reviewed directly on the HMI by tapping the arrows and scroll bar to the right of the history details. -
Page 74: Formatting A Usb
10. APPENDIX PROFESSIONAL SERIES – 2020 – SEED TREATER 10.2.2 Formatting a USB How to Format a USB Flash Drive Using a PC 1. Put your USB in the USB port on your computer. 2. Click the start-up icon on the lower left side of the screen. 3. -
Page 75: Installing Software
PROFESSIONAL SERIES – 2020 – SEED TREATER 10. APPENDIX 7. If you have downloaded the .exe file, please double click on the file, choose run, update the destination folder to your removable drive using the browse button and finally press the extract button. Please verify you have nine items on your USB before ejecting. -
Page 76: Specifications
11. SPECIFICATIONS PROFESSIONAL SERIES – 2020 – SEED TREATER 11. Specifications CAPACITY Seed Flow 22.5 to 45 bu/min with 70 lb/bu Treatment Application Rate 10 to 1200 ml/100kg Treatment Application Coverage Accuracy +/- 5% (typical) Tube Size of Mixer 10” (254 mm) DIMENSIONS Transport Length 50’... - Page 77 PROFESSIONAL SERIES – 2020 – SEED TREATER 11. SPECIFICATIONS OTHER Fire Extinguisher 10lb 4A 60 BC 4400-90006 R0...
-
Page 78: Storm Warranty
Company, or to our factory, with transportation charges prepaid. This warranty does not obligate AGI to bear the cost of labor in replacing defective parts. Any defects must be reported to the Company before the end of the one year period. - Page 79 PROFESSIONAL SERIES – 2020 – SEED TREATER 12. STORM WARRANTY 4400-90006 R0...
- Page 80 Shipping: 201 Industrial Drive, Swift Current, Saskatchewan S9H 5R4, CANADA Mailing: Box 1750, Swift Current, Saskatchewan S9H 4J8, CANADA Toll-Free: (877) 667-7421 (Canada & USA) Phone: (306) 773-7779 Fax: (306) 778-2524 Web: www.stormtreaters.com ©Ag Growth International Inc. 2019 Printed in Canada If you have any comments or questions on this manual, or find an error, email us at comments@aggrowth.com.
Need help?
Do you have a question about the STORM Professional 2020 Series and is the answer not in the manual?
Questions and answers