Table of Contents
Advertisement
Quick Links
STX2 & XTA 10 Series
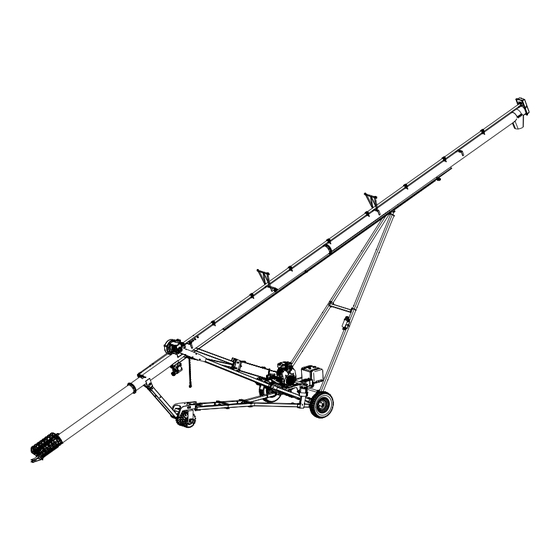
Portable Grain Auger
Assembly Manual
This manual applies to:
AGI Westfield STX2 10 (61)
AGI XTA 10 (61)
AGI Hutchinson STX2 10 (61)
AGI Mayrath STX2 10 (61)
Read this manual before using product. Failure to
follow instructions and safety precautions can
result in serious injury, death, or property
damage. Keep manual for future reference.
Part Number: 31136 R3
Revised: October 2024
Original Instructions
Advertisement
Table of Contents

Subscribe to Our Youtube Channel
Related Manuals for AGI STX2 Series


Summary of Contents for AGI STX2 Series
- Page 1 STX2 & XTA 10 Series Portable Grain Auger Assembly Manual This manual applies to: AGI Westfield STX2 10 (61) AGI XTA 10 (61) AGI Hutchinson STX2 10 (61) AGI Mayrath STX2 10 (61) Read this manual before using product. Failure to...
- Page 2 New in this Manual The following changes have been made in this revision of the manual: Description Section Updated the image. Section 4.10 – Add Grease to the Head Cover on page Updated the wheel assembly instructions. Section 4.16 – Attach the Upper Frame to the Axle on page 38 Updated the fuel tank.
-
Page 3: Table Of Contents
STX2 & XTA 10 SERIES – PORTABLE GRAIN AUGER CONTENTS 1. Introduction ............................5 2. Safety............................... 6 2.1 Safety Alert Symbol and Signal Words..................6 2.2 General Safety Information....................... 6 2.3 Rotating Flighting Safety ......................7 2.4 Rotating Parts Safety......................... 7 2.5 Hydraulic Winch Safety ...................... - Page 4 STX2 & XTA 10 SERIES – PORTABLE GRAIN AUGER 4.21.5 Install the Motor ....................49 4.21.6 Install the Guard Assembly ..................50 4.21.7 Install the Belt ......................50 4.21.8 Install the Engine Pulley Guard ................52 4.21.9 Tension the Belt ..................... 53 4.21.10 Install the Fully Enclosed Guarding..............
-
Page 5: Introduction
Before assembling, please read this manual. Familiarize yourself with the process and the necessary precautions for efficient and safe assembly of this AGI Portable Grain Auger. Everyone present at the assembly site is required to be familiar with all safety precautions. -
Page 6: Safety
• Follow a health and safety program for your worksite. Contact your local occupational health and safety organization for information. • Contact your local representative or AGI if you need assistance or additional information. • Always follow applicable local codes and regulations. -
Page 7: Rotating Flighting Safety
2. SAFETY STX2 & XTA 10 SERIES – PORTABLE GRAIN AUGER 2.3. Rotating Flighting Safety • KEEP AWAY from rotating flighting. • DO NOT remove or modify flighting guards, doors, or covers. Keep in good working order. Have replaced if damaged. •... -
Page 8: Drives And Lockout Safety
2. SAFETY STX2 & XTA 10 SERIES – PORTABLE GRAIN AUGER 2.6. Drives and Lockout Safety Inspect the power source(s) before using and know how to shut down in an emergency. Whenever you service or adjust your equipment, make sure you shut down the power source and unplug or remove the key (as applicable) to prevent inadvertent start-up and hazardous energy release. -
Page 9: Electric Motor Safety
2. SAFETY STX2 & XTA 10 SERIES – PORTABLE GRAIN AUGER 2.6.2 Electric Motor Safety Power Source • Electric motors and controls shall be installed and serviced by a qualified electrician and must meet all local codes and standards. • Use a magnetic starter to protect the electric motor. •... -
Page 10: Hydraulic Power Safety
2. SAFETY STX2 & XTA 10 SERIES – PORTABLE GRAIN AUGER 2.6.3 Hydraulic Power Safety Power Source • Refer to the rules and regulations applicable to the power source operating the hydraulic system. • Do not connect or disconnect hydraulic lines while system is under pressure. -
Page 11: Tire Safety
2. SAFETY STX2 & XTA 10 SERIES – PORTABLE GRAIN AUGER 2.6.4 Tire Safety Failure to follow proper procedures when mounting a tire on a wheel or rim can produce an explosion that may result in serious injury or death. •... -
Page 12: Personal Protective Equipment
2. SAFETY STX2 & XTA 10 SERIES – PORTABLE GRAIN AUGER 2.6.6 Personal Protective Equipment The following Personal Protective Equipment (PPE) should be worn when assembling the equipment. Safety Glasses • Wear safety glasses at all times to protect eyes from debris. Coveralls •... -
Page 13: Safety Decals
2. SAFETY STX2 & XTA 10 SERIES – PORTABLE GRAIN AUGER 2.7. Safety Decals • Keep safety decals clean and legible at all times. • Replace safety decals that are missing or have become illegible. See decal location figures that follow. •... - Page 14 2. SAFETY STX2 & XTA 10 SERIES – PORTABLE GRAIN AUGER Figure 1. Safety Decal Locations 20804 20803 17113 19960 20807 20813 20817 20811 31136 R3...
- Page 15 2. SAFETY STX2 & XTA 10 SERIES – PORTABLE GRAIN AUGER Figure 2. Safety Decal Locations P1513136 20803 Figure 3. Optional Safety Decal Locations (Hydraulic Steering) 28128 20806 31136 R3...
- Page 16 2. SAFETY STX2 & XTA 10 SERIES – PORTABLE GRAIN AUGER Figure 4. Decal Locations (Hydraulic Winch) 20810 20806 31136 R3...
- Page 17 2. SAFETY STX2 & XTA 10 SERIES – PORTABLE GRAIN AUGER Table 1. Safety Decals Part Number Description 20817 DANGER ELECTROCUTION HAZARD To prevent death or serious injury: • When operating or moving, keep equipment away from overhead power lines and devices. •...
- Page 18 2. SAFETY STX2 & XTA 10 SERIES – PORTABLE GRAIN AUGER Table 1 Safety Decals (continued) Part Number Description 20803 (inside) WARNING MISSING GUARD HAZARD To prevent serious injury or death, shut off power and reattach guard before operating machine. 20804 WARNING ENTANGLEMENT HAZARD...
- Page 19 2. SAFETY STX2 & XTA 10 SERIES – PORTABLE GRAIN AUGER Table 1 Safety Decals (continued) Part Number Description 20807 WARNING To prevent serious injury or death: • Read and understand the manual before assembling, operating, or maintaining the equipment. •...
- Page 20 2. SAFETY STX2 & XTA 10 SERIES – PORTABLE GRAIN AUGER Table 1 Safety Decals (continued) Part Number Description 20811 WARNING UPENDING HAZARD To prevent death or serious injury: • Anchor intake end and/or support discharge end to prevent upending. •...
- Page 21 2. SAFETY STX2 & XTA 10 SERIES – PORTABLE GRAIN AUGER Table 1 Safety Decals (continued) Part Number Description P1513136 WARNING CONTENTS MAY BE UNDER PRESSURE As part of the fuel vapour retention system, it is normal for your tank to expand from internal pressure. Use the vent screw to relieve pressure and before refueling.
-
Page 22: Features
3. FEATURES STX2 & XTA 10 SERIES – PORTABLE GRAIN AUGER 3. Features discharge & upper chain drive pulley guarding cable bridge belt idler 10 belt tension adjustment shaft guarding 11 manual holder cable adjustment 12 track hydraulic winch 13 hydraulic HDSP kit reversible gearbox control intake &... -
Page 23: Assembly
Take pictures of shipments prior to, or just after, unloading if there are any damages. Report missing or damaged parts immediately to ensure that proper credit is received from AGI or your representative, and to ensure that any missing parts can be shipped quickly to avoid holding up the assembly process. -
Page 24: Hydraulic Fittings And Bolt Tightening
4. ASSEMBLY STX2 & XTA 10 SERIES – PORTABLE GRAIN AUGER 4.4. Hydraulic Fittings and Bolt Tightening Remember the following basic considerations when tightening hydraulic fittings and bolts: • Tighten all fasteners to the torque specified in Section 6.1 – Bolt Torque on page 82. -
Page 25: Assemble The Tube & Flighting
4. ASSEMBLY STX2 & XTA 10 SERIES – PORTABLE GRAIN AUGER 4.6. Assemble the Tube & Flighting flight connector shaft lock nut, 7/16" bolt, 7/16" x 3" bolt, 7/16" x 1" 31136 R3... -
Page 26: Install The Track Stops
4. ASSEMBLY STX2 & XTA 10 SERIES – PORTABLE GRAIN AUGER 4.7. Install the Track Stops Assembly Note: • Slide the track shoe onto the track before attaching the upper track stop. track stop lock nut, 7/16" bolt, 7/16" x 1" track shoe track washer, 7/16"... -
Page 27: Install The Driveshaft
4. ASSEMBLY STX2 & XTA 10 SERIES – PORTABLE GRAIN AUGER 4.8. Install the Driveshaft To use this section: 1. Locate and review the driveshaft layout drawing for the auger you are assembling in Section 4.8.1 – Driveshaft Layout Drawing on page 2. - Page 28 4. ASSEMBLY STX2 & XTA 10 SERIES – PORTABLE GRAIN AUGER Step 1: Slide on Driveshaft and Driveshaft Guards Assembly Notes: • The wood bearing, flange and flange bearing bracket are pre-installed; these will need to be removed before installing the driveshaft. •...
- Page 29 4. ASSEMBLY STX2 & XTA 10 SERIES – PORTABLE GRAIN AUGER Step 3: Slide up the Driveshaft Guard driveshaft driveshaft guard Step 4: Install the Bearing lower driveshaft driveshaft guard bolt, 3/8" x 1" whiz nut, 3/8" Step 5: Install the Lower Driveshaft Guard lower driveshaft bolt, 3/8"...
-
Page 30: Install The Spout
4. ASSEMBLY STX2 & XTA 10 SERIES – PORTABLE GRAIN AUGER 4.9. Install the Spout half clamp bolt, 7/16" x 1-1/2" spout lock nut, 7/16" 31136 R3... -
Page 31: Add Grease To The Head Cover
4. ASSEMBLY STX2 & XTA 10 SERIES – PORTABLE GRAIN AUGER 4.10. Add Grease to the Head Cover 1. Remove the head cover from the discharge end. 2. Fill the head cover half full of grease. 3. Lubricate the chain. 4. -
Page 32: Install The Intake Cage
4. ASSEMBLY STX2 & XTA 10 SERIES – PORTABLE GRAIN AUGER 4.11. Install the Intake Cage 1/4" Assembly Notes: • Ensure the slot on the intake cage engages the retention pin on the lower tube. • Maintain a 1/4" clearance between the bushing and the end of the flight. intake cage lock nut, 7/16"... -
Page 33: Install The Truss Tower And Cable
4. ASSEMBLY STX2 & XTA 10 SERIES – PORTABLE GRAIN AUGER 4.12. Install the Truss Tower and Cable truss cable anchor bracket, bottom lock nut, 7/16" eyebolt, 1/2" truss bracket truss cable anchor (with welded rods) lock nut, 1/2" bolt, 7/16" x 1" hex nut, 1/2"... - Page 34 4. ASSEMBLY STX2 & XTA 10 SERIES – PORTABLE GRAIN AUGER 7-3/4" (20cm) 6-3/4" (17cm) (minimum turn-back length) cable truss cable anchor (with welded rods) cable clamp, 1/4" cable clamp, 5/16" truss cable anchor bracket, bottom lock nut, 1/2" eyebolt, 1/2" truss cable anchor, bottom hex nut, 1/2"...
-
Page 35: Attach The Lower Frame To The Tube
4. ASSEMBLY STX2 & XTA 10 SERIES – PORTABLE GRAIN AUGER Important Take slack out of the truss cable only (DO NOT tension the cable). Tension in the cable will cause the auger to droop at the flange when in the lowered position. 3. - Page 36 4. ASSEMBLY STX2 & XTA 10 SERIES – PORTABLE GRAIN AUGER Assembly Note: • Center the pulley shim guard on the lower arm bolt holes. spacer lower frame pulley shim guard bolt, 3/8" x 1-1/2" bolt plate, small lock nut, 3/8" bolt plate, large lower frame flat washer, 3/8"...
-
Page 37: Attach The Lower Frame To The Axle
4. ASSEMBLY STX2 & XTA 10 SERIES – PORTABLE GRAIN AUGER 4.14. Attach the Lower Frame to the Axle Assembly Notes: • Loosely install the lower frame to the axle assembly. • Loosely install all the lower support frame hardware. •... -
Page 38: Attach The Upper Frame To The Tube
4. ASSEMBLY STX2 & XTA 10 SERIES – PORTABLE GRAIN AUGER 4.15. Attach the Upper Frame to the Tube upper frame arm bolt, 3/4" x 6-1/2" track shoe (installed in a previous section) lock nut, 3/4" 4.16. Attach the Upper Frame to the Axle STRONG SLING OR CHAIN Important Be sure to use proper hoisting equipment... - Page 39 4. ASSEMBLY STX2 & XTA 10 SERIES – PORTABLE GRAIN AUGER Assembly Note: • Remove the stand from the intake end of the auger tube and raise the discharge end with a block and tackle or a front end loader and a strong sling or chain. Height should be sufficient so the frame can be easily attached to the axle.
-
Page 40: Install The Over-Center Drive
4. ASSEMBLY STX2 & XTA 10 SERIES – PORTABLE GRAIN AUGER 4.17. Install the Over-Center Drive 1. Position the axle cap of the over-center drive assembly squarely on the axle tube. 2. With the pinion gear flush with the ring gear, bolt the axle cap to the axle tube using four carriage bolts and lock nuts. -
Page 41: Adjust The Pinion Gear
4. ASSEMBLY STX2 & XTA 10 SERIES – PORTABLE GRAIN AUGER 4.18. Adjust the Pinion Gear Failure to ensure proper gear meshing will result in gear damage. The pinion gear should mesh with the ring gear to provide maximum tooth contact. Insufficient meshing •... -
Page 42: Install The Reversible Gearbox
4. ASSEMBLY STX2 & XTA 10 SERIES – PORTABLE GRAIN AUGER 4.19. Install the Reversible Gearbox 6, 7 Assembly Notes: • Check the gearbox oil level; gearbox should be half full. Use only EP90 lube oil and fill to HALF FULL only. •... - Page 43 4. ASSEMBLY STX2 & XTA 10 SERIES – PORTABLE GRAIN AUGER Note During assembly, ensure the reversible gearbox components do not interfere with any other auger components. 1. Mount the detent lever assembly to the auger tube. 2. Use the gearbox shifter to move the gearbox into either forward or reverse position. 3.
- Page 44 4. ASSEMBLY STX2 & XTA 10 SERIES – PORTABLE GRAIN AUGER Figure 6. Hole Positions in Straight Gearbox Handle Extension gearbox push rod flat washer, 5/16" gearbox handle extension, straight lock nut, 5/16" adjust lug bolt, 1/2" x 1-1/4" lock pin flat washer, 1/2"...
-
Page 45: Install The Motor Mount
4. ASSEMBLY STX2 & XTA 10 SERIES – PORTABLE GRAIN AUGER 4.20. Install the Motor Mount engine slider assembly cotter pin, 3/16" x 1-3/4" motor pivot pin Assembly Note: • Ensure leveller tube is through slots in the engine slider assembly before attaching to leveller tube mount brackets. -
Page 46: Install The Gas Drive
4. ASSEMBLY STX2 & XTA 10 SERIES – PORTABLE GRAIN AUGER 4.21. Install the Gas Drive 4.21.1 Install the Battery and Fuel Tank Fuel Tank Assembly Note: • Route the fuel line between the heat shield and gas tank. non-EPA fuel tank heat shield fuel tank straps bolt, 7/16"... -
Page 47: Install The Engine Slider Mount Bracket
4. ASSEMBLY STX2 & XTA 10 SERIES – PORTABLE GRAIN AUGER 4.21.2 Install the Engine Slider Mount Bracket engine slider mount bracket bolt, 7/16" x 1-1/4" lock nut, 7/16" 4.21.3 Install the Hydraulic Pump STX2/ hydraulic pump assembly lock nut, 7/16" bolt, 7/16"... -
Page 48: Install The Electric Clutch
4. ASSEMBLY STX2 & XTA 10 SERIES – PORTABLE GRAIN AUGER steel fitting, 3/4" HB x 10 MORB steel fitting, 8 MORB x 1/2" FNPSM 4.21.4 Install the Electric Clutch Assembly Note: • Apply anti-seize to the engine shaft where the electric clutch will slide on. gas engine motor square key, 1/4"... -
Page 49: Install The Motor
• If using a Vanguard motor for installation, there is a possible interference with the (standard) muffler hitting the belt guards. If this happens, then please contact your local AGI dealer for an alternative. • Perform all the engine wiring. -
Page 50: Install The Guard Assembly
4. ASSEMBLY STX2 & XTA 10 SERIES – PORTABLE GRAIN AUGER 4.21.6 Install the Guard Assembly bottom guard assembly lock nut, 1/2" bolt, 1/2" x 1-3/4" 4.21.7 Install the Belt Pump Belt Assembly Note: • Rotate the pump handle clockwise to apply tension to the pump belt and pull down the handle to lock the belt in place. - Page 51 4. ASSEMBLY STX2 & XTA 10 SERIES – PORTABLE GRAIN AUGER Drive Belt Assembly Note: • The belt must run straight. Check the alignment of the pulleys and adjust if necessary. belt flat idler pulley engine pulley gearbox pulley 31136 R3...
-
Page 52: Install The Engine Pulley Guard
4. ASSEMBLY STX2 & XTA 10 SERIES – PORTABLE GRAIN AUGER 4.21.8 Install the Engine Pulley Guard Assembly Note: • Slip guard over the engine pulley and slide into the guard assembly. guard lock nut, 3/8" manual belt engage handle assembly bolt, 1/2"... -
Page 53: Tension The Belt
4. ASSEMBLY STX2 & XTA 10 SERIES – PORTABLE GRAIN AUGER clutch stop lock nut, 5/16" bolt, 5/16" x 1" bolt, 5/16" x 1-1/4" flat washer, 5/16" 4.21.9 Tension the Belt TIGHTEN BELT LOOSEN BELT Assembly Notes: • Use the two hex nuts to apply tension to the drive belt prior to closing the guard cover. •... -
Page 54: Install The Fully Enclosed Guarding
4. ASSEMBLY STX2 & XTA 10 SERIES – PORTABLE GRAIN AUGER 4.21.10 Install the Fully Enclosed Guarding closed guard upper channel mount lock nut, 3/8" bolt, 3/8" x 1" belt bolt, 5/16" x 4-1/2" closed guard upper channel mount lock nut, 5/16" closed guard channel 31136 R3... - Page 55 4. ASSEMBLY STX2 & XTA 10 SERIES – PORTABLE GRAIN AUGER pulley cover guard bolt, 3/8" x 5" bolt, 5/16" x 4-1/2" whiz nut, 3/8" lock nut, 5/16" 31136 R3...
-
Page 56: Wire The Electric Clutch
4. ASSEMBLY STX2 & XTA 10 SERIES – PORTABLE GRAIN AUGER 4.21.11 Wire the Electric Clutch 1. Remove (cut off) the clutch harness connector that includes a connection clip on one side. 2. Prepare the cut end for connection by trimming harness jacket and wire insulation as needed, crimp ring terminals to the two wires on that end, and connect them to the screw terminals on the clutch (it does not matter which wire connects to which terminal). -
Page 57: Install The Lift Cable
4. ASSEMBLY STX2 & XTA 10 SERIES – PORTABLE GRAIN AUGER 4.22. Install the Lift Cable 1. Attach the cable to the cable attach rod welded to the bottom of the track by wrapping it around the rod and doubling-back about 7" (18 cm) of cable. 2. -
Page 58: Install The Hydraulic Winch
4. ASSEMBLY STX2 & XTA 10 SERIES – PORTABLE GRAIN AUGER 4.23. Install the Hydraulic Winch hydraulic winch assembly lock nut, 3/8" flat washer, 3/8" steel fitting, 90, 6 MNPT x 6 FNPSM 4.24. Connect the Lift Cable Important Make sure there is a minimum of three wraps of cable on the winch drum when the auger is in transport position. -
Page 59: Install The Hydraulic Oil Tank
4. ASSEMBLY STX2 & XTA 10 SERIES – PORTABLE GRAIN AUGER 4.25. Install the Hydraulic Oil Tank 7 " 28 " Assembly Notes: • Place the first hydraulic tank mount 7" from the end of the tube. • Place the second hydraulic tank mount 28" from the end of the tube. lower support frame, right square U-bolt, 3/8"... - Page 60 4. ASSEMBLY STX2 & XTA 10 SERIES – PORTABLE GRAIN AUGER Assembly Note: • Ensure the cap is located on the raised side. hydraulic tank lock nut, 1/4" square U-bolt, 1/4" x 7-1/4" x 7-5/8" 31136 R3...
-
Page 61: Install The Hydraulic Filter
4. ASSEMBLY STX2 & XTA 10 SERIES – PORTABLE GRAIN AUGER 4.26. Install the Hydraulic Filter Assembly Note: • The hydraulic hoses MUST be installed to ensure that the oil flows to the tank in the same direction as the arrow on the filter head. -
Page 62: Install The Hydraulic Manifold
4. ASSEMBLY STX2 & XTA 10 SERIES – PORTABLE GRAIN AUGER 4.27. Install the Hydraulic Manifold hydraulic manifold lock washer, 5/16" bolt, 5/16" x 3/4" 4.28. Install the Undercarriage Connecting the SP Reach Arms to the Mover Assembly AWD SP reach arm lock nut, 1/2"... - Page 63 4. ASSEMBLY STX2 & XTA 10 SERIES – PORTABLE GRAIN AUGER Connecting the SP Reach Arms to the Axle Assembly Note: • This connection must rotate—do not overtighten. AWD SP reach arm lock nut, 3/4" axle bolt, 3/4" x 2" Installing the SP Reach Arm Tie Braces tie brace lock nut, 7/16"...
- Page 64 4. ASSEMBLY STX2 & XTA 10 SERIES – PORTABLE GRAIN AUGER Installing the Slider Assembly onto the Tube and Mover Assembly Assembly Note: • These joints must pivot—do not overtighten. AWD mover slider assembly bolt, 5/8" x 2" bolt, 3/4" x 2" lock nut, 5/8"...
- Page 65 4. ASSEMBLY STX2 & XTA 10 SERIES – PORTABLE GRAIN AUGER Installing the Mover Controls Assembly Assembly Note: • This connection must rotate—do not overtighten. mover controls assembly lock nut, 3/4" controls tower bolt, 3/4" x 5-1/2" Installing the Bent Steel Hydraulic Lines Assembly Notes: •...
- Page 66 4. ASSEMBLY STX2 & XTA 10 SERIES – PORTABLE GRAIN AUGER Assembly Notes: • Install on the same side as the controls. • Install clamp bracket with the bend tab pointing inside of the bolt hole. hydraulic steel line, straight bolt, 3/8"...
- Page 67 4. ASSEMBLY STX2 & XTA 10 SERIES – PORTABLE GRAIN AUGER Installing the Straight Hydraulic Steel Lines onto the Axle Assembly Note: • Install the clamp bracket with the bend tab pointing towards the axle. hydraulic manifold hydraulic tube clamp bracket hydraulic steel line, straight bolt, 3/8"...
-
Page 68: Install The Hydraulic Adapters
4. ASSEMBLY STX2 & XTA 10 SERIES – PORTABLE GRAIN AUGER 4.29. Install the Hydraulic Adapters Installing Adapters at the Valve steel fitting, 45, 8 MORB x 1/2 FNPSM hydraulic valve steel fitting, 45, 6 MORB x 6 MJIC 31136 R3... - Page 69 4. ASSEMBLY STX2 & XTA 10 SERIES – PORTABLE GRAIN AUGER Installing Adapters at the Hydraulic Motors hydraulic motor steel fitting, 90, 8 MNPT x 6 FNPSM 31136 R3...
- Page 70 4. ASSEMBLY STX2 & XTA 10 SERIES – PORTABLE GRAIN AUGER Installing Adapters at the Hydraulic Winch hydraulic winch steel fitting, 90, 6 MNPT x 6 FNPSM 31136 R3...
- Page 71 4. ASSEMBLY STX2 & XTA 10 SERIES – PORTABLE GRAIN AUGER Installing Adapters at the Steering Cylinder mover steering cylinder steel elbow, 90, 6 MORB x 3/8 NPSM 31136 R3...
-
Page 72: Attach The Transport Chain
4. ASSEMBLY STX2 & XTA 10 SERIES – PORTABLE GRAIN AUGER 4.30. Attach the Transport Chain Assembly Note: • If necessary, the transport chain assembly can be shortened. – Remove mid link from chain. – Attach mid link to the appropriate chain link. transport chain mid link 31136 R3... -
Page 73: Attach The Hydraulic Hoses
4. ASSEMBLY STX2 & XTA 10 SERIES – PORTABLE GRAIN AUGER 4.31. Attach the Hydraulic Hoses Hydraulic Hose Routing Hydraulic Components hydraulic valve oil filter hydraulic winch drive motor hydraulic cylinder, slider hydraulic cylinder, steering hydraulic pump steel hydraulic lines, bent hydraulic manifold steel hydraulic lines, straight oil tank... - Page 74 4. ASSEMBLY STX2 & XTA 10 SERIES – PORTABLE GRAIN AUGER Hydraulic Hoses Length Item Hose Ends A1/A2 3/8" MNPT x #6 FJIC 3/8" x 296" #6 FJIC x #6 FJIC B1/B2 3/8" x 60" #6 FJIC x #6 MJIC C1/C2 3/8"...
- Page 75 4. ASSEMBLY STX2 & XTA 10 SERIES – PORTABLE GRAIN AUGER Hydraulic Hoses A1 & A2 Hydraulic Hoses B1/B2, F1/F2, I1/I2, P, T & H I1/I2 B1/B2 F1/F2 31136 R3...
- Page 76 4. ASSEMBLY STX2 & XTA 10 SERIES – PORTABLE GRAIN AUGER Hydraulic Hose G Note Route hose G under the engine slider assembly along the lower frame. Hydraulic Hoses E1 & E2 Hydraulic Hoses C1/C2 & D1/D2 (from Valve) 31136 R3...
- Page 77 4. ASSEMBLY STX2 & XTA 10 SERIES – PORTABLE GRAIN AUGER Hydraulic Hoses J1 & J2 Hydraulic Hoses K1 & K2 31136 R3...
-
Page 78: Install The Manual Holder
4. ASSEMBLY STX2 & XTA 10 SERIES – PORTABLE GRAIN AUGER Hydraulic Steering Valve 4.32. Install the Manual Holder manual holder mount lock nut, 3/8" manual holder bolt, 1/4" x 3/4" square U-bolt, 3/8" x 3-1/16" x 4" flat washer, 1/4" flat washer, 3/8"... -
Page 79: Install The Hitch
4. ASSEMBLY STX2 & XTA 10 SERIES – PORTABLE GRAIN AUGER 4.33. Install the Hitch clevis hitch clevis pin grip clip 4.34. Install the Work Lights 1. Install the discharge-area flood lamp to the track stop with a bolt, washer, and lock nut, then plug the wiring harness connector into the flood lamp connector. - Page 80 4. ASSEMBLY STX2 & XTA 10 SERIES – PORTABLE GRAIN AUGER flood lamp (includes hardware) switch box lamp bracket tek screw, #8 x 3/4" wiring harness bolt, 1/2" x 1" P-clamp, 1/4" lock washer, 1/2" tek screw, #14 x 5/8" 31136 R3...
-
Page 81: Specifications
5. SPECIFICATIONS STX2 & XTA 10 SERIES – PORTABLE GRAIN AUGER 5. Specifications Specification 10-61 10" (254 mm) Tube Size CAPACITIES Up to 6000 Bu/Hr Unloading Rate (212 m³/Hr) TRANSPORT DIMENSIONS Length 61'6" (18.7 m) 8' (2.44 m) Width Height 14'4"... -
Page 82: Appendix
Tighten all bolts to the torque specified, unless otherwise noted. Check tightness periodically, using Table 2 as a guide. Replace the hardware with the same strength bolt, contact AGI if you are unsure. Table 2. Recommended Bolt Torque Recommended Torque (ft-lb) Threads... -
Page 83: Fittings Torque Values
6. APPENDIX STX2 & XTA 10 SERIES – PORTABLE GRAIN AUGER 6.2. Fittings Torque Values These specifications are for carbon steel. With Zinc plating always lubricate threads and seals. For stainless steel, use the high value of the torque range of steel. For brass, use 70% of the torque value of steel. For mixed metals, use the torque of the lower of the two metals. - Page 84 6. APPENDIX STX2 & XTA 10 SERIES – PORTABLE GRAIN AUGER Table 5 Stud End O-Ring Boss (ORB) SAE (U/UF) – Carbon Steel (continued) Max N-m Tube Size Thread UNF-2A Max ft-lbs 22-24 29-33 9/16" - 18 40-43 49-53 3/4" - 16 43-48 59-64 7/8"...
- Page 85 6. APPENDIX STX2 & XTA 10 SERIES – PORTABLE GRAIN AUGER 31136 R3...
- Page 86 AGI is a leading provider of equipment solutions for agriculture bulk commodities including seed, fertilizer, grain, and feed systems with a growing platform in providing equipment and solutions for food processing facilities. AGI has manufacturing facilities in Canada, the United States, the United Kingdom, Brazil, South Africa, India and Italy and distributes its products globally.
Need help?
Do you have a question about the STX2 Series and is the answer not in the manual?
Questions and answers