Table of Contents
Advertisement
Quick Links
Advertisement
Table of Contents

Related Manuals for AGI STORM FX2 Series


Summary of Contents for AGI STORM FX2 Series
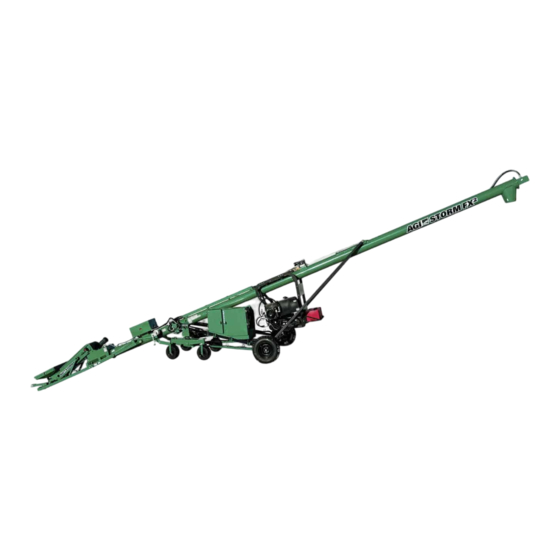
- Page 1 Seed Treater FX² Series Operator’s Manual Read this manual before using product. Failure to Part Number: 8210-00046 R2 follow instructions and safety precautions can Revised: January 2024 result in serious injury, death, or property Original Instructions damage. Keep manual for future reference.
- Page 2 This product has been designed and manufactured to meet general engineering standards. Other local regulations may apply and must be followed by the operator. All personnel must be trained in the correct operational and safety procedures for this product. Use the sign-off sheet below to record initial and periodic reviews of this manual with all personnel.
-
Page 3: Table Of Contents
SEED TREATER – FX² SERIES CONTENTS 1. Introduction ............................6 1.1 Serial Number Location......................6 1.2 Intended Use ..........................7 1.2.1 Misuse ........................7 2. Safety............................... 8 2.1 Safety Alert Symbol and Signal Words..................8 2.2 General Safety Information....................... 8 2.3 Rotating Flighting Safety ...................... - Page 4 SEED TREATER – FX² SERIES 7.1 Operation Safety ........................30 7.2 Preparing the Operator's Station for Use ................30 7.3 Providing Power to the Control System.................. 32 7.4 Operating a Generator ......................32 7.5 Pre-Season Tasks ........................33 7.6 Pre-Season System Check ....................... 33 7.7 Conveyor Break-In ........................
- Page 5 SEED TREATER – FX² SERIES 9.5 Grease the Bearings ........................ 82 9.6 Check the Gearbox Oil......................82 9.7 Change the Gearbox Oil ......................82 9.8 Clean the Calibration Cylinders....................83 9.9 Coat the Calibration Cylinders ....................84 9.10 Inspect the Calibration Cylinder Wiper................. 84 9.11 Inspect, Clean, and Align Nozzles..................
-
Page 6: Introduction
Keep this manual handy for frequent reference and to review with new personnel. A sign-off form is provided on the inside front cover for your convenience. If any information in this manual is not understood or if you need additional information, please contact AGI or your representative for assistance. -
Page 7: Intended Use
1. INTRODUCTION SEED TREATER – FX² SERIES 1.2. Intended Use The seed treater is intended for use as listed below and described throughout this manual. Use in any other way is considered contrary to the intended use and is not covered by the warranty. Intended use for the seed treater •... -
Page 8: Safety
2. SAFETY SEED TREATER – FX² SERIES 2. Safety 2.1. Safety Alert Symbol and Signal Words This safety alert symbol indicates important safety messages in this manual. When you see this symbol, be alert to the possibility of injury or death, carefully read the message that follows, and inform others. -
Page 9: Rotating Flighting Safety
2. SAFETY SEED TREATER – FX² SERIES 2.3. Rotating Flighting Safety • KEEP AWAY from rotating flighting. • DO NOT remove or modify flighting guards, doors, or covers. Keep in good working order. Have replaced if damaged. • DO NOT operate the seed treater without all guards, doors, and covers in place. -
Page 10: Seed Treatment Safety
2. SAFETY SEED TREATER – FX² SERIES 2.7. Seed Treatment Safety Hazards associated with handling, sorting, mixing and storage of treated seed and seed treatments can be minimized by following the safety precautions listed below. The below are guidelines only and vary based on the type of seed treatment being used. -
Page 11: Raising And Lowering The Seed Treater
2. SAFETY SEED TREATER – FX² SERIES 2.10. Raising and Lowering the Seed Treater • Before raising/lowering/moving/adjusting the seed treater, make sure the area around the seed treater is clear of obstructions and/or untrained personnel. Never allow anyone to stand on or beneath the seed treater when it is being placed. •... -
Page 12: Positioning The Seed Treater
2. SAFETY SEED TREATER – FX² SERIES 2.13. Positioning the Seed Treater • Transport and place equipment on reasonably level ground when raising, lowering, positioning, or operating. • Move the seed treater into position slowly. Do not unhitch and attempt to move by hand. •... -
Page 13: Gas Engine Safety
2. SAFETY SEED TREATER – FX² SERIES 2.15.1 Gas Engine Safety Power Source • Keep guards in place and secure. • Properly ventilate surrounding area. • Never fill the fuel tank with the engine running, while smoking, or near an open flame. Always shut down and allow engine to cool before filling with fuel. -
Page 14: Hydraulic Power Safety
2. SAFETY SEED TREATER – FX² SERIES 2.15.3 Hydraulic Power Safety Power Source • Refer to the rules and regulations applicable to the power source operating the hydraulic system. • Do not connect or disconnect hydraulic lines while system is under pressure. -
Page 15: Tire Safety
2. SAFETY SEED TREATER – FX² SERIES 2.16. Tire Safety Failure to follow proper procedures when mounting a tire on a wheel or rim can produce an explosion that may result in serious injury or death. • DO NOT attempt to mount a tire unless you have the proper equipment and experience to do the job. -
Page 16: Work Area Safety
2. SAFETY SEED TREATER – FX² SERIES 2.18. Work Area Safety • Have another trained person nearby who can shut down the seed treater in case of accident. • Do not allow any unauthorized persons in the work area. • Keep the work area clean and free of debris. •... -
Page 17: Safety Equipment
2. SAFETY SEED TREATER – FX² SERIES 2.20. Safety Equipment The following safety equipment should be kept on site. • Fire Extinguisher • First-Aid Kit Have a properly-stocked first-aid kit Provide a fire extinguisher for use in case available for use should the need arise, of an accident. - Page 18 2. SAFETY SEED TREATER – FX² SERIES 8100-00096 8100-00131 8100-00132 8100-00133 P1513040 8100-00256 P1513052 8100-00028 P1513039 8100-00280 P1513001 P1513037 P1513003 P1513016 9909-00025 8110-20191 9909-00034 9909-00026 8110-00280 P1513002 9909-00023 8110-20162 P15130009 9909-00020 Table 1. Safety Decal Details DANGER DANGER WARNING ROTATING FLIGHTING HAZARD ELECTROCUTION HAZARD To prevent serious injury or death: •...
- Page 19 2. SAFETY SEED TREATER – FX² SERIES Table 1 Safety Decal Details (continued) WARNING WARNING WARNING TRANSPORT HAZARD To prevent serious injury or equipment damage, before towing: CRUSH HAZARD • Lift up wheel frame completely and secure with safety chain. •...
- Page 20 2. SAFETY SEED TREATER – FX² SERIES Table 1 Safety Decal Details (continued) 8100-00256 8100-00028 8100-00133 OIL FILL LINE 8110-20191 8100-00280 8210-00046 R2...
-
Page 21: Features
3. FEATURES SEED TREATER – FX² SERIES 3. Features 3.1. Main Components The figure and table below covers the main components of the seed treater. Figure 1. Main Components Table 2. Main Components Item Description Item Description Conveyor Intake Alarm Conveyor Controls (positioning) Mixer Boot... -
Page 22: Controls
3. FEATURES SEED TREATER – FX² SERIES 3.2. Controls The STORM mixer section has the following controls: Mechanical Controls • Engine throttle with toggle switch that moves a linear actuator. • Mover kit controls move/steer the unit and raise/lower the mixer tube. •... -
Page 23: Preparation
4. PREPARATION SEED TREATER – FX² SERIES 4. Preparation 4.1. Emergency Response Plan A response plan must be developed before using the seed treater the first time to be prepared in the event of an emergency. Keep a copy of the plan in the product manual holder. This section provides guidance on developing your emergency response plan. -
Page 24: Safety Training
4. PREPARATION SEED TREATER – FX² SERIES 4.2. Safety Training After reading this manual and completing training, an operator must be able to: Explain the established procedures for the use and care of emergency and safety equipment including: • Personal Protective Equipment (PPE) •... -
Page 25: Transport
5. TRANSPORT SEED TREATER – FX² SERIES 5. Transport When transporting, follow all safety precautions and use a proper tow vehicle to help ensure safe transport of the seed treater. 5.1. Transport Safety • Check with local authorities regarding transport on public roads. Obey all applicable laws and regulations. - Page 26 5. TRANSPORT SEED TREATER – FX² SERIES 2. Lower the mixer tube fully using the controls, see Figure 3. Use the controls to raise the seed treater hitch. Note Confirm the conveyor lugs catch under the tow frame transport stops (see Figure 4.
- Page 27 5. TRANSPORT SEED TREATER – FX² SERIES Figure 3. Conveyor Frame and Mover Kit Transport Locks Figure 4. Transport Position 8210-00046 R2...
-
Page 28: Placement
6. PLACEMENT SEED TREATER – FX² SERIES 6. Placement 6.1. Placement Safety • The seed treater is not insulated, keep away from overhead power lines. Electrocution can occur without direct contact. • Anchor intake end before using. • Place the seed treater on reasonably level ground before operating. The seed treater could topple if ground is too uneven. - Page 29 6. PLACEMENT SEED TREATER – FX² SERIES 2. Remove the hitch and place in the transport rest. 3. Use the controls to position the seed treater partly under the bin, resting the intake end on the ground, see Figure 4. Use the joystick to move the seed treater fully under the bin and position the conveyor intake under the bin. 5.
-
Page 30: Operation
7. OPERATION SEED TREATER – FX² SERIES 7. Operation For optimal operation, follow these safety precautions, checklists, and instructions. 7.1. Operation Safety • Keep away from rotating and moving parts, including the conveyor belt, auger flighting, drive components, shafts, and bearings. •... - Page 31 7. OPERATION SEED TREATER – FX² SERIES Rear View Item Item Description Description Access Door Swinging Hook Latch Handle Knob 1. With the machine in the operating position, open the two access doors for the operator station by turning the handles counterclockwise. 2.
-
Page 32: Providing Power To The Control System
7. OPERATION SEED TREATER – FX² SERIES 7.3. Providing Power to the Control System Important Before connecting the control system to the power supply, verify that the power source has the appropriate voltage and amperage as detailed below, and that it is protected by an appropriately sized circuit breaker. -
Page 33: Pre-Season Tasks
7. OPERATION SEED TREATER – FX² SERIES 7.5. Pre-Season Tasks Complete the following tasks annually before starting each treating season. • Review the Emergency Response Plan with all personnel who will be operating and assisting with operation of the seed treater, see Section 4.1 –... -
Page 34: Conveyor Break-In
7. OPERATION SEED TREATER – FX² SERIES 7.7. Conveyor Break-In This section covers the general guidelines for using the newly acquired conveyor or after a major service has been performed on the machine. Follow the recommended break-in activities listed in Table 3 to help ensure the reliability and optimal performance of the machine. -
Page 35: Treating Seed
7. OPERATION SEED TREATER – FX² SERIES 7.8. Treating Seed Overview To treat seed, you need to perform a test weight procedure, create a job, calibrate the pumps, apply treatment and run the mixer, shut down the seed treater, and finally clean up the site. These options are covered in the sections that follow. - Page 36 7. OPERATION SEED TREATER – FX² SERIES 1. Loosen the two locking knobs (4) holding the pump shoe retainers (5,6). 2. Swing the pump shoe retainers down and out of the way. 3. Select the hoses (3) to be engaged. 4.
- Page 37 7. OPERATION SEED TREATER – FX² SERIES 5. To disengage a hose: a. Place the end of the corresponding shoe (2) between the inner pump shoe retainer (5) and outer pump shoe retainer (6). In this configuration, disengaged hose is not being squeezed between the shoe and the pump roller. Hose Item Description...
- Page 38 7. OPERATION SEED TREATER – FX² SERIES Figure 10. Pump Shoe Engaged and Disengaged Positions Item Description Pump Shoe in Disengaged Position Pump Shoe in Engaged Position Figure 11. Flow Valve Open and Closed Positions Item Description Flow valve in Closed Position Flow valve in Open Position 8210-00046 R2...
-
Page 39: Create A Job
7. OPERATION SEED TREATER – FX² SERIES 7.8.3 Create a Job To create a new job, first give it a name, then enter information about the seed, followed by selecting or entering treatment information. A maximum of 20 jobs can be configured and stored for use. The gas engine does not have to run to create a job. - Page 40 7. OPERATION SEED TREATER – FX² SERIES Prepare for Calibration If you will be using both pumps, using pump one for the more viscous (thickest) product will speed up the calibration process. 1. Connect to the seed treatment product container. Important Air leaks in the connection between treatment product and intake lines affect the accuracy of the calibration and treatment processes.
- Page 41 7. OPERATION SEED TREATER – FX² SERIES Re-Calibrate the Pumps After the initial calibration, each time a job is run, it is recommended that you re-calibrate the pumps. The system saves the treating speed and pump calibration parameters after a calibration is performed, and uses those values the next time the job is run.
-
Page 42: Overview Of Mixer Operation
7. OPERATION SEED TREATER – FX² SERIES 7.8.5 Overview of Mixer Operation During steady-state operation, the suggested system pressure is less than 2,500 psi, while the system relief setting is set at 2,900 psi. If the system pressure reaches the relief setting, the mixer will stop turning and will potentially plug. -
Page 43: Update The Calibration
7. OPERATION SEED TREATER – FX² SERIES Figure 12. Hydraulic Mixer Pressure Gauge Item Description Pressure Gauge Mixing Valve 13. Run until the desired amount of treated seed is obtained. 14. Stop the treater. 15. Do not stop the mixer until it is empty. Important Do not leave the mixer full and allow it dry. -
Page 44: Emergency Stop
7. OPERATION SEED TREATER – FX² SERIES 7.9. Emergency Stop Although it is recommended that the seed treater be emptied before stopping, in an emergency situation press the emergency stop button. The emergency stop will stop the conveyor, seed treatment metering pumps, and spray nozzles. -
Page 45: Chemical Spill Cleanup
7. OPERATION SEED TREATER – FX² SERIES 7.12. Chemical Spill Cleanup When operating the seed treater, keep spill clean-up gear at the work area. At minimum, have an aluminum shovel, broom, bag of absorbent material, and paper towel available. It is recommended to also carry heavy duty garbage bags, water, and other clean-up materials as recommended by the seed treatment manufacturer. - Page 46 7. OPERATION SEED TREATER – FX² SERIES 12. Chock wheels. 13. Support intake on blocks to eliminate prolonged contact with the ground. 14. Coat exposed hydraulic cylinder shaft(s) with a light film of grease to protect from the environment. 15. Place the seed treater in its transport position. 16.
-
Page 47: Software Screens
8. SOFTWARE SCREENS SEED TREATER – FX² SERIES 8. Software Screens This section describes all of the software screens and how to navigate through them. 8.1. Electronic Controls Treatment application is controlled through the system software. The main menu, which shows the graphical buttons for the four main control sub menus, can be seen in Figure Figure 13. -
Page 48: View Software Version
8. SOFTWARE SCREENS SEED TREATER – FX² SERIES Figure 14. Set Date and Time 8.3. View Software Version From the main menu, tap: Setup — Software Version • Tap Back to return to the Setup menu. Figure 15. View Software Version 8210-00046 R2... -
Page 49: View And Configure Pump Setup
• Tap Back to abandon any changes and return to the Setup menu. • Tap Save and Continue to save changes and return to the Setup menu. • Tap Advanced to view or make changes to advanced pump setup parameters under the guidance of AGI service staff. -
Page 50: View And Configure Advanced Pump Setup
Setup — Pump 1 Setup or Pump 2 Setup — Advanced • Tap and change the low- and high-speed limits according to the direction of an AGI service professional. • Tap Back to abandon any changes and return to the Setup menu. -
Page 51: View And Configure Conveyor Options
SEED TREATER – FX² SERIES 8.6. View and Configure Conveyor Options Important Do not adjust any conveyor parameters unless directed to do so by an AGI service professional. From the main menu, tap: Setup — Conveyor Options • Tap and change the Conveyor Drive Ratio and Conveyor Correction Factor according to the direction of an AGI service professional. -
Page 52: Viewing Configured Jobs
8. SOFTWARE SCREENS SEED TREATER – FX² SERIES 8.7. Viewing Configured Jobs From the main menu, tap Jobs. Jobs are displayed in several pages. Use “More” and “Back” to page through configured jobs. Newest created jobs will appear highest in the list. Selecting a job from the list will take you to Job Options Screen. -
Page 53: Viewing Job Parameters
8. SOFTWARE SCREENS SEED TREATER – FX² SERIES Figure 20. Confirm Job Delete 8.9. Viewing Job Parameters From the main screen, tap Jobs — <select job> — Start Treating: The first job parameter screens are the pump configuration screens, which appear only if the current pump configurations are different than those for the selected job. - Page 54 8. SOFTWARE SCREENS SEED TREATER – FX² SERIES Table 6. Viewing Job Parameters Field Description Value The name of the job, used to 1-30 letters and characters uniquely identify the job from all other configured jobs. Seed Type The type of seed configured for wheat, barley, oats, peas, lentils, the job.
-
Page 55: Viewing Treating History (All Jobs)
8. SOFTWARE SCREENS SEED TREATER – FX² SERIES 8.10. Viewing Treating History (All Jobs) From the main screen, tap Jobs — History: The treating history maintains the details of the 40 most recent jobs. The treating history can be reviewed directly on the HMI by tapping the arrows and scroll bar to the right of the history details (see Figure 22 on page... -
Page 56: Viewing Treating History (Specific Job)
8. SOFTWARE SCREENS SEED TREATER – FX² SERIES Figure 22. Treating History Treating History Message Format Date (yy/mm/dd), Time (24 hour), Job Name, Seed Type, Seed Calibration Weight, Seed Flow Correction, Seed Treated (lbs), Pump 1 Product Name, Pump 1 Application Rate, Pump 1 Calibration Number, Pump 1 Calibration Error, Pump 1 Litres Used, Pump 2 Product Name, Pump 2 Application Rate, Pump 2... -
Page 57: Calibrate A One Pump Job
8. SOFTWARE SCREENS SEED TREATER – FX² SERIES Table 7. Viewing Job Treating History Parameters Field Description The name of the job. The date and time that the job was run. Date / Time Seed lbs The actual (if entered after a batch completes) or estimated weight of seed treated when the job was complete. - Page 58 8. SOFTWARE SCREENS SEED TREATER – FX² SERIES 5. Tap and hold Empty until the liquid is at the zero mark. 6. Tap Start Test to start the countdown. 7. After the countdown is complete, tap the flashing Amount Collected box and enter the number of ml collected in the cylinder during the test.
-
Page 59: Calibrate A Two Pump Job
8. SOFTWARE SCREENS SEED TREATER – FX² SERIES Figure 27. Calibration Outcome Screen 11. Tap Continue to end the calibration procedure and return to the Job Screen. 8.13. Calibrate a Two Pump Job Set both valves to the calibrate position. Calibrate Pump One Figure 28. - Page 60 8. SOFTWARE SCREENS SEED TREATER – FX² SERIES 4. Tap and hold Prime until 1000 ml of product has been collected in the calibration cylinder 1. Note Ensure there are no air bubbles in the line. 5. Tap and hold Empty until the liquid is at the zero mark. 6.
- Page 61 8. SOFTWARE SCREENS SEED TREATER – FX² SERIES Figure 31. Calibration Outcome Screen 11. Tap Continue to Pump 2 Calibration to proceed to Calibrate Pump Two on page Calibrate Pump Two Figure 32. Calibration Test Screen 1. Tap and hold Prime until 1000 ml of product has been collected in the calibration cylinder 2. Note Ensure there are no air bubbles in the line.
- Page 62 8. SOFTWARE SCREENS SEED TREATER – FX² SERIES 5. Tap Next. 6. Review the screen generated by the system and decide your next action. The system will generate one of the following screens: This screen appears when you collected 1000 ml Figure 33.
- Page 63 8. SOFTWARE SCREENS SEED TREATER – FX² SERIES Figure 35. Calibration Outcome Screen Recalibrate Pump One 1. Tap and hold Empty (see Figure 36) . 2. Tap Recalibrate Pump 1. Figure 36. Calibration Outcome Screen 3. Tap and hold Prime until 1000 ml of product has been collected in the calibration cylinder 1 (see Figure 37 on page 4.
- Page 64 8. SOFTWARE SCREENS SEED TREATER – FX² SERIES Figure 37. Calibration Test Screen 8. Review the screen generated by the system and decide your next action. The system will generate one of the following screens: This screen appears when you collected 1000 ml Figure 38.
- Page 65 8. SOFTWARE SCREENS SEED TREATER – FX² SERIES This screen appears if you did not achieve your Figure 39. Calibration Results Screen target treating speed. • Tap Try to reach Target Treating Speed to perform another test and return to step 3. •...
-
Page 66: Calibration Results
8. SOFTWARE SCREENS SEED TREATER – FX² SERIES 8.14. Calibration Results Reading the Results Screen Any test that does not achieve the target treating speed generates a results screen. The results screen displays the following information: • The amount of product collected during the test. •... -
Page 67: Calibration Successful
8. SOFTWARE SCREENS SEED TREATER – FX² SERIES 8.15. Calibration Successful When the calibration is complete, the system displays a Calibration Successful Outcome Screen. On the Calibration Successful Outcome Screen you can view the treating speed used for the job, and may proceed to calibrate a second pump, or proceed to save the job parameters and begin treatment. -
Page 68: Overriding The Pump Speed Setpoint
8. SOFTWARE SCREENS SEED TREATER – FX² SERIES 8.16. Overriding the Pump Speed Setpoint Users who are familiar with both the product being calibrated and the STORM calibration procedure may wish to override the calculated pump speed. Adjusting the Setpoint may reduce the number of times a test needs to be performed before collecting the desired 1000 ml result. -
Page 69: Viewing Amount Of Treatment Used While Operating (Job Specific)
8. SOFTWARE SCREENS SEED TREATER – FX² SERIES Figure 44. Total Amount Treated (Seed Tab) 8.18. Viewing Amount of Treatment Used While Operating (Job Specific) 1. From the operation screen, tap Toggle Screens until you view the pumps screen. 2. Toggle Entry Amount Treated button to Total Amount: •... -
Page 70: Seed Flow Correction
8. SOFTWARE SCREENS SEED TREATER – FX² SERIES 8.19. Seed Flow Correction The default value for seed flow is 1000. Seed flow correction represents the adjustment to treating speed made between batches by the STORM software; this adjustment occurs when there is a difference between the STORM metering system’s estimated amount of seed treated and the actual amount of seed treated. - Page 71 8. SOFTWARE SCREENS SEED TREATER – FX² SERIES How Seed Flow Correction Affects Further Treating The system automatically adjusts parameters to ensure optimum treatment the next time the job is run. It is important to recalibrate the pumps after a seed flow correction has occurred. While it is possible to treat using the system’s estimated calibration values, it is not recommended.
-
Page 72: Flush Out
8. SOFTWARE SCREENS SEED TREATER – FX² SERIES 8.20. Flush Out The Flush Out function allows the operator to set pump and the conveyor direction (forward or reverse), and specify the state (on or off) for each when START is pressed. From the main menu, tap: Maintenance —... -
Page 73: View Lifetime Total Use
8. SOFTWARE SCREENS SEED TREATER – FX² SERIES 8.21. View Lifetime Total Use Lifetime total use is the amount of time that the STORM has spent actively treating seed, and does not include the amount of time spend powered up but not treating seed. From the main menu, tap Maintenance: Figure 50. -
Page 74: View Diagnostics
8. SOFTWARE SCREENS SEED TREATER – FX² SERIES 8.22. View Diagnostics • Pre-operational diagnostics can be viewed before operating the system, and are used to verify that the conveyor and pumps are reporting adequate supply voltages before a job is running. •... -
Page 75: Alarms
To attempt to correct an alarm, see the alarm descriptions in Table 11, and follow any instructions, including those provided on the STORM display. Be prepared to contact an AGI service professional as required. Table 11. Alarm Descriptions Error Alarm #... - Page 76 OPF2 output side of the connections. motor controller. Check motor supply cables for damage. If problem persists, contact an AGI Service Specialist. Input Phase Loss Error Loss of Input power. If problem persists, contact an AGI Service Specialist. UnderVoltage Error Input Voltage Fault - Check power source.
- Page 77 Check motor supply cables for damage. If problem persists, contact an AGI Service Specialist. 1. Often occurs when control box is not powered down for 30 seconds after a software upload. 2. May occur if conveyor or pumps have excessive drag.
-
Page 78: Maintenance
9. MAINTENANCE SEED TREATER – FX² SERIES 9. Maintenance Proper maintenance will improve safety, efficiency, and will keep the seed treater operating reliably. 9.1. Maintenance Safety • Keep components in good condition. Follow the maintenance procedures. • Ensure the service area is clean, dry, and has sufficient lighting. -
Page 79: Maintenance Schedule
9. MAINTENANCE SEED TREATER – FX² SERIES 9.2. Maintenance Schedule Follow the Maintenance Schedule below. Keep good records of the hours the seed treater has been operated and the maintenance performed. For Maintenance of the gas engine, consult the engine Operator’s Manual. Yearly (or end Pre-... - Page 80 9. MAINTENANCE SEED TREATER – FX² SERIES Yearly (or end Pre- Daily Weekly Biennially Item Required Season Weeks Season) Section 9.5 – Grease the Bearings on page 82 Section 9.6 – Check the Gearbox Oil on page 82 Section 9.7 – Change the Gearbox Oil on page 82 Section 9.21 –...
-
Page 81: Checking System Software
9. MAINTENANCE SEED TREATER – FX² SERIES Yearly (or end Pre- Daily Weekly Biennially Item Required Season Weeks Season) Section 9.35 – Change the Hydraulic Oil on page 101 Section 9.36 – Change the Hydraulic Oil Filter on page 101 Section 9.37 –... -
Page 82: Grease The Bearings
9. MAINTENANCE SEED TREATER – FX² SERIES 9.5. Grease the Bearings To keep the system operating effectively, check all grease points and ensure that they are sufficiently well greased. Refer to Section 12. – Specifications on page 116 for grease and oil types. Figure 52. -
Page 83: Clean The Calibration Cylinders
9. MAINTENANCE SEED TREATER – FX² SERIES 7. Add oil until the gearbox is half full (center of cross shaft) and replace filler plug. A flexible funnel may be required. Gearbox should be level when checking or refilling. Do not overfill. 8. -
Page 84: Coat The Calibration Cylinders
9. MAINTENANCE SEED TREATER – FX² SERIES 9.9. Coat the Calibration Cylinders 1. Remove and clean the calibration cylinder, see Section 9.8 – Clean the Calibration Cylinders on page 2. Dry the cylinder and use a rag to coat a thin layer of petroleum jelly to its interior surface. 9.10. - Page 85 9. MAINTENANCE SEED TREATER – FX² SERIES • pressure iii. Covers the desired spray width. If the spray pattern is not covering the desired width, check the alignment of the nozzles, see Step Figure 54. Spray Pattern 8. Reinstall the nozzles to the boot. 9.
-
Page 86: Clean The Mixing Boot And Chemical Hoses
9. MAINTENANCE SEED TREATER – FX² SERIES Important Properly aligned nozzles will cover the intended width and will deliver uniform and right amount of spray, minimizing build-up in the boot. • The rear nozzles should be directed to spray towards the discharge of the conveyor. •... -
Page 87: Check The Chemical Pump Rollers
9. MAINTENANCE SEED TREATER – FX² SERIES 9.13. Check the Chemical Pump Rollers 1. Open the covers and confirm the pump rollers move freely. Figure 57. Chemical Pump Rollers 9.14. Clean the Filter Strainers 1. Unscrew the cap and rinse residue from strainer and replace. Replace the cartridge if it is damaged. Note Watch for the rubber seal that seals the cup to the body, it can get lost easily when cleaning. -
Page 88: Drain Antifreeze From The System
9. MAINTENANCE SEED TREATER – FX² SERIES 4. Coat calibration cylinders with antifreeze. 5. Drain antifreeze. 6. Set ball valves to treat. 7. Run antifreeze through the system. 8. Operate the pumps in the reverse direction to remove any excess antifreeze from the lines. 9. -
Page 89: Check And Maintain The Containment System
9. MAINTENANCE SEED TREATER – FX² SERIES 9.18. Check and Maintain the Containment System Chemical Hoses Ensure nothing is caught in the hoses, if there is, flush out with water or replace the line if necessary. Fittings Check for leaks at intake filters and other connection points, replace if cracked or worn. Back Clean-out Door Seal Make sure the rubber bulb seal is in good condition, replace if damaged. -
Page 90: Check And Replace The Pump's Chemical Hoses
9. MAINTENANCE SEED TREATER – FX² SERIES 6. Use detergent and pressure washer to loosen and remove the build-up. 7. Reassemble. 9.20. Check and Replace the Pump’s Chemical Hoses To maintain treating accuracy and safe handling of treatment chemicals, it is necessary to change pump tubing annually or if there are kinks, wear, or leaks. -
Page 91: Inspect/Replace The Conveyor Rollers And Bearings
9. MAINTENANCE SEED TREATER – FX² SERIES 9.21. Inspect/Replace the Conveyor Rollers and Bearings Inspecting the Conveyor Rollers and Bearings To inspect the rollers, listen for the belt slipping (squealing sound) from the drive roller on the conveyor. Operating the conveyor with a damaged roller will result in a damaged conveyor belt. Check the roller bearings for wear. - Page 92 9. MAINTENANCE SEED TREATER – FX² SERIES Failure to stop using a conveyor with a slipping belt will damage it and/or the drive roller lagging. In extreme cases, sections of burnt belt will have to be replaced. This type of damage is not covered by warranty.
-
Page 93: Align The Conveyor Belt
9. MAINTENANCE SEED TREATER – FX² SERIES 9.23. Align the Conveyor Belt Basic Conveyor Belt Alignment: The conveyor belt will run straight when all of the rollers are straight. Loosen or tighten the adjustment bolt(s) to align the conveyor belt. Tighten the side the belt has moved toward, or loosen the side the belt has moved away from. -
Page 94: Adjusting The Rollers
9. MAINTENANCE SEED TREATER – FX² SERIES 9.23.1 Adjusting the Rollers 1. Loosen bearing nuts and jam nuts (if equipped). Figure 65. Loosen the Bearing Nuts 2. Rotate adjustment bolt 1/2 turn. Figure 66. Rotate the Adjustment Bolt 3. Restart conveyor and run empty for 1 minute. 4. -
Page 95: Align The Drive Belts
9. MAINTENANCE SEED TREATER – FX² SERIES Figure 67. Typical Drive Belt Tensioning 1 inch (25 mm) 2. Tighten or loosen the drive belts (or idler pulley when equipped) to achieve the proper tension. Important The drive belt should be just tight enough to not slip on the drive pulley when operating. If the belt is too loose, it will slip, possibly causing a squeaking sound and slowing the belt down. -
Page 96: Clean And Wash The Equipment
9. MAINTENANCE SEED TREATER – FX² SERIES 9.27. Clean and Wash the Equipment 1. Clean out excess grain from all areas of the seed treater. 2. Make sure water can drain from the seed treater tube and intake, then wash the tube with a water hose or pressure washer until all dirt, mud, debris, or residue is gone. - Page 97 9. MAINTENANCE SEED TREATER – FX² SERIES 7. Disconnect the old belt. 8. Reattach conveyor belt ends together. If required, use a ratchet strap clamped to both ends of belt to cinch belting ends together. Figure 68 on page Figure 68. Using the Ratchet Strap 9.
-
Page 98: Inspect And Service The Hand Winch And Lift Cable
9. MAINTENANCE SEED TREATER – FX² SERIES Figure 69. Lacing the Conveyor Belt 13. Follow Section 7.7 – Conveyor Break-In on page 34 for the procedure to break in a newly installed conveyor belt. 9.31. Inspect and Service the Hand Winch and Lift Cable When equipped: Place seed treater in fully lowered position with cable slack. -
Page 99: Inspect And Service The Hydraulic Winch And Lift Cable
9. MAINTENANCE SEED TREATER – FX² SERIES 9.32. Inspect and Service the Hydraulic Winch and Lift Cable Place the seed treater in the fully lowered position with the cable slack. To Inspect the Lift Cable: 1. Inspect the cable for damage such as fraying, kinking, or unwinding. Replace if damaged (see below). 2. - Page 100 9. MAINTENANCE SEED TREATER – FX² SERIES STROKE LIMITER SCREW PRESSURE RELIEF VALVE STROKE LIMITER SCREW Travel Speed Adjustment To control the speed of the mover, the cushion valve can be adjusted: • screwed in for increased speed. • screwed out for decreased speed. 8210-00046 R2...
-
Page 101: Adjusting The Mover Kit Pinion Gear
9. MAINTENANCE SEED TREATER – FX² SERIES 9.34. Adjusting the Mover Kit Pinion Gear For seed treaters equipped with a mover kit. The pinion gear must mesh fully with the ring gear to provide maximum contact. 1. Adjust the handle slot bolt (which bolts to the drive mount clamp) so full meshing of the pinion gear is achieved when the handle is in the over-center position. -
Page 102: Remove / Replace The Shear Bolt
9. MAINTENANCE SEED TREATER – FX² SERIES 9.37. Remove / Replace the Shear Bolt 1. Position the seed treater with the mover controls to allow for the full extraction of the mixer flighting with the mixer tube at a low angle, boot slightly raised, and conveyor intake at full height. Lock ball valves to secure the seed treater. -
Page 103: Troubleshooting
The following section covers some causes and solutions to some of the problems that may be encountered. If there is a problem that is difficult to solve, even after having read through this section, please contact your representative or AGI. Have this manual and the serial number available. Seed Treating Issues Cause... - Page 104 10. TROUBLESHOOTING SEED TREATER – FX² SERIES Problem Cause Solution Electronics not achieving Conveyor Drive ratio should be 10:1, proper conveyor motor adjust if not set correctly. speeds. Ensure that the Conveyor Correction Factor is set at 1000. Pump won’t prime, Air leak on intake.
- Page 105 10. TROUBLESHOOTING SEED TREATER – FX² SERIES Problem Cause Solution Ensure the container attached to the pump is free of air leaks, including the connector assembly and drop tube. Check for filter seal and that the filter body is tightly secured. The line is restricted on the Check the condition of the pump hose.
- Page 106 10. TROUBLESHOOTING SEED TREATER – FX² SERIES Problem Cause Solution The system signals a calibration error has occurred on the results screen during the calibration procedure. Running a job without adjusting for seed flow corrections results in inaccurate pump outputs; recalibrate the pumps to remove the estimated job parameters and replace them with calibrated parameters.
- Page 107 Ensure nozzles are oriented correctly and spraying the full seed curtain. System won’t operate Pump max. speed limit has Lower product dilution if possible. Split at higher conveyor been met. treatment application to two pumps. speeds Consult with AGI for metering options. 8210-00046 R2...
- Page 108 10. TROUBLESHOOTING SEED TREATER – FX² SERIES Problem Cause Solution Insufficient power supply. Check advanced diagnostics during operation for voltage condition. If low, ensure that the STORM is powered by a dedicated circuit. Extension cords should be 12 gauge or heavier and should not exceed 100 feet in total length.
- Page 109 Bearing is seized. Identify the bearing and replace. Shear pin broken. Replace shear pin. Hydraulic issue. Check hydraulic and electric systems, call AGI Service for assistance. Seed treater flighting Obstruction in the seed Identify and remove obstruction. is noisy. treater tube.
- Page 110 10. TROUBLESHOOTING SEED TREATER – FX² SERIES Problem Cause Solution Shear bolts fail Incorrect shear bolt type. Replace with correct part number. STORM repeatedly. shear bolts are specifically designed to provide correct driveline protection. Excessive loading during stops Decrease engine throttle when starting and starts.
- Page 111 10. TROUBLESHOOTING SEED TREATER – FX² SERIES Problem Cause Solution Oil level is too low. Check oil level. Pump is worn out. Replace pump. Hydraulic cylinder Worn seal. Replace seal. leaking. Winch coupler spins Internal winch parts worn. Replace worn parts. off (Dutton winch).
-
Page 112: Appendix
11. APPENDIX SEED TREATER – FX² SERIES 11. Appendix 11.1. Test Weight Procedure Follow this procedure to achieve highly accurate seed density and highly accurate seed treatment application. Repeat this procedure five times for best accuracy. Eliminate the highest and lowest value and average the three middle measurements for best results. -
Page 113: Updating System Software
11. APPENDIX SEED TREATER – FX² SERIES Figure 71. Test Weight Procedure Steps 11.2. Updating System Software To Ensure your STORM is operating at optimum levels, always install the most up-to-date software found on the "Downloading Software" tab or Of the www.stormtreaters.com website /owner centre The STORM control uses a USB Flash Drive to transfer treating history and to install new software. -
Page 114: Formatting A Usb
11. APPENDIX SEED TREATER – FX² SERIES 11.2.1 Formatting a USB How to Format a USB Flash Drive Using a PC 1. Put your USB in the USB port on your computer. 2. Click the start-up icon on the lower left side of the screen. 3. -
Page 115: Installing Software
11. APPENDIX SEED TREATER – FX² SERIES 7. If you have downloaded the .exe file, please double click on the file, choose run, update the destination folder to your removable drive using the browse button and finally press the extract button. Please verify you have nine items on your USB before ejecting. -
Page 116: Specifications
12. SPECIFICATIONS SEED TREATER – FX² SERIES 12. Specifications CAPACITY Seed Flow 15 to 30 bu/min [900 to 1,800 lb/min at 60 lb/bu] (408 to 816 kg/min [24.5 to 49 mt/h]) Treatment Application Rate 10 to 1,200 ml/100 kg* Treatment Application Coverage Accuracy +/- 5% (typical) Tube Size of Mixer 10"... - Page 117 12. SPECIFICATIONS SEED TREATER – FX² SERIES Gearbox Oil Type Mobil SHC 634 or similar synthetic 0.5-0.75 L Gearbox Oil Capacity Grease Type SAE multi-purpose high temperature grease with extreme pressure (EP) performance, OR use SAE multi- purpose lithium base grease Cooler Fan Fuse 15 A ATC Blade Type Engine Throttle Actuator Fuse...
- Page 118 12. SPECIFICATIONS SEED TREATER – FX² SERIES 8210-00046 R2...
-
Page 119: Storm Warranty
Company, or to our factory, with transportation charges prepaid. This warranty does not obligate AGI to bear the cost of labor in replacing defective parts. Any defects must be reported to the Company before the end of the one year period. - Page 120 STORM is an AGI Brand. AGI is a leading provider of equipment solutions for agriculture bulk commodities including seed, fertilizer, grain, and feed systems with a growing platform in providing equipment and solutions for food processing facilities. AGI has manufacturing facilities in Canada, the United States, the United Kingdom, Brazil, South Africa, India and Italy and distributes its products globally.
Need help?
Do you have a question about the STORM FX2 Series and is the answer not in the manual?
Questions and answers