Table of Contents
Advertisement
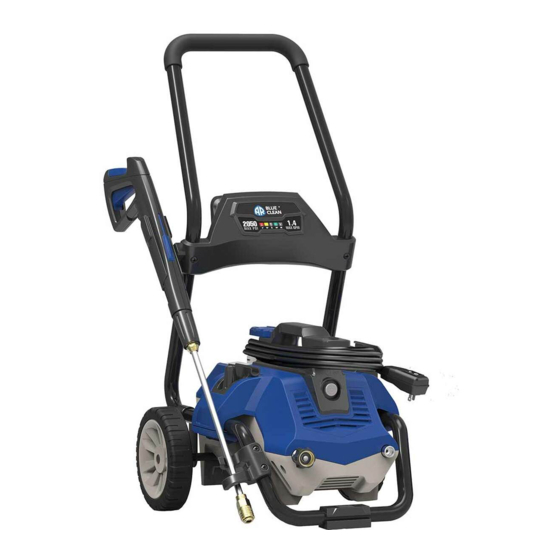
2050 PSI
Electric Pressure Washer
94641-KN
ASSEMBLY, CARE AND
USE INSTRUCTIONS
Model AR 2N1-Q
READ CAREFULLY
IMPORTANT:
RETAIN THESE INSTRUCTIONS
AND ATTACH RECEIPT TO MANUAL FOR FUTURE
REFERENCE.
Questions, problems, missing parts?
Before returning to your retailer, call (1-866-235-5112)
or email (info@arnorthamerica.com) our customer
service department. They are available from 8:00 a.m. -
5:00 p.m., CST, Monday - Friday. www.arblueclean.com
Advertisement
Table of Contents

Subscribe to Our Youtube Channel
Related Manuals for Blue Clean AR 2N1-Q


Summary of Contents for Blue Clean AR 2N1-Q
- Page 1 2050 PSI Electric Pressure Washer ASSEMBLY, CARE AND USE INSTRUCTIONS Model AR 2N1-Q READ CAREFULLY IMPORTANT: RETAIN THESE INSTRUCTIONS AND ATTACH RECEIPT TO MANUAL FOR FUTURE REFERENCE. Questions, problems, missing parts? Before returning to your retailer, call (1-866-235-5112) or email (info@arnorthamerica.com) our customer service department.
-
Page 2: Table Of Contents
Pump Saver ........................15 Troubleshooting ....................... 16 Limited Warranty ......................17 Replacement Parts List ....................18 PRODUCT SPECIFICATIONS PRODUCT SPECIFICATIONS SPECIFICATIONS Max PSI Max GPM Frequerry Weight (lbs.) Model (lbs/sq. in.) (Gal/per min) Cold Water Volts Amps AR 2N1-Q 2050 36.8 ✔... -
Page 3: Package Contents
PACKAGE CONTENTS PACKAGE CONTENTS PACKAGE CONTENTS 1 .4 Soap – Black PW909383SS 0° – Red 15° – Yellow 25° – Green PART DESCRIPTION QUANTITY PART DESCRIPTION QUANTITY Hose Holder Spray Gun Handle Spray Gun Trigger Lock Rotary Nozzle Spray Gun Holster O-Ring Replacement Kit High Pressure Hose Quick Connect Nozzles... -
Page 4: Safety Information
SAFETY INFORMATION SAFETY INFORMATION SAFETY INFORMATION Please read and understand this entire manual before 9. DO NOT use your power washer when you are under attempting to assemble and operate the product. the influence of alcohol or drugs. Use this power tool carefully and only when you are alert. - Page 5 35. NEVER use lances or other parts that are not to protect pumps. compatible for this specific AR Blue Clean unit. 36. NEVER use an extension power cord since it defeats 27. NEVER use hot water with your power washer. It will the effectiveness of the GFCI and increases the overheat and damage the high pressure pump.
-
Page 6: Assembly Instructions
PREPARATION PREPARATION PREPARATION Before beginning assembly of product, make sure all Tools Required for Assembly (not included): Phillips parts are present. Compare parts with package contents screwdriver. list and hardware contents list. If any part is missing or damaged, DO NOT attempt to assemble the product. Please call customer service at 1-866-235-5112. - Page 7 ASSEMBLY INSTRUCTIONS Install nozzle holder (H) to lower frame (G). Secure with two screws (BB). Hardware Used: Screws Axle Pins Screws Cotter Pins Press buttons on lower frame (G) extensions and install Qty. 2 Qty. 2 Qty. 2 handle (B). Lower frame extensions will click when handle is in proper position.
- Page 8 PREPARATION ASSEMBLY INSTRUCTIONS Slide spray gun holster (M) into place on the upper handle (B). Place power washer unit (F) into position on the lower frame (G). Pull back on collar at one end of the high pressure hose (N). Push the center post on hose firmly into the spray gun (K), then twist the collar on to secure the connec- tion.
- Page 9 ASSEMBLY INSTRUCTIONS ASSEMBLY INSTRUCTIONS Unlocked Locked Locking Spray Gun (before Lance installation) To lock Extension Lance installation trigger of spray gun (K), point gun away from you and While spray gun (K) is in the locked position, insert turn dial to lock (“3” and “9” position). Squeeze or pull lance (*I) into the end of the spray gun and turn trigger to make sure it is locked.
- Page 10 ASSEMBLY INSTRUCTIONS Pull back on the collar at the other end of the high pressure hose (N). Push the exposed center post of the hose firmly into the power washer’s water outlet on the right side of the machine, then twist the collar to secure it.
-
Page 11: Operating Instructions
OPERATING INSTRUCTIONS OPERATING INSTRUCTIONS OPERATING INSTRUCTIONS • Make sure the power switch is off. • Squeezing and releasing the trigger rapidly will cause • Unwind the power cord completely and plug the auto start feature to miss an on/off cycle that into a grounded 120 volt outlet. - Page 12 OPERATING INSTRUCTIONS OPERATING INSTRUCTIONS • When using detergent (not included), fill the • When using the foam cannon, fill it with a properly detergent tank with a properly formulated detergent formulated detergent or cleaner with water ratio or cleaner with water ratio according to instructions according to instructions on the container.
- Page 13 OPERATING INSTRUCTIONS OPERATING INSTRUCTIONS How to Avoid Damaging Surfaces • Damage to surfaces being cleaned occurs because the impact force of the water pressure exceeds the durability of the surface. Bare wood can be penetrated, paint can be peeled off, etc. You can vary the force of your power washer by controlling: 1.
-
Page 14: Care And Maintenance
OPERATING INSTRUCTIONS Detergents • Use detergents designed for power washers. surface. Do not pre-soak area. Wetting the surface Hardware stores or home centers also have power first dilutes the detergent and reduces its cleaning washer detergents for different cleaning projects. The ability. -
Page 15: Pump Saver
5) Turn power off when pump saver exits the machine’s while being stored in ALL climates. It also assists with water outlet. protection from internal corrosion. The AR Blue Clean part #is: PW64511(16oz. bottle). Order online at Note: Instructions on Pump Saver Bottle are generic and www.arblueclean.com... -
Page 16: Troubleshooting
TROUBLESHOOTING If you have any questions regarding the product, please call customer service at 1-866-235-5112 PROBLEM CORRECTIVE ACTION 1. The GFCI module on the end of the power cord must be plugged directly into an outlet. Unit will not turn on. 2. -
Page 17: Limited Warranty
TROUBLESHOOTING LIMITED WARRANTY This product has a 2 (two) year warranty. Please read the following carefully to understand what each warranty entails: This product is under warranty to the original retail consumer against defects in material and workmanship for a period 1 (one) year and is a complete “bumper to bumper”... -
Page 18: Replacement Parts List
REPLACEMENT PARTS LIST For replacement parts, call our customer service department at 1-866-235-5112, 8:00 a.m. - 5:00 p.m., CST, Monday - Friday or order online at www.arblueclean.com PW909383SS Soap – Black 0° – Red 15° – Yellow 25° – Green PART DESCRIPTION PART #...
Need help?
Do you have a question about the AR 2N1-Q and is the answer not in the manual?
Questions and answers